
1991-1994 Ford Explorer Door Panel: Fixing Cracks, Sag, and Compatibility
Your definitive guide to identifying common failure points, choosing the right used panel, and performing the replacement on your first-generation Explorer.
- Before buying, you must verify the panel matches your vehicle's power or manual window configuration by checking the cutouts.
- The armrest and pull handle area is the most common failure point; inspect any used panel closely for cracks before purchasing.
- Used OEM panels are the most practical replacement option, as new OEM parts are discontinued and aftermarket colors may not match perfectly.
- Always plan on replacing all the plastic retaining clips when installing a replacement panel to ensure a secure, rattle-free fit.
Symptoms of Failure
Over three decades, the original door panels in first-generation Explorers are prone to several common, age-related failures. These issues are typically visual and auditory, stemming from the plastic and adhesives breaking down over time.
Cracked or Broken Armrest / Pull Handle
This is the most frequent point of failure. Years of passengers pulling the door shut places significant stress on the integrated armrest and pull cup area. The plastic becomes brittle from sun exposure and age, leading to cracks or complete breakage, which can make it difficult to close the door.
Rattling and Buzzing Noises
Annoying rattles, especially when driving over bumps or closing the door, are almost always caused by broken plastic retaining clips. These small clips hold the panel securely to the metal door frame. They become brittle and snap easily during removal for other repairs or simply from years of vibration.
Sagging Fabric or Map Pockets
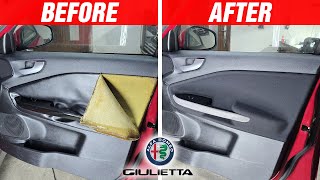
The adhesive used to bond the cloth or vinyl inserts to the main panel often fails, causing the material to bubble, sag, or detach completely. Similarly, the large map pocket at the bottom of the panel can sag or crack from use or being kicked by passengers.
Loose Switches or Components
When the plastic structure of the panel breaks, especially around the cutouts, the power window and lock switch assembly can become loose. This may cause the switches to fall into the door, function unreliably, or create further rattles.
Pro Tip: Door panels from 1991-1994 Mazda Navajo models are often a direct fit and can be a good alternative when searching for a used replacement.
Buying a Used 1991-1994 Explorer Door Panel
Since new OEM panels are no longer available from Ford and aftermarket options can have color and texture matching issues, a high-quality used OEM panel is usually the best solution. Here’s what to inspect before you buy.
1. Verify Power vs. Manual Window Configuration
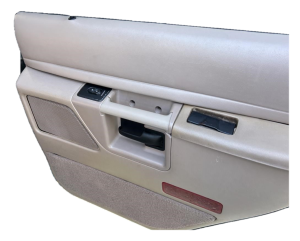
This is the most important compatibility check. The door panel must have the correct cutouts for your vehicle's options. A panel for power windows will have a large, rectangular opening for the switch bezel, while a panel for manual windows will have a small, round hole for the window crank handle. Inspect photos carefully to ensure they match your existing setup.
2. Inspect the Armrest and Pull Handle Area
This is the panel's weakest point. Ask the seller for close-up photos of both the top and underside of the armrest. Look for hairline cracks, stress marks (discolored white lines in the plastic), or previous repairs. A panel with a solid, crack-free armrest is significantly more valuable.
3. Check All Mounting Points
Turn the panel over and inspect the back side. Pay close attention to the plastic bosses—the round towers where the retaining clips push in and where screws are secured. These are frequently broken off. While a panel with one or two broken clip mounts might still be usable, one with widespread damage will never fit tightly and will lead to rattles.
4. Examine Upholstery and Color
First-generation Explorers were offered with several interior colors, including gray, tan (mocha), blue, and red. Ensure the color of the panel and any fabric inserts match your vehicle's interior. Be aware that sun fading can alter the color over time, so a perfect match on a 30-year-old part is not always possible. Aftermarket panels are often sold in pairs because their colors are not guaranteed to match an aged OEM interior.
Known Issues, Recalls, and TSBs
There are no official recalls or Technical Service Bulletins (TSBs) from Ford or the NHTSA specifically for the interior door trim panel on the 1991-1994 Explorer. All common failures are due to age and wear-and-tear.
Note: While the panel itself has no recalls, this vehicle generation had several important safety recalls for components located within the door, including door latches and power mirror switches that could pose a fire risk. It is wise to check your vehicle's VIN on the NHTSA website to ensure all relevant safety recalls have been addressed.
Cost Comparison
Prices can vary based on condition, color, and whether you are buying a single component or a full panel.
| Part Type | Estimated Price Range |
|---|---|
| New OEM | Not Available (Discontinued) |
| New Aftermarket (Full Panel) | $330 - $450 (Often sold in pairs) |
| New Aftermarket (Repair Kits) | $25 - $50 (For armrest pull handles) |
| Used OEM | $75 - $250 (Per panel, depending on condition) |
| Shop Labor to Install | $100 - $150 |
Installation Guide
Replacing the door panel is a beginner-friendly DIY task that requires basic tools and patience.
- Difficulty: 2/5
- Estimated Time: 0.75 Hours
- Tools Required: Phillips screwdriver, 5.5mm and 7mm sockets, plastic trim removal tool.
Step-by-Step Replacement
- Remove Screws: Locate and remove the Phillips screws. There are typically two in the armrest pull cup and one or two at the very bottom of the panel.
- Remove Switch Panel/Window Crank: For power windows, use a trim tool to gently pry up the switch panel, then disconnect the electrical connectors behind it. There may be another screw hidden underneath. For manual windows, use a special tool or a pick to remove the clip holding the window crank handle on, then slide the handle off.
- Remove Handle Bezel: Pry off the small plastic trim piece surrounding the interior door latch handle. 🎬 Watch: How to replace the interior door handle while the panel is off.
- Pop the Clips: Starting from a bottom corner, use a plastic trim removal tool to pry the panel away from the door. You will hear the plastic clips pop as they release. Work your way around the bottom and sides of the panel.
- Lift Panel Off: Once all clips are free, lift the entire panel straight up to unhook it from the top of the window sill.
- Installation: Before installing the new panel, transfer the plastic moisture barrier if your replacement panel doesn't have one. It's highly recommended to replace all the old plastic retaining clips with new ones to ensure a tight, rattle-free fit. Installation is the reverse of removal.
Frequently Asked Questions (FAQ)
Can I repair my cracked armrest instead of replacing the whole panel?
While some owners attempt repairs using epoxy or plastic welders, these fixes often fail again due to the high stress on the armrest area. For a durable, long-term solution, replacing the panel or finding an aftermarket pull handle repair kit is the recommended approach.
🎬 See this walkthrough on how to repair a cracked door armrest.How do I fix the sagging fabric on my door panel?
This can be a DIY project. It involves removing the door panel, carefully peeling back the loose fabric, cleaning off the old, deteriorated foam and adhesive from both the panel and the fabric, and then re-applying it using a high-temperature spray adhesive. For split vinyl on the armrest, some owners have had success carefully hand-stitching the seam back together.
🎬 Watch: A simple DIY guide to reupholstering your door panel fabric.Will a door panel from a Ford Ranger fit my Explorer?
No, door panels from a Ford Ranger will not fit a 1991-1994 Explorer. While the platforms share some mechanical components, the door shells and interior styling are different. You must use a panel from a 1991-1994 Explorer or a 1991-1994 Mazda Navajo.
What are the little plastic things that hold the panel on called?
They are called door panel retaining clips, retainers, or sometimes 'Christmas tree' clips. They are inexpensive and widely available at auto parts stores. It is always best practice to replace them whenever you remove the door panel.
Helpful Videos

Technical Specifications
OEM Part Numbers: F3TZ7823942AAK
Material: ABS Plastic with optional cloth or vinyl inserts. Compatibility: 1991-1994 Ford Explorer (4-Door models), 1991-1994 Mazda Navajo. Note: 2-Door Explorer models use a different, longer door panel.
We Have This Part in Stock

The information in this article is provided for general reference and educational purposes only. Vehicle specifications, procedures, and part compatibility can vary by production date, trim level, and region. Always consult your vehicle's factory service manual and verify part numbers before purchasing or performing repairs. Safety-critical components such as airbags, seat belts, and braking systems should be installed by a qualified professional.
- Ford Explorer:
- 🎬 Helpful Videos
- 🛍️ Shop This Part
- Symptoms of Failure
- Cracked or Broken Armrest / Pull Handle
- Rattling and Buzzing Noises
- Sagging Fabric or Map Pockets
- Loose Switches or Components
- Buying a Used 1991-1994 Explorer Door Panel
- 1. Verify Power vs. Manual Window Configuration
- 2. Inspect the Armrest and Pull Handle Area
- 3. Check All Mounting Points
- 4. Examine Upholstery and Color
- Known Issues, Recalls, and TSBs
- Cost Comparison
- Installation Guide
- Step-by-Step Replacement
- Frequently Asked Questions (FAQ)
- 🎟️ Get 5% Off