
P0018 on 2009-2017 Audi Q5 2.0T: Timing Chain & Tensioner Causes and Fixes
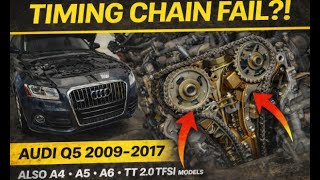
On the 2009-2017 Audi Q5 2.0T, code P0018 almost always means the timing chain has stretched due to a failed tensioner. This is a critical issue that requires immediate attention to prevent engine damage. The fix is a complete timing chain kit replacement with updated parts, costing between $1,500 and $3,500 at a shop. This is a well-documented, widespread failure on EA888 Gen 2 engines.
- P0018 on a 2009-2017 Audi Q5 2.0T is a critical warning, most often pointing to a stretched timing chain.
- Do not drive the vehicle. The risk of the chain jumping time and causing catastrophic engine failure is very high.
- The most important diagnostic step is to visually inspect the timing chain tensioner through the inspection port.
- The correct fix is not a simple sensor replacement; it is a comprehensive timing chain service that replaces the chain, guides, and the updated tensioner.
- Due to the complexity and the need for special tools, this repair is best left to a professional shop experienced with Audi engines.
What's Unique About the 2009-2017 Audi Q5
The EA888 2.0L Turbo engine (specifically the Gen 2 variant found in approximate 2009-2014 models) is notorious for a critical flaw in its timing chain system. The original-design timing chain tensioner is prone to premature failure due to a faulty ratchet mechanism and reliance on oil pressure, allowing the timing chain to become slack and stretch over time. This issue was so widespread that it led to a class-action lawsuit. Therefore, unlike on many other vehicles where a P0018 code might point to a simple sensor fault, on this specific Audi, it is a very strong indicator of a failing timing chain and tensioner requiring a complete system overhaul with updated parts.
Generation note: The 2009-2017 Audi Q5 covers the first generation (8R). However, the timing chain tensioner issue is most prevalent in earlier models, roughly from 2009 to 2013/2014, which used the original problematic tensioner design (part number ending in 467). Later models in this range received an updated tensioner from the factory (part number 06K109467K or similar), but can still experience chain stretch with high mileage.
Symptoms You May Notice
- Check Engine Light is on
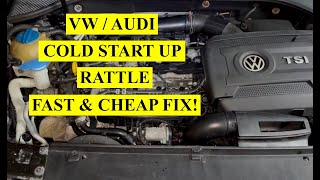
- Brief rattling noise from the engine on cold startup, often described as 'diesel-like clatter' or a chain dragging sound, lasting 1-3 seconds.
- Rough or unstable idle
- Noticeable loss of engine power and poor acceleration
- Engine stalling
- Increased fuel consumption
- Misfire codes (P0300-P0304) accompanying the P0018 code
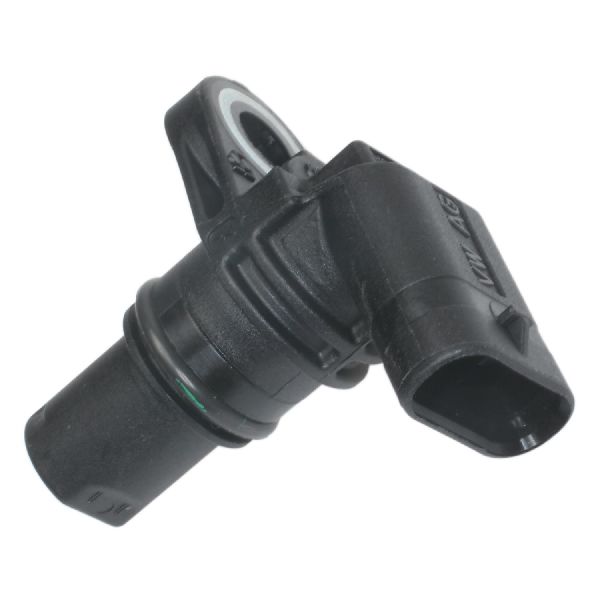
- Replacing only the camshaft position sensor
- Replacing only the crankshaft position sensor
- Replacing the VVT solenoid without checking the mechanical timing first
- Performing an oil change and assuming the problem is fixed without inspecting the tensioner
Most Likely Causes
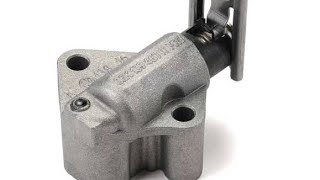
- Stretched Timing Chain due to Failed Tensioner 🔴 High Probability → Shop Engine Timing Chain Early versions of the EA888 Gen 2 engine (approx. 2009-2013) were equipped with a poorly designed timing chain tensioner that fails hydraulically and mechanically, losing its ability to keep the chain taut. This leads to chain stretch and jumped timing.
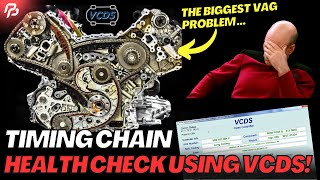
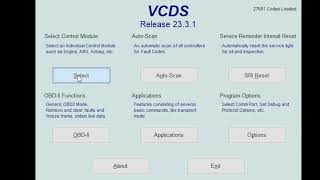
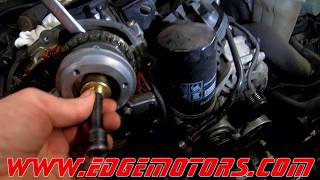
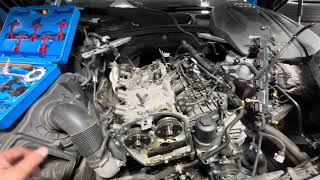
How to confirm: Visually inspect the timing chain tensioner through the small inspection port on the lower timing cover (a 14mm triple square bit may be needed for the plug). Using a mirror and light, count the number of exposed ridges (teeth) on the tensioner's piston. If more than 6-7 teeth are visible, the chain is stretched, and the tensioner has extended to its limit. Replacement is immediately required. Another method is checking measuring block 93 in VCDS/VAG-COM for phase deviation; a value greater than -4.0 degrees indicates significant stretch. 🎬 Watch: How to use VCDS to check for chain stretch.
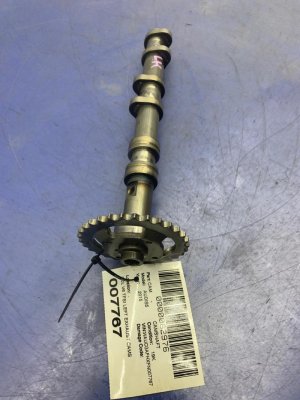
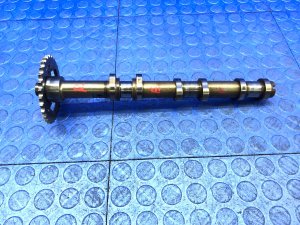
Typical fix: A complete timing chain replacement including the chain, the updated design tensioner (p/n 06K109467K), all plastic guide rails, and often the lower timing cover which must be resealed. 🎬 Watch: How to check chain stretch via the inspection port. It is also highly recommended to replace the camshaft bridge/bracket as its oil screen can fail and cause oil starvation.
Est. part cost: $400-$800 for a comprehensive OEM-quality kit. - Failed Camshaft Adjuster Solenoid (VVT Solenoid) ⚪ Low Probability → Shop Engine Camshaft The solenoid can become clogged with oil sludge or metallic debris, especially with infrequent oil changes, or fail electronically. This prevents proper camshaft adjustment and can trigger a correlation code.
How to confirm: Swap the intake and exhaust solenoids and see if the fault code changes (e.g., to P0017). You can also test its resistance with a multimeter (typically 5.0 to 15.0 ohms) or attempt to clean it with electrical contact or MAF cleaner while actuating it with a 9V battery.
Typical fix: Replace the faulty camshaft adjuster solenoid. The updated part number is often 06L109259D.
Est. part cost: $40-$100 - Low or Dirty Engine Oil ⚪ Low Probability The timing chain tensioner and VVT system are both hydraulically operated. Incorrect oil viscosity, low oil level, or oil sludge from extended drain intervals can prevent these components from functioning correctly and lead to timing correlation faults. Many of these engines suffer from oil consumption issues, making low oil a common occurrence.
How to confirm: Check the engine oil level and condition. If the oil is very old, dark, or below the minimum mark, it could be a contributing factor. Many of these engines suffer from oil consumption issues, making low oil a common occurrence.
Typical fix: Perform an oil and filter change using a manufacturer-specified oil (e.g., VW 502.00). Clear codes and monitor if the problem returns. This is a good first step but rarely the final solution.
Est. part cost: $70-$120
Rare But Worth Checking
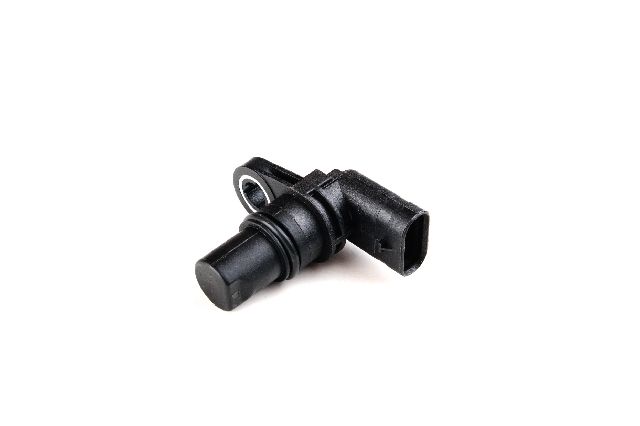
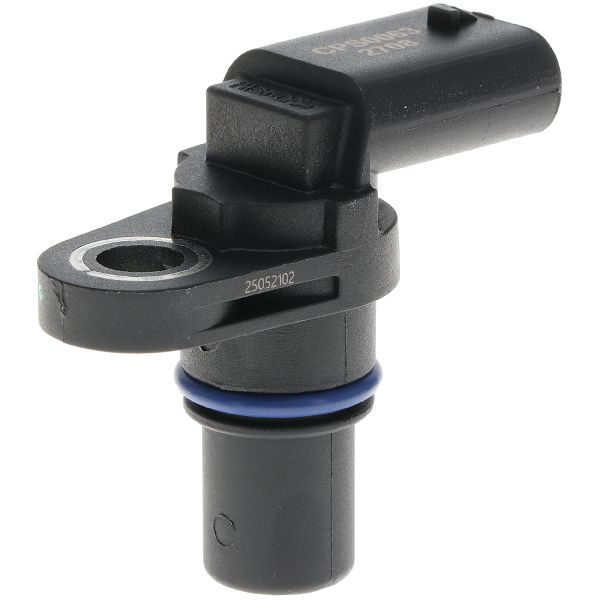
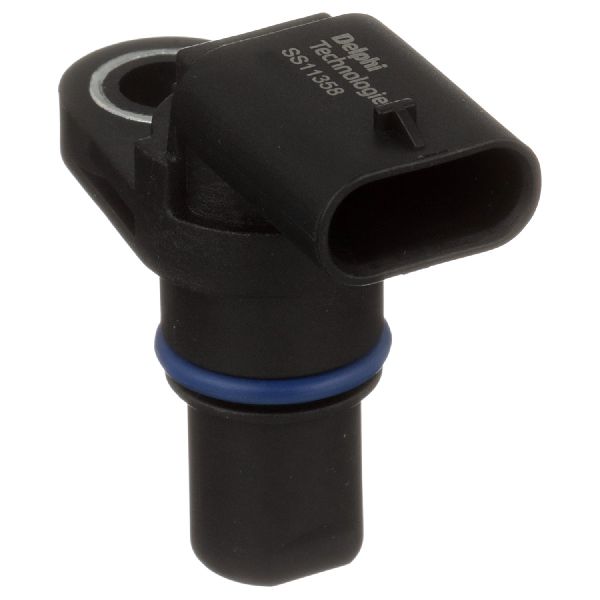
- Failed Camshaft or Crankshaft Position Sensor: → Shop Engine Crankshaft Position Sensor While these sensors can fail, they are often replaced unnecessarily. On this engine, a timing correlation code is much more likely to be a mechanical timing issue than a sensor issue. Consider this only after confirming the timing chain and tensioner are in good condition. A faulty sensor may also present with a blank reading in VCDS measuring blocks.
- Clogged or Dislodged Camshaft Bridge Screen: → Shop Engine Camshaft The camshaft bridge, which holds the VVT solenoid, has a small mesh screen that can break apart or get clogged, starving the VVT system of oil. A TSB was issued recommending the removal of this screen if the bridge is serviced. If it dislodges, it can fall into the timing assembly, causing catastrophic failure. This is often replaced as part of a full timing chain job.
Diagnosis Steps
- Scan for all fault codes with a VAG-specific tool like VCDS. Note any accompanying codes like P0016, P0300, etc.
- Check engine oil level and condition. If low or dirty, correct this first, clear codes, and see if the problem returns. This is mandatory maintenance but unlikely to be the sole fix.
- Listen for a rattling noise from the front of the engine during a cold start. A 1-3 second rattle is a classic sign of a bad tensioner losing hydraulic pressure overnight.
- CRITICAL STEP: Remove the inspection plug on the lower timing chain cover. Visually inspect the timing chain tensioner's extension. If more than 6-7 teeth are showing, the timing chain job is required. This is the most definitive diagnostic step.
- Using VCDS or a similar tool, check Engine Measuring Value Block 93 for 'Camshaft Adaptation Intake Bank 1 Phase Position'. A value more negative than -4.0° indicates significant chain stretch.
- If the tensioner appears okay (unlikely), you can proceed with testing the camshaft position sensor and VVT solenoid. Swapping the sensor and solenoid with known good parts is a reliable diagnostic method.
- Inspect the camshaft bridge for the presence and integrity of the oil screen. If it is loose or missing, the bridge must be addressed.
Parts You'll Likely Need
- Complete Timing Chain Kit
(OEM #Various, kit should include updated tensioner 06K109467K)— This is the most common failure. A complete kit ensures all worn components (chain, guides, tensioner) are replaced with updated parts to provide a lasting repair.
Trusted brands: INA, FCP Euro, Iwis, ECS Tuning
OEM price range: $500-$800
Aftermarket price range: $300-$500 - Camshaft Bridge / Bracket
(OEM #06H103144J)— Often replaced preventatively during a timing job due to the high failure rate of its integrated oil screen, which can cause oil starvation or catastrophic engine damage if it detaches.
Trusted brands: OEM (Volkswagen Group)
OEM price range: $150-$250
Aftermarket price range: $80-$150 - Camshaft Adjuster Solenoid (VVT Solenoid)
(OEM #06L109259D)— A potential but less common cause. Can get clogged with oil sludge or fail electrically.
Related Codes That Often Appear With This One
- P0016 — This is the same correlation fault but for Bank 1, Sensor A. On an inline-four engine like the EA888, seeing P0016 or P0018 points to the same root cause: a stretched timing chain affecting the single intake camshaft's correlation to the crankshaft.
- P0300, P0301, P0302, P0303, P0304 — These are random or specific cylinder misfire codes. Incorrect cam timing disrupts the air/fuel mixture and spark timing, leading to incomplete combustion and misfires.
- P0017 — This code indicates a correlation issue with the exhaust camshaft ('Crankshaft Position - Camshaft Position Correlation Bank 1 Sensor B'). If the timing chain is stretched, it can affect the timing of both intake and exhaust camshafts, sometimes triggering multiple codes.
- P0341 — This code for 'Camshaft Position Sensor 'A' Circuit Range/Performance' can appear alongside P0018, suggesting the signal from the sensor is implausible due to the underlying mechanical timing being so far out of specification.
Technical Service Bulletins (TSBs) & Recalls
- TSB 2027731/5 (also cited as 17 13 43): Titled 'Engine oil consumption too high' for 2009-2011 2.0T models, instructing dealers to replace the crankcase pressure regulating valve and front crankshaft seal as a first step.
- TSB 15-12-01 (2028302): Supersedes an earlier TSB, related to camshaft adjustment and timing faults, indicating an ongoing pattern of timing-related issues addressed by the manufacturer.
- An unnumbered TSB recommends the removal of the oil screen in the camshaft bridge during service to prevent it from dislodging and causing engine damage.
Platform-Specific Known Issues
- A class-action lawsuit was filed against Volkswagen/Audi for the premature failure of the timing chain tensioner on the EA888 2.0T engine, affecting 2008-2013 models.
- Many of these engines also suffer from excessive oil consumption due to piston ring design flaws, which was the subject of a separate class-action lawsuit and TSBs (e.g., TSB 17 13 43 2027731/5). This can lead to low oil levels that exacerbate timing system problems.
Mechanic-Grade Diagnostic Values
- VCDS Engine Measuring Block 93.2 - Camshaft Adaptation Intake Bank 1 Phase Position — expected: 0° to -4° at warm idle.. Failure: A value more negative than -4.0° (e.g., -5°, -8°) indicates significant chain stretch and is a strong signal that a timing chain replacement is needed. Some consider the red zone to begin at -4°, while others may drive up to -6° at high risk.
- Camshaft Adjuster Solenoid (N205) Resistance — expected: 5.0 to 15.0 Ohms.. Failure: A reading outside this range, or an open/short circuit, points to a faulty solenoid. Some sources narrow the expected range to 6.9-7.9 Ohms.
- Camshaft Position Sensor (G40) Voltage Supply — expected: Approximately 5.0V at the sensor connector (terminals 1 to 3) with ignition on.. Failure: Voltage significantly below 4.5V or 5.0V suggests a wiring or ECU power supply issue, not necessarily a failed sensor.
- Engine Oil Pressure at Hot Idle (~80°C) — expected: 17.4 - 30.5 psi (1.2 - 2.1 bar).. Failure: Pressure below 17.4 psi can starve the hydraulic tensioner and VVT system, contributing to timing correlation faults.
Scan Tool Commands That Help
- VCDS (VAG-COM): Read Measuring Value Block 93 (MVB 093) — This is the primary diagnostic step after checking for codes. It shows the phase deviation between the crankshaft and camshaft, directly indicating the amount of timing chain stretch. A value exceeding -4 degrees is a strong indicator of a required timing job.
- VCDS (VAG-COM): Output Test for N205 Camshaft Adjustment Valve — If timing stretch is not confirmed, this test can be used to command the VVT solenoid to actuate. The technician can listen for a click and observe changes in engine operation or live data to confirm the solenoid is responding to ECU commands.
- VCDS (VAG-COM): Basic Settings - Camshaft Adaptation — After a timing chain replacement, some ECUs may benefit from having the camshaft adaptation values reset. While not always documented as a required step, if codes return after a repair, performing this basic setting can help the ECU relearn the new, correct timing values.
Wiring & Ground Locations
- Engine Ground Strap — A primary engine ground connection point is located in the engine compartment on the left side, between the shock absorber strut tower and the water drainage plenum.. A poor engine ground can cause erratic sensor readings and unpredictable behavior from electronic components like the camshaft position sensor and ECU, potentially leading to false correlation codes. Ensuring this connection is clean and tight is a crucial step in diagnosing any electrical fault.
- G40 Camshaft Position Sensor Wiring — The harness runs from the sensor on the upper timing cover to the Engine Control Module (J623). Specific pins on the ECU connector (e.g., T105/30, T105/35, T105/47 on some models) correspond to the sensor's signal, ground, and power.. Damage to this harness can mimic a failed sensor. A continuity test from the sensor connector to the ECU pins is required to rule out a wiring issue before replacing the ECU.
- Right A-Pillar Ground — A ground connection point is located behind the trim at the bottom of the right-side A-pillar.. This interior ground point can be relevant for the ECU and other control modules. While less likely to be the direct cause, water ingress or corrosion at this point can cause a variety of difficult-to-diagnose electrical issues.
Real Owner Repair Stories
- 2CarPros Forum User (Audi 3.2L (similar VVT system principles)) — P0018 and P0019 codes appeared after a timing chain replacement.
❌ Tried (didn't work) Verifying mechanical timing was correct with locking tools., Swapping camshaft position sensors from bank to bank (this changed the code to P0017, but didn't resolve the issue)., Checking wiring for continuity and voltage (all checked out good)., Replacing the suspect cam sensor with a new one.
✅ What actually fixed it The user suspected the ECU was the final culprit after exhausting all other possibilities, as the car ran smoothly with no misfires despite the persistent codes. The thread implies a computer issue, though a final confirmation of an ECU replacement fixing the issue was not posted. This highlights that even after a mechanically perfect timing job, electrical issues or faulty (even new) sensors can cause persistent codes. - AudiWorld Forums User (2012 Audi A6 3.0T) — P0018 code, sometimes longer than normal crank time, low idle after warm-up.
❌ Tried (didn't work) Replacing the camshaft position sensor., Removing and cleaning the VVT solenoid (oil control valve)., Checking wiring for the sensor and solenoid (tested good).
✅ What actually fixed it The user's final update stated, "It was a PITA to fix but it is fixed now," after discussing checking the mechanical timing. This strongly implies the root cause was indeed the mechanical timing, despite first attempting to fix it by replacing the cheaper and more accessible electronic components. - NHTSA ODI #11233069 — An owner reported that at approximately 63,000 miles, the check engine light illuminated with code P0018. The vehicle subsequently failed an emissions test for license renewal during the diagnostic process.
OEM Part Supersession History
Various early tensioners (e.g., 06H109467N, 06H109467AB, 06H109467T)→06K109467K— The original tensioner design was prone to premature failure of its ratchet mechanism and relied too heavily on oil pressure, leading to slack on startup and eventual chain stretch. The updated 'K' revision features a stronger design that is less prone to failure.
Heads up: It is critical to only use the latest revision tensioner (06K109467K) when performing a timing service. Using old stock or an earlier revision part will lead to a repeat failure.EA888 Gen 2 Timing Chain→EA888 Gen 3 Timing Chain (in later engines)— The Gen 2 chain uses a 5x4 link structure. The Gen 3 chain was redesigned with a 4x4 structure and increased link thickness for better wear resistance and higher fatigue strength.
Heads up: While the chains are physically different, the main upgrade for a Gen 2 engine repair is ensuring a high-quality, new chain is used along with the updated tensioner and guides. The Gen 3 chain is not a direct swap into a Gen 2 system without changing other components.
Model Year Variations Within This Range
- 2009-2012/2013: These earlier models are equipped with the EA888 Gen 2 engine and are highly susceptible to the original, faulty timing chain tensioner design. They are also known for oil consumption issues due to piston ring design. A 2012 facelift introduced cosmetic changes, but the engine issues persisted until the Gen 3 transition.
- 2013/2014-2017: Later models in this range transitioned to the EA888 Gen 3 engine. The Gen 3 features significant improvements, including an integrated exhaust manifold in the cylinder head, an electric wastegate, and a redesigned, more robust timing chain system. While still susceptible to wear over high mileage, they do not have the widespread, premature tensioner failure flaw of the Gen 2 engines.
Diagnostic Flowchart
Other Known Issues on This Vehicle
Issues unrelated to this code that are worth knowing about as an owner of this generation:
- Excessive Oil Consumption 🔴 High — Very common on 2009-2014 2.0T engines. Caused by faulty piston ring design. Can lead to oil starvation and catalytic converter damage. (Ref: TSB 2027731/5)
- PCV Valve Failure 🟠 Medium — Common across all years. The diaphragm can tear, leading to high-pitched whistling noises, rough idle, high oil consumption, and oil leaks from pressurized crankcase seals. (Ref: Related to TSB 2027731/5, as PCV replacement is a first step for oil consumption issues.)
- Water Pump / Thermostat Housing Failure 🔴 High → Shop Engine Water Pump — Extremely common. The plastic housing becomes brittle and cracks, causing significant coolant leaks. Often fails between 60,000 and 100,000 miles. Failure can lead to overheating and engine damage.
- Carbon Buildup on Intake Valves 🟠 Medium — Inevitable on all direct-injection (FSI/TSI) engines. Requires manual cleaning (walnut blasting) every 60,000-80,000 miles to restore performance and prevent misfires.
- Turbocharger Wastegate Failure 🟠 Medium — The wastegate actuator or linkage can fail, leading to underboost or overboost conditions (codes P0299/P0234). This was the subject of a class-action lawsuit settlement. (Ref: Kimball v. Volkswagen Group of America class-action settlement)
- Leaking Sunroof Drains 🟠 Medium — Common issue where the sunroof drain tubes clog or detach, causing water to leak into the cabin, potentially damaging electronics in the A-pillars or under the seats.
Used vs. New Parts: Buying Guide for This Vehicle
When a used part is the smart pick: For this specific P0018 repair, which is almost always a timing system failure, using used parts is strongly discouraged. The only exception might be a major structural component like a cylinder head or engine block if the original was damaged by the failure, and even then, it must be from a known-good, low-mileage donor vehicle.
Donor-vehicle mileage cap: roughly under 50000 miles for the part to have meaningful remaining life.
What to inspect on the donor part:
- For a major component like a head or block, verify the donor vehicle's VIN to check for accident history and service records.
- Inspect for any signs of overheating (warped surfaces, discolored metal).
- Look for excessive sludge in oil passages, indicating poor maintenance.
- If possible, get a compression or leak-down test from the donor engine before purchase.
OEM-only on this vehicle (don't cheap out):
- Timing Chain Tensioner
- Timing Chain
- Timing Chain Guides
- Camshaft Bridge/Bracket
Aftermarket brands forum-validated for this vehicle:
- INA (often the OEM supplier for tensioners and guides)
- Iwis (often the OEM supplier for chains)
- FCP Euro, ECS Tuning (reputable kit suppliers who often bundle OEM-quality parts)
Brands owners have reported issues with on this vehicle:
- Unnamed, no-brand 'white box' kits from online marketplaces. The risk of premature failure is extremely high and can lead to catastrophic engine damage, negating any initial cost savings.
Real Owner Stories
Aggregated from forums and TSBs cited above. Mileages and costs reflect what owners reported in those sources.
2012 Audi Q5 2.0T
Symptoms: The owner discussed diagnostic steps including checking measuring blocks and eventually concluded the engine had a jumped timing chain.
What fixed it: The discussion concluded a jumped timing chain was the cause, requiring a timing chain replacement.
Source hint: AudiWorld thread titled 'Engine code P0018'
2009 Audi Q5 2.0T
Symptoms: The owner experienced P0018 and P0019 codes that persisted even after the timing chain had been replaced.
What fixed it: The case highlighted the importance of correct installation and considering other factors like VVT solenoids when the code persists after a chain job.
Source hint: 2carpros.com post 'audi-q5-2009-audi-q5-codes-p0018-and-p0019-after-replacing-the-timing-chain'
2011 Audi A4 2.0T (Platform Mate)
Symptoms: Community members detailed experiences with timing chain failure, tensioner inspection, and the sister code P0016.
What fixed it: Timing chain and tensioner replacement based on visual inspection of the tensioner through the inspection port.
Source hint: Audizine thread '2.0T Timing Chain Failure P0016'
2011 Audi Q5 (NHTSA Report)
Symptoms: According to NHTSA ODI #11233069, the check engine light came on at about 63,000 miles and displayed code P0018. The vehicle subsequently failed an emissions test required for license renewal.
What fixed it: The owner took the vehicle to a dealership for diagnosis and repair after the code appeared.
Source hint: NHTSA ODI #11233069
Related OBD-II Codes
Frequently Asked Questions
Does TSB 2027731/5 apply to my 2010 Audi Q5 with high oil consumption and a P0018 code?
How can I check if my 2012 Q5's timing chain is stretched without taking the whole engine apart?
Was there a lawsuit regarding the timing chain tensioner on the 2009-2017 Audi Q5?
What is the updated part number for the timing chain tensioner I should use for my EA888 engine?
Should I be concerned about the oil screen in the camshaft bridge of my 2014 Q5?
Can I just swap parts to diagnose a P0018 code on my Audi?
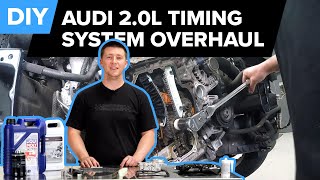
Helpful Videos


Used OEM Parts in Stock
New Aftermarket Parts Available


The information in this article is provided for general reference and educational purposes only. Vehicle specifications, procedures, and part compatibility can vary by production date, trim level, and region. Always consult your vehicle's factory service manual and verify part numbers before purchasing or performing repairs. Safety-critical components such as airbags, seat belts, and braking systems should be installed by a qualified professional.
- Audi Q5:
- 🧭 Diagnostic Flowchart
- 🎬 Helpful Videos
- 🛍️ Shop This Part
- What's Unique About the 2009-2017 Audi Q5
- Symptoms You May Notice
- Most Likely Causes
- Rare But Worth Checking
- Diagnosis Steps
- Parts You'll Likely Need
- Related Codes That Often Appear With This One
- Technical Service Bulletins (TSBs) & Recalls
- Platform-Specific Known Issues
- Mechanic-Grade Diagnostic Values
- Scan Tool Commands That Help
- Wiring & Ground Locations
- Real Owner Repair Stories
- OEM Part Supersession History
- Model Year Variations Within This Range
- Other Known Issues on This Vehicle
- Used vs. New Parts: Buying Guide for This Vehicle
- Real Owner Stories
- 2012 Audi Q5 2.0T
- 2009 Audi Q5 2.0T
- 2011 Audi A4 2.0T (Platform Mate)
- 2011 Audi Q5 (NHTSA Report)
- Related OBD-II Codes
- Frequently Asked Questions
- 🎟️ Get 5% Off