
P0036 on 2011-2015 Kia Optima 2.4L: Causes and Fixes for the O2 Sensor Heater Circuit
This code almost always means the downstream oxygen sensor (after the catalytic converter) has failed. The internal heater burns out, requiring replacement of the sensor. Before buying parts, check the 'SENSOR 1' 15A fuse and inspect the wiring harness for melting. Expect to pay $50-$100 for an aftermarket sensor and $100-$180 for an OEM part. It's a straightforward DIY fix for many, though the sensor can be tight.
- P0036 points to a fault in the heater circuit of the downstream O2 sensor, located after the catalytic converter.
- The most likely cause is a failed oxygen sensor that needs to be replaced.
- Before replacing the sensor, always perform a quick visual inspection of the wiring for melting and check the 15A 'SENSOR 1' fuse in the engine bay fuse box.
- This is a DIY-friendly repair for most, but be aware that you may need a modified or ground-down 7/8" O2 sensor socket for proper clearance.
- Ignoring this code will not harm your engine but will cause you to fail an emissions test.
What's Unique About the 2011-2015 Kia Optima
The 2011-2015 Kia Optima with the Theta II 2.4L engine is a straightforward platform for this code. There are no widespread, unique design flaws that cause P0036. The issue is typically a standard wear-and-tear failure of the O2 sensor itself. The most platform-specific issue to be aware of is the potential for the sensor's wiring harness to come loose from its clips and melt on the hot exhaust pipe, so a visual inspection is critical before buying parts. Some DIYers have noted that access to the sensor can be tight, sometimes requiring a modified or ground-down O2 sensor socket to fit properly around the catalytic converter housing.
Symptoms You May Notice
- Check Engine Light is on.
- Failure to pass a vehicle emissions test.
- Slightly decreased fuel economy (less common).
- Replacing the upstream (Bank 1, Sensor 1) oxygen sensor. This code is specific to the downstream sensor (Sensor 2), which is located after the catalytic converter.
- Assuming the sensor is bad without checking the wiring and fuse first. A melted wire can mimic a failed sensor.
Most Likely Causes
- Failed Downstream Oxygen Sensor 🔴 High Probability → Shop Oxygen Sensor The internal heater element within the oxygen sensor is a common failure point due to age and constant heat cycles. It simply burns out like a light bulb filament. This is the most frequent cause for P0036.
How to confirm: Disconnect the sensor and measure the resistance between the two heater circuit pins (often the two wires of the same color, typically black). An open circuit (infinite resistance or 'OL' on a multimeter) confirms the heater has failed. A healthy heater should have a low resistance, typically between 3 and 20 ohms.
Typical fix: Replace the Bank 1, Sensor 2 (downstream) oxygen sensor.
Est. part cost: $50 - $180 - Damaged Wiring or Connector 🟡 Medium Probability The sensor's wiring is routed under the car near the hot exhaust system. If retaining clips fail, the harness can sag and make contact with the exhaust pipe, melting the wire insulation and causing a short circuit. This is a known issue and should be the first visual check.
How to confirm: Visually inspect the entire length of the wiring harness from the O2 sensor to its connection point. Look for any signs of melting, chafing, or corrosion on the wires and inside the connector plug. Pay close attention to where the harness is routed near the exhaust pipe.
Typical fix: Repair the damaged section of the wiring harness and secure it away from the exhaust. If the connector is damaged, it may need to be replaced.
Est. part cost: $10 - $50 - Blown O2 Sensor Heater Fuse ⚪ Low Probability → Shop Oxygen Sensor A short circuit in the wiring or the sensor itself can cause the fuse to blow as a protective measure.
How to confirm: Locate the fuse box in the engine compartment. Check the fuse labeled 'SENSOR 1' (typically a 15A fuse). Visually inspect if the fuse is blown or use a multimeter to test for continuity. A video guide by Tony The Mechanic 🎬 See this easy fix for O2 sensor heater codes. confirms this as a necessary check.
Typical fix: Replace the blown fuse. If the new fuse blows immediately, it indicates a persistent short circuit in the wiring or sensor that must be found and fixed.
Est. part cost: $1 - $5
Rare But Worth Checking
- Faulty Powertrain Control Module (PCM): → Shop Engine Control Module (ECM) This is extremely rare. The PCM is the last thing to suspect and should only be considered after all other possibilities (sensor, wiring, fuse) have been definitively ruled out by a professional.
Diagnosis Steps
- Read the code with an OBD-II scanner to confirm P0036 is present.
- Safely raise the vehicle and secure it on jack stands.
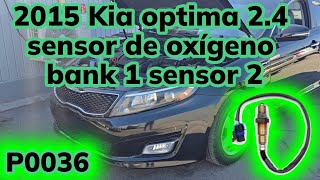
- Locate the downstream oxygen sensor (Bank 1, Sensor 2) on the exhaust pipe, just after the catalytic converter. 🎬 Watch: How to locate and remove the downstream sensor.
- Thoroughly inspect the sensor's wiring harness for any signs of melting, chafing, or physical damage. Ensure it is properly secured in its clips and not touching the exhaust.
- Inspect the electrical connector for corrosion, moisture, or damaged pins.
- Locate the engine compartment fuse box. Find the 15A fuse labeled 'SENSOR 1' and check if it is blown.
- If the fuse and wiring are good, disconnect the sensor. Use a multimeter set to Ohms to measure the resistance across the two heater pins on the sensor side of the connector (usually the two same-colored wires). If you get an 'OL' or infinite reading, the sensor's heater is broken and the sensor must be replaced.
- If resistance is within spec (usually 3-20 ohms), check for 12V power at the corresponding pins on the vehicle harness side of the connector (with the ignition key in the 'On' position). Lack of power points to a wiring or fuse issue upstream.
- If power and ground are present and the sensor resistance is good, the issue may be intermittent or, in very rare cases, a PCM fault.
Parts You'll Likely Need
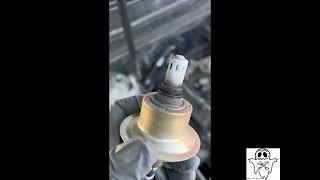
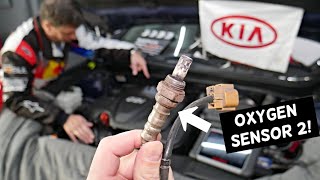
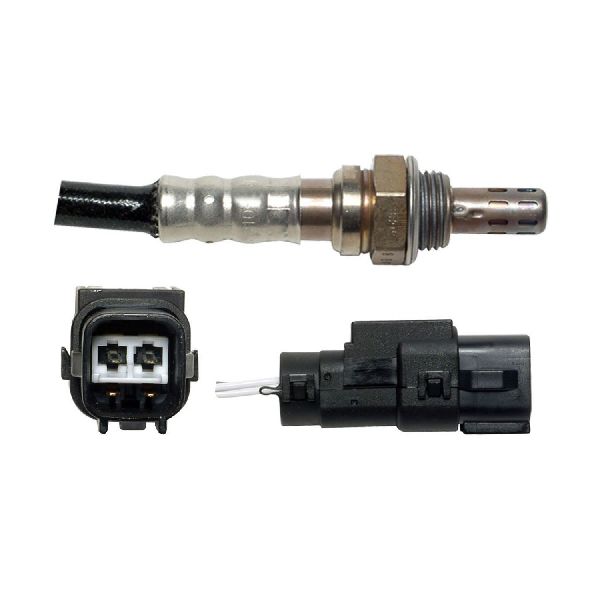
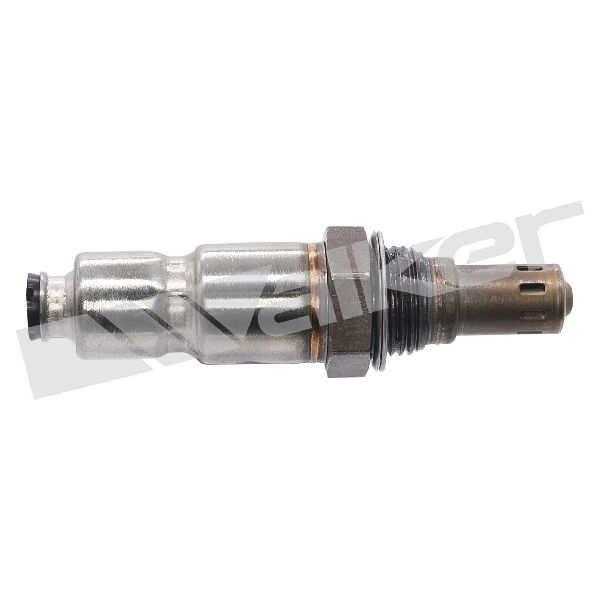
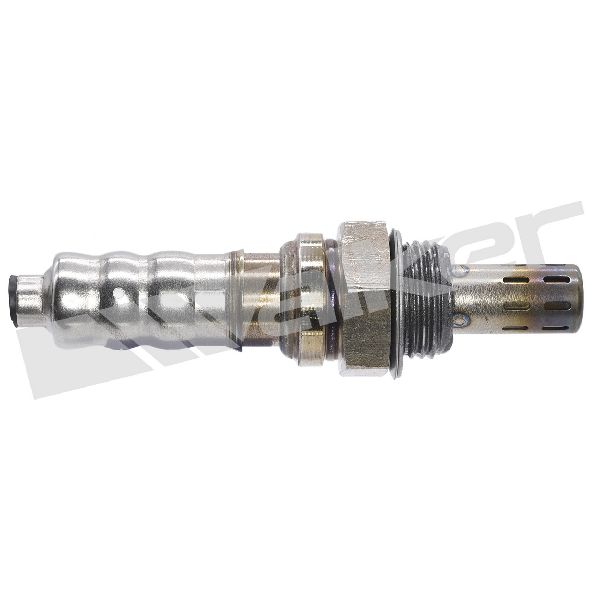
- Downstream Oxygen Sensor (Bank 1, Sensor 2)
(OEM #39210-2G200)— This is the most common failure for code P0036. The internal heater element fails from age and use. Note: The part number 39210-2G560 from Pass 1 appears less common than 39210-2G200, which fits a wider range of Hyundai/Kia vehicles with the Theta II engine. Always verify the part number 🎬 Watch: A step-by-step 2.4L oxygen sensor replacement guide. with your vehicle's VIN before purchasing.
Trusted brands: Bosch, Denso, NGK, Walker Products, Mando (OEM)
OEM price range: $100-$180
Aftermarket price range: $50-$100
Related Codes That Often Appear With This One
- P0037 — This code indicates the heater circuit voltage is low, which is often caused by the same root problems like a failed sensor heater (open circuit) or wiring issue.
- P0038 — This code indicates the heater circuit voltage is high, usually pointing to a short circuit in the wiring.
- P0141 — This is another generic code for O2 Sensor Heater Circuit Malfunction (Bank 1, Sensor 2), essentially describing the same fault as P0036.
Platform-Specific Known Issues
- Tight Sensor Access: In a YouTube DIY video by Tony The Mechanic, the creator notes that the space around the downstream O2 sensor can be very tight against the catalytic converter. He had to grind down the tip of his 7/8" O2 sensor socket to allow it to fit properly over the sensor without hitting the converter housing. This is a useful tip for DIYers attempting this repair.
Mechanic-Grade Diagnostic Values
- O2 Sensor Heater Element Resistance — expected: Between 3 and 20 Ohms. Some sources cite a tighter range of 4-10 Ohms or even a specific value around 6 Ohms.. Failure: An 'OL' or infinite resistance reading on a multimeter indicates an open circuit (failed heater).
- Heater Circuit Power Supply Voltage — expected: Approximately 12-14 Volts (battery voltage) at the power supply pin on the harness-side connector with the ignition key on, engine off.. Failure: No voltage indicates a blown fuse or a break in the power wire from the fuse/relay to the sensor.
- Downstream Oxygen Sensor Installation Torque — expected: 26 to 33 ft-lbs.. Failure: Overtightening can damage the sensor threads or housing; undertightening can cause an exhaust leak.
Scan Tool Commands That Help
- Kia GDS (Global Diagnostic System): DTC Analysis & Data Analysis — The dealer-level tool can be used to read fault codes, view live data streams from the sensor, and potentially perform actuator tests on the heater circuit if available for the specific ECU.
Wiring & Ground Locations
- Heater Circuit Wires — Within the 4-wire connector for the downstream O2 sensor.. These are the two wires that must be tested for resistance on the sensor side and for voltage/ground on the harness side. They are typically the two wires of the same color (e.g., two black or two white wires).
- Engine/Chassis Ground — A primary ground point is often a bolt on the chassis near the fuse panel or on the engine block itself.. While the heater circuit ground is typically controlled by the PCM, a poor main engine or chassis ground can cause a variety of electrical issues, including intermittent sensor faults. A visual inspection for corrosion or looseness at major ground points is a wise, though indirect, diagnostic step.
Real Owner Repair Stories
- AliExpress User/Reviewer (2013 Kia Sportage (shares platform/engine with Optima)) — Persistent P0036 code even after clearing.
❌ Tried (didn't work) Initial diagnosis suggested replacing the entire exhaust assembly.
✅ What actually fixed it The problem was not the sensor itself, but white-green oxidation residue inside the harness connector due to moisture intrusion. Cleaning the oxidized male and female connector terminals with an electronics cleaner and a brass brush restored the connection and resolved the code without replacing the sensor. - NHTSA ODI #11581569 (Kia Sorento - shares platform/engine) — An owner reported multiple codes including P0036 (B1S2), P0171, and P0138. The report notes that defects in the system led to frequent fuel pump and fuel injector replacements, which caused major damage.
Model Year Variations Within This Range
- 2011-2015: Vehicles sold in California-emissions states may have a Super Ultra Low Emissions Vehicle (SULEV) rating, which results in a slightly lower power output (192 hp vs 200 hp) compared to the standard ULEV models. This does not fundamentally change the P0036 diagnosis but is a known variation.
Diagnostic Flowchart
Other Known Issues on This Vehicle
Issues unrelated to this code that are worth knowing about as an owner of this generation:
- Catastrophic Engine Failure (Rod Bearing) 🔴 High — Widespread enough to trigger multiple class-action lawsuits and recalls. Failure can occur suddenly, often between 60,000 and 120,000 miles. (Ref: Subject of NHTSA recall 17V224000 and a lifetime engine warranty extension for many owners under the resulting settlement (Kia Settlement SC147).)
- Excessive Oil Consumption 🔴 High — Very common, often starting after 80,000 miles. Many owners report consuming a quart of oil every 1,000 miles or less. This is often a precursor to engine failure. (Ref: Kia has issued TSB ENG222 which outlines an oil consumption test. If consumption exceeds 1 quart per 1,000 miles, dealers may perform a combustion chamber cleaning or engine replacement under warranty.)
- Degrading Steering Coupler 🟠 Medium — Extremely common. Owners notice a distinct 'clicking' or 'clunking' noise from the steering column when turning the wheel, especially at low speeds. (Ref: Kia issued TSB CHA072 and Customer Satisfaction Program CS1604, extending the warranty on the flexible coupling to 10 years/unlimited miles for this known issue.)
- Carbon Buildup on Intake Valves 🟠 Medium — A systemic issue with the Gasoline Direct Injection (GDI) design. Becomes problematic around 60,000-100,000 miles, causing misfires (P0300), rough idle, and poor performance.
- Cracked Low-Pressure Fuel Hose 🔴 High — Common on 2013-2014 models. The hose can deteriorate from engine heat, crack, and leak fuel, creating a significant fire risk. (Ref: NHTSA Recall 18V907000 was issued to address this problem.)
Used vs. New Parts: Buying Guide for This Vehicle
When a used part is the smart pick: For this repair, sourcing a used part is generally not recommended for the oxygen sensor itself, as it is a wear item. However, a used wiring harness pigtail from a junkyard is a very smart choice if your original connector is melted or corroded, as new connectors can be expensive or hard to find.
Donor-vehicle mileage cap: roughly under 80000 miles for the part to have meaningful remaining life.
What to inspect on the donor part:
- For a wiring pigtail, inspect for any signs of melting, brittleness, or cracked insulation.
- Check the connector pins to ensure they are clean, straight, and free of green or white corrosion.
- Ensure the locking tab on the connector is intact and clicks securely.
OEM-only on this vehicle (don't cheap out):
- While not strictly required, using an OEM sensor (Mando) or a trusted OEM supplier like Denso or NTK/NGK is highly recommended. Some vehicles can be sensitive to the specific resistance and response time of aftermarket sensors, leading to persistent issues even with a new part.
Aftermarket brands forum-validated for this vehicle:
- Denso
- NTK (NGK)
- Bosch (though some forum users report occasional incompatibility on vehicles that didn't use Bosch as OEM)
Brands owners have reported issues with on this vehicle:
- Avoid unbranded, no-name sensors from online marketplaces. While the price is tempting, they have a high failure rate and may not meet the precise specifications required by the vehicle's ECU, causing the code to return.
Real Owner Stories
Aggregated from forums and TSBs cited above. Mileages and costs reflect what owners reported in those sources.
2015 Kia Optima 2.4L I4
Symptoms: The owner was confused about the 'Bank 1 Sensor 2' terminology on an inline-4 engine and sought clarification on which sensor to replace.
What fixed it: Confirmed that Sensor 2 is the downstream sensor located after the catalytic converter.
Source hint: Reddit r/MechanicAdvice - Code p0036 O2 sensor on 2015 Kia optima lx - some questions
2015 Kia Optima 2.4L I4
Symptoms: Check engine light on with code P0036; encountered clearance issues when trying to remove the sensor.
What fixed it: Replaced the downstream oxygen sensor after modifying a 7/8" O2 sensor socket by grinding the tip down to fit the tight space near the catalytic converter.
Source hint: YouTube - 2011-2017 Kia Optima 2.4 how to change oxygen sensor (code P0036) by Tony The Mechanic
2013 Kia Optima 2.4L I4
Symptoms: Check engine light present; visual inspection revealed potential for melted wiring due to proximity to the exhaust.
What fixed it: Identified the downstream O2 sensor location and checked for melted wires or a bad sensor.
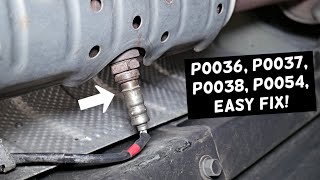
Source hint: YouTube - KIA OPTIMA CODE P0036, P0037, P0038, P0054 OXYGEN SENSOR, EASY FIX by Auto Repair Guys
Related OBD-II Codes
Frequently Asked Questions
Where is the 'SENSOR 1' fuse located on my 2011-2015 Kia Optima, and what does it do for P0036?
I'm getting a P0036 on my 2015 Optima LX; which sensor do I need to replace?
Is there a specific tool I need to change the downstream O2 sensor on my Optima?
Could my Optima's P0036 code be related to the common oil consumption issues on the Theta II engine?
My O2 sensor wiring looks melted; is this a known problem for the 2011-2015 Optima?
Helpful Videos
We Have This Part in Stock


The information in this article is provided for general reference and educational purposes only. Vehicle specifications, procedures, and part compatibility can vary by production date, trim level, and region. Always consult your vehicle's factory service manual and verify part numbers before purchasing or performing repairs. Safety-critical components such as airbags, seat belts, and braking systems should be installed by a qualified professional.
- Kia Optima:
- 🧭 Diagnostic Flowchart
- 🎬 Helpful Videos
- 🛍️ Shop This Part
- What's Unique About the 2011-2015 Kia Optima
- Symptoms You May Notice
- Most Likely Causes
- Rare But Worth Checking
- Diagnosis Steps
- Parts You'll Likely Need
- Related Codes That Often Appear With This One
- Platform-Specific Known Issues
- Mechanic-Grade Diagnostic Values
- Scan Tool Commands That Help
- Wiring & Ground Locations
- Real Owner Repair Stories
- Model Year Variations Within This Range
- Other Known Issues on This Vehicle
- Used vs. New Parts: Buying Guide for This Vehicle
- Real Owner Stories
- 2015 Kia Optima 2.4L I4
- 2015 Kia Optima 2.4L I4
- 2013 Kia Optima 2.4L I4
- Related OBD-II Codes
- Frequently Asked Questions
- 🎟️ Get 5% Off