
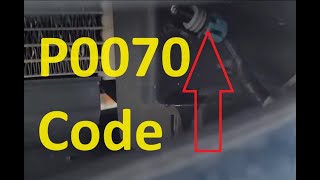
P0070 on 2016-2020 Ram 3500: Ambient Air Temp Sensor Causes & Fixes
Code P0070 on a 2016-2020 Ram 3500 indicates a fault in the ambient air temperature sensor circuit. The fix is usually replacing the sensor, which is located behind the grille on 2016-2018 models or in the driver's side mirror on 2019-2020 models. The part is typically inexpensive, costing between $20 and $60. For 2019+ models, broken wires in the driver's door jamb are also a very common cause.
- P0070 on your Ram 3500 points to an electrical fault with the outside air temperature sensor.
- The first step is to identify the sensor's location: behind the grille for 2016-2018 models, or in the driver's mirror for 2019-2020 models.
- For 2019-2020 trucks, a broken wire inside the rubber boot between the driver's door and the cab is a highly probable cause and should be inspected carefully before replacing parts.
What's Unique About the 2016-2020 Ram 3500
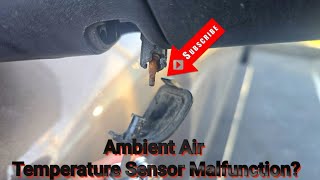
The most critical detail for this code on a Ram 3500 is the location of the sensor, which changed between generations. On fourth-generation models (2016-2018), the sensor is typically an easy-to-access part located behind the front grille. However, on fifth-generation models (2019-2020), Ram integrated the sensor into the driver's side mirror assembly. This change makes the repair more complex, as it can involve disassembling the mirror or, more commonly, inspecting and repairing wiring that runs through the flexible rubber boot in the driver's door jamb, a known area for wire fatigue and breakage from repeated door use.
Diagnostic Flowchart
Tap your situation to follow the diagnostic path that matches what you're seeing on this vehicle.
Generation note: This range covers the end of the fourth generation (2016-2018) and the start of the fifth generation (2019-2020). The location of the ambient air temperature sensor is a key difference: it is typically behind the grille or on the radiator support on 4th-gen models and integrated into the driver's side mirror on 5th-gen models. This location change introduces different failure points, with the 5th-gen being prone to wiring issues in the door harness.
Symptoms You May Notice
- Check Engine Light is illuminated.
- Incorrect, blank, or stuck outside temperature reading on the dashboard (e.g., showing -40°F or a wildly inaccurate high temperature like 165°F).
- Automatic climate control (A/C and heat) does not work properly, blows air at the wrong temperature, or the A/C compressor will not engage.
- On some models with auto climate features, the heated/ventilated seats may activate incorrectly based on the faulty temperature reading.
- Recharging the A/C system. The A/C compressor is often disabled by the PCM as a protective measure when it can't get a valid reading from the ambient temp sensor. The issue is electrical, not a lack of refrigerant. 🎬 See how a faulty sensor can disable your A/C system.
- Replacing the climate control head unit. The control unit is simply reacting to the bad data it's receiving; it is almost never the source of a P0070 code.
- Replacing the entire mirror assembly (on 2019+ models) when the actual fault is a simple broken wire in the door jamb harness.
Most Likely Causes
- Damaged or Failed Ambient Air Temperature Sensor 🔴 High Probability → Shop Ambient Air Temperature Sensor On 2016-2018 models, the sensor is in a vulnerable position behind the grille, making it susceptible to damage from road debris, front-end impacts, or even high-pressure car washes. On all years, the sensor can also fail internally from age and exposure to the elements.
How to confirm: Visually inspect the sensor for physical damage like a broken tip. Test the sensor's internal resistance with a multimeter set to Ohms. A healthy sensor should read between 2,000 and 3,000 Ohms (2-3 kΩ) at room temperature (~77°F/25°C). An open circuit (infinite resistance) or short (near-zero resistance) indicates failure.
Typical fix: Replace the ambient air temperature sensor. This is often a simple plug-and-play part. After replacement, it may be necessary to disconnect the vehicle's battery for 30 minutes to clear the PCM's memory and force it to recognize the new sensor.
Est. part cost: $20 - $60 - Wiring or Connector Damage 🔴 High Probability For 2019+ models, this is a very common cause. The wiring harness that passes through the rubber boot in the driver's door jamb is a known failure point. The wires become brittle and break from the repeated stress of opening and closing the door, causing an open circuit. For all years, wiring to the sensor is exposed to the elements, leading to corrosion (especially from road salt), chafing, or breaks.
How to confirm: Visually inspect the wiring harness for cuts, chafing, or breaks. On 2019+ models, pull back the rubber boot between the driver's door and the truck body and carefully inspect the wires inside for breakage. Unplug the connector and check for green or white corrosion on the pins. Use a multimeter to check for the 5-volt reference signal at the connector with the key on. If voltage is missing or incorrect, trace the wiring for a break.
Typical fix: Repair the broken wire(s), often by soldering in a new section of wire and using heat-shrink tubing for protection. If the connector is corroded, clean the terminals with contact cleaner or replace the connector pigtail if damage is severe.
Est. part cost: $15 - $50 for a pigtail or wire repair supplies
Rare But Worth Checking
- Failed Powertrain Control Module (PCM): This is extremely rare and should only be considered after the sensor and all wiring have been thoroughly tested and confirmed to be good.
Diagnosis Steps
- First, determine your truck's generation to identify the sensor's location. For 2016-2018 models, look behind the front grille or near the radiator support. For 2019-2020 models, locate the small nub on the bottom of the driver's side mirror.
- Visually inspect the sensor and its connector for obvious damage, such as cracks, corrosion, or dirt.
- Check the outside temperature reading on your dashboard. An impossible value like -40°F or a stuck reading is a strong indicator of a circuit fault.
- Use an OBD-II scanner to view live data from the AAT sensor. If the reading is stuck at a default high or low value and doesn't change, it confirms a circuit issue.
- For 2019+ models, the most likely fault is a broken wire. Pull back the rubber boot in the driver's door jamb and carefully inspect the bundle of wires for any that are snapped or have damaged insulation.
- If wiring appears intact, test the sensor. Unplug it and use a multimeter set to Ohms. The resistance across the sensor's pins should be 2kΩ-3kΩ at room temperature. If it reads open (OL) or shorted (0Ω), the sensor is bad.
- If the sensor tests good, check for 5V reference voltage at the harness-side connector with the ignition on. If voltage is absent, a wiring break exists between the connector and the PCM.
- If wiring and the sensor are confirmed good, the fault may lie within the PCM, but this is highly unlikely.
Parts You'll Likely Need
- Ambient Air Temperature Sensor (Grille Mount)
(OEM #5149264AB (Supersedes 5149264AA, 5293138AA) - Note: Verify with VIN)— This sensor is the most common failure point for code P0070 on 2016-2018 models, either due to internal failure or physical damage.
Trusted brands: Mopar, Dorman, Standard Motor Products
OEM price range: $30-$50
Aftermarket price range: $20-$40 - Ambient Air Temperature Sensor (Mirror Mount)
(OEM #68138681AE (Possible candidate) - Note: MUST verify with VIN. This part is often integrated into the mirror assembly and may not be sold separately by dealers.)— On 2019-2020 models, the sensor can fail, but it's often misdiagnosed when the real issue is broken wiring. One owner reported a dealer replaced the sensor and then the entire mirror without fixing the issue, which was likely in the harness.
Trusted brands: Mopar
OEM price range: $25-$75 (if available separately)
Aftermarket price range: $20-$50
Related Codes That Often Appear With This One
- P0073 — This code for 'Ambient Air Temperature Sensor Circuit High' is often triggered along with P0070. The manufacturer TSB S2208000080 explicitly groups these codes together as they both point to electrical faults in the same circuit.
- P0071 — This code for 'Ambient Air Temperature Sensor Range/Performance' indicates the sensor's reading is illogical compared to other sensors, which can happen alongside a circuit fault. Owners on forums often report P0071 for the same underlying issues.
Technical Service Bulletins (TSBs) & Recalls
- S2208000080: Addresses the Malfunction Indicator Lamp (MIL) being on with DTC P0070-15 (Ambient Air Temperature Sensor Circuit-Circuit Short to Battery or Open) or P0073.
Platform-Specific Known Issues
- The change in sensor location from the front grille area (2016-2018) to the driver's side mirror (2019-2020) is the most significant issue. The mirror location on 5th-gen trucks is known to give inaccurate readings after being 'heat-soaked' in the sun, and the wiring in the door jamb is a very common point of failure due to wire fatigue from opening and closing the door.
- Some owners have reported that sudden, drastic temperature changes, such as entering a cool-water car wash on a hot day, can trigger AAT sensor-related fault codes like P0072, suggesting the system can be sensitive to thermal shock.
Mechanic-Grade Diagnostic Values
- Ambient Air Temperature Sensor Resistance — expected: Approximately 3012 Ω (3.0 kΩ) at 25°C (77°F). Some charts show values closer to 10 kΩ at this temperature, so comparing to a new part is recommended.. Failure: A reading of infinite resistance (Open Loop) or near-zero resistance indicates a failed sensor.
- AAT Sensor Signal Voltage — expected: Varies with temperature, typically within a 0.1V (very cold) to 5.0V (very hot) range.. Failure: A constant 0V or 5V reading, or a voltage that doesn't change when the sensor's temperature changes, points to a circuit or sensor fault.
Hidden / Shadow Codes Worth Checking
- P0070-15: Ambient Air Temperature Sensor Circuit - Circuit Short to Battery or Open. This is a manufacturer-specific sub-code that provides more detail than the generic P0070. (see via Dealer-level scan tools (like wiTECH) or advanced aftermarket tools (like AlfaOBD) that can read Body Control Module (BCM) and Driver Door Module (DDM) faults.)
Scan Tool Commands That Help
- wiTECH or other capable scan tool: Post-Repair Drive Cycle Verification — After replacing the AAT sensor or repairing its wiring, the vehicle must be driven for at least 5 minutes at speeds above 15 mph. The code cannot be successfully cleared and will remain active until this drive cycle is completed to update the temperature signal.
- AlfaOBD: Read DDM/BCM Faults — On 2019+ models, the AAT circuit routes through the Driver Door Module (DDM). A generic OBD-II scanner might only show a PCM code, but using AlfaOBD to connect to the DDM can reveal more specific faults related to the door harness or module itself.
Wiring & Ground Locations
- Fuse F99 (2016-2018) — In the main engine compartment fuse box (Power Distribution Center). It is a 10 Amp fuse.. For the 4th generation models, this fuse protects the temperature sensor circuit. A blown fuse will cause an open circuit and trigger P0070-related codes.
- G31 (AAT Signal) & G931 (Sensor Ground) Circuits (2019-2020) — These circuits run from the AAT sensor in the driver's mirror, through the door jamb harness, to the Driver Door Module (DDM) C2 connector. The signal then goes from the DDM C4 connector to the Body Control Module (BCM) C4 connector.. This is the exact wiring path to inspect for breaks, especially within the flexible boot in the door jamb, as specified by a manufacturer TSB.
OEM Part Supersession History
5293138AA, 5149264AA→5149264AB— Part revision and consolidation for grille-mounted sensors.
Model Year Variations Within This Range
- 2016-2018: The AAT sensor circuit is protected by fuse F99 (10A) in the under-hood fuse box. The sensor is located in the front grille area.
- 2019-2020: The AAT sensor is in the driver's mirror. The wiring does not use a dedicated fuse in the same way, but instead routes through the Driver Door Module (DDM) and Body Control Module (BCM) via the G31 and G931 circuits. This design makes it prone to wire breakage in the door jamb.
Helpful Videos
We Have This Part in Stock


The information in this article is provided for general reference and educational purposes only. Vehicle specifications, procedures, and part compatibility can vary by production date, trim level, and region. Always consult your vehicle's factory service manual and verify part numbers before purchasing or performing repairs. Safety-critical components such as airbags, seat belts, and braking systems should be installed by a qualified professional.
- Ram 3500:
- 🧭 Diagnostic Flowchart
- 🎬 Helpful Videos
- 🛍️ Shop This Part
- What's Unique About the 2016-2020 Ram 3500
- Symptoms You May Notice
- Most Likely Causes
- Rare But Worth Checking
- Diagnosis Steps
- Parts You'll Likely Need
- Related Codes That Often Appear With This One
- Technical Service Bulletins (TSBs) & Recalls
- Platform-Specific Known Issues
- Mechanic-Grade Diagnostic Values
- Hidden / Shadow Codes Worth Checking
- Scan Tool Commands That Help
- Wiring & Ground Locations
- OEM Part Supersession History
- Model Year Variations Within This Range
- 🎟️ Get 5% Off