
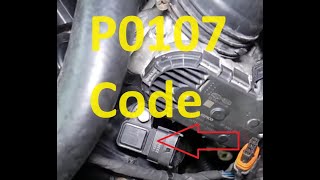
P0107 on 1999-2005 Hyundai Sonata: MAP Sensor Circuit Low Causes and Fixes
P0107 on a 1999-2005 Hyundai Sonata almost always points to a failed Manifold Absolute Pressure (MAP) sensor. This causes rough running, poor power, and bad gas mileage. Replacing the sensor is a simple DIY fix, with the part costing between $30 and $90. Before replacing, verify the sensor's wiring and connector are intact.
- P0107 on a 1999-2005 Sonata is most likely caused by a bad MAP sensor.
- Symptoms include a rough idle, poor acceleration, and bad gas mileage.
- Before replacing the sensor, always check its connector and wiring for 5V reference and ground.
- This generation of Sonata has a critical safety recall for front subframe rust that all owners should be aware of.
What's Unique About the 1999-2005 Hyundai Sonata
On the fourth-generation (EF) Hyundai Sonata and its platform mate, the Kia Optima, the MAP sensor is a common failure point that leads to a host of drivability issues. Unlike some vehicles where vacuum leaks are a primary trigger for MAP-related codes, on this Sonata, the sensor itself or its direct wiring is most often the root cause. The repair is straightforward for both the 2.4L 4-cylinder and the 2.5L/2.7L V6 engines, as the sensor is easily accessible on the intake manifold. The same sensor part is used across a wide variety of Hyundai/Kia vehicles from this era, indicating a common component failure rather than a specific vehicle design flaw.
Generation note: The 1999-2005 model years cover the entire fourth generation (EF) of the Hyundai Sonata, including the 2002 facelift. The causes and repair procedures for code P0107 are consistent across this generation for all available engines (2.4L I4, 2.5L V6, 2.7L V6).
Symptoms You May Notice
- Check Engine Light is illuminated.
- Rough, shaking, or unstable idle.
- Hesitation, stumbling, or lack of power during acceleration.
- Engine may stall, especially when coming to a stop.
- Noticeably poor fuel economy.
- Black smoke from the tailpipe due to a rich fuel condition.
- Replacing the Mass Airflow (MAF) sensor. P0107 is specific to the MAP sensor circuit, not the MAF. This engine uses both sensors, and it's important to diagnose the correct one.
- Replacing the Throttle Position Sensor (TPS). While a bad TPS can cause similar drivability issues, it will generate its own specific codes.
Most Likely Causes
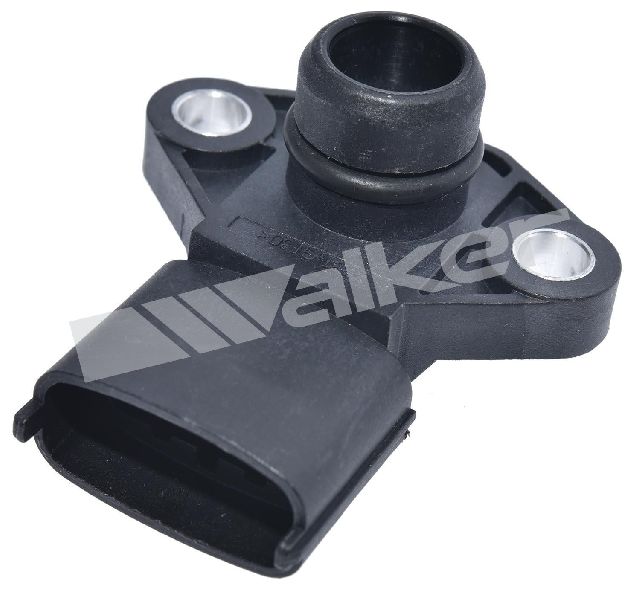
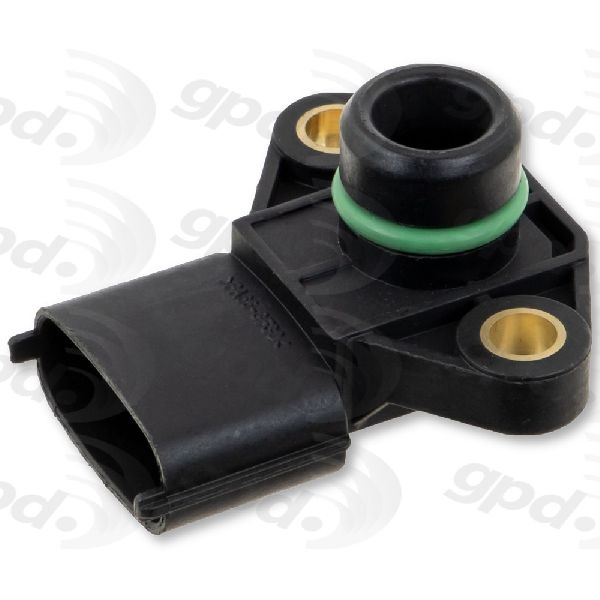
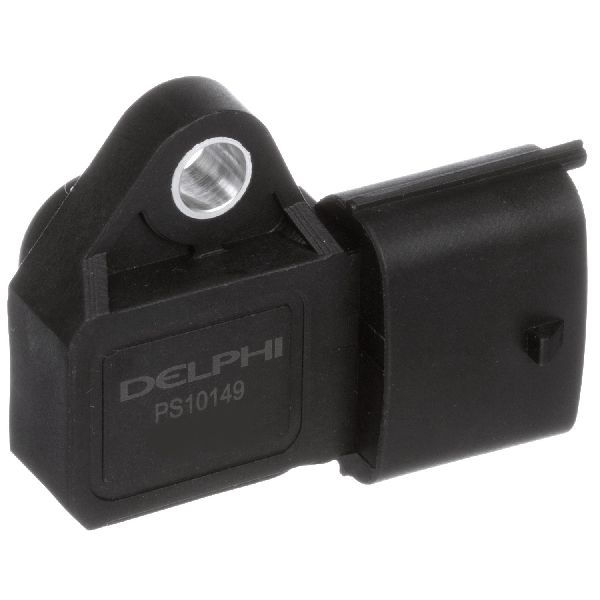
- Faulty Manifold Absolute Pressure (MAP) Sensor 🔴 High Probability → Shop Manifold Absolute Pressure Sensor The sensor is a common failure item on this platform due to age, heat cycles, and vibration in the engine bay. The internal electronics of the sensor simply wear out and fail to produce a correct voltage signal.
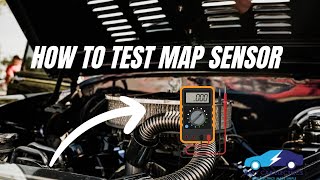
How to confirm: After confirming the wiring is good, test the sensor's output signal with a multimeter. The voltage should be around 4.5-5.0V with the key on and engine off, and drop to 1-2V at idle. 🎬 See this step-by-step guide on testing any MAP sensor If the voltage is stuck low (e.g., under 0.5V) or doesn't change, the sensor is bad.
Typical fix: Replace the MAP sensor. It is typically held to the intake manifold by a single 10mm bolt. 🎬 Watch: How to test and replace your MAP sensor
Est. part cost: $30-$90 - Damaged Wiring or Poor Connection 🟡 Medium Probability The wiring harness in the engine bay is exposed to heat and vibration, which can cause wires to crack, fray, or short to ground over time. The connector itself can also become corroded or loose, leading to a low or intermittent signal. A common failure point is the harness clip breaking, allowing the wires to fall into and be damaged by the radiator fan.
How to confirm: Visually inspect the wiring harness leading to the MAP sensor for any signs of damage, paying close attention to the area near the radiator fan. With the key on, use a multimeter to check for a 5-volt reference signal and a good ground at the sensor's electrical connector. Perform a "wiggle test" on the harness while the engine is running to see if it causes a change in idle, indicating a loose connection.
Typical fix: Repair the damaged section of the wiring harness or clean/replace the connector.
Est. part cost: $5-$50
Rare But Worth Checking
- Major Vacuum Leaks: While less common to cause a 'low input' code specifically, a significant vacuum leak from a cracked hose or failed intake manifold gasket can sometimes alter pressure readings enough to trigger a MAP sensor code. This would usually be accompanied by a loud hissing sound from the engine bay.
- Faulty Powertrain Control Module (PCM): → Shop Engine Control Module (ECM) This is extremely rare. Before condemning the PCM, you must prove that the MAP sensor and all its related wiring are in perfect working order. A failed PCM might not send the 5-volt reference signal or correctly interpret the return signal.
- Clogged Catalytic Converter: A severe exhaust restriction can alter intake manifold pressure and potentially trigger a P0107 code, though this is uncommon and would typically be accompanied by other codes like P0420 and more severe power loss.
- EGR System Leaks: In some Hyundai models, an unmetered air leak can be caused by mechanical failure in the exhaust gas recirculation system. For example, NHTSA ODI #11143359 describes a situation where an EGR pipe separated from its flange, causing an air leak that triggered codes P0105 and P0107.
Diagnosis Steps
- Read the Codes: Use an OBD-II scanner to confirm P0107 is present and check for any other stored codes.
- Visual Inspection: Carefully inspect the MAP sensor, its electrical connector, and the wiring harness. Look for cracked wires, loose pins, or corrosion. Ensure the sensor is securely mounted and its vacuum port is not clogged. Pay special attention to the harness routing near the radiator fan.
- Check Live Data: With the scanner, monitor the MAP sensor's live data. With the Key On, Engine Off (KOEO), the pressure reading should be close to the current atmospheric pressure, and the voltage should be high (~4.5V).
- Check Idle Reading: Start the engine. At idle, the manifold vacuum is high, so the MAP sensor voltage should drop significantly, typically to between 1.0V and 2.0V. If the voltage stays low (under 0.5V) in both KOEO and idle states, the sensor or its circuit is faulty.
- Test the Circuit with a Multimeter: Disconnect the sensor. With the key on, probe the connector terminals. You should find: one terminal with a 5-volt reference from the PCM, one with a good ground (near 0 volts), and the third is the signal return.
- Verify Signal Wire: If the power and ground are good, reconnect the sensor. Back-probe the signal wire with your multimeter. If the voltage is stuck below 0.5V even with the engine off, the sensor has almost certainly failed internally.
- Isolate the Fault: If the 5V reference is missing, there is a wiring issue between the PCM and the sensor, or a rare PCM fault. If all tests point to the sensor, replace it.
Parts You'll Likely Need
- Manifold Absolute Pressure (MAP) Sensor
(OEM #39300-22600 (supersedes 39300-38110), 39300-38200)— This is the most common component to fail, causing the P0107 code on this vehicle. The part number 39300-22600 is a widely used sensor across many Hyundai and Kia models from this era.
Trusted brands: Hyundai (OEM), Bosch, Delphi, Standard Motor Products, NGK/NTK
OEM price range: $80-$140
Aftermarket price range: $30-$90
Related Codes That Often Appear With This One
- P0300 — A random misfire code can occur because the incorrect MAP sensor reading causes the PCM to calculate the wrong fuel mixture, leading to misfires in one or more cylinders.
- P0106 — This code for 'MAP/Barometric Pressure Circuit Range/Performance' can sometimes appear alongside P0107 if the sensor's signal is erratic or nonsensical before failing completely low.
- P0108 — This code for 'MAP Circuit High Input' is the opposite of P0107. Seeing both logged in history could point to a failing sensor with an erratic output.
Technical Service Bulletins (TSBs) & Recalls
- Hyundai Campaign 089 / NHTSA Recall ID 09V124000 - Front Subframe Corrosion Inspection and Replacement.
Platform-Specific Known Issues
- Front Subframe Corrosion Recall: A critical issue for 1999-2004 Sonatas operated in 'Salt Belt' states is severe corrosion of the front subframe. This can lead to the lower control arm detaching, causing a loss of vehicle control. Hyundai issued a service campaign (Campaign 089 / NHTSA 09V124000) to inspect and either rust-proof or replace the affected subframes free of charge. Any owner of one of these vehicles should verify if this service was performed.
Mechanic-Grade Diagnostic Values
- MAP Sensor Signal Voltage (Key On, Engine Off) — expected: ~4.5V - 5.0V. Failure: Voltage is stuck low (below 0.5V), indicating an internal short or circuit issue.
- MAP Sensor Signal Voltage (Engine at Idle) — expected: 1.0V - 2.0V. Failure: Voltage does not drop from the KOEO reading, or is stuck below 0.5V.
- PCM Reference Voltage to Sensor — expected: ~5.0V. Failure: Voltage is significantly lower than 5.0V or absent, indicating a wiring or PCM issue.
- DTC Trigger Threshold — expected: Signal voltage above 0.5V. Failure: Code P0107 sets when voltage drops below 0.25V - 0.5V for several seconds.
- Sensor Ground Wire Resistance — expected: Below 10 Ω. Failure: Resistance above 10 Ω suggests a poor ground connection, which can cause a low voltage reading.
Scan Tool Commands That Help
- Hyundai GDS (Global Diagnostic System): Resetting Adaptive Values — After replacing a MAP sensor, this function in the 'Vehicle S/W Management' or 'Special Function' menu can be used to clear learned fuel trim and other adaptations, forcing the ECU to re-learn with the new sensor's data.
- Hyundai GDS (Global Diagnostic System): Data Analysis (Live Data) — To monitor MAP sensor voltage and pressure in real-time. The GDS provides OEM-level data, which can be graphed to spot intermittent dropouts or glitches that might not be obvious with a generic scanner.
Wiring & Ground Locations
- MAP Sensor Harness — The wiring runs from the MAP sensor on the intake manifold toward the main engine harness.. A common point of failure is the plastic clip holding the harness breaking, which can allow the harness to fall into the path of the radiator fan, causing wires to be cut, frayed, or shorted. This will directly cause a P0107 by interrupting the signal, power, or ground.
- Engine Ground Points — Main ground points are typically located on the engine block, cylinder head, and from the block to the chassis via a ground strap.. While specific diagrams for the 1999-2005 model are not readily available, a poor engine ground can cause a floating ground for all sensors, including the MAP sensor. This can create a voltage differential that the PCM interprets as a low signal, triggering P0107. Verifying clean, tight main grounds is a key step when a direct circuit test is inconclusive.
Real Owner Repair Stories
- Reddit user u/Helllionlod (2017 Hyundai Elantra (different model, but same manufacturer and relevant principle)) — Repeatedly getting MAP sensor codes even after replacing the sensor multiple times.
❌ Tried (didn't work) Replacing the MAP sensor three times.
✅ What actually fixed it The actual cause was a faulty PCV valve. When the PCV valve sticks, it can cause incorrect pressure in the crankcase and intake system, which the MAP sensor reads as a fault. Replacing the inexpensive PCV valve resolved the issue permanently. - NHTSA ODI #11143359 (Hyundai owner) — An owner reported that warning lights came on while driving, and pulling the codes showed P0105 and P0107. A dealer inspection revealed that the EGR pipe had separated from the flange, causing an unmetered air leak.
"I Checked Everything" — The Actual Cause
- In cases where P0107 persists after replacing the sensor and verifying the wiring, and a smoke test reveals no vacuum leaks, the cause may be internal engine pressure issues. A prime example is a faulty PCV valve. A stuck-closed PCV valve can increase crankcase pressure, which can affect intake manifold pressure readings under certain conditions, leading to a MAP sensor code without an actual vacuum leak that a smoke test would find.
OEM Part Supersession History
39300-38110→39300-22600— Standard part consolidation and revision by the manufacturer.
Heads up: While 39300-22600 is the official replacement, forums and part sellers note that using a sensor not specifically calibrated for the vehicle's ECU can cause persistent issues. It is critical to source the part using the vehicle's VIN to ensure the correct revision is supplied.
Model Year Variations Within This Range
- 1999-2005: There are no significant variations within this generation related to the P0107 code. The same MAP sensor part number (39300-22600, superseding earlier versions) is used across the 2.4L I4, 2.5L V6, and 2.7L V6 engines, and the diagnostic procedure is identical.
Diagnostic Flowchart
Other Known Issues on This Vehicle
Issues unrelated to this code that are worth knowing about as an owner of this generation:
- Front Subframe Corrosion 🔴 High — Very common in regions that use road salt ('Salt Belt'). Can occur on vehicles over 8-10 years old, leading to control arm separation. (Ref: Hyundai Campaign 089 / NHTSA ID: 09V124000)
- Premature Timing Belt Failure 🔴 High — The timing belt on both I4 and V6 engines is known to fail before the 60,000-mile service interval. Failure will cause catastrophic, engine-bending valve damage. Many owners recommend a preventative replacement every 40,000-50,000 miles.
- Automatic Transmission Shift Problems 🟠 Medium — Owners report issues including harsh downshifts when coming to a stop, delayed engagement, and slipping. Problems are sometimes related to failed input/output speed sensors or internal valve body solenoids. (Ref: See TSBs like 18-AT-004 for general Hyundai 6-speed diagnosis, though specific TSBs for this 4/5-speed are older.)
- Minor Electrical Faults 🟡 Low — Common age-related issues include fluctuating coolant temperature gauges due to a poor engine-to-chassis ground, and failing wiper motors or linkages.
Used vs. New Parts: Buying Guide for This Vehicle
When a used part is the smart pick: For this specific repair, a used part is strongly discouraged. The part is a relatively low-cost electronic sensor, and a used part from a junkyard carries a high risk of premature failure with no warranty, negating any small cost savings.
What to inspect on the donor part:
- If forced to consider a used part, only select one from a vehicle with documented low mileage.
- Inspect the connector pins for any corrosion or damage.
- Ensure the O-ring is present and pliable, though it should always be replaced with a new one.
OEM-only on this vehicle (don't cheap out):
- Manifold Absolute Pressure (MAP) Sensor
Aftermarket brands forum-validated for this vehicle:
- While OEM is most recommended by forum users, if choosing aftermarket, stick to well-known brands that are often OEM suppliers themselves, such as Bosch, Delphi, or NGK/NTK.
Brands owners have reported issues with on this vehicle:
- Unnamed, no-brand, or exceptionally cheap online marketplace sensors. Multiple sources indicate that Hyundai vehicles can be particularly sensitive to sensor calibration, and cheap aftermarket sensors are a common cause of recurring codes.
Real Owner Stories
Aggregated from forums and TSBs cited above. Mileages and costs reflect what owners reported in those sources.
1999-2004 Hyundai Sonata
Symptoms: Owners in 'Salt Belt' states reported severe corrosion of the front subframe, in some cases leading to the lower control arm detaching.
What fixed it: Hyundai dealers inspected and either rust-proofed or replaced the affected subframes free of charge under Campaign 089.
Source hint: Hyundai-Forums.com discussions regarding Campaign 089 / NHTSA Recall ID 09V124000
2002-2005 Hyundai Sonata 2.7L V6
Symptoms: Harsh downshifts when coming to a stop, delayed engagement, and transmission slipping.
What fixed it: Replacement of failed input/output speed sensors or internal valve body solenoids.
Source hint: Owner reports in repair databases (Edmunds, CarParts.com) and TSB 18-AT-004
Related OBD-II Codes
Frequently Asked Questions
Is there a recall for my 1999-2005 Hyundai Sonata that I should check while fixing the P0107 code?
Can I use a used MAP sensor from a salvage yard to save money on my Sonata?
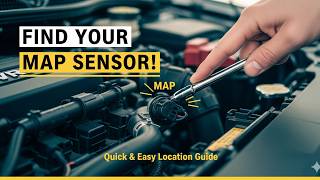
Where is the MAP sensor located on the 1999-2005 Sonata engine?
My Sonata is stalling at stoplights and has black smoke from the tailpipe 🎬 Watch: Understanding the causes and fixes for code P0107; is this related to P0107?
Are there specific wiring areas I should check for the P0107 code on this car?
Which brands should I look for if I don't buy the OEM Hyundai MAP sensor?
Helpful Videos


We Have This Part in Stock


The information in this article is provided for general reference and educational purposes only. Vehicle specifications, procedures, and part compatibility can vary by production date, trim level, and region. Always consult your vehicle's factory service manual and verify part numbers before purchasing or performing repairs. Safety-critical components such as airbags, seat belts, and braking systems should be installed by a qualified professional.
- Hyundai Sonata:
- 🧭 Diagnostic Flowchart
- 🎬 Helpful Videos
- 🛍️ Shop This Part
- What's Unique About the 1999-2005 Hyundai Sonata
- Symptoms You May Notice
- Most Likely Causes
- Rare But Worth Checking
- Diagnosis Steps
- Parts You'll Likely Need
- Related Codes That Often Appear With This One
- Technical Service Bulletins (TSBs) & Recalls
- Platform-Specific Known Issues
- Mechanic-Grade Diagnostic Values
- Scan Tool Commands That Help
- Wiring & Ground Locations
- Real Owner Repair Stories
- "I Checked Everything" — The Actual Cause
- OEM Part Supersession History
- Model Year Variations Within This Range
- Other Known Issues on This Vehicle
- Used vs. New Parts: Buying Guide for This Vehicle
- Real Owner Stories
- 1999-2004 Hyundai Sonata
- 2002-2005 Hyundai Sonata 2.7L V6
- Related OBD-II Codes
- Frequently Asked Questions
- 🎟️ Get 5% Off