
P0135 on 2011-2023 Dodge Challenger 3.6L: O2 Sensor Heater Failure Causes and Fixes
For a Dodge Challenger with the 3.6L V6, code P0135 almost always means the heater inside the upstream oxygen sensor on the driver's side has failed. This sensor is also known as Bank 1, Sensor 1. Replacing this sensor is the most common fix, with quality aftermarket parts costing between $40 and $100. Ignoring the issue can lead to poor fuel economy and eventual damage to the catalytic converter.
- P0135 points to a failure in the heater circuit of the O2 sensor located on the driver's side exhaust manifold (before the catalytic converter).
- The most common fix is to replace the Bank 1, Sensor 1 oxygen sensor itself, as the internal heater element burns out over time.
- Before replacing the sensor, always perform a quick visual inspection of the wiring for any obvious melting or damage.
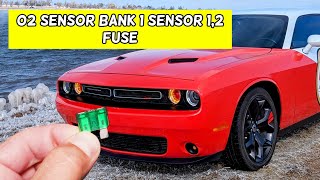
- Also, check the O2 sensor heater fuse(s). For 2015+ models, start with fuse F77 in the under-hood fuse box.
- This is a DIY-friendly repair for most home mechanics with the proper O2 sensor socket.
What's Unique About the 2011-2023 Dodge Challenger
This guide covers the 2011-2023 Dodge Challenger, as this is the period when the 3.6L Pentastar V6 engine was available. For the rear-wheel-drive Challenger, 'Bank 1' is the driver's side of the engine. This can be confusing as some generic Chrysler documentation identifies Bank 1 as the passenger side. However, video evidence specific to the Challenger 3.6L confirms Bank 1 is on the driver's side. 'Sensor 1' is the upstream sensor, located in the exhaust manifold before the catalytic converter.
Generation note: The Dodge Challenger received a major interior and exterior refresh for the 2015 model year. This update included changes to the fuse box layout. For 2015 and newer models, the O2 sensor heater fuse may be in a different location (such as F77 in the under-hood fuse box) compared to 2011-2014 models. For pre-2015 models, the heater circuit power is often tied to several 'engine management' fuses in the front and rear power distribution centers.
Symptoms You May Notice
- Check Engine Light is on.
- Reduced fuel economy. A drop of 2-3 MPG is commonly reported by owners.
- Rough or unstable idle, especially when the engine is cold.
- Failing a vehicle emissions test.
- Slight hesitation when accelerating, particularly on inclines or under light load.
- Replacing the wrong oxygen sensor. P0135 is specifically for Bank 1, Sensor 1. It is crucial to identify the correct sensor (driver's side, upstream) before replacement.
- Replacing the sensor when the actual fault is a blown fuse or damaged wiring.
Most Likely Causes
- Failed Bank 1, Sensor 1 Oxygen Sensor 🔴 High Probability → Shop Oxygen Sensor The internal heater element is a common failure point on oxygen sensors, which are considered a wear-and-tear item with a typical lifespan of 80,000-100,000 miles. The constant heating and cooling cycles eventually cause the delicate filament inside to break.
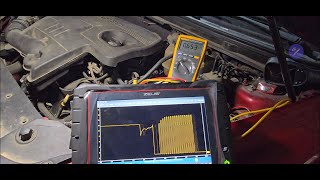
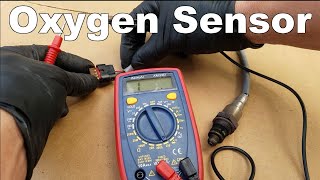
How to confirm: Disconnect the sensor and measure the resistance between the two heater circuit pins (usually the two wires of the same color, often black). 🎬 Watch: A pro shows you how to test heater circuits. A healthy sensor should read between 2.0 and 30.0 ohms when tested at room temperature (70°F / 21°C). A reading of infinity (OL) indicates a burned-out, open circuit, confirming the sensor is bad.
Typical fix: Replace the Bank 1, Sensor 1 (driver's side, upstream) oxygen sensor. It is recommended to use a quality OEM (Mopar) or OEM-supplier (NTK/NGK) part for best results.
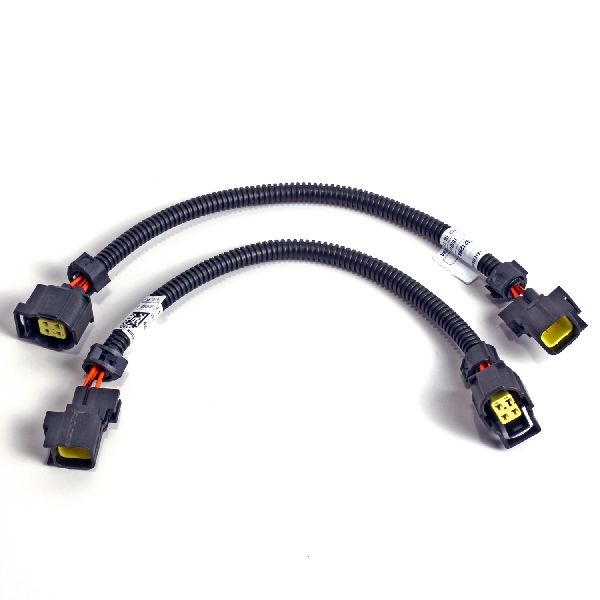
Est. part cost: $40-$100 - Damaged Wiring or Connector 🟡 Medium Probability The sensor wiring is located near the hot exhaust manifold, making it susceptible to melting, chafing, or becoming brittle over time. In one documented case on a similar platform, melted wires leading to the sensor were the root cause of a persistent P0135 code. The connector can also suffer from corrosion or loose pins.
How to confirm: Visually inspect the entire length of the wiring harness from the O2 sensor to where it connects to the main engine harness. Look for any signs of melting, frayed wires, or physical damage. Check that the connector is securely plugged in and free of corrosion. A wiring diagram can help identify the specific wires for the heater circuit (e.g., on 2018 models, the supply wire is often Dark Blue/Orange).
Typical fix: Repair the damaged section of wire or replace the connector pigtail. If damage is extensive, a new sensor with its integrated harness is often the easiest solution.
Est. part cost: $10-$30 - Blown Fuse for Heater Circuit ⚪ Low Probability
How to confirm: Check the fuses related to the O2 sensor heaters. On 2015+ models, check fuse F77 in the under-hood fuse box. 🎬 See this video to find your O2 sensor heater fuse. On 2011-2014 models, check 'engine management' fuses 31, 34, 35, and 37 in the under-hood box and relays (like R29 and R63) in both the under-hood and trunk fuse boxes. Use a multimeter or test light to verify the fuse is good.
Typical fix: Replace the blown fuse. If the new fuse blows immediately, it indicates a short circuit in the wiring or the sensor itself that must be found and repaired. This often happens when the sensor's internal heater element shorts to ground.
Est. part cost: $1-$5
Rare But Worth Checking
- Failed Powertrain Control Module (PCM): → Shop Engine Control Module (ECM) This is very uncommon. The PCM's internal driver that controls the ground for the heater circuit can fail. This should only be considered after all other possibilities (sensor, wiring, fuses) have been definitively ruled out.
Diagnosis Steps
- Use an OBD-II scanner to confirm P0135 is the only code present. If other codes exist, address them first.
- Visually inspect the Bank 1, Sensor 1 (driver's side, upstream) oxygen sensor wiring and connector for obvious signs of damage, such as melting, chafing, or corrosion.
- Check the fuse(s) for the O2 sensor heater circuit. For 2015+ models, this is likely F77 in the front power distribution center (under the hood). For 2011-2014 years, consult a wiring diagram or check engine management fuses 31, 34, 35, and 37 and associated relays.
- If fuses are good, disconnect the O2 sensor connector. Use a multimeter to measure the resistance across the two heater pins on the sensor side. A reading between 2.0 and 30.0 ohms is expected at room temperature. An infinite reading (OL) means the heater is broken and the sensor must be replaced.
- If the sensor resistance is good, check for power at the harness connector. With the key in the 'On' position (engine off), one pin should have battery voltage (approx. 12V). On 2018 models, this is often a Dark Blue/Orange wire.
- If voltage is present and the sensor's resistance is good, the issue may be in the ground control wire leading back to the PCM, or a rare PCM fault.
- If no voltage is present at the connector and the fuse is good, there is a break in the power wire between the fuse box and the sensor.
Parts You'll Likely Need
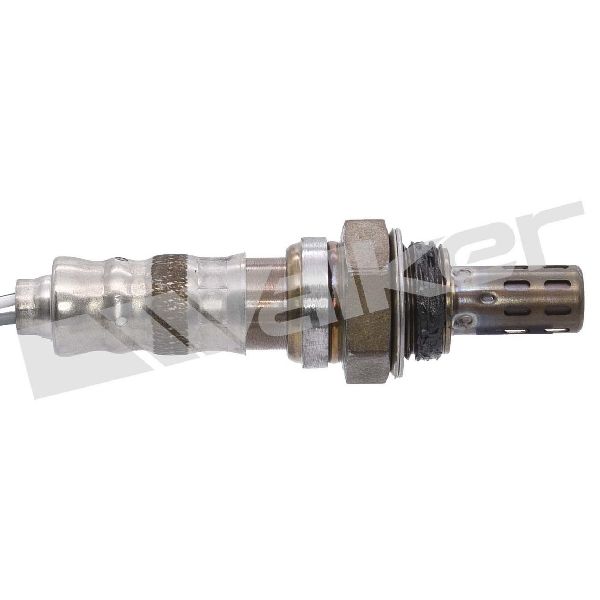
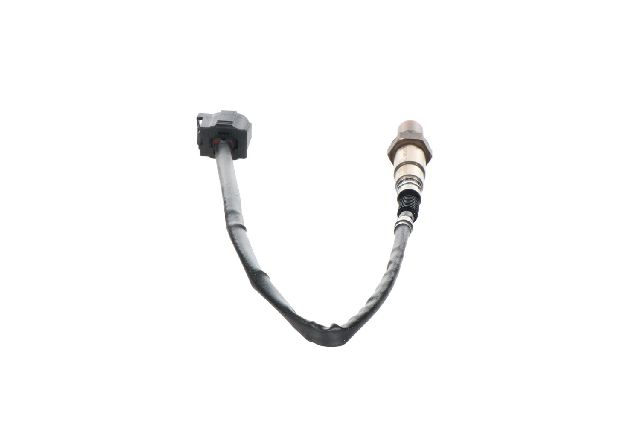
- Oxygen Sensor (Bank 1, Sensor 1)
(OEM #5149171AB)— This is the upstream sensor on the driver's side. Its internal heater element is the most common failure point for code P0135. The original part number 5149171AA has been superseded by 5149171AB.
Trusted brands: Mopar (OEM), NTK (often the OEM supplier), Denso, Bosch
OEM price range: $80-$150
Aftermarket price range: $40-$100
Related Codes That Often Appear With This One
- P0171 — If the O2 sensor is not heating up correctly, it may provide inaccurate (lean) readings to the PCM, which can trigger a 'System Too Lean (Bank 1)' code.
- P0134 — This code means 'O2 Sensor Circuit No Activity Detected (Bank 1 Sensor 1)'. A failed heater can prevent the sensor from reaching operating temperature, leading to a lack of signal activity.
Technical Service Bulletins (TSBs) & Recalls
- While no TSB directly addresses P0135 on the Challenger 3.6L, related TSBs for other Pentastar engines show a pattern of PCM software updates fixing sensor-related codes. For example, TSB 18-031-14 was issued for the related 3.2L engine to fix erroneous temperature codes via a PCM reflash. This highlights that in rare cases, a software issue could be a factor, though it is not a documented common cause for this specific code on this vehicle.
- Manufacturer TSB Bulletin #25-002-14, TSB Bulletin #25-003-13, and TSB Bulletin #25-004-12 all specifically list P0135 as "O2 Sensor 1/1 Heater Performance" across various models in the manufacturer's lineup, confirming this as a recognized heater performance fault within the vehicle's diagnostic architecture.
Platform-Specific Known Issues
- Access Difficulty: While not overly difficult, accessing the Bank 1 Sensor 1 O2 sensor can be tight. It is located on the driver's side exhaust manifold. Using a specialized O2 sensor socket with a slit for the wire is highly recommended to get the proper leverage to break the old sensor loose, as they are often seized in the manifold.
Mechanic-Grade Diagnostic Values
- O2 Sensor Heater Element Resistance — expected: 2.0 to 30.0 ohms at 70°F (21°C). Failure: A reading of infinity (OL) indicates an open circuit (bad sensor). A reading outside the specified range also indicates a faulty sensor.
- O2 Sensor Heater Circuit Current Draw — expected: 0.8 to 2.0 amps during warm-up. Failure: Significantly higher or lower current suggests a wiring short, a faulty heater element, or a PCM driver issue.
- O2 Sensor Heater Ground Circuit Continuity — expected: Less than 0.1 ohms. Failure: Higher resistance indicates a poor ground connection, which can cause the heater to malfunction.
Scan Tool Commands That Help
- wiTECH or equivalent full-function scan tool: O2 Heater Test / Actuation — This command allows a technician to manually activate the O2 sensor heater circuit with the engine off. It is used to verify that the PCM driver, wiring, and fuse are all working correctly. By connecting a test light or amp clamp to the circuit while running this test, you can confirm power delivery and current draw without having to start the engine.
Wiring & Ground Locations
- Engine Block to Chassis Ground Strap — Typically a braided strap or thick wire connecting the engine block or cylinder head to the vehicle's firewall or frame.. A poor engine ground can cause a host of electrical issues, including creating a high-resistance path for components like the O2 sensor heater. While the sensor has its own ground wire in the harness, the entire engine electrical system relies on this main ground strap for a stable reference. A faulty strap can lead to incorrect sensor readings and intermittent codes.
- O2 Sensor 1/2 Heater Ground Circuit (Z906) — This is a specific wire within the engine harness that provides the ground path for the downstream (Sensor 2) O2 sensor heater, controlled by the PCM. The upstream sensor has a similar dedicated ground circuit.. Diagnostic procedures for related codes (e.g., P0038) involve checking the resistance to ground on this specific circuit at the sensor connector. An open in this wire (high resistance) would prevent the heater from working and set a code.
OEM Part Supersession History
5149171AA→05149171AB— Standard part revision, likely for improved durability or material changes.68066160AA→05149171AB— Part consolidation. 68066160AA was also used on these platforms and has been rolled into the 5149171AB part number.
Diagnostic Flowchart
Other Known Issues on This Vehicle
Issues unrelated to this code that are worth knowing about as an owner of this generation:
- Cracked Oil Filter Housing/Cooler Assembly 🔴 High — Very common, especially on models from 2011-2016. The plastic housing becomes brittle from heat cycles and can crack, causing significant oil and/or coolant leaks into the engine valley.
- Rocker Arm and Lifter Failure ('Pentastar Tick') 🔴 High — Common on early Pentastar engines (approx. 2011-2016). Needle bearings in the rocker arms fail, causing a distinct ticking noise, metal debris in the oil, and potential camshaft damage leading to misfires. (Ref: No recall, but multiple class-action lawsuits have been filed.)
- Left Cylinder Head Failure 🟠 Medium — Primarily affects 2011-early 2013 models. A manufacturing defect could cause excessive valve guide wear on the left cylinder head, leading to misfires (e.g., P0302, P0304, P0306) and requiring cylinder head replacement. Chrysler extended the warranty for this issue on some vehicles. (Ref: Extended Warranty (X45) for some vehicles, not a formal recall.)
- Cooling System Failures (Water Pump, Thermostat) 🟠 Medium — Water pumps and thermostat housings can fail prematurely, leading to coolant leaks and overheating conditions. This is a common point of failure across many vehicles with the 3.6L engine.
Used vs. New Parts: Buying Guide for This Vehicle
When a used part is the smart pick: For this specific repair, sourcing used parts is generally not recommended for the oxygen sensor itself. However, if diagnosis points to a damaged connector or a section of the wiring harness, a used pigtail or harness from a reputable auto recycler can be a cost-effective and reliable solution.
Donor-vehicle mileage cap: roughly under 80000 miles for the part to have meaningful remaining life.
What to inspect on the donor part:
- For a wiring pigtail, inspect for any signs of melting, brittleness, or cracking in the insulation.
- Check the connector for corrosion, broken locking tabs, or bent pins.
- Ensure the wires have not been previously cut and poorly spliced.
- If possible, choose a donor vehicle from a dry climate to minimize corrosion risk.
OEM-only on this vehicle (don't cheap out):
- While not strictly 'OEM-only', forum consensus strongly favors Mopar or the OEM supplier (NTK) for the oxygen sensor itself. Some aftermarket sensors, particularly budget brands, have been reported to fail prematurely or cause performance issues.
Aftermarket brands forum-validated for this vehicle:
- NTK (often the OEM supplier for Chrysler/Dodge)
- Denso
Brands owners have reported issues with on this vehicle:
- While some users have success, many forum posts advise caution with Bosch sensors on Chrysler platforms, citing instances of incompatibility or early failure, despite Bosch being a reputable brand for European vehicles.
Real Owner Stories
Aggregated from forums and TSBs cited above. Mileages and costs reflect what owners reported in those sources.
2012 Dodge Charger 3.6L Pentastar V6
Symptoms: Check engine light with code P0135, a drop in fuel economy from 20.5 to 17.8 MPG, and hesitation during acceleration.
What fixed it: Replacing the sensor with Mopar part 514917.
Source hint: Owner experience on a 2012 Dodge Charger 3.6L
2004 Jeep Grand Cherokee (similar architecture)
Symptoms: Persistent P0135 code that remained after replacing the PCM and multiple sensors.
What fixed it: Finding and repairing melted wiring leading to the sensor.
Source hint: Reddit r/MechanicAdvice
Owner Complaint: Persistent Code After Replacement
Symptoms: An owner reported a persistent P0135 code for the O2 sensor heater that remained even after replacing the sensor itself.
What fixed it: According to NHTSA ODI #10577984, the repair involved flashing the body controller, as there was a service bulletin indicating a software update was necessary to resolve the issue.
Source hint: NHTSA ODI #10577984
Related OBD-II Codes
Frequently Asked Questions
Where is the Bank 1 Sensor 1 oxygen sensor located on my 3.6L Pentastar Challenger?
Does TSB 18-031-14 apply to my Challenger's P0135 code?
Which fuse should I check for the O2 sensor heater on a 2015 or newer Challenger?
What are the specific heater circuit fuses for a 2011-2014 Challenger?
What brand of replacement oxygen sensor is recommended for the Pentastar V6?
What resistance reading should I see when testing the O2 sensor heater pins?
Helpful Videos

We Have This Part in Stock


The information in this article is provided for general reference and educational purposes only. Vehicle specifications, procedures, and part compatibility can vary by production date, trim level, and region. Always consult your vehicle's factory service manual and verify part numbers before purchasing or performing repairs. Safety-critical components such as airbags, seat belts, and braking systems should be installed by a qualified professional.
- Dodge Challenger:
- 🧭 Diagnostic Flowchart
- 🎬 Helpful Videos
- 🛍️ Shop This Part
- What's Unique About the 2011-2023 Dodge Challenger
- Symptoms You May Notice
- Most Likely Causes
- Rare But Worth Checking
- Diagnosis Steps
- Parts You'll Likely Need
- Related Codes That Often Appear With This One
- Technical Service Bulletins (TSBs) & Recalls
- Platform-Specific Known Issues
- Mechanic-Grade Diagnostic Values
- Scan Tool Commands That Help
- Wiring & Ground Locations
- OEM Part Supersession History
- Other Known Issues on This Vehicle
- Used vs. New Parts: Buying Guide for This Vehicle
- Real Owner Stories
- 2012 Dodge Charger 3.6L Pentastar V6
- 2004 Jeep Grand Cherokee (similar architecture)
- Owner Complaint: Persistent Code After Replacement
- Related OBD-II Codes
- Frequently Asked Questions
- 🎟️ Get 5% Off