
P0135 on 2010-2015 Hyundai Tucson: O2 Sensor Heater Malfunction Causes and Fixes
For a 2010-2015 Tucson, code P0135 almost always means the heater inside the upstream oxygen sensor (Bank 1, Sensor 1) has failed. The most likely fix is replacing the sensor itself. Before buying, check the 15A 'SENSOR 1' fuse in the engine bay fuse box. Expect to pay $50-$120 for an aftermarket sensor and $150-$250 for an OEM part.
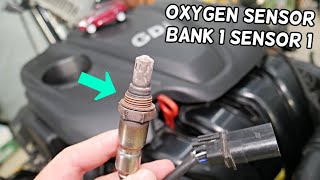
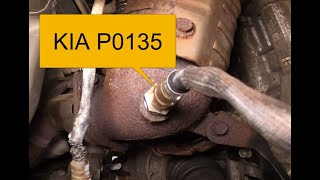
- P0135 on your Tucson points to a problem with the heater in the upstream O2 sensor, located on the exhaust manifold.
- The most likely fix is replacing the sensor, but always check the 15A 'SENSOR 1' fuse in the engine bay first to avoid unnecessary expense.
- This is a DIY-friendly repair for many home mechanics with the proper tool (a 22mm O2 sensor socket).
- Ignoring this code will lead to poor gas mileage and will cause you to fail an emissions test.
What's Unique About the 2010-2015 Hyundai Tucson
On the second-generation (LM) Hyundai Tucson, this code is straightforward. All engines offered were 4-cylinders (2.0L and 2.4L Theta II), so there is only one exhaust bank. This eliminates the need to identify Bank 1 vs. Bank 2 as you would on a V6 engine. The issue is almost always a simple component failure of the sensor's heater, a blown fuse, or wiring damage near the hot exhaust manifold. The platform mate, the Kia Sportage, exhibits the exact same failure pattern.
🎬 Watch: Diagnosing the O2 heater circuit on a Kia or Hyundai.Symptoms You May Notice
- Check Engine Light is on
- Reduced fuel economy
- Failing an emissions test
- Rough idle or poor performance, especially during cold starts
- A rotten egg or sulfur smell from the exhaust
- Replacing the downstream (Bank 1, Sensor 2) oxygen sensor instead of the upstream (Bank 1, Sensor 1) sensor.
- Replacing the oxygen sensor without first checking for a blown fuse or damaged wiring.
- Assuming the code indicates a bad catalytic converter. P0135 is strictly related to the sensor's heater circuit, not the catalytic converter's efficiency.
Most Likely Causes
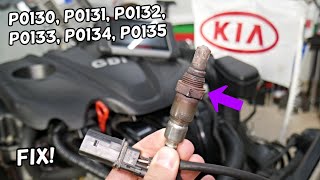
- Failed Upstream Oxygen Sensor 🔴 High Probability → Shop Oxygen Sensor The internal heater element is a common failure point on oxygen sensors as they age due to constant exposure to extreme heat cycles. This is the most frequent cause of P0135.
How to confirm: After confirming the fuse and wiring are intact, test the resistance of the heater circuit within the sensor using a multimeter. 🎬 Watch: How to test and replace an O2 sensor for P0135. An open circuit (infinite resistance) or a reading outside of the manufacturer's specification indicates a failed heater. For this specific vehicle, the heater resistance should be between 2.4 and 2.9 Ω. A reading of 0 ohms indicates a short circuit, while infinite resistance (OL) means the circuit is open.
Typical fix: Replace the Bank 1, Sensor 1 (upstream) oxygen sensor.
Est. part cost: $50-$250 - Blown Fuse 🟡 Medium Probability A short circuit in the sensor's heater element or its wiring can cause the corresponding fuse to blow as a protective measure.
How to confirm: Locate the fuse box in the engine compartment and check the 15A fuse labeled 'SENSOR 1'. Visually inspect if the fuse is blown or test for continuity with a multimeter.
Typical fix: Replace the blown fuse. If the fuse blows again immediately, it indicates a persistent short circuit in the wiring or the sensor itself that must be found and repaired.
Est. part cost: $1-$5 - Damaged Wiring or Connector ⚪ Low Probability The sensor's wiring harness is located near the hot exhaust manifold and can become brittle, melt, or get damaged over time, leading to an open or short circuit.
How to confirm: Visually inspect the entire wiring harness from the oxygen sensor to its connector. Look for any signs of melting, chafing, corrosion in the connector pins, or breaks in the wires.
Typical fix: Repair the damaged section of the wire or replace the connector pigtail. Ensure the repaired harness is properly secured away from hot exhaust components.
Est. part cost: $10-$30
Rare But Worth Checking
- Faulty Engine Control Module (ECM): → Shop Engine Control Module (ECM) This is extremely rare. The ECM's internal driver circuit for the O2 sensor heater can fail. This should only be considered after all other possibilities (sensor, wiring, fuse) have been definitively ruled out by a professional.
- Faulty Engine Coolant Temperature (ECT) Sensor: A faulty ECT sensor can cause the PCM to misinterpret the time it takes for the O2 sensor to warm up, potentially triggering a P0135 code, though this is uncommon.
Diagnosis Steps
- Read the code with an OBD-II scanner to confirm P0135 is the only code present.
- Locate the Bank 1, Sensor 1 (upstream) oxygen sensor. On the 2.0L and 2.4L engines, it is on the exhaust manifold, visible from the top of the engine bay. 🎬 Watch: See the exact location and replacement of the upstream sensor.
- Inspect the fuse for the O2 sensor heater, which is a 15A fuse labeled 'SENSOR 1' in the engine bay fuse box. Replace if blown.
- Carefully inspect the sensor's wiring harness and connector for any signs of melting, corrosion, or physical damage. Ensure the connector is securely plugged in.
- If the fuse and wiring are good, disconnect the sensor and test the resistance of the heater circuit pins on the sensor side. A reading outside the 2.4-2.9 Ω range (e.g., infinite resistance) means the heater is broken and the sensor must be replaced.
- If resistance is within spec, test for battery voltage at the connector on the vehicle harness side (with the key on, engine off). Lack of voltage points to a wiring issue between the fuse box and the sensor.
- If the fuse, wiring, and voltage supply are all correct, the oxygen sensor itself is faulty and should be replaced.
Parts You'll Likely Need
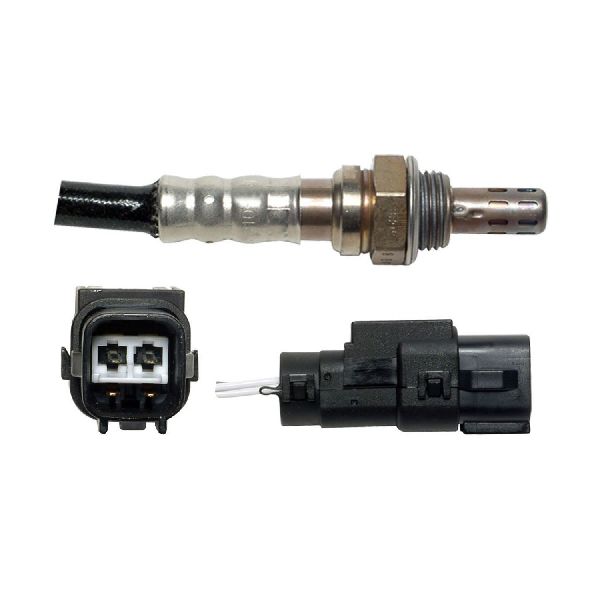
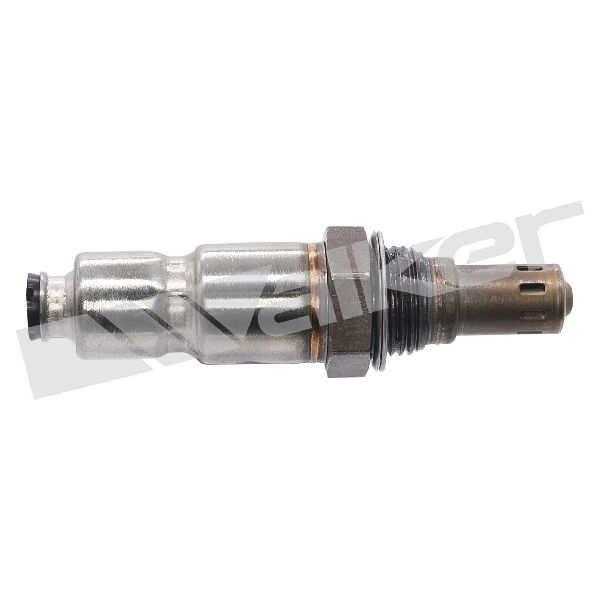
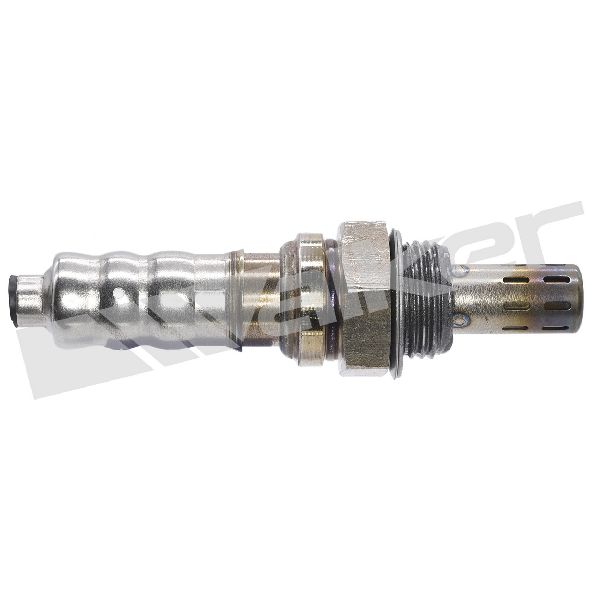
- Upstream Oxygen Sensor (Air/Fuel Ratio Sensor)
(OEM #39210-2G100 (for 2.0L/2.4L), 39210-2G650 (for 2.4L, often listed as downstream but sometimes used upstream, verify by VIN))— This is the most common failure for code P0135, as the internal heater element burns out over time. Part numbers can vary based on emissions standards (Federal vs. California) and specific production dates. Always verify fitment with your vehicle's VIN.
Trusted brands: Denso, NGK/NTK, Bosch, Walker
OEM price range: $150-$250
Aftermarket price range: $50-$120
Mechanic-Grade Diagnostic Values
- O2 Sensor Heater Resistance — expected: Approx. 9.0 Ω at 20°C (68°F) per one Hyundai manual, while another for a similar model states 2.4 ~ 4.0 Ω. The original Pass 2 value of 2.4-2.9 Ω is a valid and common reading.. Failure: Infinite resistance (OL) indicates an open circuit; 0 Ω indicates a short. Any reading significantly outside the specified range suggests a faulty heater element.
- O2 Sensor Heater Power Supply Voltage — expected: Battery voltage (approx. 12V) should be present at the heater power supply pin on the harness-side connector with the ignition key in the 'ON' position (engine off).. Failure: No voltage or significantly low voltage points to a problem upstream of the sensor (fuse, relay, or wiring).
- O2 Sensor Heater Control (Live Data) — expected: Using a scan tool like Hyundai GDS, the 'O2 Sensor Heater Duty Cycle' for B1S1 should show the ECM actively commanding the heater on (a percentage value that changes) after a cold start.. Failure: A duty cycle that remains at 0% when it should be active suggests a possible ECM or wiring issue. A 100% duty cycle with no change in sensor temperature points to a failed heater element or open circuit.
Scan Tool Commands That Help
- Hyundai GDS (or equivalent advanced scanner): Live Data / Data Analysis — Monitor the 'O2 Sensor Heater Duty Cycle' for Bank 1 Sensor 1. This is crucial for advanced diagnosis. It allows a technician to see if the ECM is commanding the heater to turn on. If the ECM sends a command (e.g., 50% duty cycle) but the sensor doesn't heat up, it confirms the problem is likely the sensor or its wiring, not the ECM itself.
- Hyundai GDS (or equivalent advanced scanner): O2 Test Result — This function displays the results of the onboard oxygen sensor monitoring test. It can provide specific test values and limits that the sensor must meet, which can help confirm a pass or fail status outside of just the DTC.
Wiring & Ground Locations
- Engine Ground — A primary engine-to-chassis ground strap is typically located on the engine block and connects to the vehicle's frame or body, often near the engine mount or alternator.. The ECM provides the ground for the O2 sensor heater circuit. A poor main engine ground can cause unstable voltage and floating grounds for all engine sensors, including the O2 sensor, potentially leading to incorrect readings and fault codes. Verifying the main engine ground is clean and tight is a crucial step in diagnosing persistent electrical issues.
- GHG03 — Under center of dash.. This is a ground distribution point shown in wiring diagrams for the 2011-2012 Tucson. While not directly for the O2 sensor, it illustrates the importance of ground points throughout the vehicle. A fault in a major ground distribution block can cause seemingly unrelated electrical issues.
- O2 Sensor Connector Pins — At the sensor connector itself.. Per a Hyundai service manual, the heater element resistance is tested between terminals 3 and 4 of the sensor-side connector. Knowing the specific pins is essential for accurate testing and avoids damaging the wrong circuits.
Real Owner Repair Stories
- Hyundai-Forums member (2004 Hyundai Sonata 2.7L V6 (Similar V6 platform, but principle applies)) — Unable to pass state inspection because O2 Heater and Catalyst readiness monitors would not set after a misfire repair.
❌ Tried (didn't work) Driving over 1,500 miles including specific drive cycles., Idling the car for 20 minutes on a cold start., Replacing all four O2 sensors with aftermarket parts.
✅ What actually fixed it The forum consensus pointed to the aftermarket O2 sensors as the likely culprit, as Hyundai/Kia vehicles can be sensitive to non-OEM sensors, preventing readiness monitors from completing even if no code is thrown. The recommended fix was to install OEM or high-quality Denso/NGK sensors and then perform the drive cycle.
OEM Part Supersession History
39210-2G650→N/A - It is a valid part number, but its application is confusing.
Heads up: Part number 39210-2G650 is often listed for the 2.4L engine, but sources are conflicting on whether it is for upstream or downstream. Part number 39210-2G100 is more consistently listed as the upstream sensor for both 2.0L and 2.4L engines in this generation. This highlights the critical need to verify the correct part number using the vehicle's VIN before purchase to avoid installing the wrong sensor.
Model Year Variations Within This Range
- 2014-2015: For the 2014 model year, the 2.4L Theta II engine was updated with Gasoline Direct Injection (GDI). While the P0135 code's meaning is the same, the engine management software, fuel system, and potentially the specific sensor part numbers are different from the earlier 2.4L MPI engines. Always verify parts by VIN, especially for these facelift years.
Diagnostic Flowchart
Other Known Issues on This Vehicle
Issues unrelated to this code that are worth knowing about as an owner of this generation:
- Theta II Engine Failure (Connecting Rod Bearing) 🔴 High — Widespread issue affecting 2.0L and 2.4L engines, leading to recalls and class-action lawsuits. Often presents as knocking noise, oil consumption, or sudden seizure. (Ref: Multiple recalls (e.g., NHTSA 19V063000) and warranty extensions. Hyundai implemented a Knock Sensor Detection System (KSDS) software update to monitor for failure.)
- ABS Module Fire Risk 🔴 High — An internal leak in the ABS module can cause an electrical short, potentially leading to an engine compartment fire even when the vehicle is parked. (Ref: NHTSA Recall 23V651000. Affects 2010-2013 Tucson models among many other Hyundai vehicles.)
- Excessive Oil Consumption 🟠 Medium — Often a precursor to the more catastrophic engine bearing failure, related to manufacturing defects in the Theta II engine. (Ref: Related to engine recalls and warranty extensions. Hyundai recalled some 2011-2013 models for leaking engine oil pans.)
- Transmission Shifting Issues 🟡 Low — Owners report rough or delayed shifting from the automatic transmission. This is a common complaint logged with the NHTSA for this generation. (Ref: NHTSA Recall 16V057000 was issued for an issue where the transmission shifter could be moved out of Park without applying the brake.)
Used vs. New Parts: Buying Guide for This Vehicle
When a used part is the smart pick: For this specific P0135 repair, using a used part is almost never a smart choice. The primary failure component, the oxygen sensor, is a wear-and-tear item with a finite lifespan. A used sensor from a junkyard has unknown remaining life and may fail soon after installation, wasting time and money.
Donor-vehicle mileage cap: roughly under 20000 miles for the part to have meaningful remaining life.
What to inspect on the donor part:
- If forced to use a used sensor, source it from a very low-mileage, collision-damaged vehicle.
- Inspect the wiring pigtail for any signs of melting, brittleness, or damage.
- Ensure the connector is clean and free of corrosion.
- Avoid sensors that show heavy carbon fouling or physical damage to the sensor tip shield.
OEM-only on this vehicle (don't cheap out):
- While not strictly 'OEM-only', experience from forums suggests that Hyundai/Kia vehicles are sensitive to the brand of oxygen sensor used. Using a non-reputable or cheap aftermarket sensor can lead to persistent issues, such as readiness monitors failing to set, even if the P0135 code is resolved.
Aftermarket brands forum-validated for this vehicle:
- Denso
- NGK / NTK
Brands owners have reported issues with on this vehicle:
- Unnamed, 'white-box', or ultra-low-cost brands from online marketplaces are frequently reported to cause issues.
Real Owner Stories
Aggregated from forums and TSBs cited above. Mileages and costs reflect what owners reported in those sources.
2013 Hyundai Tucson — 118000 miles
Symptoms: Check engine light with P0135 code returned within weeks of repair.
What fixed it: Installed the OEM-equivalent oxygen sensor, part number 39210-2C210, after two cheap aftermarket units failed.
Source hint: 39210-2C210 Oxygen Sensor: The Complete Guide for Hyundai and Kia Owners (2009–2016) - AliExpress
2011 Hyundai Tucson
Symptoms: Owner experienced both heater circuit codes simultaneously.
What fixed it: Replacing both the upstream and downstream O2 sensors.
Source hint: hyundai-forums.com: Thread titled 'P0135 and P0141'
2012 Tucson Limited 2.4l
Symptoms: Check Engine Light with codes P0135 and P2251.
What fixed it: Information not available in search snippet.
Source hint: Hyundai Forum - Hyundai Enthusiast Forums, Thread Title: P0135 and P2251 Codes - 2012 Tucson Limited 2.4l
Related OBD-II Codes
Frequently Asked Questions
Where is the fuse for the upstream oxygen sensor heater on my 2010-2015 Tucson?
What is the correct resistance specification for a new O2 sensor on this vehicle?
Can I use a used oxygen sensor from a salvage yard to fix P0135?
Is there a specific OEM part number I should look for to ensure the code doesn't return?
Does the Kia Sportage share this same P0135 issue?
Could my P0135 code be related to the major Hyundai engine recalls?
Helpful Videos

We Have This Part in Stock


The information in this article is provided for general reference and educational purposes only. Vehicle specifications, procedures, and part compatibility can vary by production date, trim level, and region. Always consult your vehicle's factory service manual and verify part numbers before purchasing or performing repairs. Safety-critical components such as airbags, seat belts, and braking systems should be installed by a qualified professional.
- Hyundai Tucson:
- 🧭 Diagnostic Flowchart
- 🎬 Helpful Videos
- 🛍️ Shop This Part
- What's Unique About the 2010-2015 Hyundai Tucson
- Symptoms You May Notice
- Most Likely Causes
- Rare But Worth Checking
- Diagnosis Steps
- Parts You'll Likely Need
- Mechanic-Grade Diagnostic Values
- Scan Tool Commands That Help
- Wiring & Ground Locations
- Real Owner Repair Stories
- OEM Part Supersession History
- Model Year Variations Within This Range
- Other Known Issues on This Vehicle
- Used vs. New Parts: Buying Guide for This Vehicle
- Real Owner Stories
- 2013 Hyundai Tucson — 118000 miles
- 2011 Hyundai Tucson
- 2012 Tucson Limited 2.4l
- Related OBD-II Codes
- Frequently Asked Questions
- 🎟️ Get 5% Off