
P0135 on 1996-2001 Jeep Cherokee 4.0L: O2 Sensor Heater Circuit Causes and Fixes
This code almost always means the heating element inside the upstream oxygen sensor has failed. On a 1996-2001 Cherokee, this is a common failure due to age. Expect to pay $30-$80 for a quality aftermarket sensor (NTK or Denso) and replace it yourself in under an hour. Before replacing, check the 15A fuse in the Power Distribution Center and inspect the wiring for oil contamination.
- P0135 on a 4.0L Cherokee almost always points to a bad upstream O2 sensor.
- Before replacing the sensor, always check the 15A fuse in the PDC and visually inspect the wiring harness for oil saturation or heat damage, which is a common issue on this engine.
- Use a quality replacement sensor from brands like NTK (OEM) or Denso. Avoid Bosch sensors, as they are widely reported to cause issues on this platform.
What's Unique About the 1996-2001 Jeep Cherokee
On the famously reliable but leak-prone 4.0L PowerTech I6 engine, the P0135 code is extremely common. While the sensor itself is the usual culprit, the wiring harness for the upstream O2 sensor is often a victim of oil leaks from the valve cover or oil filter adapter. This oil saturation can degrade the wiring insulation over time, leading to shorts or open circuits that trigger the code. Additionally, be aware that 2000-2001 models sold with California emissions have a more complex four-sensor setup with two pre-catalytic converters; however, P0135 still refers to the primary upstream sensor (Bank 1, Sensor 1), which is located on the front half of the exhaust manifold for cylinders 1-3.
Symptoms You May Notice
- Check Engine Light is on
- Reduced fuel economy
- Failure to pass an emissions test
- Slightly rough idle or hesitation, especially when the engine is cold
- "Rotten egg" or sulfur smell from the exhaust
- Replacing the O2 sensor without first checking the fuse and inspecting the wiring harness for damage. A simple blown fuse or a damaged wire can mimic a failed sensor.
- Using a Bosch brand oxygen sensor. Numerous forum threads across Jeep communities strongly recommend using NTK (the OEM supplier) or Denso sensors, as many users report persistent codes or driveability issues after installing Bosch sensors on the 4.0L engine.
Most Likely Causes
- Failed Oxygen Sensor Heater Element 🔴 High Probability → Shop Oxygen Sensor The internal heating element is a wear item that simply burns out over time. Given the age of these vehicles, this is the most frequent cause.
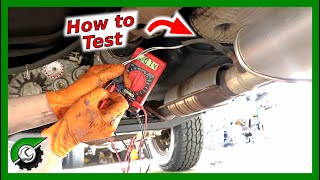
How to confirm: Disconnect the sensor and measure the resistance between the two heater circuit pins (usually the two same-colored wires). A reading of 'OL' (Open Loop) or infinite resistance on a multimeter confirms the heater is burned out. 🎬 Watch: A mechanic's guide to testing your O2 sensor heater. A good heater should have a low resistance, typically between 4 and 7 ohms for this vehicle.
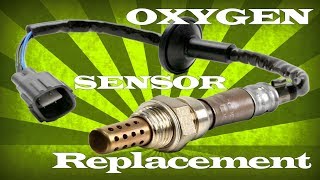
Typical fix: Replace the upstream (Bank 1, Sensor 1) oxygen sensor. 🎬 See this walkthrough on how to change your Jeep's O2 sensors.
Est. part cost: $30-$80 - Damaged Wiring or Connector 🟡 Medium Probability The 4.0L engine is known for oil leaks, particularly from the valve cover gasket and power steering pump. This oil can drip onto the O2 sensor wiring harness, degrading the insulation and causing shorts or breaks. The harness is also susceptible to heat damage from the exhaust manifold.
How to confirm: Visually inspect the wiring harness from the sensor to where it connects to the main loom. Look for brittle, cracked, or oil-soaked insulation, melted spots, or corrosion in the connector pins. A user on Reddit noted their P0135 was caused by a power steering leak that damaged the harness.
Typical fix: Repair the damaged section of wire with new wire and heat-shrink tubing or replace the connector pigtail if it is damaged.
Est. part cost: $10-$25 - Blown Fuse for O2S Heater Circuit ⚪ Low Probability
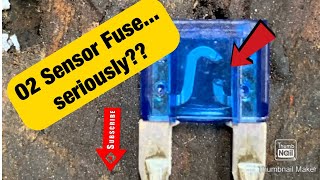
How to confirm: Locate the 15 amp mini-fuse for the O2 sensor heater in the Power Distribution Center (PDC) under the hood. Multiple forum posts confirm this fuse is often located in the row closest to the firewall. 🎬 Watch: How a simple blown fuse can cause these codes. Visually inspect the fuse to see if it is blown. If multiple O2 heater codes (e.g., P0141) are present, a blown fuse is highly likely.
Typical fix: Replace the blown fuse. If the new fuse blows immediately, it indicates a short circuit in the wiring or the sensor itself that must be diagnosed.
Est. part cost: $1-$5
Rare But Worth Checking
- Faulty Powertrain Control Module (PCM): → Shop Engine Control Module (ECM) This is extremely rare. The driver circuit within the PCM that supplies power or ground to the heater can fail. This should only be considered after the sensor, wiring, and fuse have all been confirmed to be good. One forum user reported replacing a PCM to solve a persistent P0135 after all other avenues were exhausted.
- Bad Ground Connection: A forum expert noted that if the O2S heater fuse is good but heater codes persist, the common ground for the O2S heaters could be at fault. This ground is located at the G101 ground studs on the lower left, front side of the engine.
Diagnosis Steps
- Read the code with an OBD-II scanner to confirm P0135 is present.
- Visually inspect the upstream O2 sensor's wiring harness and connector for any signs of melting, chafing, oil saturation, or physical damage.
- Check the O2 sensor heater fuse (typically a 15A mini-fuse) in the Power Distribution Center under the hood.
- If the fuse and wiring appear intact, disconnect the O2 sensor connector.
- With the ignition key in the 'On' position (engine off), use a multimeter to check for 12V power at the heater power wire in the vehicle-side harness connector.
- Check for a good ground on the corresponding ground wire in the harness-side connector.
- Using the multimeter set to Ohms, measure the resistance across the heater circuit pins on the sensor itself. An infinite reading (OL) indicates a failed heater element. A good sensor should read a low resistance, typically between 4 and 7 Ohms.
- If power and ground are present at the harness and the sensor's resistance is infinite, replace the oxygen sensor.
- If power is not present at the harness and the fuse is good, there is a break in the wire between the fuse box and the sensor that needs to be traced and repaired.
Parts You'll Likely Need
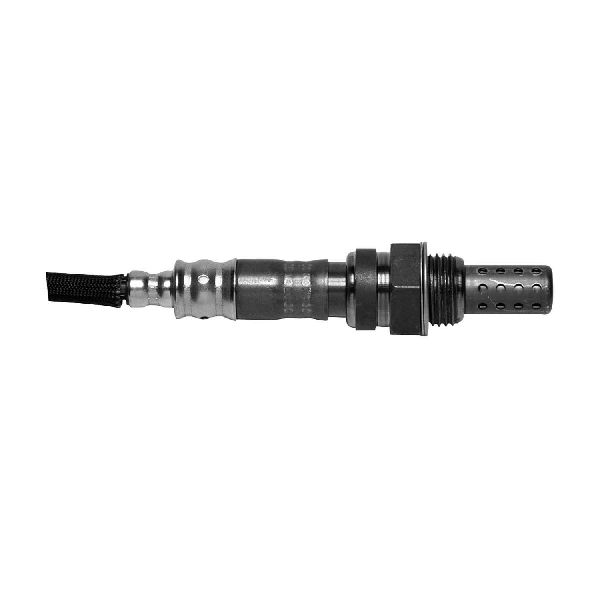
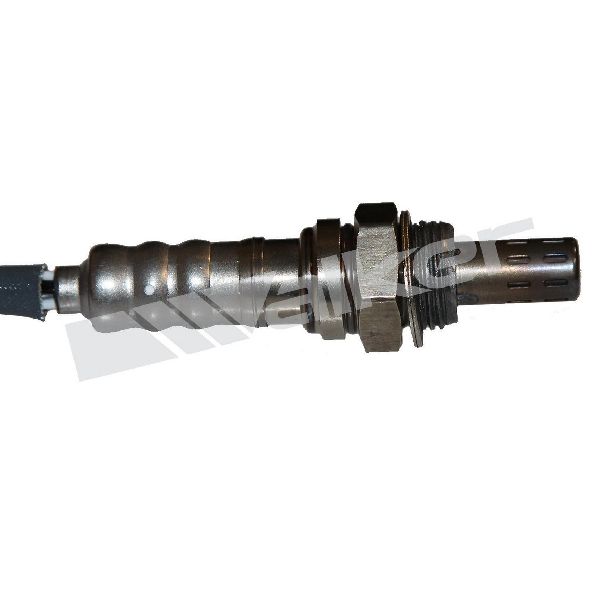
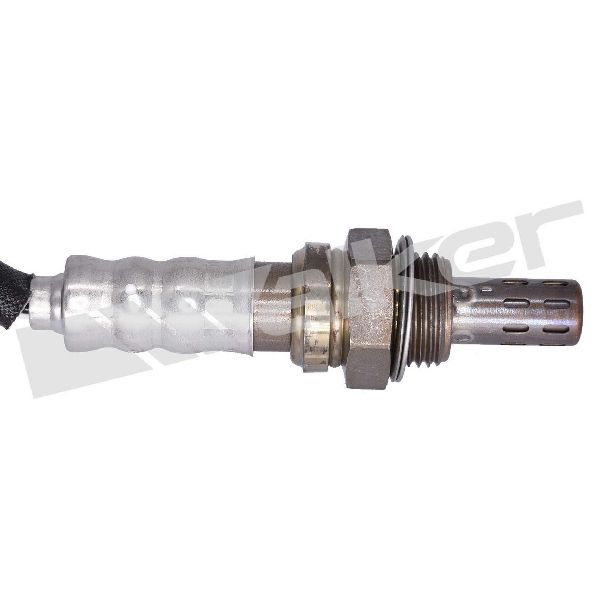
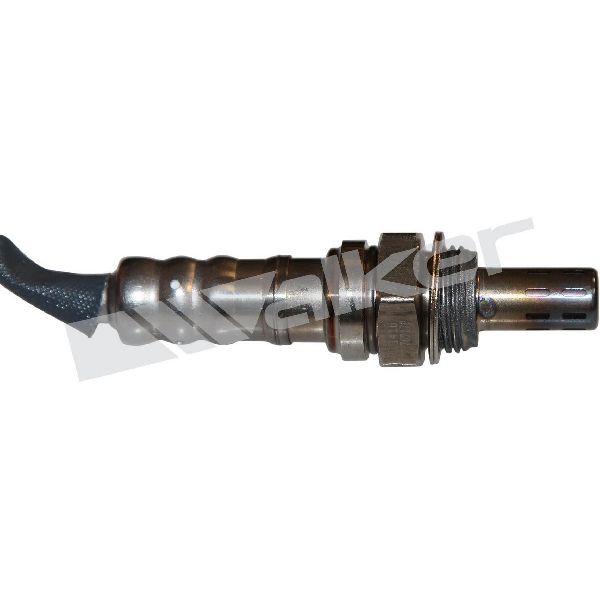
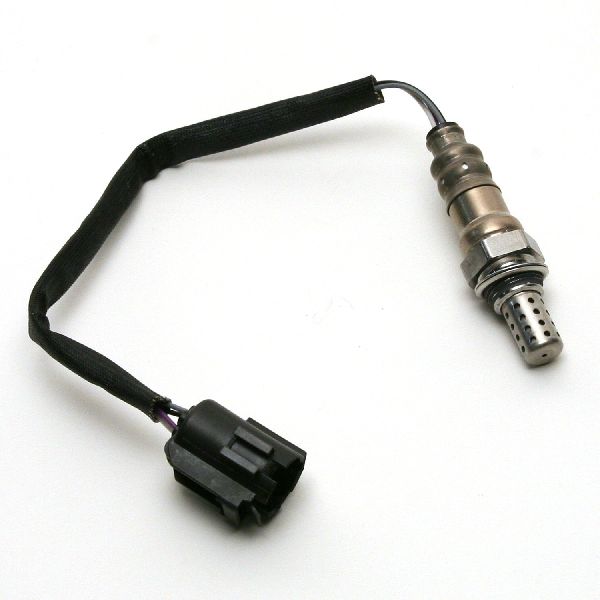
- Upstream Oxygen Sensor (Bank 1, Sensor 1)
(OEM #56041212AB (Note: This part number may be discontinued or superseded by 56041212AC, 56041212AF).)— This is the primary sensor responsible for fuel trim, and its internal heater is the most common failure point for code P0135.
Trusted brands: NTK (OEM supplier, highly recommended by owners), Denso, Mopar
OEM price range: $60-$100
Aftermarket price range: $30-$80
Related Codes That Often Appear With This One
- P0141 - O2 Sensor Heater Circuit Malfunction (Bank 1, Sensor 2): If both P0135 and P0141 are present, it strongly suggests a common power or ground issue, like a blown fuse, rather than two simultaneously failed sensors.
- P0132 - O2 Sensor Circuit High Voltage (Bank 1, Sensor 1): This can sometimes appear with P0135, indicating a potential internal short within the sensor itself.
Platform-Specific Known Issues
- On 2000-2001 models with California emissions, there are four O2 sensors due to two small pre-catalytic converters integrated into the exhaust manifold. P0135 refers to the sensor for cylinders 1-3, which is the one located furthest forward (top, towards the radiator). The corresponding NTK part number is 23151.
- The wiring harness for the upstream O2 sensor is frequently damaged by engine oil leaks from the valve cover gasket or oil filter adapter, a very common issue on the 4.0L engine.
- Many owners report issues when using Bosch brand oxygen sensors, with problems often being resolved by switching to an NTK or Mopar sensor.
Mechanic-Grade Diagnostic Values
- O2 Sensor Heater Element Resistance — expected: 5 to 7 Ohms when the sensor is at ambient temperature.. Failure: An open circuit (OL) or very high resistance indicates a burned-out heater element.
- Heater Power Supply Voltage at Harness Connector — expected: 10 to 12 Volts (battery voltage) with key on, engine off.. Failure: 0 Volts indicates a blown fuse, a failed Auto Shutdown (ASD) relay, or a break in the power wire.
- Heater Ground Circuit at Harness Connector — expected: A good ground provided by the PCM. This can be tested by checking for 10-12 Volts between the power and ground pins on the harness side.. Failure: If 12V is present on the power pin but not between power and ground, it indicates an open in the ground wire back to the PCM.
Scan Tool Commands That Help
- DRB III (Dealer Tool): O2 Heater Test — The dealer-level DRB III scan tool for this era may have an actuation test to command the O2 sensor heaters on, allowing a technician to monitor the circuit's response in real-time without starting the engine. This is useful for verifying PCM control of the ground circuit after confirming power and wiring integrity.
Wiring & Ground Locations
- G101 — Two studs on the right side of the engine block, near the alternator and the former ignition coil mounting location.. This is the primary ground point for the O2 sensor heaters, as well as the PCM and TCM. A loose or corroded connection at G101 can cause intermittent or persistent heater circuit codes for multiple sensors simultaneously.
- Auto Shutdown (ASD) Relay — Located in the Power Distribution Center (PDC) under the hood.. On these Jeep 4.0L engines, the ASD relay supplies the 12V power to the upstream O2 sensor heater element. A faulty ASD relay or a problem in its circuit can cut power to the heater, causing a P0135 code.
- O2 Sensor Heater Fuse — A 15A fuse in the Power Distribution Center (PDC). On 1997-1999 models, it is often F23. The location can vary on 2000-2001 models.. This fuse is the dedicated protection for the O2 sensor heater circuits. If it blows, both upstream and downstream heaters will lose power, typically setting codes P0135 and P0141 together.
- Upstream O2 Sensor Connector (Harness Side) — Connected to the upstream O2 sensor, typically near the exhaust manifold.. Pin 1 is the 12V power feed from the ASD relay. Pin 2 is the ground control wire from the PCM. Testing for voltage and ground at these specific pins is a critical diagnostic step.
Real Owner Repair Stories
- Reddit user post (2004 Jeep Grand Cherokee 4.0L) — Persistent P0135 code, fuel trim issues.
❌ Tried (didn't work) Replacing the O2 sensor (multiple times), Replacing relays, Replacing IAS and TPS sensors, Repairing melted wires near the sensor
✅ What actually fixed it The mechanic diagnosed and replaced a faulty Powertrain Control Module (PCM). The code returned once more after 60 miles, but was resolved after that, implying the PCM was the root cause. - Reddit r/Cartalk post (2005 Jeep Wrangler 4.0L (similar wiring and PCM logic)) — All four O2 sensor heater circuit high codes (P0032, P0038, P0052, P0058).
❌ Tried (didn't work) Dealer TSB flash, Checking all wiring and grounds, Replacing all four O2 sensors with correct NTK parts, Resetting PCM by disconnecting battery
✅ What actually fixed it The user suspected a faulty PCM as the final step after exhausting all other possibilities, as the PCM directly supplies the 12V+ feed to the heaters on this specific model, and all four failed simultaneously.
OEM Part Supersession History
56041212AB→56041212AC, 56041212AF— Standard part evolution and supplier changes.
Heads up: While 56041212AF is a valid Mopar part number, some parts catalogs list it for the REAR (downstream) O2 sensor on 2000 models with California emissions or for V8/V10 applications. For P0135 (Bank 1, Sensor 1), it is critical to use the specified UPSTREAM sensor, such as NTK 23151, to avoid issues.
Model Year Variations Within This Range
- 1997-1999 vs 2000-2001: The layout of the Power Distribution Center (PDC) and the specific fuse slot for the O2 sensor heaters can differ. While often in the same general area, owners report discrepancies between online diagrams and their actual vehicle's fuse box, especially between the 1999 and 2000 model years.
- 2000-2001 with California Emissions: These models use a four-sensor system with two upstream sensors in mini-catalytic converters integrated into the exhaust manifold. P0135 refers to the Bank 1 Sensor 1, which is for cylinders 1-3 (front half of the engine). Bank 2 (cylinders 4-6) has its own upstream sensor that would set a different code (P0155).
Diagnostic Flowchart
Real Owner Stories
Aggregated from forums and TSBs cited above. Mileages and costs reflect what owners reported in those sources.
1999 Jeep Cherokee XJ
Symptoms: Check engine light with codes P0135 and P0138, would run but get really rough.
What fixed it: Replaced a blown 15 amp fuse for the O2 sensors located in the fuse box in the engine bay.
Source hint: O2 Sensor Fuse Caused Check Engine Codes on my Jeep Cherokee - YouTube
2001 Jeep Cherokee XJ
Symptoms: Check engine light with code P0135, failing smog test even after CEL turned off.
What fixed it: Replaced all 4 O2 sensors and the O2 relay fuses. A commenter noted the persistent issue was likely due to the wiring harness being damaged by a power steering fluid leak.
Source hint: Reddit r/CherokeeXJ - P0135! Help!!
Jeep Cherokee XJ
Symptoms: Upstream and downstream heater codes (P0135, P0141) appearing at the same time.
What fixed it: Checked and replaced the shared 15A mini-fuse in the Power Distribution Center (PDC).
Source hint: Jeep Cherokee Forum - o2 Sensor codes need some help
Related OBD-II Codes
Frequently Asked Questions
Which specific oxygen sensor does P0135 refer to on my 2000-2001 Cherokee with California emissions?
What brand of oxygen sensor should I use to fix P0135 on my 4.0L engine?
I have both P0135 and P0141 codes on my Jeep Cherokee. What should I check first?
Why is the wiring harness for the O2 sensor so prone to damage on the 4.0L PowerTech I6?
How can I test if the O2 sensor heater element is actually burned out?
Can a power steering leak cause a P0135 code on my XJ?
Helpful Videos
We Have This Part in Stock

The information in this article is provided for general reference and educational purposes only. Vehicle specifications, procedures, and part compatibility can vary by production date, trim level, and region. Always consult your vehicle's factory service manual and verify part numbers before purchasing or performing repairs. Safety-critical components such as airbags, seat belts, and braking systems should be installed by a qualified professional.
- Jeep Cherokee:
- 🧭 Diagnostic Flowchart
- 🎬 Helpful Videos
- 🛍️ Shop This Part
- What's Unique About the 1996-2001 Jeep Cherokee
- Symptoms You May Notice
- Most Likely Causes
- Rare But Worth Checking
- Diagnosis Steps
- Parts You'll Likely Need
- Related Codes That Often Appear With This One
- Platform-Specific Known Issues
- Mechanic-Grade Diagnostic Values
- Scan Tool Commands That Help
- Wiring & Ground Locations
- Real Owner Repair Stories
- OEM Part Supersession History
- Model Year Variations Within This Range
- Real Owner Stories
- 1999 Jeep Cherokee XJ
- 2001 Jeep Cherokee XJ
- Jeep Cherokee XJ
- Related OBD-II Codes
- Frequently Asked Questions
- 🎟️ Get 5% Off