
P0140 on 2013-2018 Toyota RAV4 2.5L: O2 Sensor Circuit Fixes
For a 2013-2018 RAV4, code P0140 almost always means the downstream oxygen sensor (Bank 1, Sensor 2) has failed. Replacing this sensor is the most common fix. Before replacing, check the 'A/F HEATER' fuse and inspect the wiring under the car for damage. Expect to pay $70-$120 for a quality aftermarket sensor (like Denso) or $150-$200 for an OEM part. It's a straightforward DIY job for many, though the sensor can be difficult to remove if rusted.
- P0140 on your RAV4 means the rear oxygen sensor (after the catalytic converter) isn't working.
- The most likely cause is a failed sensor, which is a common wear-and-tear item.
- Before buying a new sensor, always check the wiring for physical damage and test the 'EFI NO.1' fuse.
- Use a quality Denso or NTK aftermarket sensor for a reliable repair without paying for OEM parts.
- Fixing this code is necessary to pass an emissions test.
What's Unique About the 2013-2018 Toyota RAV4
On the 2013-2018 RAV4 with the 2AR-FE engine, this code is a very common and straightforward issue. There are no widespread, complex problems or TSBs associated with P0140 for this vehicle, which is good news for the owner. The issue is almost always isolated to the downstream O2 sensor or its immediate wiring, making diagnosis relatively simple compared to more complex engine codes. The sensor is located in the exhaust pipe under the passenger side of the vehicle.
Symptoms You May Notice
- Check Engine Light is on.
- Vehicle will fail an emissions test.
- In rare cases, a slight decrease in fuel economy may be noticed over a long period.
- Replacing the upstream Air/Fuel Ratio sensor (Sensor 1) instead of the downstream Oxygen Sensor (Sensor 2).
- Cleaning the Mass Airflow (MAF) sensor. Some generic repair videos incorrectly suggest this. A MAF issue would set different codes and is not related to a P0140 circuit fault.
- Replacing the catalytic converter. P0140 is a sensor circuit code, not a converter efficiency code (like P0420). A common scenario is that a faulty downstream sensor (causing P0139 or P0140) is replaced, which then allows the system to properly diagnose a failing catalytic converter, triggering a P0420 code afterward. Fix the sensor code first.
Most Likely Causes
- Failed Downstream Oxygen Sensor (Bank 1, Sensor 2) 🔴 High Probability → Shop Oxygen Sensor Oxygen sensors are wear items. After thousands of heat cycles and exposure to exhaust gases, the internal heating element or the sensing element simply fails. This is the most common reason for a P0140 code.
How to confirm: After confirming the wiring is intact and has proper voltage, the sensor is the presumed culprit. A scan tool showing a flat, unresponsive voltage from B1S2 live data (e.g., stuck at 0.45V or 0V) points to a bad sensor. The sensor's internal heater can also be tested with a multimeter for resistance; an open circuit (infinite resistance) confirms failure.
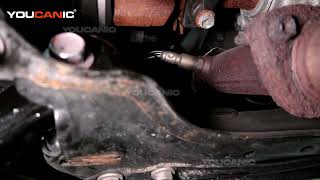
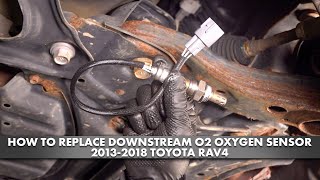
Typical fix: Replace the Bank 1, Sensor 2 oxygen sensor. 🎬 Watch: A helpful guide for replacing the Bank 1 Sensor 2. It is located in the exhaust pipe after the catalytic converter, under the passenger side. An O2 sensor socket is recommended for removal.
Est. part cost: $70-$200 - Damaged Wiring or Connector 🟡 Medium Probability The sensor and its wiring are located under the vehicle, exposed to road debris, water, and salt. Wires can be frayed, cut, or corroded, and the connector can become damaged or filled with debris. Rodent damage is also a possibility.
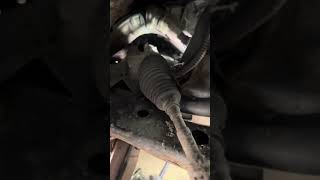
How to confirm: Visually inspect the entire wiring harness from the sensor to where it connects to the main vehicle harness. The connector is located behind the front passenger-side wheel well liner. Check for breaks, melting on the exhaust, or corrosion in the connector pins. Use a multimeter to check for continuity and proper voltage at the connector.
Typical fix: Repair the damaged section of wiring or clean/replace the connector.
Est. part cost: $5-$50 - Blown A/F Heater Fuse ⚪ Low Probability A short in the sensor's heater circuit or its wiring can cause the fuse to blow. This will prevent the sensor from heating up to its operational temperature, which can trigger a 'no activity' code.
How to confirm: Locate and inspect the fuse for the Air/Fuel sensor heater circuit. For the XA40 RAV4, this is typically the 10A 'EFI NO.1' fuse in the engine room fuse box. If the fuse is blown, it confirms a circuit issue.
Typical fix: Replace the blown fuse. If it blows again immediately, there is a short circuit in the wiring or the O2 sensor itself that must be found and repaired.
Est. part cost: $1-$5
Rare But Worth Checking
- Exhaust Leak: An exhaust leak before the sensor can introduce outside oxygen, causing incorrect readings. This is more likely to set a performance code (like P0139) but can sometimes lead to P0140. It's worth a quick check, especially if you hear an exhaust noise.
- Faulty Engine Control Module (ECM): → Shop Engine Control Module (ECM) This is extremely rare. The ECM should only be considered a potential cause after all other possibilities (sensor, wiring, fuses) have been exhaustively tested and ruled out.
Diagnosis Steps
- Read the code: Use an OBD-II scanner to confirm P0140 is the only code present.
- Visual Inspection: Safely raise the vehicle and visually inspect the downstream O2 sensor (after the catalytic converter, under the passenger side) and its wiring harness. Look for any obvious signs of damage, such as frayed or melted wires, or a damaged connector.
- Check the Fuse: Check the fuse box in the engine bay for the 10A 'EFI NO.1' fuse. Verify it is not blown.
- Monitor Live Data: Use a scan tool that can display live data. Watch the voltage for 'O2S B1S2' (Bank 1, Sensor 2). With the engine warm, it should fluctuate slowly around 0.6-0.8V. If it's stuck at a constant voltage (e.g., 0.45V) or shows 0V, it confirms a lack of activity.
- Test the Circuit: Disconnect the sensor. Use a multimeter to check for battery voltage at the heater power wire and a good ground on the heater ground wire at the connector (vehicle side).
- Test the Sensor: If the wiring and fuse are good, the sensor itself is highly suspect. You can test the resistance of the heater circuit on the sensor side; an open circuit (infinite resistance) means the internal heater is broken.
- Replace the Sensor: If all tests point to the sensor, replace it. Using an O2 sensor socket is highly recommended. Apply anti-seize compound to the threads if not pre-applied. 🎬 See this step-by-step walkthrough for replacing the downstream oxygen sensor. After replacement, clear the code with the scanner and drive the vehicle to ensure the code does not return.
Parts You'll Likely Need
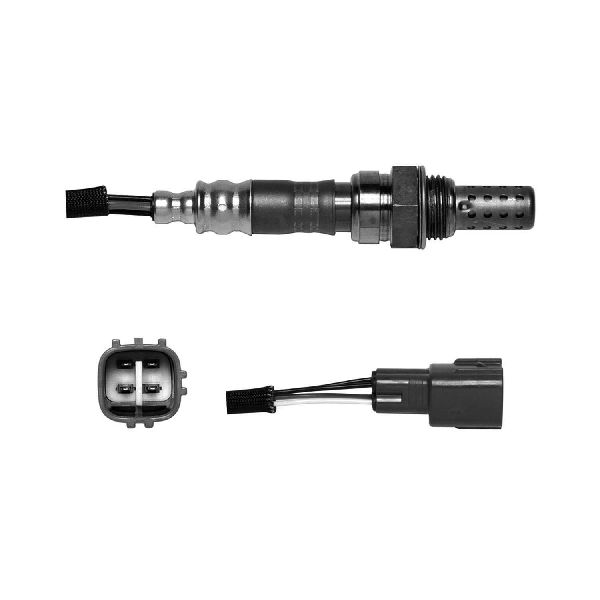
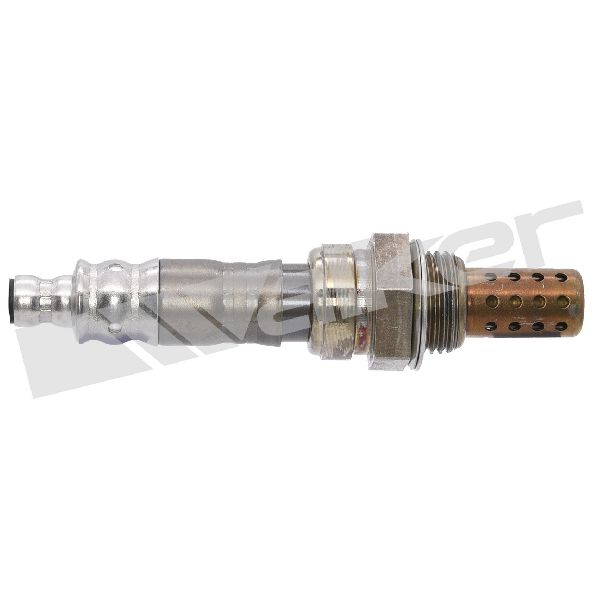
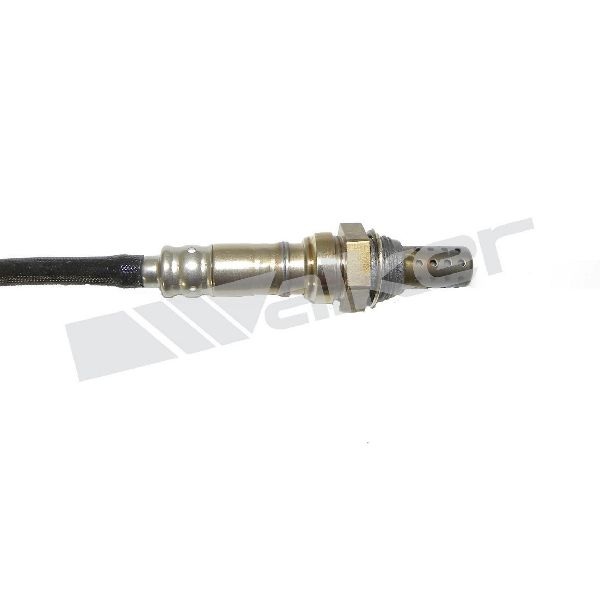
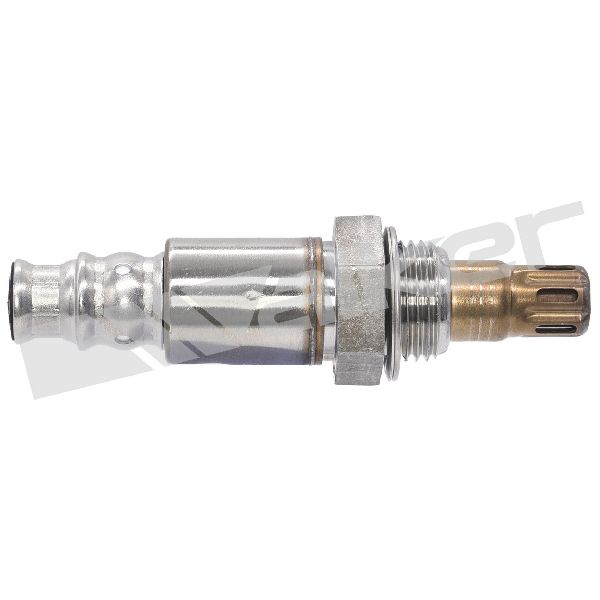
- Downstream Oxygen Sensor (Bank 1, Sensor 2)
(OEM #89465-0R040)— This is the component that reports exhaust oxygen content after the catalytic converter. Its internal heating element or sensing capabilities fail over time, causing the 'no activity' fault.
Trusted brands: Denso (OEM supplier, part #234-4622 is a common cross-reference), Bosch, Walker, NGK/NTK
OEM price range: $150-$200
Aftermarket price range: $70-$120
Platform-Specific Known Issues
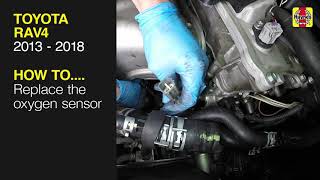
- Access to Downstream Sensor: Some owners and repair videos note that while the sensor is visible, getting a wrench on it for removal can be tight. 🎬 Watch: This video shows how to access and replace the sensor. In some cases, removing the front section of the exhaust pipe may be necessary to get enough leverage, especially if the sensor is heavily rusted in place.
Mechanic-Grade Diagnostic Values
- Downstream O2 Sensor (B1S2) Heater Circuit Resistance — expected: 11 to 16 Ohms at 68°F (20°C). Failure: Infinite resistance (open circuit) or very low resistance (short circuit).
- Downstream O2 Sensor (B1S2) Live Data Voltage — expected: Slowly fluctuating between 0.1V and 0.9V on a warm, idling engine. Should stay relatively stable, often between 0.6V and 0.8V, if the catalytic converter is healthy.. Failure: Voltage is stuck at 0V, 0.45V, or any other fixed number and does not change with engine conditions. This indicates no activity.
- O2 Sensor Heater Circuit Current Draw — expected: 0.4A to 1.0A when the heater is active (during warm-up).. Failure: Current below 0.3A may trigger a low current/open circuit fault, while current above 2.0A can trigger a short circuit fault.
Scan Tool Commands That Help
- Toyota Techstream: Active Test: A/F Control — While not directly for the downstream sensor, a technician can use this bidirectional command to force the fuel mixture rich or lean (+12.5% to -24.8%). By observing the B1S2 voltage reaction (or lack thereof) during this test, a dead sensor can be definitively confirmed. A healthy downstream sensor should show a voltage change after a few seconds in response to the forced rich/lean condition.
Wiring & Ground Locations
- Engine Harness Ground — On the 2AR-FE, a key grounding point for the engine harness is located on the side of the cylinder head, directly underneath the throttle body.. The O2 sensor circuit relies on a clean ground path to the ECM. While a dedicated sensor ground wire exists, a poor main engine-to-chassis ground can introduce electrical noise or voltage offsets, potentially confusing the ECM's reading of the sensor's low-voltage signal. This should be checked if the sensor and its immediate wiring test good but the code persists.
Real Owner Repair Stories
- Chevrolet Forum user (2000 Chevrolet Impala (Note: Different vehicle, but illustrates a common diagnostic trap for P0140)) — Check Engine Light with code P0140 returned repeatedly.
❌ Tried (didn't work) Replaced catalytic converter., Replaced downstream O2 sensor (B1S2)., Replaced upstream O2 sensor (B1S1).
✅ What actually fixed it The user reported the final fix was replacing the downstream O2 sensor a second time, implying the first 'new' sensor was defective out of the box.
OEM Part Supersession History
89465-42230→89465-0R040— Standard part number update/revision.
Heads up: The parts are interchangeable. 89465-0R040 is the current correct part number for non-Japan built models.
Model Year Variations Within This Range
- 2016-2018: The RAV4 received a significant facelift for the 2016 model year. While the 2AR-FE engine and P0140 diagnostic logic remained the same, the refresh included improved cabin insulation, reworked suspension, and the addition of the Toyota Safety Sense package on higher trims. This does not change the repair for P0140 but is a key differentiator when sourcing other used parts or identifying a vehicle's features.
Diagnostic Flowchart
Other Known Issues on This Vehicle
Issues unrelated to this code that are worth knowing about as an owner of this generation:
- Torque Converter Shudder 🟠 Medium — Common on 2013-2015 models. A brief shudder is felt under light acceleration between 25-50 mph. (Ref: T-SB-0023-15 Rev2. Fix involves replacing the torque converter and updating the ECM software. A warranty enhancement program was also issued.)
- Sticky / Melting Dashboard 🟡 Low — Affects vehicles in high heat/humidity climates. The dashboard surface can become shiny, sticky, or cracked over time. This was more common on earlier Toyota models but can still occur. (Ref: Toyota issued a Warranty Enhancement Program (ZE6) to cover replacement, though the primary coverage period has expired.)
- Oil Seeping from Timing Cover / Valve Cover 🟡 Low — Noted on higher mileage (150k+) vehicles. A slow seep or leak can develop from the timing cover or valve cover gaskets.
- Battery Hold-Down Short Circuit Risk 🔴 High — Affects 2013-2018 models. Certain replacement 12V batteries have a top design that can allow the battery hold-down clamp to contact the positive terminal, causing a short circuit and fire risk. (Ref: NHTSA Recall 23V-720 (Toyota Recall 23TA13). The fix involves replacing the battery hold-down clamp, battery tray, and positive terminal cover.)
Used vs. New Parts: Buying Guide for This Vehicle
When a used part is the smart pick: For this repair, buying a used oxygen sensor is strongly discouraged. O2 sensors are wear items with a finite lifespan, similar to brake pads. A used sensor from a junkyard has unknown remaining life and may fail shortly after installation, wasting time and money.
What to inspect on the donor part:
- Not applicable as used sensors are not recommended.
OEM-only on this vehicle (don't cheap out):
- While not strictly required, using an OEM or OEM-supplier sensor is highly recommended. Some universal or budget aftermarket sensors may not have the correct heater resistance or response rate, leading to persistent or new codes.
Aftermarket brands forum-validated for this vehicle:
- Denso (often the Original Equipment Manufacturer for Toyota)
- NGK/NTK (also a frequent OEM supplier)
Brands owners have reported issues with on this vehicle:
- Generic, unbranded, or 'white-box' sensors sold on price alone have a higher risk of being incompatible or failing prematurely. While brands like Bosch are reputable, some Toyota specialists prefer to stick with Denso or NTK for guaranteed compatibility with the ECM's expectations.
Real Owner Stories
Aggregated from forums and TSBs cited above. Mileages and costs reflect what owners reported in those sources.
2013-2018 Toyota RAV4 2.5L
Symptoms: The sensor was visible, but getting a wrench on it for removal was very tight due to the location.
What fixed it: Removed the front section of the exhaust pipe to get enough leverage to remove the stuck sensor.
Source hint: Haynes Manuals Video - 'How to Replace the oxygen sensor on the Toyota RAV4 2013 to 2018'
2010 Toyota RAV4 2.5L (2AR-FE)
Symptoms: Check engine light on; needed to access the electrical connector for the downstream sensor.
What fixed it: Replaced the downstream oxygen sensor by accessing the connector behind the passenger front wheel well liner.
Source hint: YouTube - 'Toyota Rav4 Downstream Oxygen Sensor Replacement' by 'Alex DIY'
Toyota RAV4 2AR-FE
Symptoms: Owner had a P0139 (slow response) code initially, replaced the downstream sensor, and then encountered a P0420 code.
What fixed it: Replacing the downstream sensor was the necessary first step before addressing the catalytic converter efficiency.
Source hint: Reddit r/autorepair: A user described having a P0139 (slow response) code...
Related OBD-II Codes
Frequently Asked Questions
Where is the Bank 1, Sensor 2 oxygen sensor located on my 2013-2018 RAV4?
Is there a specific fuse I should check for a P0140 code on this Toyota generation?
I'm having trouble removing the sensor; is it common for it to be stuck?
Does the 2AR-FE engine have any recalls that might be related to electrical shorts?
Can I use a used oxygen sensor from a salvage yard to fix this?
Could a P0140 code be related to the torque converter shudder issue on my 2014 RAV4?
Helpful Videos
We Have This Part in Stock


The information in this article is provided for general reference and educational purposes only. Vehicle specifications, procedures, and part compatibility can vary by production date, trim level, and region. Always consult your vehicle's factory service manual and verify part numbers before purchasing or performing repairs. Safety-critical components such as airbags, seat belts, and braking systems should be installed by a qualified professional.
- Toyota RAV4:
- 🧭 Diagnostic Flowchart
- 🎬 Helpful Videos
- 🛍️ Shop This Part
- What's Unique About the 2013-2018 Toyota RAV4
- Symptoms You May Notice
- Most Likely Causes
- Rare But Worth Checking
- Diagnosis Steps
- Parts You'll Likely Need
- Platform-Specific Known Issues
- Mechanic-Grade Diagnostic Values
- Scan Tool Commands That Help
- Wiring & Ground Locations
- Real Owner Repair Stories
- OEM Part Supersession History
- Model Year Variations Within This Range
- Other Known Issues on This Vehicle
- Used vs. New Parts: Buying Guide for This Vehicle
- Real Owner Stories
- 2013-2018 Toyota RAV4 2.5L
- 2010 Toyota RAV4 2.5L (2AR-FE)
- Toyota RAV4 2AR-FE
- Related OBD-II Codes
- Frequently Asked Questions
- 🎟️ Get 5% Off