
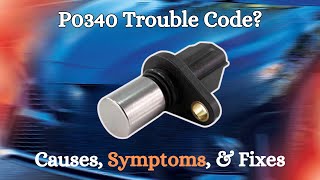
P0340 on 2012-2018 GMC Yukon: Camshaft Position Sensor Circuit Causes and Fixes
P0340 on a GMC Yukon most often points to a faulty camshaft position sensor or a problem in its wiring circuit. On 2015+ models, corrosion in connector X154 is a known culprit. Expect to pay $25-$75 for a quality aftermarket sensor and around $100 for an OEM part. It's a DIY-friendly repair for many, but sensor location varies significantly by year, affecting difficulty.
- P0340 on a 2012-2018 GMC Yukon means there's a fault in the camshaft position sensor circuit.
- The most common symptoms are a Check Engine Light, difficulty starting, and engine stalling.
- The most likely fix is replacing the camshaft position sensor, but always inspect the wiring and connector first for damage.
- GM has issued service bulletins for this code, indicating it's a recognized issue on these vehicles.
- While a DIY replacement is possible, the sensor can be in a difficult-to-reach location, especially on earlier models of this generation.
What's Unique About the 2012-2018 Gmc YUKON

The 2012-2018 GMC Yukon spans two vehicle generations, the GMT900 (through 2014) and the K2UG (starting 2015). While the P0340 code's meaning is consistent, the common causes differ. For the later K2UG models (2015+), GM issued TSB #PIP5335B, which specifically identifies water intrusion and corrosion in connector X154 on the front engine cover as a frequent cause of P0340. For earlier models, TSB #PIP5099A points to faulty cam position sensors on some 2012-2013 vehicles, suggesting a bad batch of parts from the factory. These bulletins confirm that while a bad sensor is a common failure, wiring issues are a very close second and must be investigated.
Diagnostic Flowchart

Tap your situation to follow the diagnostic path that matches what you're seeing on this vehicle.
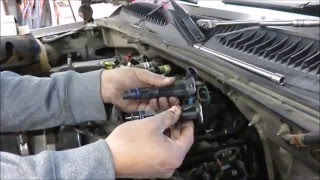
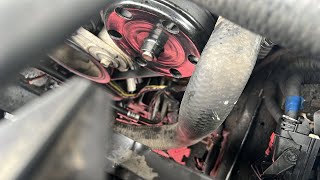
Generation note: This range covers the end of the third generation (GMT900, 2012-2014) and the beginning of the fourth generation (K2UG, 2015-2018). The camshaft position sensor location is a key difference. On many GMT900 5.3L V8s, the sensor is located at the top-rear of the engine block near the firewall, making it notoriously difficult to access 🎬 Watch: How to access the sensor on GMT900 models without specialized tools or working 'blind'. On the K2UG platform, the sensor is typically located on the front of the engine on the timing cover, which is significantly easier to access. Always verify the location for your specific year and engine.
Symptoms You May Notice
- Check Engine Light is on
- Engine is hard to start or cranks for a long time before starting
- Engine will not start
- Engine stalls or idles roughly
- Loss of engine power and poor acceleration
- Reduced fuel economy
- Service StabiliTrak message may appear, often with reduced engine power mode
- Replacing the crankshaft position sensor instead of the camshaft position sensor.
- Replacing the sensor immediately without first inspecting the wiring harness and connectors, especially connector X154 on 2015+ models.
- Replacing the PCM when the actual fault is in the wiring or the sensor itself.
Most Likely Causes

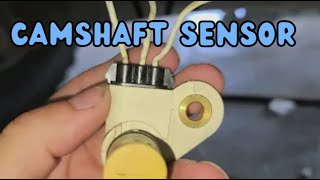
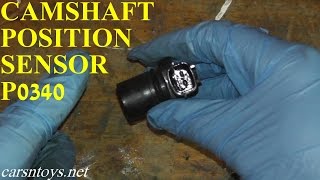
- Faulty Camshaft Position Sensor 🔴 High Probability → Shop Engine Camshaft Position Sensor TSB #PIP5099A advises replacing the cam position sensor on certain 2012-2013 models if diagnostics are inconclusive, suggesting a known issue with the part itself from that period. General wear and tear also makes this the most common failure point.
How to confirm: After checking wiring, test the sensor's output with a multimeter or oscilloscope. The easiest confirmation for a DIYer is often replacing the sensor, as it's a relatively inexpensive part.
Typical fix: Replace the camshaft position sensor and its O-ring.
Est. part cost: $25-$100 - Damaged Wiring or Connector 🔴 High Probability On 2015+ models, TSB #PIP5335B and its successor #PIP5335C point directly to corrosion from water intrusion in connector X154 on the front engine cover. On all years, the wiring harness can become oil-soaked or chafe against the cylinder head or brackets, causing a short.
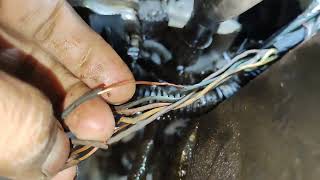
How to confirm: Visually inspect the wiring harness to the sensor for chafing, melting, or oil saturation. On 2015+ models, specifically disconnect and check connector X154 🎬 See this video for the exact wire break location for green or white corrosion.
Typical fix: Repair the damaged section of wiring or replace the connector pigtail. If connector X154 is corroded, it may need to be cleaned or replaced.
Est. part cost: $15-$50 - Weak or Failing Battery ⚪ Low Probability → Shop Vehicle Battery Low system voltage during cranking can cause erratic signals from various sensors. While not specific to the Yukon, it's a common cause for this code on many modern vehicles.
How to confirm: Test the battery voltage with a multimeter. A healthy battery should read approximately 12.6 volts with the engine off and 13.7-14.7 volts with the engine running.
Typical fix: Charge or replace the battery.
Est. part cost: $150-$350 - Internal Engine Timing Issues ⚪ Low Probability On higher mileage engines, a stretched timing chain or failed tensioner can cause the camshaft and crankshaft correlation to be off, triggering a P0340 code. This is a known potential issue on GM V8s.
How to confirm: This is an advanced diagnosis. It may involve checking cam/crank correlation with a professional scan tool or physically inspecting the timing components. This is often accompanied by other codes like P0016.
Typical fix: Replace the timing chain, tensioners, and guides. This is a significant and costly repair.
Est. part cost: $400-$1000+
Rare But Worth Checking
- Faulty Powertrain Control Module (PCM): → Shop Engine Control Module (ECM) This is very rare. The PCM should only be considered after all other possibilities, including the sensor, wiring, and mechanical timing, have been thoroughly ruled out. Some forum users have replaced the PCM as a last resort.
- Damaged Camshaft Reluctor Wheel: → Shop Engine Camshaft The sensor reads a toothed wheel on the camshaft. If this wheel is damaged or has missing teeth, it can send an erratic signal, triggering P0340. This is uncommon and typically requires significant engine disassembly to inspect.
Diagnosis Steps
- Read all stored fault codes with an OBD-II scanner. Note any other codes that are present, especially P0341 or P0335.
- Check the battery and charging system to ensure proper voltage.
- Carefully inspect the camshaft position sensor's wiring harness and connector for any visible damage, corrosion, oil contamination, or loose pins.
- For 2015-2018 models: Specifically locate and inspect connector X154 on the front engine cover for any signs of water intrusion or corrosion, as per TSB PIP5335B/C.
- Using a scan tool with live data, monitor the camshaft position sensor signal (Cam Signal) while the engine is cranking or running. Look for a consistent signal that changes with RPM.
- If the signal is absent or erratic, test the sensor's circuit. Check for a 5-volt reference and a good ground at the connector with the key on.
- If wiring and power/ground are good, the sensor itself is the most likely culprit. Replace the camshaft position sensor and its O-ring.
- After replacement, clear the codes with a scanner and perform a drive cycle to see if the code returns.
- If the problem persists, the issue may be more complex, such as a damaged reluctor wheel or a timing chain problem, requiring more advanced mechanical diagnosis.
Parts You'll Likely Need

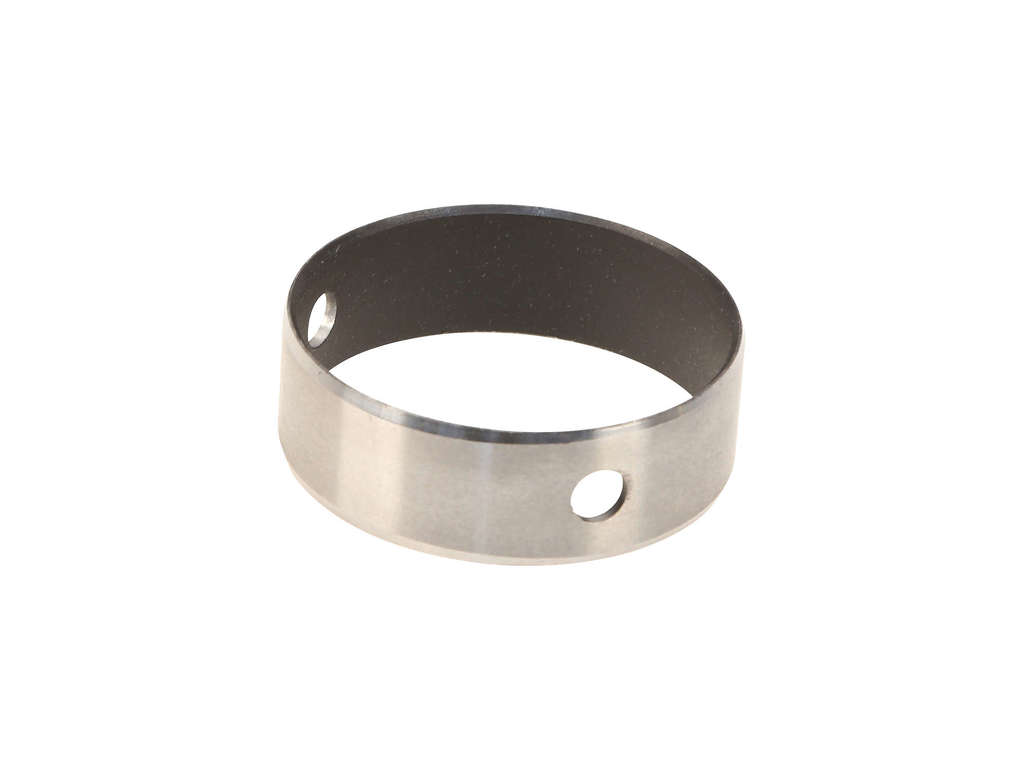
- Camshaft Position Sensor
(OEM #12680848)— This is the most frequent cause of a P0340 code. TSBs and repair data confirm it's a common failure item. It is highly recommended to use an OEM (ACDelco) or reputable OE-supplier brand like Delphi.
Trusted brands: ACDelco (OEM), Delphi, Bosch, NTK
OEM price range: $80-$120
Aftermarket price range: $25-$75 - Camshaft Position Sensor Connector Pigtail — The connector can become brittle from heat and vibration, or corroded from water, leading to a poor connection that mimics a failed sensor.
Trusted brands: ACDelco, Dorman
OEM price range: $25-$45
Aftermarket price range: $15-$30 - Camshaft Position Sensor O-Ring — The O-ring provides a seal against oil leaks. It should always be replaced with the sensor and lubricated with clean engine oil before installation.
Trusted brands: ACDelco, Fel-Pro
OEM price range: $3-$10
Aftermarket price range: $2-$5
Related Codes That Often Appear With This One
- P0341 — This code indicates a range/performance issue with the same sensor circuit, often appearing with P0340 and pointing to the same root causes like a failing sensor or bad wiring.
- P0335 — This is for the Crankshaft Position Sensor. A problem with the crank sensor or a timing chain issue affecting the cam/crank relationship can trigger codes for both.
- P0365 — This code relates to the Camshaft Position Sensor 'B' circuit, which may be present on engines with multiple camshafts.
Technical Service Bulletins (TSBs) & Recalls
- PIE0416A: Field information request for DTCs P0335, P0340, or P0365.
- PIP5335B/C: Information regarding P0340 and P0341 on 2015+ models, directing technicians to inspect connector X154 for corrosion.
- PIP5099A: Recommends replacing the cam position sensor for intermittent P0340 on specific 2012-2013 builds.
Platform-Specific Known Issues
- TSB #PIP5335B/C: Corroded Connector on 2015-2018 Models: For the K2UG generation, this TSB is critical. It points to water intrusion and corrosion in connector X154 (a 16-pin connector on the driver's side of the front engine cover) as a common cause for P0340 and P0341. Technicians are advised to inspect this specific connector if standard diagnostics fail.
- TSB #PIP5099A: Faulty Sensor Batch on 2012-2013 Models: For some 2012-2013 models built in September or October 2012, this TSB advises replacing the cam position sensor if an intermittent P0340 code is present and standard diagnostics don't find a cause. This suggests a known batch of faulty sensors from the factory.
- Harness Chafing and Oil Contamination: Owners and GM bulletins report that the engine wiring harness can chafe against the sharp corner of a cylinder head or other engine brackets, especially near the front of the engine on 2015+ models. Oil leaks can also saturate the loom, degrading the wire insulation over time.
Mechanic-Grade Diagnostic Values
- 5V Reference at CMP Connector — expected: 4.8-5.2 Volts DC. Failure: Voltage below 4.8V indicates an open/short to ground in the reference circuit; voltage above 5.2V indicates a short to voltage.
- Ground Circuit at CMP Connector — expected: Approximately 12.6V (Battery Voltage). Failure: A reading significantly lower than battery voltage indicates a poor ground connection.
- Signal Circuit at CMP Connector (Key On, Engine Off) — expected: 4.8-5.2 Volts DC. Failure: Voltage below this range can indicate a short to ground or an open in the signal circuit.
- Signal Circuit Integrity (Sensor disconnected) — expected: Voltage should drop to near 0V when a fused jumper wire connected to the signal pin is momentarily touched to ground.. Failure: If the signal on a scan tool does not change, the fault may be in the ECM.
- Wiring Harness Resistance — expected: Below 5.0 Ohms. Failure: Resistance above 5.0 ohms between the sensor connector and the PCM connector indicates an open or high resistance in the circuit.
Scan Tool Commands That Help
- GDS2 / Tech2 / Professional Scan Tool: Camshaft Retard Offset — Primarily for older GM engines with a distributor (pre-2012). This value is checked at 1000 RPM and should be 0° ± 2°. While not directly adjustable on the 2012-2018 Yukon, an incorrect reading on a scan tool could still point towards a timing issue.
- Professional Scan Tool: Camshaft Position Sensor Relearn — After replacing the camshaft position sensor, some vehicles may require a relearn procedure to sync the new sensor with the PCM. This function may be available in the scan tool's service menu.
Wiring & Ground Locations
- Connector X154 — A 16-pin connector located on the front engine cover, next to the vacuum pump on 2015-2018 models.. This is a known failure point for P0340/P0341 due to water intrusion and corrosion, as documented in GM TSB #PIP5335C. It is a critical inspection point before replacing any parts.
- Connector X159 — Located on the front engine cover next to the vacuum pump, specifically on 2015 models.. TSB #PIP5335C calls this connector out as an inspection point for corrosion, but only for the 2015 model year, making it a key year-specific detail.
- ECM Ground — On top of the engine block, often at the rear of the driver's side.. This is the main ground for the Engine Control Module. A poor connection here can create an unstable ground reference for all engine sensors, potentially causing a P0340 code among others.
- G103 — Located at the left rear of the engine compartment on the cowl, above the brake booster.. This is a major body and module ground point. While not exclusive to the CMP sensor, a poor connection here can cause various difficult-to-diagnose electrical issues that could manifest as sensor codes.
Real Owner Repair Stories
- GMTNation forum user (2004 GMC Envoy 4.2L (similar GM wiring design)) — Persistent P0340 code after replacing sensor.
❌ Tried (didn't work) Replacing the camshaft position sensor.
✅ What actually fixed it The wiring was broken internally right at the 180-degree bend near the connector. The sensor tested good when held straight but failed when installed and bent into position. The final fix was cutting out the bad section of wire and soldering in a new pigtail. - YouTube video by 'kiko mekaniko' (2013 GMC Yukon) — P0340, engine hard starting.
❌ Tried (didn't work) Initial diagnosis pointed to the sensor.
✅ What actually fixed it The wiring harness near the camshaft position sensor was found to be stripped and damaged. Repairing the wires and properly insulating them resolved the code and the starting issue. - Tahoe Yukon Forum user 'Rosko' (2007 Yukon Denali) — P0340, hard starting, rough idle.
❌ Tried (didn't work) Attempted to replace the sensor without removing the crankshaft pulley but found it too difficult.
✅ What actually fixed it Replacing the camshaft position sensor. A shop charged one hour of labor and had to remove the pulley for access. The new sensor fixed the P0340 code and also smoothed out a rough idle problem.
When the Usual Fixes Don't Work
- In one documented case involving a similar GM truck, a mechanic replaced the camshaft position sensor to fix a P0340 code, but the problem persisted. The ultimate cause was found to be a previous, improper wire repair on the sensor's pigtail connector that used butt connectors. Butt connectors are not recommended for low-voltage sensor circuits as they can introduce resistance and intermittent connections. The final fix was to properly solder and heat-shrink the wiring harness, which resolved the code. This demonstrates that replacing the sensor is not a guaranteed fix, and the integrity of the wiring, including previous repairs, is paramount.
OEM Part Supersession History
PIP5335→PIP5335A, then PIP5335B, then PIP5335C— Updates to model years covered by the bulletin regarding corrosion in connector X154.
Heads up: This is a Technical Service Bulletin supersession, not a physical part. Following the latest version (PIP5335C) is critical for accurate diagnosis.
Model Year Variations Within This Range
- 2015 only: TSB #PIP5335C and its predecessors specifically call out inspecting an additional connector, X159, for corrosion on 2015 models. For 2016-2019 models, the inspection is focused only on connector X154.
- 2012-2014 vs 2015-2018: The primary known issue shifts from a potential bad batch of sensors on 2012-2013 models (TSB #PIP5099A) to a known wiring connector corrosion issue on 2015+ models (TSB #PIP5335 series).
Helpful Videos

We Have This Part in Stock


The information in this article is provided for general reference and educational purposes only. Vehicle specifications, procedures, and part compatibility can vary by production date, trim level, and region. Always consult your vehicle's factory service manual and verify part numbers before purchasing or performing repairs. Safety-critical components such as airbags, seat belts, and braking systems should be installed by a qualified professional.
- Gmc YUKON:
- 🧭 Diagnostic Flowchart
- 🎬 Helpful Videos
- 🛍️ Shop This Part
- What's Unique About the 2012-2018 Gmc YUKON
- Symptoms You May Notice
- Most Likely Causes
- Rare But Worth Checking
- Diagnosis Steps
- Parts You'll Likely Need
- Related Codes That Often Appear With This One
- Technical Service Bulletins (TSBs) & Recalls
- Platform-Specific Known Issues
- Mechanic-Grade Diagnostic Values
- Scan Tool Commands That Help
- Wiring & Ground Locations
- Real Owner Repair Stories
- When the Usual Fixes Don't Work
- OEM Part Supersession History
- Model Year Variations Within This Range
- 🎟️ Get 5% Off