
P0442 on 2003-2010 GMC Savana 2500: EVAP Small Leak Causes & Fixes
For a 2003-2010 GMC Savana, a P0442 code is most often caused by a loose or faulty gas cap. If that's not the issue, the next most likely culprits are the EVAP vent or purge solenoids. Rust on the fuel filler neck is also a known issue on these vans that can cause this code.
- Always check the gas cap first for a P0442 code. Ensure it's tight and the seal is intact before attempting any other repairs.
- The most common parts to fail after the gas cap are the EVAP vent solenoid (under the van) and the EVAP purge valve (in the engine bay).
- On Savana vans, especially those from rust-prone areas, carefully inspect the fuel filler neck for corrosion, as this is a known failure point that prevents the gas cap from sealing.
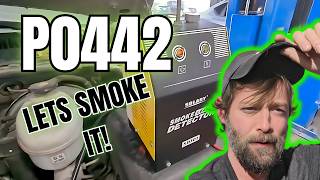
- A smoke test is the most reliable and efficient way to find the exact source of a small EVAP leak if it's not an obvious gas cap issue.
What's Unique About the 2003-2010 Gmc SAVANA 2500
The GMC Savana and its twin, the Chevrolet Express, are built on a durable truck platform, but their long production run means some issues are well-documented. For the 2003-2010 models, a primary vehicle-specific issue is the tendency for the fuel filler neck to rust, especially in regions where road salt is used. This corrosion can prevent the gas cap from sealing properly or create pinhole leaks in the neck itself. Additionally, the EVAP vent solenoid's location on the driver's side frame rail makes it highly vulnerable to moisture and road debris, leading to frequent failures. A GM Technical Service Bulletin also noted that the fuel cap tether can get caught under the cap, preventing a proper seal.
Diagnostic Flowchart
Tap your situation to follow the diagnostic path that matches what you're seeing on this vehicle.
Symptoms You May Notice
- Check Engine Light is on.
- A faint fuel smell may be noticeable, particularly after refueling.
- Possible failure to pass an emissions inspection.
- In rare cases where the purge valve is stuck open, you may experience a long crank time after filling the gas tank.
- Replacing the purge valve when the vent valve is the actual problem, or vice-versa. A proper diagnosis with a smoke test is crucial to avoid replacing the wrong part.
- Replacing oxygen sensors or other unrelated emissions components before properly diagnosing the EVAP system.
- Assuming the gas cap is good just because it looks okay. An aged or incorrect aftermarket cap can fail to seal properly even if it clicks.
Most Likely Causes
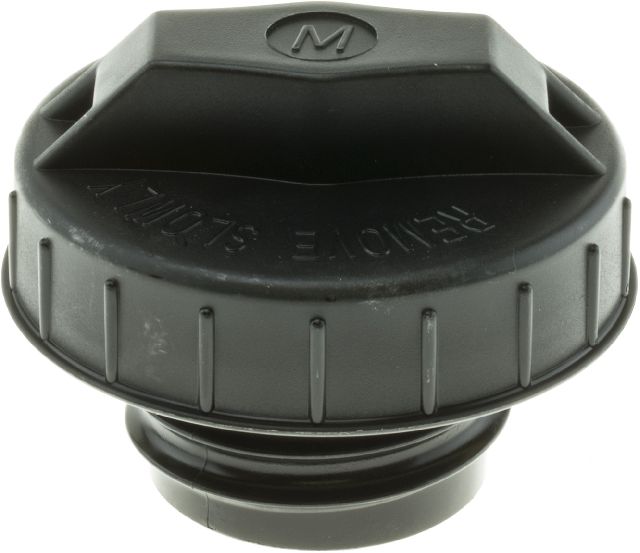
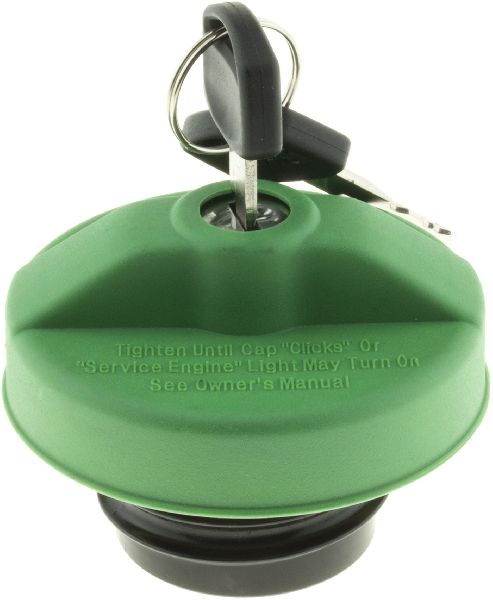
- Loose or Faulty Gas Cap 🔴 High Probability → Shop Fuel Tank Cap This is the most common cause for any vehicle. The seal can degrade over time, or the cap may not be tightened correctly. Using a non-OEM cap can also cause sealing issues. Sometimes the tether can get caught under the cap, preventing a proper seal, an issue noted in GM TSB #PI0873.
How to confirm: Inspect the gas cap's rubber seal for cracks, stiffness, or damage. Ensure the cap clicks several times when tightened. Check that the tether is not caught underneath, preventing a seal.
Typical fix: Replace the gas cap with a new, high-quality OEM part (like ACDelco) to ensure a proper seal.
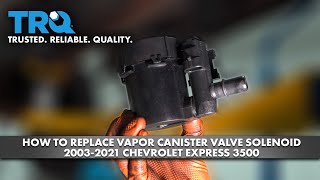
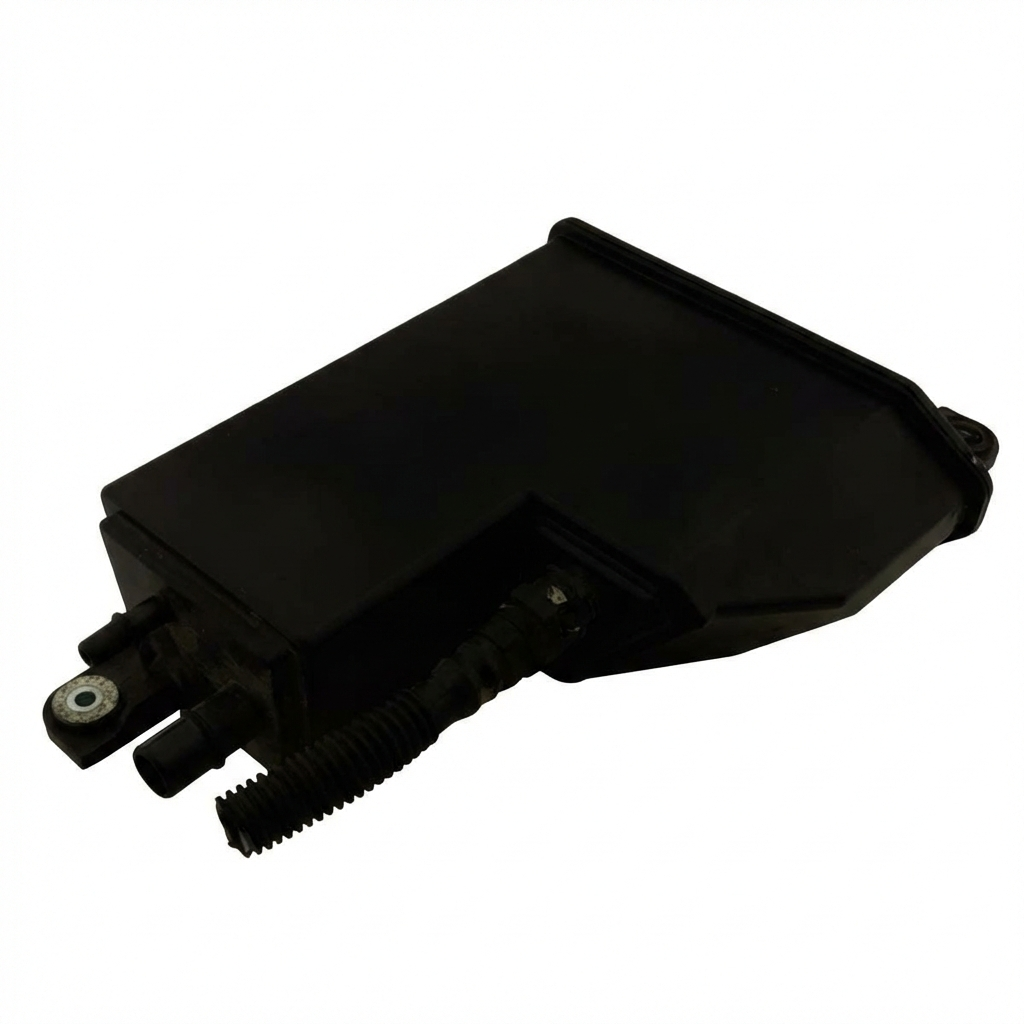
Est. part cost: $15-$35 - Failed EVAP Vent Solenoid/Valve 🟡 Medium Probability → Shop Vapor Canister This valve is located under the van on the driver's side frame rail, often between the door and the fuel tank, near the charcoal canister. Its exposed position makes it highly susceptible to road salt, water, and debris, which leads to corrosion and causes it to stick open or fail.
How to confirm: Visually inspect the valve for heavy rust or damage. A mechanic can command the valve to close with a scan tool during a smoke test to check its function. A definitive diagnosis is made with a smoke test, which will show smoke leaking from a faulty valve if it's stuck open.
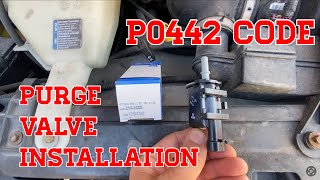
Typical fix: Replace the EVAP vent solenoid. This is a common DIY repair that involves disconnecting an electrical connector and a hose and sliding the valve off its bracket. 🎬 Watch: Step-by-step guide to replacing the vent solenoid.
Est. part cost: $30-$80 - Failed EVAP Purge Solenoid/Valve 🟡 Medium Probability → Shop Vapor Canister This valve is located in the engine bay and is subjected to constant heat cycles, which can cause it to fail over time. It can get stuck open or closed, or the plastic housing can crack.
How to confirm: On V8 models, the purge solenoid is typically on top of the intake manifold, sometimes behind the alternator. It can be tested with a hand-held vacuum pump to see if it holds vacuum when de-energized. A scan tool can also command it to open and close to check for proper operation. A simple test is to remove it and try to blow through it; if air passes when it's not energized, it has failed.
Typical fix: Replace the purge solenoid. On many Savana models, this requires removing the engine cover ('doghouse') inside the van for access.
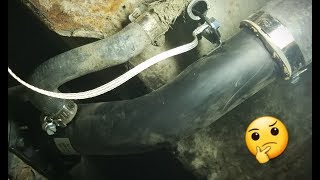
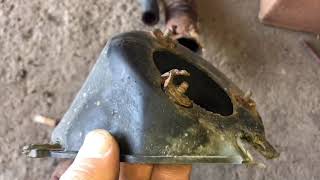
Est. part cost: $25-$75 - Rusted or Damaged Fuel Filler Neck 🟡 Medium Probability → Shop Fuel Filler Neck In areas where road salt is used (the 'Salt Belt'), the metal filler neck is highly susceptible to rust. This is a well-known issue on these vans and their Chevrolet Express twin.
How to confirm: When you remove the gas cap, visually inspect the metal surface where the cap seals. Look for bubbling paint, flaking rust, or pitting that would prevent a good seal. A smoke test will clearly show smoke escaping from pinholes in the neck if it has rusted through.
Typical fix: Replace the fuel filler neck. This involves disconnecting it from the fuel tank and the body of the van. Aftermarket replacements are widely available from brands like Dorman. 🎬 Watch: How to replace a rusted fuel filler neck.
Est. part cost: $70-$150 - Cracked or Disconnected EVAP Hoses ⚪ Low Probability Over time, the rubber and plastic hoses in the EVAP system can become brittle from age and heat, leading to small cracks or loose connections, particularly at the connection points to the solenoids and canister.
How to confirm: Perform a thorough visual inspection of all accessible EVAP lines from the engine bay to the fuel tank. The most effective method is a smoke test, which will make even tiny leaks visible.
Typical fix: Replace the specific section of cracked hose or secure the loose connection.
Est. part cost: $10-$50
Rare But Worth Checking
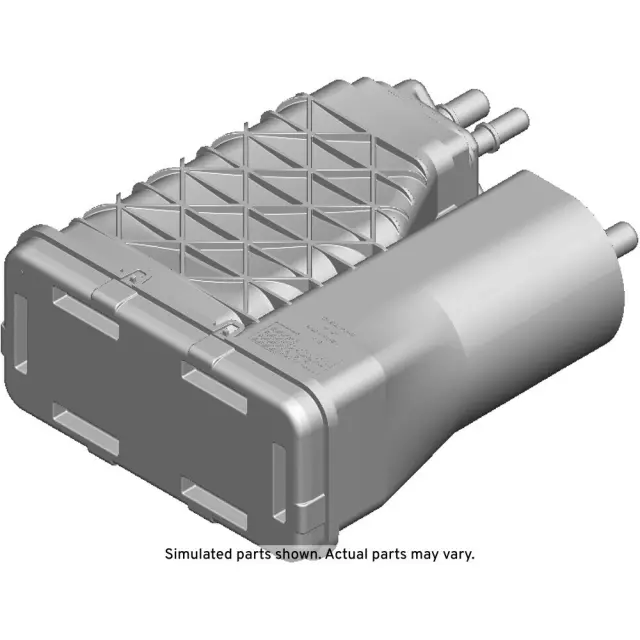
- Cracked EVAP Charcoal Canister: → Shop Vapor Canister While less common for a small leak, the plastic canister housing can be damaged by road debris or become brittle with age, causing a crack. This is usually found during a smoke test after other components are ruled out.
- Leaking Fuel Tank Pressure (FTP) Sensor: → Shop Fuel Tank The sensor itself or the gasket where it mounts to the fuel pump module can fail, creating a small leak. This is less common than valve failures but is a possible cause.
Diagnosis Steps
- Read the code with an OBD-II scanner to confirm P0442 is present and check for any other related codes like P0455 or P0449.
- Inspect the gas cap. Remove it, check the seal for cracks or damage, and ensure it is tightened until it clicks at least three times. Make sure the tether is not caught underneath.
- Clear the code and drive for a few days. If the code does not return, the gas cap was the issue.
- If the code returns, perform a visual inspection of all accessible EVAP hoses and lines, especially around the engine, filler neck, and charcoal canister. Look for obvious cracks, breaks, or loose connections.
- Thoroughly inspect the fuel filler neck for rust or corrosion where the gas cap seals. Clean the surface if necessary to see the condition of the metal.
- If no obvious issues are found, the most effective next step is to perform a smoke test. This involves injecting vaporized smoke into the EVAP system's service port (often has a green cap under the hood). The smoke will escape from the leak's location, making it easy to pinpoint 🎬 See how to find a small leak using a smoke test. whether the issue is a hose, solenoid, canister, or the filler neck.
- During the smoke test, use a bi-directional scan tool to command the purge and vent solenoids to cycle. This can reveal intermittent leaks or a valve that is not sealing completely when commanded closed.
- Based on the smoke test results, test the specific component. For example, if no external leaks are found, the purge solenoid may be leaking internally and should be removed and tested.
Parts You'll Likely Need
- Fuel Tank Cap
(OEM #ACDelco GT330 (Replaces GM 20915842))— This is the most common and easiest part to replace for a P0442 code. The seal wears out over time. Using an OEM cap is highly recommended as some aftermarket caps do not seal correctly.
Trusted brands: ACDelco
OEM price range: $20-$35
Aftermarket price range: $15-$25 - Vapor Canister Vent Solenoid
(OEM #ACDelco 214-2149 (GM 25932571), GM 214-2324)— A very common failure point on these vans due to its exposed location under the vehicle, which leads to corrosion and sticking. Part 214-2149 is a common ACDelco replacement, while 214-2324 is a newer GM Genuine part.
Trusted brands: ACDelco, Dorman (911-238), Delphi
OEM price range: $40-$80
Aftermarket price range: $25-$50 - Vapor Canister Purge Solenoid
(OEM #ACDelco 214-1680 (GM 12597567))— Located in the engine bay, this valve controls the flow of fuel vapors to the engine and can get stuck open or closed over time due to heat and wear.
Trusted brands: ACDelco, Dorman, Standard Motor Products
OEM price range: $25-$75
Aftermarket price range: $20-$50 - Fuel Tank Filler Neck
(OEM #GM 15131043 (example, verify by VIN))— Highly prone to rusting in salt-belt states, creating a bad sealing surface for the gas cap or pinhole leaks in the neck itself.
Trusted brands: GM Genuine, Dorman, Spectra Premium
OEM price range: $100-$180
Aftermarket price range: $70-$150
Related Codes That Often Appear With This One
- P0455 — This code indicates a large EVAP leak. It often appears with P0442 if a small leak worsens or if the testing parameters detect different leak sizes during various drive cycles. The provided TSB #21-NA-124 specifically groups these two codes together.
- P0449 — This code points to a fault in the EVAP vent solenoid's electrical circuit. It can appear alongside P0442 if the vent solenoid is failing both electrically and mechanically, making the vent solenoid the almost certain culprit.
- P0496 — Indicates 'EVAP Flow During a Non-Purge Condition,' which almost always points to a purge valve that is stuck open. If the purge valve is stuck open, it will create a leak path, often triggering P0442 as well.
Technical Service Bulletins (TSBs) & Recalls
- 21-NA-124: Diagnostic Tip for Malfunction Indicator Lamp (MIL) Illuminated - DTC P0442 and/or P0455 Set. This bulletin advises a specific diagnostic order: 1) Check EVAP lines for damage/connection, 2) Check vent valve for being stuck open, 3) Check purge valve.
- PIT4943D: Directs technicians to use a smoke machine (EVAP system tester) for accurate diagnosis of P0442, emphasizing this as the proper procedure over guesswork.
- 02-06-04-037J: An older but relevant TSB for GM trucks that recommends replacing the vent valve solenoid and relocating the filter box to a less exposed area to prevent repeat failures from contamination.
Platform-Specific Known Issues
- Rusted Fuel Filler Neck: → Shop Fuel Filler Neck A very common problem in the 'Salt Belt'. The metal filler neck corrodes where the gas cap seals or develops pinholes, causing a leak that the gas cap alone cannot fix. Visual inspection and smoke testing are key to confirming.
- Exposed Vent Solenoid Location: The vent solenoid is mounted on the driver's side frame rail, where it is exposed to road salt, water, and debris. This leads to a high failure rate from corrosion and contamination, causing it to stick open.
- Doghouse Access for Purge Valve: → Shop Vapor Canister On these vans, the EVAP purge solenoid is often located at the back of the engine bay, making it very difficult to access from the front. The standard procedure requires removing the interior engine cover (the 'doghouse') to reach it.
Mechanic-Grade Diagnostic Values
- EVAP Vent Valve/Solenoid Coil Resistance — expected: 20 to 30 Ohms. Failure: A reading significantly outside this range, such as an open or shorted circuit, indicates a failed coil.
- Fuel Tank Pressure (FTP) Sensor Voltage (Key On, Gas Cap Off) — expected: Approximately 1.3 to 1.7 Volts (atmospheric pressure). Failure: A reading stuck low (near 0V) or high (near 5V) that doesn't change suggests a faulty sensor or wiring problem. A known good reading on GM vehicles is often specifically 1.5V.
- FTP Sensor Reference Voltage (at sensor connector, key on) — expected: Approximately 5 Volts. Failure: Absence of the 5V reference points to a wiring or ECM problem, not a sensor failure.
- EVAP Vent Solenoid Control Wire Voltage (Key On, Solenoid Commanded OFF) — expected: 12 Volts (Battery Voltage). Failure: If battery voltage is not present, it indicates an open in the power feed circuit or a fuse issue.
Scan Tool Commands That Help
- Tech2 / GDS2: EVAP Service Bay Test — This is a forced functional test used to run the EVAP monitor in a workshop without performing a full drive cycle. It seals the system and checks for pressure decay to verify a repair or diagnose an intermittent leak. Note: The test has preconditions, including fuel level between 15-85% and engine coolant temperature below 158°F (70°C).
- Bi-directional OBD-II Scanner: EVAP Purge/Seal — During a smoke test, this command allows the technician to manually close the vent solenoid and open the purge solenoid to pressurize the entire system with smoke, making it easier to find the physical location of a leak.
Wiring & Ground Locations
- G102 — On the left rear of the engine block for V8 engines.. This is a primary engine ground. A poor connection here can cause erratic behavior from the Engine Control Module (ECM), which operates the EVAP solenoids and interprets sensor data.
- G303 — Behind the left kick panel inside the cabin.. An interior body ground. A fault here could affect modules or wiring that pass through the cabin and communicate with the ECM about vehicle status.
- G400 — On the inner left rear frame rail.. This ground is near the EVAP canister and vent solenoid. Corrosion at this point can directly cause electrical issues with the vent solenoid, leading to codes like P0449 and P0442.
- EVAP Service Port — Under the hood, often with a green cap.. This is the access point for performing a professional smoke test to find the physical source of the leak.
Real Owner Repair Stories
- Reddit user in r/MechanicAdvice (2009 GMC Savana) — Check engine light on, repeatedly failing EVAP valves within a 6-month period.
❌ Tried (didn't work) Replacing the failing EVAP valve multiple times.
✅ What actually fixed it The likely root cause was the charcoal canister disintegrating and sending small carbon beads into the EVAP lines. These beads would contaminate and destroy the new valves. The final fix requires replacing the canister and cleaning out all associated EVAP lines before installing a new valve. It was also noted that habitually overfilling ('topping off') the fuel tank can flood the canister with liquid fuel, causing it to fail and break apart. - YouTube video by 'Fix It Angel' (2009 Chevrolet Express 3500 (identical to Savana)) — P0442 code
❌ Tried (didn't work) Assuming the gas cap was the issue (it was not).
✅ What actually fixed it The purge valve was faulty. The key detail for this repair on a 2009 model is that the valve is located behind the alternator, making it inaccessible from under the hood. The fix required removing the interior engine cover ('doghouse') to gain access to the valve for replacement.
"I Checked Everything" — The Actual Cause
- A common scenario is passing a smoke test but the P0442 code returns. The cause is often a component that holds pressure but not vacuum. The ECM's self-test uses vacuum, while a smoke test uses pressure. A valve (purge or vent) can have a weak seal that leaks under vacuum but appears fine under the low pressure of a smoke machine. Testing the valves with a hand-held vacuum pump can reveal this type of failure.
- Another cause when a smoke test passes is a faulty Fuel Tank Pressure (FTP) sensor. The system may be perfectly sealed, but if the sensor provides incorrect voltage data to the ECM, the computer will falsely trigger a P0442 code. If a smoke test is clean, verifying the FTP sensor's voltage is a critical next step.
OEM Part Supersession History
10382105, 15750484, 22728634→25932571— These are older part numbers for the Vapor Canister Vent Solenoid that have been consolidated into a single replacement part.
Heads up: Some parts suppliers note that part number 25932571 has been redesigned and may not be a direct fit for all vehicles it is listed for. It is highly recommended to verify the correct part number with your vehicle's VIN before purchasing.
Model Year Variations Within This Range
- 2003-2010: The location of the EVAP Purge Solenoid can vary. On earlier models (e.g., 2003), it is often found on top of the engine near the throttle body. On later models (e.g., 2009), it is located behind the alternator, which requires removing the interior engine cover ('doghouse') for access, making the repair more labor-intensive.
Helpful Videos
Used OEM Parts in Stock
New Aftermarket Parts Available


The information in this article is provided for general reference and educational purposes only. Vehicle specifications, procedures, and part compatibility can vary by production date, trim level, and region. Always consult your vehicle's factory service manual and verify part numbers before purchasing or performing repairs. Safety-critical components such as airbags, seat belts, and braking systems should be installed by a qualified professional.
- Gmc SAVANA 2500:
- 🧭 Diagnostic Flowchart
- 🎬 Helpful Videos
- 🛍️ Shop This Part
- What's Unique About the 2003-2010 Gmc SAVANA 2500
- Symptoms You May Notice
- Most Likely Causes
- Rare But Worth Checking
- Diagnosis Steps
- Parts You'll Likely Need
- Related Codes That Often Appear With This One
- Technical Service Bulletins (TSBs) & Recalls
- Platform-Specific Known Issues
- Mechanic-Grade Diagnostic Values
- Scan Tool Commands That Help
- Wiring & Ground Locations
- Real Owner Repair Stories
- "I Checked Everything" — The Actual Cause
- OEM Part Supersession History
- Model Year Variations Within This Range
- 🎟️ Get 5% Off