
P0461 on 2011-2016 Hyundai Elantra: Fuel Level Sensor Circuit Causes and Fixes
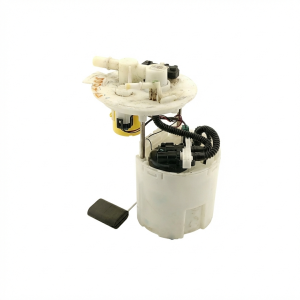
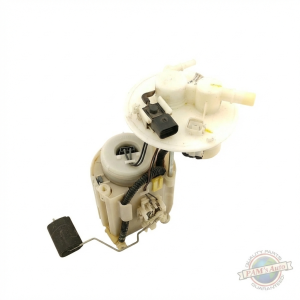
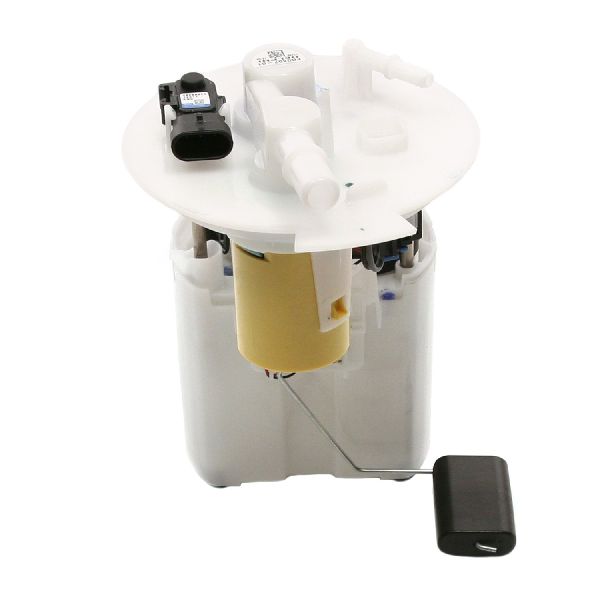
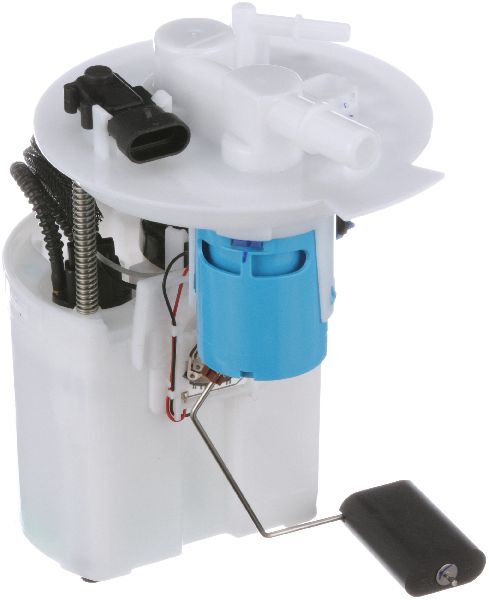
This code almost always means the fuel level sending unit inside the gas tank has failed. On the 2011-2016 Elantra with the 1.8L Nu engine, this sensor is part of the fuel pump module. Expect to pay $75-$150 for an aftermarket part or $250+ for the OEM sensor, with DIY being a common option for those comfortable working with the fuel system, as access is under the rear seat.
- P0461 on a 2011-2016 Elantra points directly to a problem with the fuel level sensor circuit.
- The most likely culprit is the fuel level sending unit itself, which has worn out.
- You will need to access the fuel pump module under the rear seat to perform the diagnosis and repair, a job considered manageable for DIYers.
- While you can drive with this code, you risk running out of fuel unexpectedly, so it's best to repair it promptly.
- Before buying parts, inspect the wiring and connector at the top of the fuel tank for obvious corrosion or damage.
What's Unique About the 2011-2016 Hyundai Elantra
For the fifth-generation (2011-2016) Elantra, there are no widespread, unique design flaws that make it exceptionally prone to this code compared to other vehicles. The issue is typically standard wear and tear of the fuel level sensor. The sensor itself is a component of the main fuel pump assembly, meaning you will need to access the top of the fuel tank to replace it. While some manufacturers sell the sensor separately, it's common to replace the entire fuel pump module while the tank is open. Access is conveniently located under the rear seat cushion, making DIY replacement feasible.
Symptoms You May Notice
- Check Engine Light is on
- Fuel gauge behaves erratically (jumps between full, half, and empty)
- Fuel gauge is stuck on 'Full' or 'Empty' regardless of the actual fuel level
- The 'Distance to Empty' (DTE) display is inaccurate or does not change
- Low fuel warning light may stay on or flash even with a full tank
- Replacing the instrument cluster first without testing the sending unit and wiring.
- Replacing the entire fuel pump when only the sending unit has failed (though replacing the assembly can be preventative maintenance on a high-mileage car).
Most Likely Causes
- Worn or Faulty Fuel Level Sending Unit 🔴 High Probability → Shop Fuel Tank Sending Unit The sensor is a mechanical part with a float and a variable resistor (potentiometer) that wears out over time from constant movement and exposure to fuel additives. The resistive strip can develop dead spots, causing the signal to jump or drop out.
How to confirm: Use a scan tool to monitor the fuel level sensor's voltage or resistance in the live data stream. If the reading is stuck or jumps erratically as you rock the vehicle to slosh fuel, the sensor is likely bad. The definitive test is to remove the fuel pump module and measure the sensor's resistance with a multimeter while manually moving the float arm. For the 2011-2016 Elantra, the expected resistance is approximately 200 Ohms at Empty and 10 Ohms at Full. A smooth sweep without dropouts is required.
Typical fix: Replace the fuel level sending unit. Since it is part of the fuel pump module, it's often practical to replace the entire module, especially on higher-mileage vehicles.
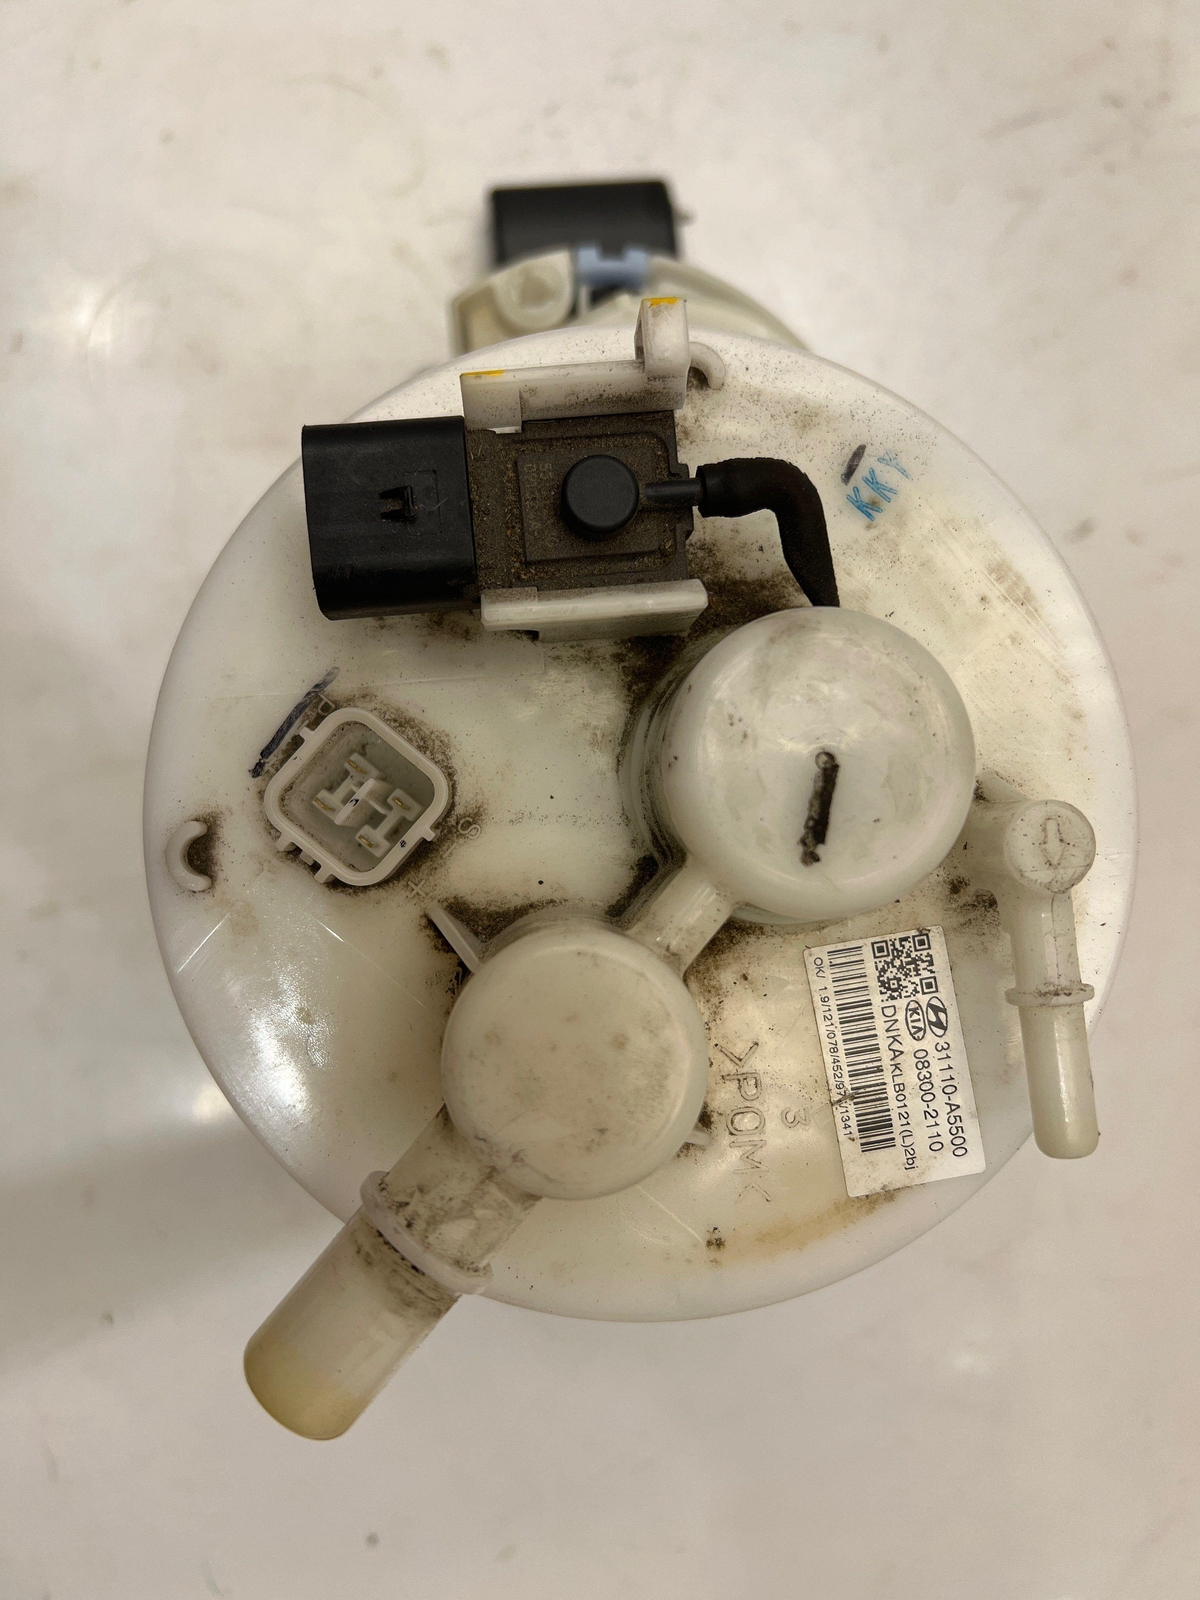
Est. part cost: $75-$260 - Damaged Wiring or Corroded Connectors 🟡 Medium Probability The wiring harness leading to the fuel tank is exposed under the vehicle and can be damaged by road debris. The main connector on top of the fuel pump module, located under the rear seat, is susceptible to moisture and corrosion if the cover is not sealed properly.
How to confirm: Visually inspect the wiring harness running to the fuel tank for any signs of chafing, breaks, or corrosion. Unplug the connector at the fuel pump module (under the rear seat) and check for green or white crust, moisture, or loose pins. A real-world case on a similar Hyundai involved rodent damage to the harness near the sender, which was discovered after peeling back the protective tape.
Typical fix: Repair the damaged section of wire or clean the connector pins with a contact cleaner and a small brush. Replace the connector if corrosion is severe.
Est. part cost: $5-$50 - Poor Ground Connection ⚪ Low Probability The ground strap for the fuel tank or sending unit circuit can corrode or become loose over time, especially in salt-belt regions. This adds resistance to the circuit, causing erratic voltage readings.
How to confirm: Locate the chassis ground point for the fuel pump circuit using a wiring diagram. Check that the connection is clean, tight, and free of corrosion. A voltage drop test on the ground side can confirm high resistance.
Typical fix: Clean the corrosion from the ground point and terminal with a wire brush and re-secure the connection. Applying dielectric grease can prevent future corrosion.
Est. part cost: $0-$5 - Stuck Float Arm ⚪ Low Probability Less common, but mechanical binding can occur. The float arm can get caught on internal tank components or the fuel pump wiring, causing it to be stuck in one position.
How to confirm: This can only be confirmed by removing the fuel pump module from the tank and visually inspecting the float arm for free movement.
Typical fix: Free the stuck arm. If it was caught on wiring, ensure the wires are properly routed and secured. If the arm itself is bent, the sending unit should be replaced.
Est. part cost: $0-$150
Rare But Worth Checking
- Faulty Instrument Cluster: This is uncommon, but if the sensor and wiring test good, the problem could be with the gauge itself or the cluster's internal logic. Some scan tools can perform a 'gauge sweep' test to check the cluster's operation.
- Faulty Powertrain Control Module (PCM): → Shop Engine Control Module (ECM) This is the least likely cause. The PCM should only be considered if all other possibilities, including the sensor, wiring, and instrument cluster, have been definitively ruled out. A software update may sometimes resolve range/performance issues.
Diagnosis Steps
- Connect an OBD-II scanner and confirm P0461 is the primary code. Note any other codes (e.g., P0462, P0463).
- Use the scanner's live data function to observe the 'Fuel Level' parameter (may be shown as a percentage, voltage, or resistance). Note if the reading is stuck or seems incorrect for the amount of fuel in the tank.
- Gently rock the vehicle side-to-side to slosh the fuel. Watch the live data to see if the reading changes smoothly or jumps erratically. An erratic reading points to a bad sensor.
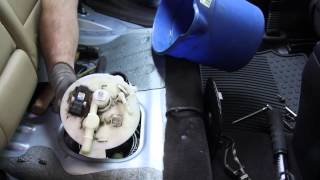
- Gain access to the fuel pump module connector, which is located under the rear seat cushion. Remove the access panel (typically held by several screws).
- Disconnect the connector and inspect for any signs of corrosion, moisture, or backed-out pins. Clean or repair as needed.
- If the connector is okay, use a wiring diagram to identify the signal and ground wires for the fuel level sensor.
- To definitively test the sensor, you must remove the fuel pump module from the tank. Once removed, connect a multimeter set to Ohms across the sensor's pins. Manually move the float arm from empty to full and watch for a smooth, linear change in resistance. For this platform, expect a range of approximately 200 Ohms (Empty) to 10 Ohms (Full). Any sudden jumps, open circuits (OL), or dead spots indicate a failed sensor.
- If the sensor tests good, perform a voltage drop test on the power and ground wires between the PCM and the fuel pump connector to rule out a wiring issue.
Parts You'll Likely Need
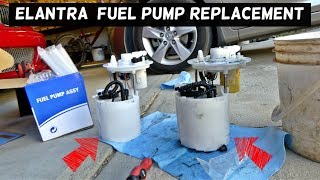
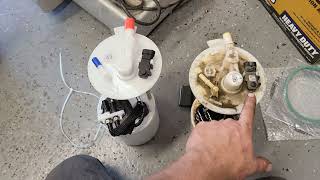
- Fuel Level Sending Unit
(OEM #94460-3X500)— This is the component that fails most often, containing the variable resistor that wears out and causes the erratic readings that trigger the P0461 code.
Trusted brands: Hyundai (OEM), Delphi, Spectra Premium, Bosch
OEM price range: $250-$280
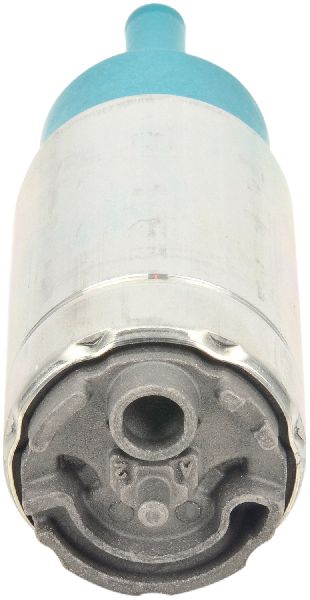
Aftermarket price range: $75-$150 - Fuel Pump Module Assembly
(OEM #31111-3X520)— The sending unit is integrated into this assembly. On a high-mileage vehicle (>100k miles), it is often wise to replace the entire module to also replace the original fuel pump and filter, preventing future failures.
Trusted brands: Hyundai (OEM), Bosch, Denso, Carter, Delphi
OEM price range: $550-$650
Aftermarket price range: $200-$400
Platform-Specific Known Issues
- DIY Repair Experience: Owners on forums like Reddit confirm that this is a manageable DIY job. One user on r/Hyundai noted for their 2014 Elantra: 'Take out the backseat... Fuel tank and pump are right there. Took me about an hour. Surprisingly easy!' This highlights the good access and straightforward nature of the replacement.
Mechanic-Grade Diagnostic Values
- Fuel Level Sensor Resistance — expected: ~10 Ohms (Full) to ~200 Ohms (Empty). Failure: A reading of 'OL' (Open Loop), infinite resistance, or values that do not sweep smoothly when moving the float arm.
- Aftermarket Fuel Pump Operating Pressure — expected: 45-55 psi. Failure: Pressure outside of this range may indicate a faulty pump, even if the level sender is the primary issue.
Wiring & Ground Locations
- Fuel Pump Relay — For the 2011-2016 Elantra, the fuel pump relay is integrated into the Engine Management System (EMS) box, also known as the under-hood fuse/relay box. It is not a separately replaceable relay; the entire box must be replaced if the relay fails.. While a relay failure typically causes a no-start condition (P0230, P0231) rather than a P0461, intermittent relay problems could theoretically cause voltage fluctuations to the entire fuel pump module, though this is a very unlikely cause for P0461.
Real Owner Repair Stories
- Reddit user comment on r/Hyundai (2014 Hyundai Elantra) — Fuel gauge not working.
❌ Tried (didn't work) The user did not report trying other fixes first.
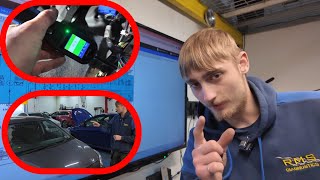
✅ What actually fixed it Replaced the fuel pump assembly. The user noted the job was 'surprisingly easy' and took about an hour, involving removing the rear seat bottom to access the pump. - YouTube video by RMS Diagnostics (2014 Hyundai i20 (similar system architecture)) — Fuel gauge not working after a new fuel sender was already installed by another shop.
❌ Tried (didn't work) Replacing the fuel sender unit.
✅ What actually fixed it The technician traced the wiring from the sender and found broken wires in the harness under the rear seat area, likely caused by rodent damage. Repairing the broken wires restored gauge function.
OEM Part Supersession History
31111-1R000→31111-3X520— Part update or consolidation by the manufacturer.
Heads up: 31111-3X520 is the correct replacement for the 2011-2016 Elantra 1.8L. Using the older part number is not advised.
Model Year Variations Within This Range
- 2011-04/15/2015 vs. 04/15/2015-2016: Part catalogs note a production date split for the fuel pump assembly (31111-3X520) on April 15, 2015. While the part number appears to be the same for both periods, this indicates a potential internal revision. It is crucial to confirm fitment with a VIN when ordering for a 2015 model.
Diagnostic Flowchart
Other Known Issues on This Vehicle
Issues unrelated to this code that are worth knowing about as an owner of this generation:
- Engine Ticking / Piston Slap (1.8L Nu) 🔴 High — Widespread issue, particularly noticeable on cold starts. Can lead to excessive oil consumption and eventual engine failure. A class-action lawsuit was settled regarding this issue. (Ref: Warranty Extension (TXXK / TSB 21-EM-002H) extended powertrain warranty for the engine short block in certain vehicles/regions.)
- Worn Steering Coupler 🟠 Medium — Very common. Owners report a clicking, popping, or 'thud' noise from the steering column when turning the wheel. The rubber coupler inside the Motor Driven Power Steering (MDPS) unit disintegrates over time. (Ref: TSB 17-ST-002 and Warranty Extension (TXX7) were issued to address this, covering replacement of the flexible coupler (Part No. 56315-2K000-FFF).)
- Timing Chain Noise / Failure 🔴 High — Less common than piston slap but serious. A chattering noise on idle or acceleration can indicate worn timing chain guides, which may break and cause the chain to jump a tooth, leading to a no-start condition.
- Premature Brake Wear 🟡 Low — Some owners report faster-than-expected wear of brake pads and rotors, sometimes under 30,000 miles.
- Air Bag Light On/Off Intermittently 🟠 Medium — Reports of the passenger airbag 'OFF' light flashing or behaving erratically even with no occupant, sometimes related to the occupant classification system (OCS) sensor in the seat. (Ref: A reflash of the control module was available for some cases.)
Used vs. New Parts: Buying Guide for This Vehicle
When a used part is the smart pick: A used fuel pump assembly from a junkyard is a risky choice. The primary failure part (the sending unit) is a wear item, and the fuel pump itself has a finite lifespan. A used part may fail soon after installation. It only makes sense if the budget is extremely tight and the donor vehicle is known to be low-mileage.
Donor-vehicle mileage cap: roughly under 60000 miles for the part to have meaningful remaining life.
What to inspect on the donor part:
- Verify the donor vehicle's mileage is low.
- Inspect the electrical connector on the used assembly for any signs of corrosion, melting, or pin damage.
- If possible, ask the yard if they tested the pump or can provide a short-term warranty.
- Avoid parts from vehicles that show signs of sitting for a very long time or have visible rust on the tank/module top hat.
OEM-only on this vehicle (don't cheap out):
- While not strictly 'OEM-only', the fuel pump assembly is a critical component where OEM or high-quality OEM-supplier parts (like Denso or Bosch) offer significantly better reliability and longevity than generic, unbranded options.
Aftermarket brands forum-validated for this vehicle:
- Delphi
- Bosch
- Denso
- Spectra Premium
Brands owners have reported issues with on this vehicle:
- Airtex (multiple forum posts report premature failure and noise issues)
- Carter (some users report early failures)
- Unbranded/generic parts from marketplaces like eBay or Amazon, which are often knockoffs of better brands.
Real Owner Stories
Aggregated from forums and TSBs cited above. Mileages and costs reflect what owners reported in those sources.
2014 Hyundai Elantra
Symptoms: Fuel gauge is not working.
What fixed it: Replacement of the fuel pump assembly.
Source hint: reddit.com/r/Hyundai/comments/1avp11w/my_fuel_gauge_is_not_working_i_have_a_2014/
2014 Hyundai Elantra
Symptoms: Fuel gauge issues; owner noted the fuel tank and pump are located right under the backseat.
What fixed it: Replaced the fuel pump/sender unit; the owner described the process as 'surprisingly easy' and took about an hour.
Source hint: DIY Repair Experience section citing r/Hyundai
Related OBD-II Codes
Frequently Asked Questions
Is there a specific resistance range I should look for when testing the fuel sender on my 2011-2016 Elantra?
Where is the fuel pump module connector located on the 2011-2016 Elantra for inspection?
Could my P0461 code be caused by a bad ground on this vehicle?
I'm hearing a clicking noise in my steering wheel along with this code; are they related?
Is the P0461 repair something I can do myself on a 2014 Elantra?
Does the 1.8L Nu engine in my Elantra have other common issues I should watch for while fixing the fuel sensor?
Helpful Videos
Used OEM Parts in Stock
New Aftermarket Parts Available


The information in this article is provided for general reference and educational purposes only. Vehicle specifications, procedures, and part compatibility can vary by production date, trim level, and region. Always consult your vehicle's factory service manual and verify part numbers before purchasing or performing repairs. Safety-critical components such as airbags, seat belts, and braking systems should be installed by a qualified professional.
- Hyundai Elantra:
- 🧭 Diagnostic Flowchart
- 🎬 Helpful Videos
- 🛍️ Shop This Part
- What's Unique About the 2011-2016 Hyundai Elantra
- Symptoms You May Notice
- Most Likely Causes
- Rare But Worth Checking
- Diagnosis Steps
- Parts You'll Likely Need
- Platform-Specific Known Issues
- Mechanic-Grade Diagnostic Values
- Wiring & Ground Locations
- Real Owner Repair Stories
- OEM Part Supersession History
- Model Year Variations Within This Range
- Other Known Issues on This Vehicle
- Used vs. New Parts: Buying Guide for This Vehicle
- Real Owner Stories
- 2014 Hyundai Elantra
- 2014 Hyundai Elantra
- Related OBD-II Codes
- Frequently Asked Questions
- 🎟️ Get 5% Off