
P1101 on 2009-2017 Audi Q5 2.0T: O2 Sensor Heater Circuit Causes and Fixes
On a 2009-2017 Audi Q5 2.0T, code P1101 almost always indicates a failed upstream oxygen sensor (Bank 1, Sensor 1). The internal heater element burns out, requiring sensor replacement. Do not confuse this with a MAF sensor code, which is the definition for other brands. Expect to pay $100-$200 for an OEM-quality sensor (like Bosch) and an hour of labor.
- P1101 on an Audi Q5 2.0T is an O2 sensor code, NOT a Mass Airflow (MAF) sensor code.
- The most likely cause is a failed heater element inside the upstream oxygen sensor (Bank 1, Sensor 1).
- Before replacing the sensor, always check the corresponding fuse for the O2 heater circuit.
- Use a quality OEM or equivalent sensor (e.g., Bosch) for the replacement to ensure longevity and proper function.
- This repair is DIY-friendly with the correct tool (a 22mm offset O2 sensor socket).
What's Unique About the 2009-2017 Audi Q5
This code is a classic example of a manufacturer-specific definition. While on many other brands like GM and Ford, P1101 points to a Mass Airflow (MAF) sensor or general intake airflow issue, for Audi and the wider VAG family, it specifically targets the Bank 1 Sensor 1 oxygen sensor heater circuit. Misdiagnosing this as a MAF problem on an Audi Q5 will lead to replacing the wrong parts. The code's reference to "Air Leak" can be confusing, but it's secondary; the primary fault is almost always an electrical issue within the O2 sensor's heater itself.
Symptoms You May Notice
- Check Engine Light is on
- Decreased fuel economy
- Rough or unstable idle, especially when cold
- Hesitation during acceleration
- Failing a vehicle emissions test
- Slightly rich exhaust smell
- Replacing the Mass Airflow (MAF) sensor. This is the correct diagnosis for P1101 on other manufacturers like GM or Ford, but it is incorrect for an Audi.
- Replacing the downstream (post-catalyst) oxygen sensor. The code specifically points to Bank 1, Sensor 1, which is the upstream (pre-catalyst) sensor.
Most Likely Causes
- Failed Upstream Oxygen Sensor (Bank 1, Sensor 1) 🔴 High Probability The internal heater element within the oxygen sensor is a very common failure point due to constant, extreme heat cycles and age. It is considered a wear-and-tear item that eventually burns out.
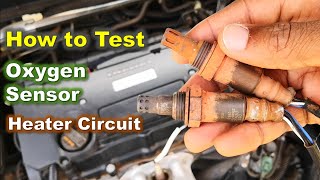
How to confirm: Disconnect the sensor and use a multimeter to measure the resistance across the two heater circuit pins (often the two white wires on the sensor pigtail). An open circuit (infinite resistance or 'OL') or a dead short (near zero resistance) confirms the heater has failed. 🎬 Watch: How to diagnose a broken O2 sensor heater element. A healthy sensor should have a low resistance, typically between 3-15 Ohms when cold.
Typical fix: Replace the Bank 1, Sensor 1 oxygen sensor. This sensor is located on the exhaust manifold or turbocharger outlet, before the catalytic converter.
Est. part cost: $100-$250 - Blown Fuse for O2 Sensor Heater Circuit 🟡 Medium Probability A short circuit in the sensor's wiring or the sensor itself can cause the corresponding fuse to blow as a protective measure. This is less common than the sensor failing outright but is a critical check before replacing parts.
How to confirm: Locate the fuse boxes in the passenger compartment (left and right side of the dashboard) and the luggage compartment. Consult the owner's manual or a fuse diagram for your specific model year to identify and visually inspect the fuse for the oxygen sensor heater. On many models, this is a 15A fuse in the engine bay fuse box.
Typical fix: Replace the blown fuse. If the new fuse blows immediately, it confirms a persistent short circuit in the wiring or the sensor that must be diagnosed and repaired.
Est. part cost: $1-$5 - Damaged Wiring or Connector ⚪ Low Probability The wiring harness for the O2 sensor is routed close to hot exhaust components and the engine block. Over time, the protective loom can degrade, allowing wires to chafe, melt, or corrode, leading to a short to ground or an open circuit.
How to confirm: Visually inspect the entire wiring harness leading from the upstream O2 sensor back towards the main engine harness. Look for any signs of melting, frayed wires, or corrosion on the connector pins. Pay close attention to where the harness might rub against heat shields or the engine itself.
Typical fix: Repair the damaged section of the wire or replace the connector pigtail. Ensure the repaired harness is properly secured with new clips or zip ties away from heat sources.
Est. part cost: $15-$50
Rare But Worth Checking
- Faulty Engine Control Module (ECM): This is extremely rare. The ECM's internal driver for the O2 sensor heater circuit can fail. This should only be considered after all other possibilities (sensor, fuse, and wiring) have been definitively ruled out by a professional technician.
Diagnosis Steps
- Scan for Codes: Confirm P1101 is present and note any other codes. Codes like P0135 or P1115 strongly corroborate the O2 sensor heater fault.
- Check the Fuse: Before buying parts, locate and inspect the fuse for the oxygen sensor heater circuit. Fuse panels are on the driver's side and passenger's side of the dash, and sometimes in the engine bay or rear cargo area. Replace if blown and re-test.
- Inspect Wiring: Carefully inspect the wiring harness leading to the upstream O2 sensor. Look for any signs of melting, chafing against the engine block, or corrosion in the connector.
- Test the Sensor's Heater Circuit: Disconnect the O2 sensor. Using a multimeter set to Ohms (Ω), measure the resistance between the two pins for the heater circuit (usually same-colored wires, often white). A reading of 3-15 Ohms is typical for a good sensor. An infinite reading (OL) means the circuit is open, and a reading near zero means it's shorted. In either failure case, the sensor is bad and needs replacement.
- Verify Power to the Sensor: With the sensor unplugged and the ignition key in the 'On' position (engine off), use a multimeter to check for 12V power at the corresponding heater circuit pin on the vehicle's harness connector. If there is no power and the fuse is good, a wiring issue between the fuse box and the connector 🎬 Watch: A simple guide to testing the O2 heater circuit. is likely.
- Replace the Sensor: If the sensor's heater circuit is confirmed to be faulty, replace the Bank 1, Sensor 1 oxygen sensor. It is recommended to use a 22mm offset oxygen sensor socket. Applying penetrating oil to the sensor threads 🎬 See this easy DIY walkthrough for replacing the upstream sensor. beforehand can make removal much easier.
Parts You'll Likely Need
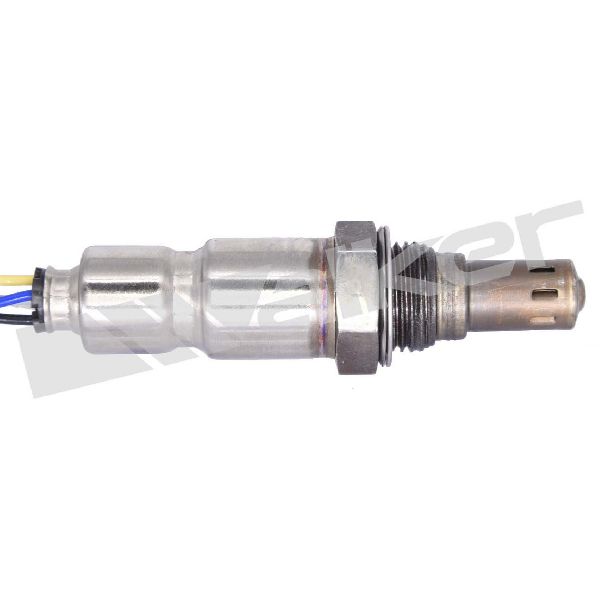
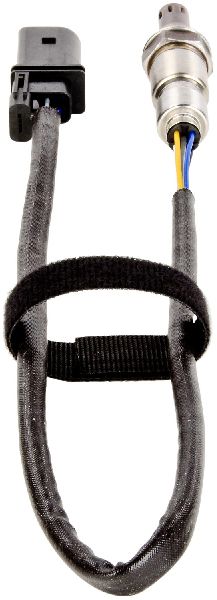
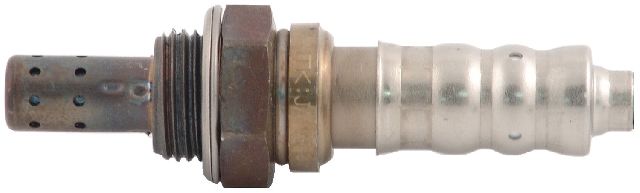
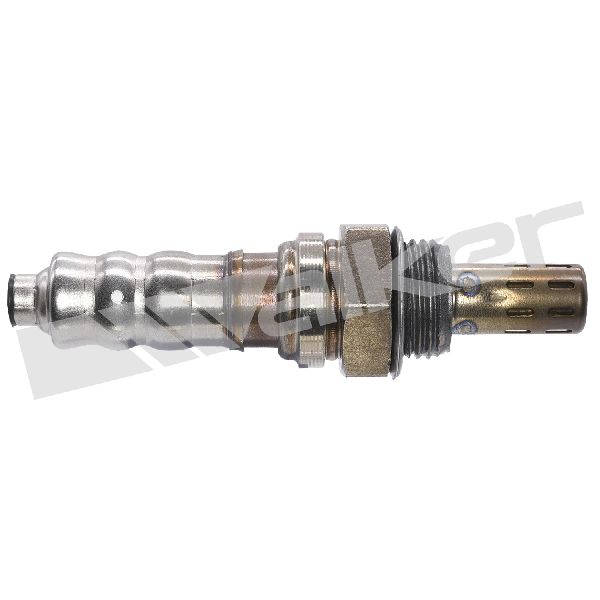
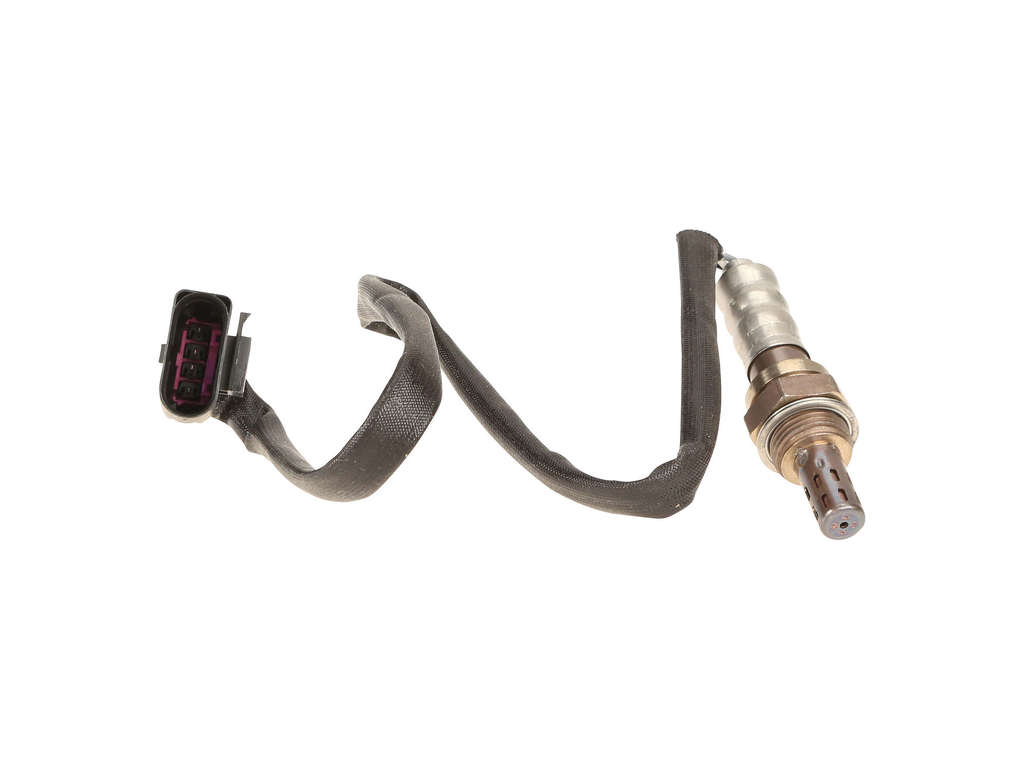
- Upstream Oxygen Sensor (Bank 1, Sensor 1)
(OEM #06J906262AA)— This is the primary component identified by the P1101 code on this vehicle. The internal heater element fails, which is the most common cause.
Trusted brands: Bosch (OEM supplier, P/N: 17351), NTK, Denso (P/N: 234-5019)
OEM price range: $180-$250
Aftermarket price range: $100-$180
Related Codes That Often Appear With This One
- P0135 — This code is for 'O2 Sensor Heater Circuit Malfunction (Bank 1 Sensor 1)'. It is a more generic SAE code that points to the exact same failure as the manufacturer-specific P1101 on an Audi.
- P1115 — This Audi-specific code for 'O2 Sensor Heater Circ.,Bank1-Sensor1 Short to Ground' is a more precise description of the electrical fault that often triggers the P1101 code.
- P0030 — Another generic code for 'HO2S Heater Control Circuit (Bank 1 Sensor 1)', which again points directly to the same failed heater element.
Platform-Specific Known Issues
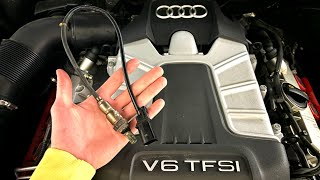
- Sensor Location and Access: On the 2.0T engine in the Q5, the upstream O2 sensor (Bank 1, Sensor 1) is located on the top of the turbocharger housing, just after the exhaust manifold. Access is from the top of the engine bay. While not overly difficult, removing the engine cover and potentially a heat shield is necessary. The sensor can be very tight, so a proper 22mm (7/8") oxygen sensor socket and a breaker bar are highly recommended.
Mechanic-Grade Diagnostic Values
- Upstream O2 Sensor (B1S1) Heater Circuit Resistance — expected: 3 to 15 Ohms (when measured cold at the sensor connector pins). Failure: An open circuit (OL or infinite resistance) or a short circuit (near 0 Ohms) indicates a failed heater element.
- Engine Ground Voltage Drop — expected: Less than 0.1 Volts (100mV). Failure: A reading greater than 0.1V when measuring between the engine block and the negative battery terminal indicates high resistance in a ground strap, which can cause sensor signal issues.
- O2 Sensor Heater Power Supply — expected: ~12V (Battery Voltage). Failure: 0V at the harness-side connector pin for the heater circuit (with key on, engine off) indicates a problem upstream, such as a blown fuse or wiring fault.
Scan Tool Commands That Help
- VCDS (VAG-COM) or ODIS: Measuring Value Blocks (MVB) / Advanced Measuring Values — Use this to observe live data for the O2 sensor heater. In VCDS, go to Engine, then Measuring Blocks. Check groups 030-036 for O2 sensor data, including heater status ('B1-S1 Htg. On' or similar). For newer models using UDS protocol, you must use 'Advanced Measuring Values' instead.
- VCDS (VAG-COM) or ODIS: Basic Settings - O2 Sensor Heater Test — After navigating to Engine and Basic Settings, a drop-down menu may offer a specific test to actively run the O2 sensor heater circuit. This can confirm if the ECU is capable of commanding the heater on and if the circuit responds.
Wiring & Ground Locations
- B1S1 O2 Sensor Connector — On the 2.0T engine, the connector for the upstream O2 sensor is a 6-pin, D-shaped black connector, typically clipped to a bracket on or near the valve cover for easy access from the top of the engine bay.. This is the primary test point for checking resistance on the sensor side and for checking power/ground on the harness side.
- Ground Point 12 — In the engine compartment on the left side (driver's side for LHD).. This is a primary engine bay ground point. A loose or corroded connection here can cause various electrical issues, including erratic sensor readings.
- Ground Point 615 — On the left (driver's side LHD) suspension strut tower in the engine bay.. Another critical chassis ground point in the engine bay. Verifying this connection is tight and clean is a good practice when diagnosing any electrical fault.
OEM Part Supersession History
06F906262R, 06F906262AC, 06J906262AC, 6F906262L, 6F906262R→06J906262AA— Part has been revised and updated by the manufacturer over time for improved reliability or to consolidate part numbers.
Heads up: The latest part number, 06J906262AA, is the correct and backward-compatible replacement for the earlier versions on this platform.
Model Year Variations Within This Range
- 2009-2012 (Pre-facelift) vs. 2013-2017 (Facelift): The Audi Q5 received a facelift for the 2013 model year which included cosmetic updates and some powertrain adjustments. However, for the 2.0T EA888 engine, the upstream oxygen sensor part number, its location, and the diagnosis for code P1101 remained consistent throughout the entire 2009-2017 generation.
Diagnostic Flowchart
Other Known Issues on This Vehicle
Issues unrelated to this code that are worth knowing about as an owner of this generation:
- Timing Chain Tensioner Failure 🔴 High — Common on pre-2013 models with the original tensioner design. Failure can occur without warning, often between 60,000 and 100,000 miles, leading to catastrophic engine damage. (Ref: Multiple class-action lawsuits and settlements have addressed this. A key symptom is a rattling noise on cold starts.)
- Excessive Oil Consumption 🔴 High — Widespread on 2009-2017 models due to faulty piston ring design. Many owners report consuming a quart of oil every 500-1,200 miles. Onset can be as early as 40,000-60,000 miles. (Ref: Subject of a major class-action lawsuit (Gonzalez v. Volkswagen Group of America) which led to a settlement extending warranties and offering reimbursement for past repairs for some owners.)
- Water Pump & Thermostat Housing Leaks 🟠 Medium — Very common failure point. The plastic housing becomes brittle from heat cycles and cracks, causing coolant leaks. Failure often occurs between 50,000 and 90,000 miles. (Ref: No recall, but it is a widely documented issue. Upgraded all-aluminum water pump housings are available in the aftermarket to provide a more durable solution.)
- PCV Valve Failure 🟠 Medium → Shop PCV Valve — The diaphragm inside the PCV (oil separator) assembly is prone to tearing, typically after 60,000 miles. This creates a significant vacuum leak. (Ref: No recall, but multiple revisions of the part exist. Symptoms include a rough idle, hissing noise from the engine, lean fault codes, and increased oil consumption.)
Used vs. New Parts: Buying Guide for This Vehicle
When a used part is the smart pick: For this repair, a used part is NEVER recommended. Oxygen sensors are wear-and-tear items with a finite lifespan. Installing a used sensor is a significant gamble, as its remaining life is unknown and it could fail shortly after installation, forcing you to do the job twice.
What to inspect on the donor part:
- Not applicable. Do not purchase a used oxygen sensor for this repair.
OEM-only on this vehicle (don't cheap out):
- While not strictly 'OEM-only', using a sensor from the original equipment manufacturer (OEM) or a known high-quality OEM supplier is strongly recommended for reliable performance and longevity.
Aftermarket brands forum-validated for this vehicle:
- Bosch (often the OEM supplier for this part)
- NTK
- Denso
Brands owners have reported issues with on this vehicle:
- Unnamed, no-brand, or generic 'white-box' sensors from online marketplaces. These often use lower-quality materials, fail prematurely, or have incorrect heater resistance values, causing the code to return immediately.
Real Owner Stories
Aggregated from forums and TSBs cited above. Mileages and costs reflect what owners reported in those sources.
2011 Audi Q5 2.0T
Symptoms: Check engine light with P1101 code.
What fixed it: Replacing the front (upstream) O2 sensor with a Bosch 17351.
Source hint: audiworld.com - Thread titled 'P1101 Code - O2 Sensor?'
Audi Q5 (B8 Platform) 2.0T
Symptoms: P1101 fault code present.
What fixed it: Replacing the pre-cat O2 sensor.
Source hint: audizine.com - Multiple threads for the B8 platform (A4/A5/Q5)
Related OBD-II Codes
Frequently Asked Questions
Is there a specific replacement part recommended for the P1101 code on a 2011 Audi Q5 2.0T?
Where is the Bank 1, Sensor 1 oxygen sensor located on my Audi Q5 2.0T?
Could a simple fuse cause the P1101 code on my Q5?
What tools do I need to change the O2 sensor on my EA888 engine to fix P1101?
Does the P1101 code on an Audi Q5 indicate a Mass Air Flow (MAF) sensor issue?
Are there any major engine issues I should watch for while diagnosing my 2009-2017 Q5?
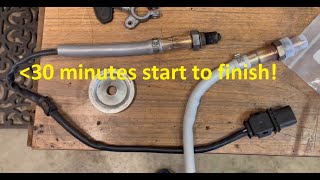
Helpful Videos

We Have This Part in Stock


The information in this article is provided for general reference and educational purposes only. Vehicle specifications, procedures, and part compatibility can vary by production date, trim level, and region. Always consult your vehicle's factory service manual and verify part numbers before purchasing or performing repairs. Safety-critical components such as airbags, seat belts, and braking systems should be installed by a qualified professional.
- Audi Q5:
- 🧭 Diagnostic Flowchart
- 🎬 Helpful Videos
- 🛍️ Shop This Part
- What's Unique About the 2009-2017 Audi Q5
- Symptoms You May Notice
- Most Likely Causes
- Rare But Worth Checking
- Diagnosis Steps
- Parts You'll Likely Need
- Related Codes That Often Appear With This One
- Platform-Specific Known Issues
- Mechanic-Grade Diagnostic Values
- Scan Tool Commands That Help
- Wiring & Ground Locations
- OEM Part Supersession History
- Model Year Variations Within This Range
- Other Known Issues on This Vehicle
- Used vs. New Parts: Buying Guide for This Vehicle
- Real Owner Stories
- 2011 Audi Q5 2.0T
- Audi Q5 (B8 Platform) 2.0T
- Related OBD-II Codes
- Frequently Asked Questions
- 🎟️ Get 5% Off