
P1442 on 1999-2010 Honda Odyssey: EVAP Vacuum Switch Malfunction Causes and Fixes
On a 1999-2010 Honda Odyssey, code P1442 is almost always caused by a corroded EVAP Bypass Solenoid Valve located under the rear of the vehicle. It's a common, well-documented failure, and the replacement part typically costs between $40 and $80.
- P1442 on a 1999-2010 Odyssey is an electrical fault code, not a leak code. Do not replace the gas cap first.
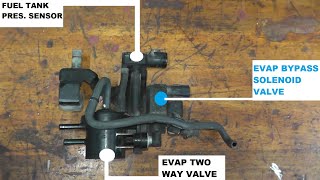
- The most likely cause is a corroded EVAP Bypass Solenoid Valve located on the charcoal canister under the rear of the van.
- The fix is usually straightforward and involves replacing this solenoid, a job that is accessible to most DIY mechanics.
- Be prepared for the mounting screws to be seized with rust; have penetrating oil, locking pliers, and replacement screws ready.
- This issue is especially common in areas where road salt is used in the winter.
What's Unique About the 1999-2010 Honda Odyssey
The Honda Odyssey from this era, like many other Hondas, has a specific design vulnerability that leads to this code. Honda placed the EVAP canister and its associated solenoids under the rear of the vehicle, directly exposing them to the elements. This design choice makes the EVAP Bypass Solenoid Valve highly susceptible to water intrusion and corrosion from road salt, a problem so common that Honda issued a Technical Service Bulletin (TSB 03-001/16) about it for the 1999-2003 models. While the TSB targets code P1457, the failure mechanism—a corroded, physically broken solenoid body—is identical for P1442.
Generation note: This range covers two Honda Odyssey generations: the second generation (1999-2004) and the third generation (2005-2010). The primary cause, a corroded under-vehicle EVAP solenoid, is common to both generations due to the similar component location. Honda TSB 03-001/16 officially covers the 1999-2003 models, but owner forums and mechanic reports confirm the same issue persists on later models, including the third generation.
🎬 See this 2006-2007 Odyssey EVAP valve replacement walkthroughSymptoms You May Notice
- Check Engine Light (Malfunction Indicator Lamp) is on.
- Difficulty starting the engine immediately after filling the gas tank.
- Faint fuel smell from the rear of the vehicle.
- Guaranteed failure of an emissions/smog test.
- A loose or faulty gas cap. While a bad gas cap causes other EVAP codes (like P1456), P1442 on a Honda specifically points to an electrical component failure, not a general system leak. Replacing the gas cap for this code is a waste of money.
Most Likely Causes
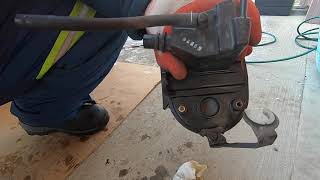
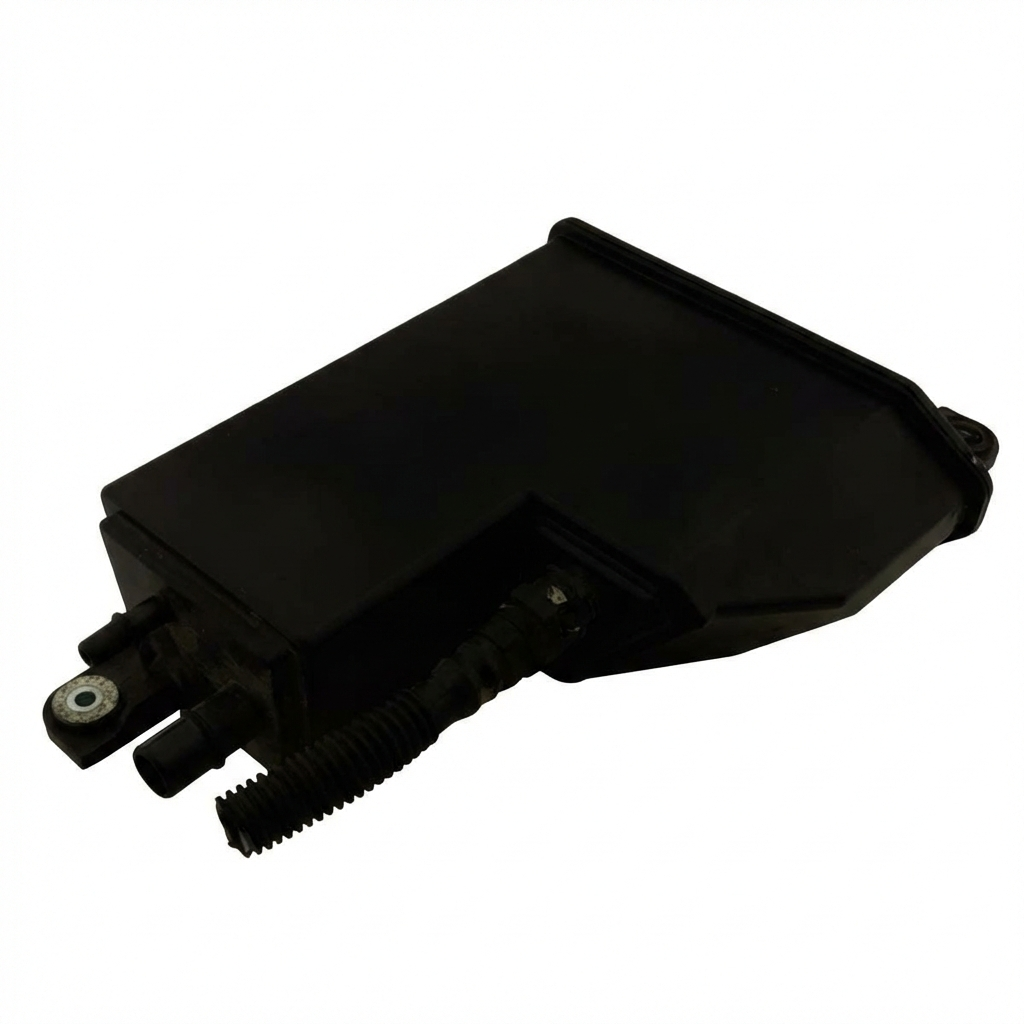
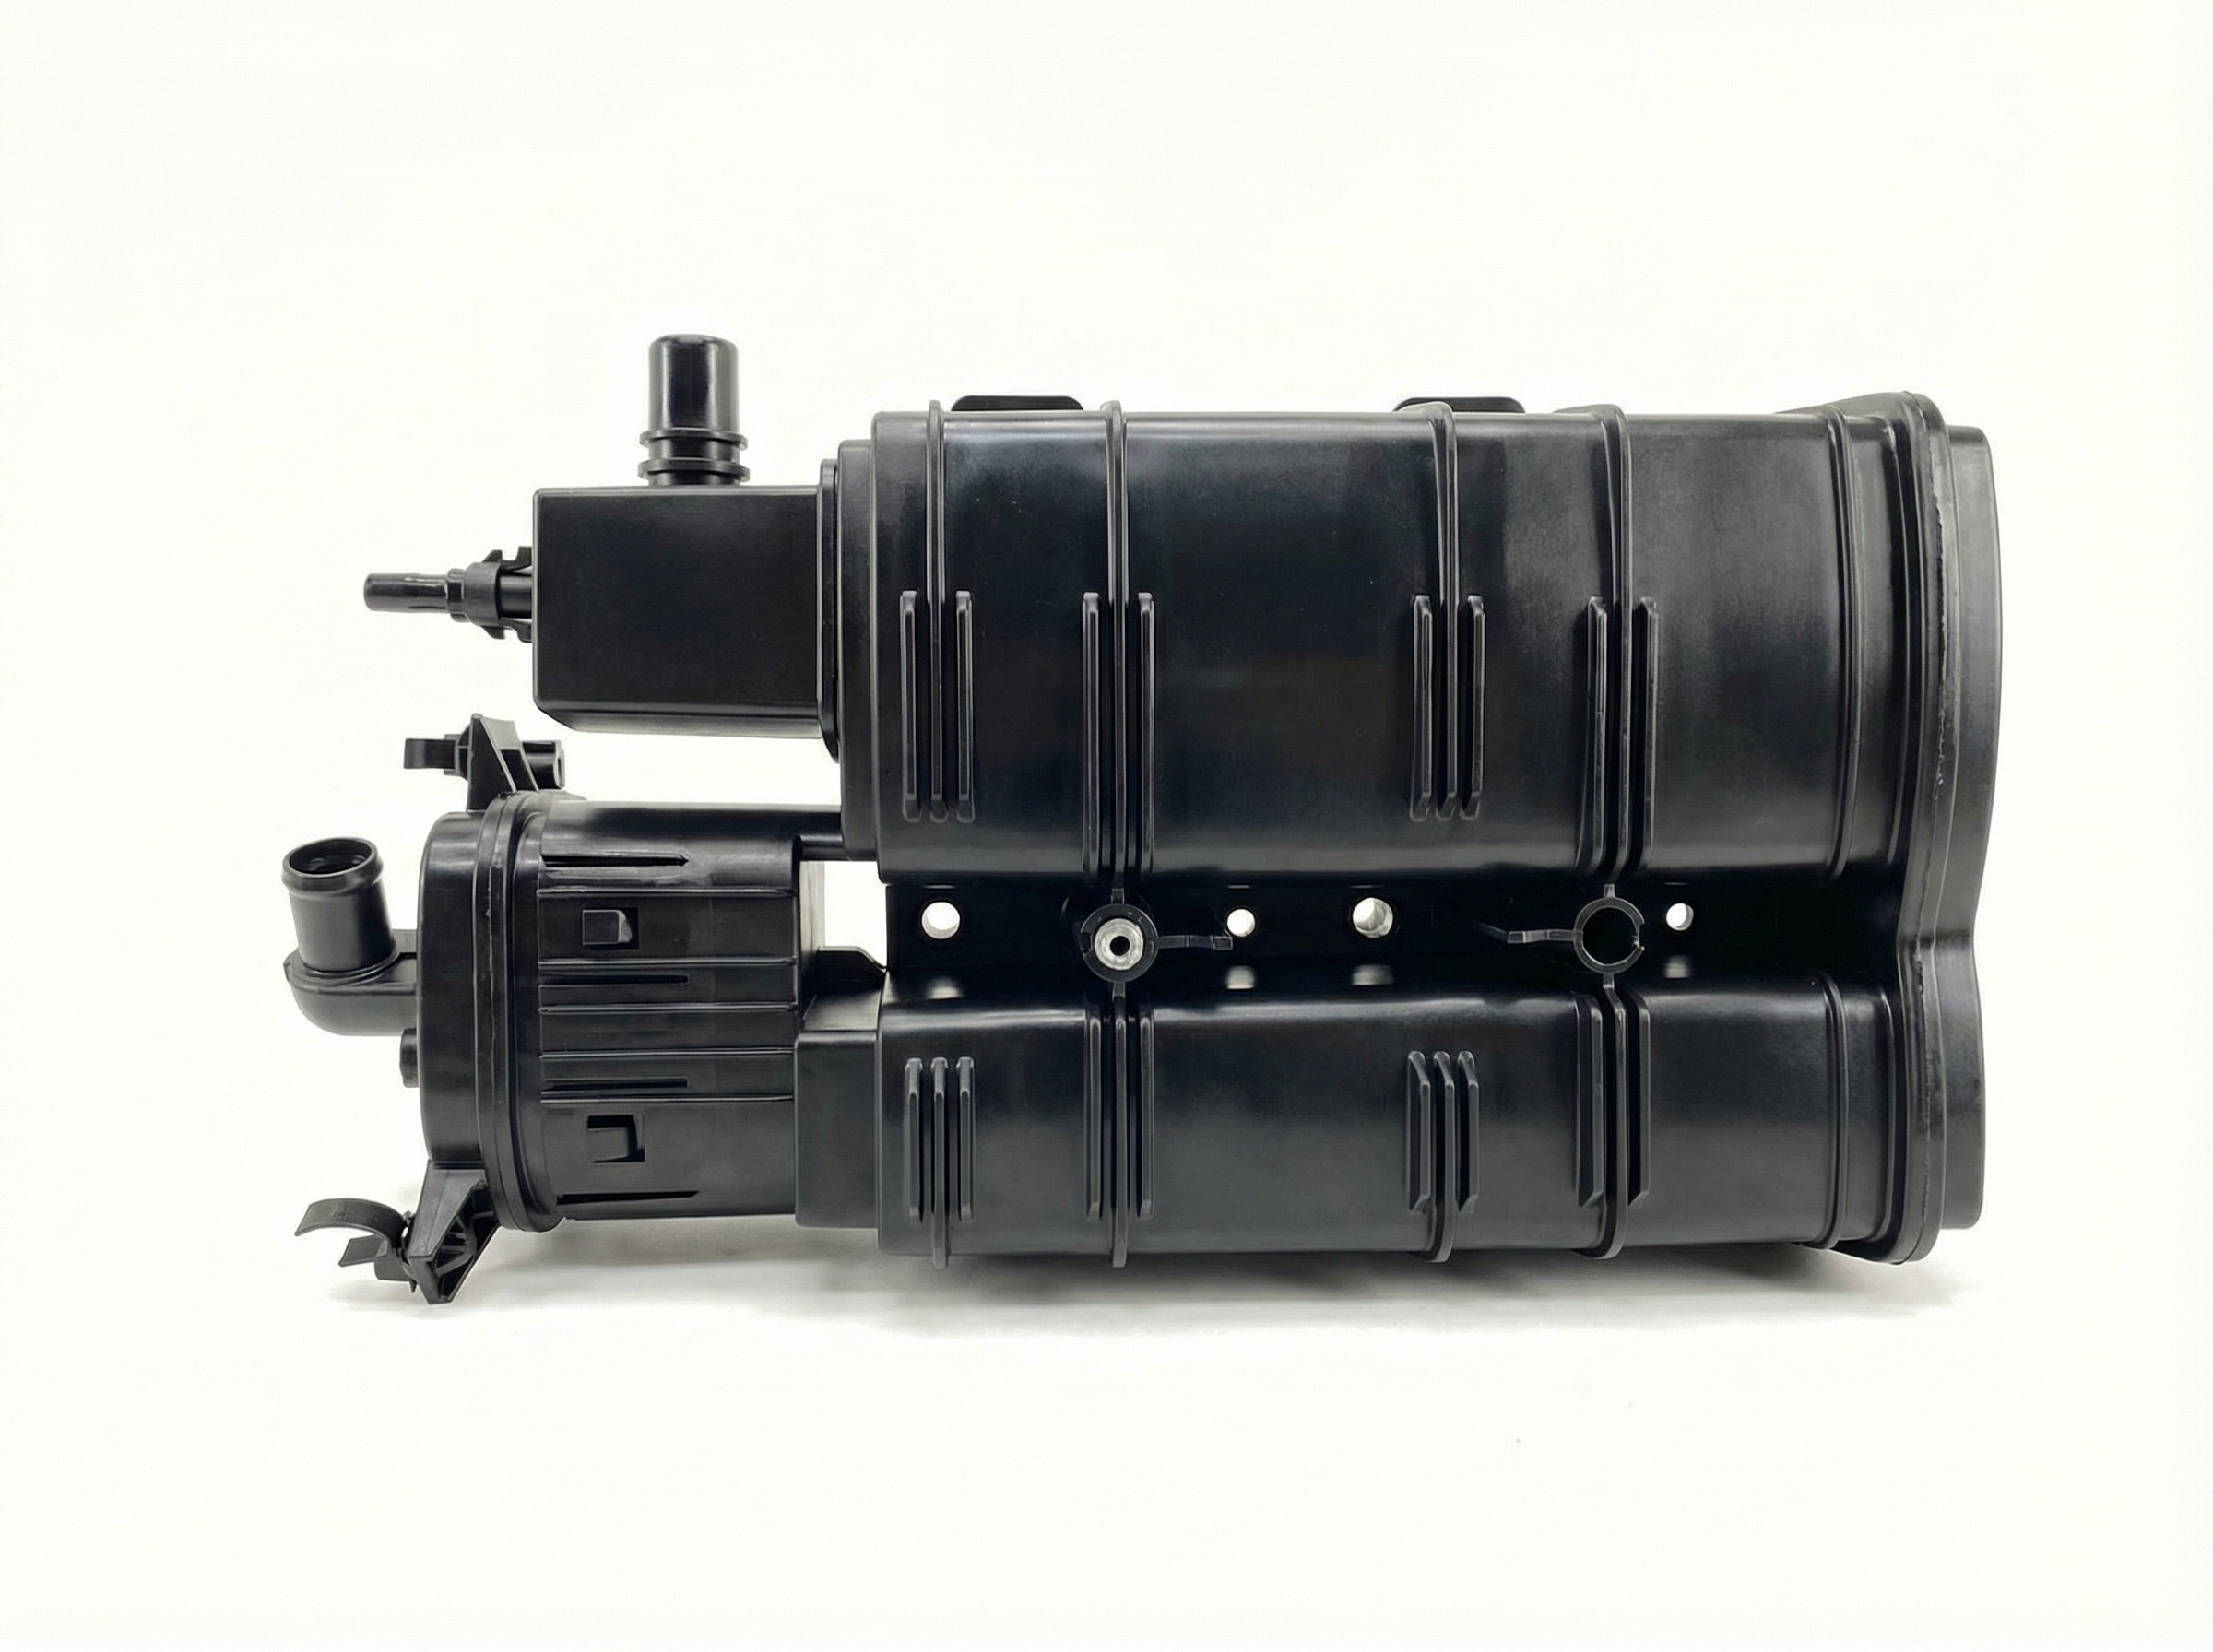
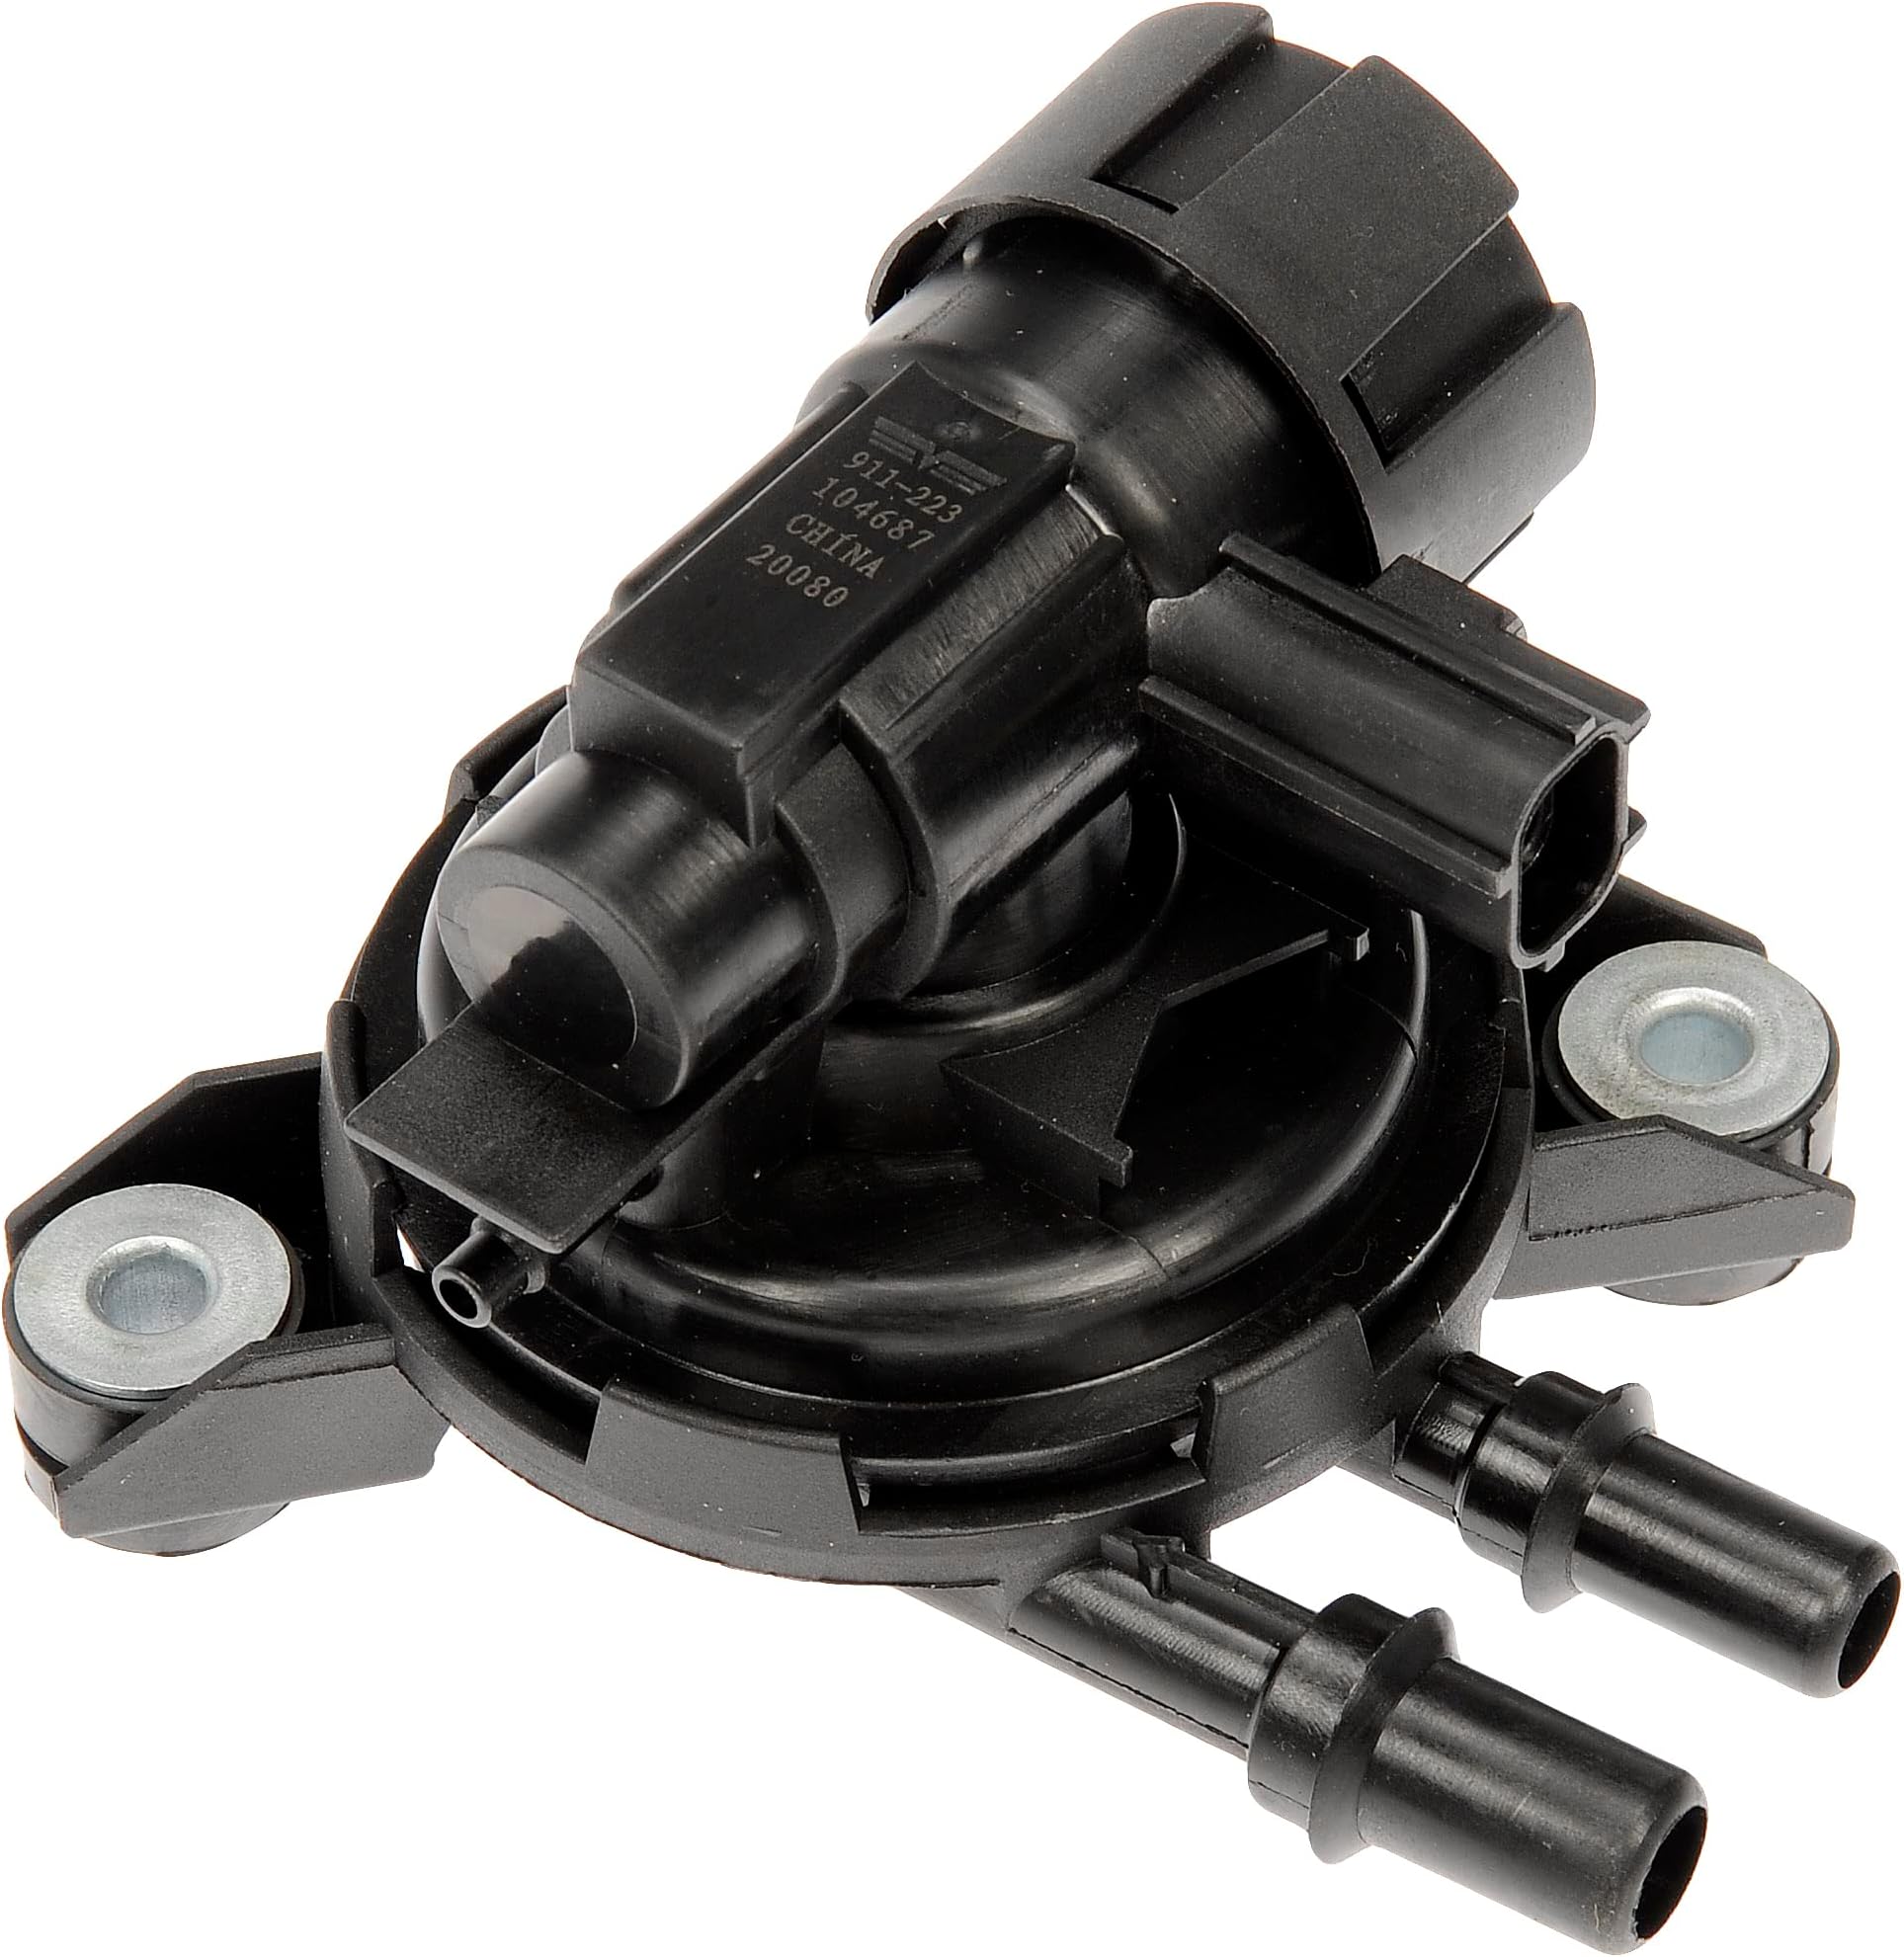
- Failed EVAP Bypass Solenoid Valve 🔴 High Probability → Shop Vapor Canister The valve is mounted under the vehicle, where it is exposed to road salt and moisture. This leads to severe corrosion of the metal valve body, which eventually cracks the plastic housing, breaking the internal seal and causing electrical failure.
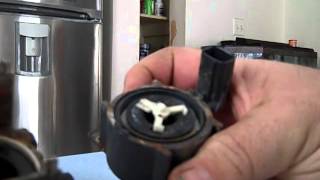
How to confirm: Locate the valve on the EVAP canister under the rear of the van, driver's side. Inspect for heavy rust or a visible crack in the solenoid body. Test the two pins on the solenoid with a multimeter for resistance; an open circuit (infinite resistance) confirms internal failure. 🎬 Watch: How to test and replace the bypass solenoid A good solenoid should read between 20-35 Ohms.
Typical fix: Replace the EVAP Bypass Solenoid Valve. The two mounting screws are often extremely corroded and may require penetrating oil, heat, or locking pliers to remove. It is highly recommended to purchase new screws with the replacement valve.
Est. part cost: $40-$80 - Corroded Wiring or Connector 🟡 Medium Probability The same road salt and moisture that kills the solenoid also damages the electrical connector and wiring harness leading to it. The plastic can become brittle and the pins can fill with green or white corrosion.
How to confirm: Visually inspect the connector for green or white corrosion, or broken/frayed wires. With the ignition on, use a multimeter to check for battery voltage at the harness connector to ensure it's receiving power.
Typical fix: Clean the connector terminals with a small brush and electrical contact cleaner. If corrosion is severe, replace the connector pigtail and repair the wiring.
Est. part cost: $15-$30 - Clogged EVAP System Hoses ⚪ Low Probability Insects (like spiders) or debris can sometimes build nests or clog the vent hoses attached to the EVAP canister assembly, leading to pressure or vacuum issues.
How to confirm: Remove the hoses from the canister and valves and attempt to blow through them. If blocked, they need to be cleared or replaced.
Typical fix: Clear the blockage with compressed air or a flexible wire. Replace the hose if it is cracked or brittle.
Est. part cost: $10-$25
Rare But Worth Checking
- Faulty Powertrain Control Module (PCM): Extremely rare, but Honda TSB 03-001/16 notes that a severe internal short in the corroded solenoid can damage the PCM's driver circuit, requiring replacement of both the solenoid and the PCM. This should only be considered after all other causes are ruled out and the wiring has been verified as good.
Diagnosis Steps
- Read the code(s) with an OBD-II scanner to confirm P1442 is present. Note if P1457 is also present, as this strongly points to the bypass solenoid.
- Safely raise and support the rear of the vehicle. Locate the EVAP canister assembly, typically near the driver's side rear wheel.
- Visually inspect the EVAP Bypass Solenoid Valve and its electrical connector for signs of heavy rust, corrosion, or physical damage. The valve body may be cracked from the corrosion.
- Disconnect the electrical connector. Inspect the pins on both the solenoid and the connector for corrosion.
- Using a multimeter set to Ohms (Ω), measure the resistance between the two pins on the solenoid itself. A reading of 20-35 Ohms is typical for a good solenoid. An open loop (OL) or infinite resistance reading means the solenoid has failed internally and must be replaced.
- If the solenoid tests good, check the vehicle's wiring. Turn the ignition to the ON position. Use a multimeter set to DC Volts to check for power at the harness connector. You should see battery voltage.
- If components and wiring appear functional, remove and inspect the vent hoses for blockages from debris or insects.
Parts You'll Likely Need
- EVAP Bypass Solenoid Valve
(OEM #17310-S84-A02 (superseded by 17310-S0X-A02))— This is the most common failure point for code P1442 on this vehicle due to corrosion from its under-vehicle location. The original part is often superseded by an updated number.
Trusted brands: Honda (Genuine), Dorman (911-762), Standard Motor Products
OEM price range: $70-$100
Aftermarket price range: $40-$80 - Solenoid Mounting Screws
(OEM #938930501008)— The original screws holding the solenoid to the canister are almost always seized with rust and are often destroyed during removal. It is highly advisable to have replacements on hand.
Trusted brands: Honda (Genuine)
OEM price range: $5-$10
Aftermarket price range: $2-$5
Related Codes That Often Appear With This One
- P1457 — This code for 'EVAP Control System Leak Detected (Canister System)' is very common alongside P1442 because it is often triggered by the exact same part failure: a corroded EVAP Bypass Solenoid Valve. The corrosion causes both an electrical fault (P1442) and a physical leak (P1457).
Technical Service Bulletins (TSBs) & Recalls
- 03-001: MIL Comes On With DTC P1457: EVAP Bypass Solenoid Valve Failure. This TSB details the common failure of the bypass solenoid due to corrosion on 1999-2003 Odysseys, which is the same root cause for P1442. 🎬 Watch: How to fix a Honda P1457 canister leak It confirms the part as the source of the problem.
Platform-Specific Known Issues
- The placement of the EVAP canister assembly under the vehicle makes it a common point of failure due to corrosion, particularly in regions that use road salt during winter months.
- The mounting screws for the bypass solenoid are notorious for seizing, requiring penetrating oil and sometimes destructive removal with locking pliers or a hammer and chisel.
Mechanic-Grade Diagnostic Values
- EVAP Bypass Solenoid Valve Coil Resistance — expected: 20 - 35 Ohms (Ω). Failure: An open circuit (OL or infinite resistance) or a reading far outside the expected range indicates an internal failure of the solenoid coil.
- Voltage at EVAP Bypass Solenoid Connector — expected: Approximately 12V (Battery Voltage) on one pin with Key On, Engine Off.. Failure: Absence of voltage points to a break in the wiring harness or a blown fuse. No voltage drop when the PCM commands the valve on indicates a problem with the PCM driver or ground circuit.
Hidden / Shadow Codes Worth Checking
- Temporary DTCs: Honda's diagnostic system (HDS) can show 'Temporary DTCs' which may be present before a code fully sets and illuminates the Check Engine Light. Checking for these can sometimes provide an earlier diagnosis. (see via Honda Diagnostic System (HDS) or other advanced, dealer-level scan tools.)
Scan Tool Commands That Help
- Honda HDS (or equivalent bidirectional scanner): EVAP FUNCTION TEST (in INSPECTION MENU) or individual component actuation test for the EVAP Bypass Solenoid Valve (sometimes called Canister Vent Shut Valve). — This command allows the technician to manually cycle the solenoid on and off. A technician should listen for an audible 'click' from the valve. If the valve is commanded on/off but does not click, and power is verified at the connector, the valve is mechanically seized or electrically failed.
Wiring & Ground Locations
- G603 — Located in the left rear of the vehicle.. This is a primary body ground point in the same area as the EVAP canister assembly. Corrosion or a loose connection at this ground could cause intermittent electrical issues for the entire EVAP system, including the bypass solenoid.
- G401 — Located behind the left kick panel, inside the cabin.. This is a major grounding point for dash components and harnesses that run to the rear of the vehicle. While less likely to be the cause than G603, a problem here can cause a wide range of difficult-to-diagnose electrical faults.
Real Owner Repair Stories
- YouTube video by 'Incin3ration' (2002 Acura TL-S (Uses a nearly identical EVAP system and parts)) — Check Engine Light with code P1457, which is commonly caused by the same part failure as P1442.
❌ Tried (didn't work) Checking hoses for cracks or disconnection., Checking the gas cap tightness and seal.
✅ What actually fixed it The user replaced the Canister Vent Shut Valve (Honda P/N: 17310-S0X-A02) and the two heavily corroded mounting screws (Honda P/N: 93893-05010-08). The repair was successful and the Check Engine Light did not return.
"I Checked Everything" — The Actual Cause
- Because P1442 is an electrical circuit malfunction code, it is common for the EVAP system to pass a smoke test. A smoke test is designed to find physical leaks in hoses or seals, which would trigger codes like P1456, P1457, or P0442. P1442 is triggered because the PCM detects an incorrect voltage from the vacuum switch or bypass solenoid circuit itself, usually due to an open or shorted coil inside the solenoid from corrosion. The system can be perfectly sealed from a pressure standpoint but still have this electrical fault, making a smoke test an inappropriate primary diagnostic step for an isolated P1442.
OEM Part Supersession History
17310-S84-A02, 17310-S84-A01, 17310-S0X-A01, 17310-S04-A01, 17310-S01-A01→17310-S0X-A02— Part consolidation and potential minor revisions over many model years.
Model Year Variations Within This Range
- 2005-2010: While the root cause of P1442 (corroded under-vehicle solenoid) remains the same across the 1999-2010 range, Honda issued Service Bulletin 19-111 noting that the service manual diagrams for 2005-2017 models were missing a non-functional component called a 'purge joint,' which acts as a sound resonator. This does not affect the diagnosis or repair of P1442.
Diagnostic Flowchart
Other Known Issues on This Vehicle
Issues unrelated to this code that are worth knowing about as an owner of this generation:
- Automatic Transmission Failure (4-speed and 5-speed) 🔴 High — Extremely common on 1999-2004 models, often failing before 100,000 miles. Less common but still present on 2005-2006 models. (Ref: Multiple TSBs and a recall (e.g., NHTSA 04V176000) were issued, including one for adding an oil jet kit to improve cooling.)
- Variable Cylinder Management (VCM) Problems 🟠 Medium — Affects 2005-2010 EX-L and Touring models. Causes excessive oil consumption, fouled spark plugs, and engine vibrations. (Ref: Honda settled a class-action lawsuit and issued a warranty extension (TSB 13-081) for some vehicles related to misfires caused by VCM.)
- Power Sliding Door Malfunction 🟠 Medium — Very common across the entire 1999-2010 range. Problems include doors not opening/closing, getting stuck, or beeping. Caused by bad rollers, motors, or broken wiring in the door harness.
- Failing Front Engine Mount 🟡 Low — Common on 1999-2005 models. The hydraulic mount fails, leading to a 'clunking' noise on acceleration/deceleration and a rough idle.
- Clogged EGR Passages 🟡 Low — Common on higher-mileage J-series V6 engines, causing rough idle, hesitation, or stalling. (Ref: Honda issued a warranty extension and TSB 05-026 for some models due to EGR port clogging.)
Used vs. New Parts: Buying Guide for This Vehicle
When a used part is the smart pick: A used part is generally NOT recommended for the EVAP Bypass Solenoid that causes P1442. The failure is due to age and corrosion, so a used part from a junkyard is highly likely to suffer the same fate or fail shortly after installation, especially if sourced from a 'salt belt' region. A used plastic EVAP canister box itself may be acceptable if it is not cracked and all hose nipples are intact.
Donor-vehicle mileage cap: roughly under 40000 miles for the part to have meaningful remaining life.
What to inspect on the donor part:
- For the solenoid, inspect the metal body for any signs of rust or bubbling paint; pristine condition is required.
- Check the plastic housing for hairline cracks, especially around the mounting points and where the metal body is inserted.
- If possible, bring a multimeter and test the resistance between the two pins. It should be within the 20-35 Ohm range.
- Ensure the electrical connector pins are clean and free of green or white corrosion.
OEM-only on this vehicle (don't cheap out):
- Gas Cap: While not the cause of P1442, it is a common cause of other EVAP codes. Owners and technicians widely recommend using a genuine Honda OEM gas cap, as aftermarket versions are known to cause sealing issues.
Aftermarket brands forum-validated for this vehicle:
- Dorman (specifically part 911-762)
- Standard Motor Products (SMP)
Real Owner Stories
Aggregated from forums and TSBs cited above. Mileages and costs reflect what owners reported in those sources.
1999-2003 Honda Odyssey
Symptoms: The Check Engine Light came on with codes P1457 and P1442. The original mounting screws for the solenoid were found to be rusted solid.
What fixed it: Replacement of the 'Canister Vent Shut Valve' (Bypass Solenoid Valve), which required using locking pliers to remove the corroded screws.
Source hint: Odyclub.com: Multiple threads on this owner's forum discuss the P1457/P1442 code combination.
2003-2008 Honda Pilot — ~100000 miles
Symptoms: EVAP system failure due to corrosion of components located in a vulnerable under-vehicle location.
What fixed it: Replacement of the EVAP system components (part 17310-S84-L31).
Source hint: Platform mate: 2003-2008 Honda Pilot
1999-2004 Honda Odyssey — ~95000 miles
Symptoms: The vehicle experienced a 'clunking' noise during acceleration and deceleration along with a rough idle.
What fixed it: Replacement of the hydraulic front engine mount.
Source hint: Known issues: Failing Front Engine Mount
Related OBD-II Codes
Frequently Asked Questions
Does TSB 03-001/16 apply to my 1999-2003 Honda Odyssey if I have an EVAP code?
Where is the EVAP Bypass Solenoid located on my Odyssey?
Why is it so difficult to remove the solenoid on this specific van?
Can I use a used solenoid from a junkyard to fix P1442?
What resistance should I look for when testing the solenoid with a multimeter?
Is there a specific part number recommended for the replacement valve?
Helpful Videos

We Have This Part in Stock

The information in this article is provided for general reference and educational purposes only. Vehicle specifications, procedures, and part compatibility can vary by production date, trim level, and region. Always consult your vehicle's factory service manual and verify part numbers before purchasing or performing repairs. Safety-critical components such as airbags, seat belts, and braking systems should be installed by a qualified professional.
- Honda Odyssey:
- 🧭 Diagnostic Flowchart
- 🎬 Helpful Videos
- 🛍️ Shop This Part
- What's Unique About the 1999-2010 Honda Odyssey
- Symptoms You May Notice
- Most Likely Causes
- Rare But Worth Checking
- Diagnosis Steps
- Parts You'll Likely Need
- Related Codes That Often Appear With This One
- Technical Service Bulletins (TSBs) & Recalls
- Platform-Specific Known Issues
- Mechanic-Grade Diagnostic Values
- Hidden / Shadow Codes Worth Checking
- Scan Tool Commands That Help
- Wiring & Ground Locations
- Real Owner Repair Stories
- "I Checked Everything" — The Actual Cause
- OEM Part Supersession History
- Model Year Variations Within This Range
- Other Known Issues on This Vehicle
- Used vs. New Parts: Buying Guide for This Vehicle
- Real Owner Stories
- 1999-2003 Honda Odyssey
- 2003-2008 Honda Pilot — ~100000 miles
- 1999-2004 Honda Odyssey — ~95000 miles
- Related OBD-II Codes
- Frequently Asked Questions
- 🎟️ Get 5% Off