
P1775 on 2003-2012 Jeep Liberty: Solenoid Switch Valve Causes and Fixes
On a Jeep Liberty with a 42RLE transmission, P1775 means the transmission is stuck in 'limp mode' (usually 2nd gear) and won't shift into 1st. The most common cause is a worn-out valve body, not just the solenoid pack. Repair requires dropping the transmission pan and servicing or replacing the valve body, often with a remanufactured unit or a specialized repair kit like one from Sonnax.
- P1775 on a Jeep Liberty means the transmission is in 'limp mode' because a valve required for 1st gear is stuck.
- The most likely cause is a mechanically worn valve body, not just a bad electronic solenoid. Replacing only the solenoid often fails to fix the problem.
- Driving with this code can cause transmission overheating and lead to a full rebuild. Address it promptly.
- This is not a beginner-friendly DIY repair. It requires dropping the transmission valve body and a special 'relearn' procedure with a scan tool.
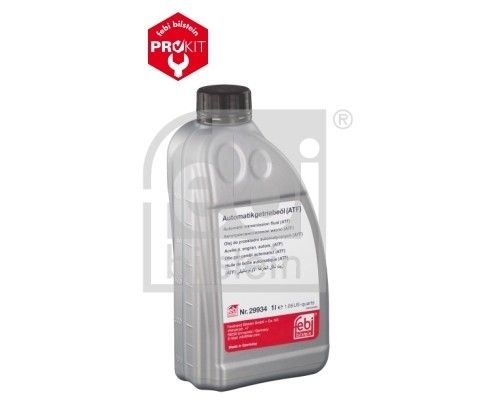
- Always use Mopar ATF+4 fluid when servicing this transmission.
What's Unique About the 2003-2012 Jeep Liberty
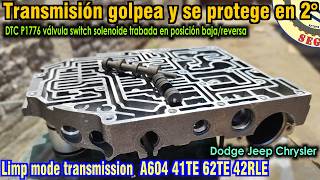
The 42RLE transmission used in the Jeep Liberty is known for this specific issue. The problem is fundamentally mechanical: the steel Solenoid Switch Valve (SSV) wears down its bore inside the softer aluminum valve body, causing it to physically stick. Because of this known wear pattern, a Chrysler technical tip specifically advises against simply replacing the electronic solenoid pack, as the root cause is the sticking valve within the valve body itself. Owners who only replace the solenoid pack often find the code returns, a common story on owner forums.
Generation note: This guide covers the entire 2003-2012 range, which includes the KJ generation (2003-2007) and the KK generation (2008-2012). Both generations used the 3.7L V6 and 42RLE automatic transmission (the 2.4L I4 was phased out in 2005), and this P1775 fault is identical across both.
Symptoms You May Notice
- Vehicle is stuck in 'limp mode' (will not shift into 1st gear, starts in 2nd)
- Very sluggish acceleration from a complete stop
- Check Engine Light is on
- Transmission 'Hot Oil' warning light may illuminate, especially under load or on hills.
- Harsh clunk or jerk when slowing to a stop.
- Companion code P1776 is often present.
- Vibration or shuddering in higher gears.
- Replacing only the solenoid pack without inspecting the valve body. Many owners and shops replace the solenoid pack as the first step, only for the P1775 code to return because the underlying mechanical issue of a worn valve body bore was not addressed.
Most Likely Causes
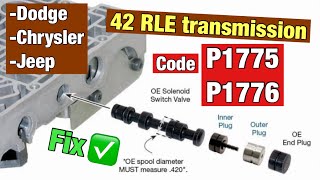
- Worn Transmission Valve Body 🔴 High Probability → Shop Transmission Valve Body The steel Solenoid Switch Valve (SSV) constantly moves within the aluminum valve body, eventually wearing the bore into an oval shape, which causes the valve to jam. This is a well-documented failure pattern for the 42RLE.
How to confirm: After removing the valve body from the transmission, the SSV can be manually checked to see if it moves freely in its bore. If it sticks or binds, the bore is worn. A transmission shop can also vacuum test the bore to check for leaks.
Typical fix: The valve body must be removed. A specialist can ream the worn bore and install an oversized valve kit, such as the Sonnax 92835-31K or 92835-32K (depending on the original valve size). The more common professional fix is to replace the entire valve body with a quality remanufactured unit.
Est. part cost: $250-$500 for a remanufactured valve body, or $60-$70 for a Sonnax repair kit (plus specialized tools). - Faulty Transmission Solenoid/Pressure Switch Assembly 🟡 Medium Probability → Shop Transmission Assembly This electronic pack, often called the 'solenoid pack', is a common failure item on the 42RLE. However, for P1775, it is often replaced mistakenly when the valve body is the true cause. A failure here can cause related codes but is not the primary cause of a 'latched' valve.
How to confirm: The solenoids can be tested for correct resistance with a multimeter once the valve body is removed. However, an electrical test won't reveal an internal hydraulic leak or intermittent failure that occurs when hot.
Typical fix: Replace the solenoid/pressure switch assembly. This part is bolted to the valve body, so it's typically replaced during a valve body service as preventative maintenance.
Est. part cost: $150-$300 - Low or Contaminated Transmission Fluid ⚪ Low Probability → Shop Transmission Assembly Like any automatic transmission, the 42RLE relies on clean fluid at the correct level for proper hydraulic pressure to move valves. Debris from internal wear can cause valves to stick.
How to confirm: Check the transmission fluid dipstick (engine running, in neutral). The fluid should be at the correct level, pink/red in color, and not smell burnt. Excessive metal shavings in the fluid indicate a severe internal failure.
Typical fix: Perform a transmission fluid and filter change using only Mopar ATF+4 fluid. If the fluid is heavily contaminated, this is unlikely to fix a stuck valve and points to a larger issue like a failing torque converter or clutches.
Est. part cost: $80-$150 for fluid and filter
Rare But Worth Checking
- Shift Cable Misadjustment: A dealer-level scan tool can read the 'TRS Code' from the event data. If the code was set when the shifter wasn't perfectly aligned in Drive (e.g., shows 'TR2'), it could point to a misadjusted cable rather than an internal transmission fault.
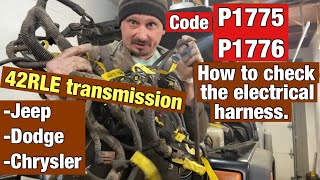
- Wiring Harness Issue: Damage or corrosion at the main transmission connector, the TCM/PCM connectors, or a bad ground can cause electrical faults. A thorough inspection of the harness from the transmission to the control module is a valid, though less common, diagnostic step.
Diagnosis Steps
- Check and confirm the transmission fluid is at the correct level and in good condition. Use only Mopar ATF+4.
- Scan for all codes. Note the presence of P1776, P0700, or P0841 as strong indicators.
- Using an advanced scan tool, check the event data for the 'TRS Code'. If it reads 'TR2', investigate the shift cable adjustment first.
- Inspect the transmission wiring harness and connectors 🎬 Watch: How to test the electrical harness for faults for any visible damage, corrosion, or loose pins, including the grounds.
- If external checks are clear, the next step is internal. Drop the transmission oil pan and inspect for excessive metal debris on the magnet.
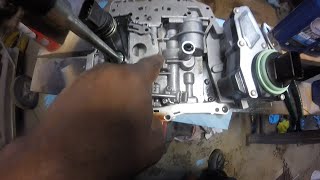
- To remove the valve body, the manual valve must be placed in a specific position (past '1st gear') to disengage an internal pin.
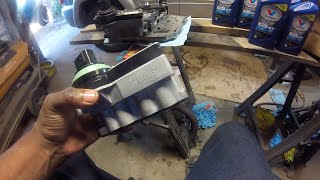
- Remove the valve body assembly from the transmission. 🎬 Watch: Step-by-step guide to removing the 42RLE valve body This is a complex step that must be done carefully.
- With the valve body on a bench, manually inspect the Solenoid Switch Valve (SSV) for any binding or sticking in its bore.
- If the SSV sticks, the valve body must be repaired 🎬 See how the solenoid switch valve gets stuck and how to fix it (reamed with a tool like Sonnax F-92835-TL31) or replaced with a remanufactured unit. It is highly recommended to also install a new solenoid/pressure switch assembly at this time.
- Reinstall the valve body, install a new transmission filter, and reinstall the pan with a new gasket.
- Refill the transmission with the correct amount of Mopar ATF+4 fluid.
- Perform a 'quick learn' or 'relearn' procedure using a compatible bi-directional scan tool.
Parts You'll Likely Need
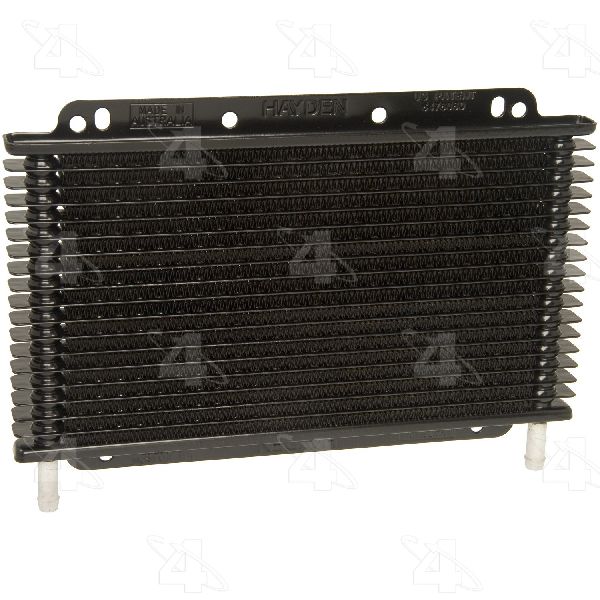
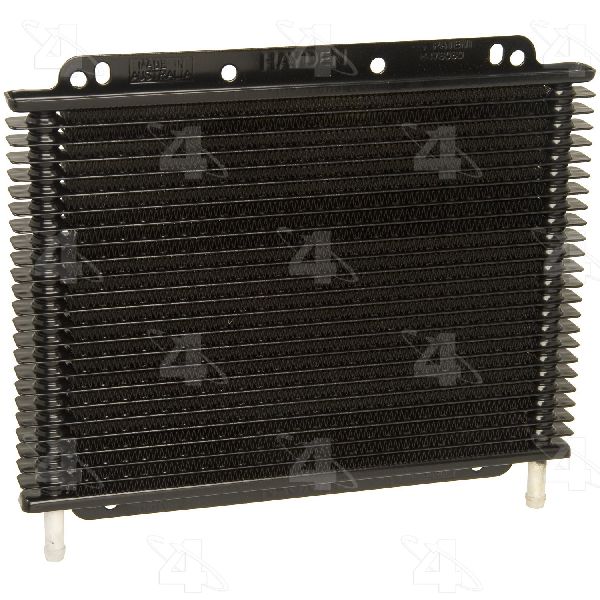
- Transmission Valve Body (Remanufactured) — This is the most common root cause of P1775 due to the Solenoid Switch Valve bore wearing out. A remanufactured unit is the standard professional repair.
Trusted brands: Mopar (OEM Remanufactured), Cobra Transmission, Various eBay/online sellers
OEM price range: $400-$600
Aftermarket price range: $250-$450 - Transmission Solenoid & Pressure Switch Assembly
(OEM #04800171AA)— This part, often called the solenoid pack, is a common failure point and is almost always replaced when the valve body is serviced.
Trusted brands: Mopar, Dorman, Rostra
OEM price range: $250-$350
Aftermarket price range: $150-$250 - Sonnax Oversized Solenoid Switch Valve & Plug Kit
(OEM #92835-31K or 92835-32K)— For DIY or shop repair of the existing valve body. This kit requires a special reaming tool (F-92835-TL31/TL32) to machine the worn bore and install a new, oversized valve.
Trusted brands: Sonnax
Aftermarket price range: $60-$70 (part only) - Mopar ATF+4 Automatic Transmission Fluid
(OEM #68218057AB (Quart))— The 42RLE transmission is sensitive to fluid type. Using anything other than ATF+4 can cause shifting problems or damage.
Trusted brands: Mopar, Valvoline ATF+4, Castrol ATF+4
OEM price range: $10-$15 per quart
Aftermarket price range: $7-$12 per quart - Transmission Filter and Pan Gasket — Must be replaced any time the transmission pan is removed for service.
Trusted brands: Mopar, Wix, ATP
OEM price range: $30-$50
Aftermarket price range: $15-$30
Related Codes That Often Appear With This One
- P1776 — This is the 'sister code' for the same Solenoid Switch Valve being stuck in the opposite (Low/Reverse) position. Seeing both codes together strongly confirms a sticking SSV in the valve body.
- P0700 — This is a generic code that the Engine Control Module sets to turn on the Check Engine Light when the Transmission Control Module has stored a fault. It will almost always be present with P1775.
- P0841 — This code relates to the Low/Reverse pressure switch circuit. The computer uses this switch to verify the SSV's position, so a fault here can be related to P1775.
Technical Service Bulletins (TSBs) & Recalls
- Chrysler Tech Tip (TT9000197): Explicitly states not to replace the solenoid assembly for P1775/P1776 and identifies the sticking Solenoid Switch Valve in the valve body as the primary cause.
Platform-Specific Known Issues
- A critical step for DIY repair is setting the manual shift lever to a 'secret' position one click past 'Low' before attempting to remove the valve body. Failure to do this will cause the parking rod to bind, preventing removal and potentially breaking components.
Mechanic-Grade Diagnostic Values
- Solenoid Coil Resistance — expected: 1-3 Ohms, typically ~1.7 Ohms (varies with temperature). Failure: A reading outside this range indicates a failed solenoid coil.
- Pressure Switch Resistor Pack Resistance — expected: 270 - 330 Ohms. Failure: A reading significantly outside this range indicates a fault in the pressure switch assembly.
- Underdrive Clutch Hydraulic Pressure — expected: 110 - 145 psi at 30 mph in Manual 2 position. Failure: Pressure outside this range indicates a hydraulic circuit problem, potentially related to the valve body or seals.
- 2/4 Clutch Hydraulic Pressure — expected: 75 - 95 psi at 30 mph in Drive (4th gear). Failure: Incorrect pressure points to issues within the 2/4 clutch hydraulic circuit.
- L/R Pressure Switch Sense Circuit Resistance to Ground — expected: Above 5.0 Ohms. Failure: A reading below 5.0 Ohms indicates a short to ground in the circuit.
Hidden / Shadow Codes Worth Checking
- EATX Event Data: This is not a code but a data log within the TCM/PCM that records the vehicle's state (speed, temp, etc.) when a fault occurred. For P1775, it can reveal if the shift cable was misaligned ('TRS Code' showing 'TR2') or other contributing factors. (see via Requires a dealer-level scan tool like a DRBIII or Witech to access the 'EATX EVENT DATA' menu.)
Scan Tool Commands That Help
- DRBIII / Witech / compatible bi-directional scanner: Quick Learn Procedure — This procedure is mandatory after replacing the valve body, solenoid pack, or the entire transmission. It allows the controller to learn the hydraulic and electronic characteristics (volume indexes) of the new components for proper shift timing.
- DRBIII / Witech: Actuate Transmission Control Relay — During advanced electrical diagnosis, this command allows a technician to energize the transmission control output circuit to test for voltage at the transmission connector, verifying the integrity of the wiring from the TIPM/PCM to the transmission.
Wiring & Ground Locations
- TCM/PCM Location — On early models (approx. 2003-2005 KJ), it's a separate Transmission Control Module (TCM) under the dash, often to the right of the steering column. On later models (approx. 2006-2012 KJ/KK), it's integrated into the Powertrain Control Module (PCM) in the engine bay. For 2006-2007 KJ, the PCM is on the driver's side inner fender; for 2008-2012 KK, it's on the passenger's side inner fender.. Knowing the location is critical for inspecting connectors and testing wiring continuity between the controller and the transmission.
- G100 — On KJ models, this is a primary chassis ground point located on the driver's side inner fender, just below the PCM.. A poor ground at this location can cause erratic behavior of the PCM/TCM and its outputs, potentially leading to false transmission codes.
- Headlight Harness Grounds — On KK models, there are important grounds for the front body harness located under the battery tray and on the passenger side inner wheel well.. While not directly for the transmission, poor body grounds can create electrical noise and voltage issues that may affect sensitive control modules.
- Transmission Main Connector (10-pin) — On the driver's side of the transmission case.. This is the primary connection point for all solenoids and sensors. It's where a technician would perform resistance checks without dropping the pan. Pin 3 is the 12V power feed for the solenoids, and Pin 1 is for the OD solenoid, for example.
Real Owner Repair Stories
- Jeep Liberty Forum User Report (2006 Jeep Liberty) — Codes P1775 and P1776, plus vibration, loss of power, and transmission overheating light on hills.
❌ Tried (didn't work) Replaced solenoid pack, Serviced (cleaned) the original valve body, Fluid and filter change
✅ What actually fixed it The initial repairs did not work. The consensus from experienced forum members was that the combination of both codes plus overheating indicated a severe mechanical failure beyond just a stuck valve, requiring a complete transmission rebuild or replacement. - YouTube Creator 'Fix it Angel' (2004 Jeep Wrangler (with same 42RLE transmission)) — Limp mode with codes P1775 and P1776.
❌ Tried (didn't work) Exhaustive inspection and electrical testing of the entire engine-to-transmission wiring harness for shorts, opens, and corrosion.
✅ What actually fixed it The wiring harness was found to be in perfect condition. The creator concluded that after ruling out all electrical possibilities, the fault was guaranteed to be mechanical and internal to the transmission (the valve body). - Go-Parts Forum Compilation (Jeep Liberty KJ) — Intermittent Check Engine Light with P1775 and P1776.
❌ Tried (didn't work) Continued driving, ignoring the intermittent light, assuming it was a minor sensor glitch.
✅ What actually fixed it The issue was not fixed in time. The transmission completely failed on the highway, requiring a full replacement for $3,800. This serves as a cautionary tale that intermittent transmission codes should be addressed immediately to prevent catastrophic failure from heat buildup.
"I Checked Everything" — The Actual Cause
- The transmission equivalent of a 'smoke test clean' is when all electrical tests pass. In multiple documented cases, technicians or owners have meticulously tested the entire wiring harness from the PCM/TCM to the transmission connector and found no faults (no shorts, no opens, good continuity). The P1775/P1776 codes persisted, and the ultimate fix was the mechanical replacement or repair of the valve body, confirming the issue was the physical valve sticking in its bore, not an electrical problem.
OEM Part Supersession History
5143151AA→04800171AA— Standard part revision and update by Mopar.
Heads up: These parts are generally interchangeable, but using the latest revision (04800171AA) is always recommended.Sonnax SSV Repair Kit→N/A— N/A
Heads up: CRITICAL: There are two different kits that are NOT interchangeable. Kit 92835-31K is for valve bodies with an original valve measuring .453" at the large spool. Kit 92835-32K is for valves measuring .420". The valve body must be disassembled and the original valve measured before ordering a repair kit.
Model Year Variations Within This Range
- 2003-2005 vs. 2006-2012: Early KJ models (approx. '03-'05) use a separate Transmission Control Module (TCM) located inside the cabin. Later KJ and all KK models ('06-'12) integrate the transmission control functions into the main Powertrain Control Module (PCM) located in the engine bay. This changes the location for electrical testing and connector inspection.
- 2003-2006 vs. 2007-2012: Some aftermarket valve body suppliers list different part numbers for pre-2007 and 2007-up models. This may be related to changes in the Electronic Pressure Control (EPC) system, which reportedly has an additional electrical connector on later models. Technicians should verify the exact valve body configuration before ordering a replacement.
Diagnostic Flowchart
Other Known Issues on This Vehicle
Issues unrelated to this code that are worth knowing about as an owner of this generation:
- Power Window Regulator Failure 🔴 High — Extremely common, especially on the 2002-2007 (KJ) generation. The plastic clips and cables fail, causing the window to drop into the door. (Ref: A warranty extension to 7 years was reportedly issued, but is now expired.)
- 3.7L V6 Engine Dropped Valve Seats 🔴 High — This is a catastrophic engine failure that typically occurs after an overheating event. The valve seats can dislodge and cause severe internal engine damage.
- Front Lower Ball Joint Failure 🔴 High — Common on the KJ generation (2002-2007), leading to a loss of steering control. A recall was issued. (Ref: NHTSA Recall 03V460000, 06V288000)
- Leaking Fuel Filler Neck / EVAP Leaks 🟠 Medium — The fuel filler tube is prone to rust and cracking, causing fuel vapor leaks, a Check Engine Light (e.g., P0456), and difficulty filling the tank.
- 3.7L V6 Engine Oil Sludge and Stuck Lifters 🟠 Medium — The engine design can lead to oil sludge buildup, especially with poor maintenance, causing hydraulic lash adjusters (lifters) to stick and create a ticking noise.
- Leaking Differential Pinion Seals 🟡 Low — Front and rear differential pinion seals can leak over time, requiring replacement to prevent gear oil loss.
Used vs. New Parts: Buying Guide for This Vehicle
When a used part is the smart pick: A complete, used valve body from a junkyard can be a cost-effective option IF it comes from a vehicle with documented low mileage or one that was taken out of service for reasons other than transmission failure (e.g., collision damage, cracked transmission case from impact). It is still a gamble on a known wear item.
Donor-vehicle mileage cap: roughly under 80000 miles for the part to have meaningful remaining life.
What to inspect on the donor part:
- Ask for the VIN of the donor vehicle to check its history and mileage.
- If possible, inspect the transmission pan magnet from the donor for excessive metal shavings.
- Avoid parts from vehicles that show signs of being poorly maintained or having sat for years exposed to the elements.
- Visually inspect the valve body for any obvious damage, corrosion, or signs of previous, improper repair.
OEM-only on this vehicle (don't cheap out):
- Transmission Fluid: Only use licensed Mopar ATF+4. The 42RLE is notoriously sensitive to fluid type, and using a generic or incorrect fluid can cause shifting problems and long-term damage.
Aftermarket brands forum-validated for this vehicle:
- Sonnax: The industry standard for valve body repair kits and problem-solving components.
- Rostra: A well-regarded manufacturer of aftermarket solenoids and transmission components.
- Mopar: For the solenoid pack, the OEM part is often recommended on forums for maximum reliability, though it is the most expensive option.
Brands owners have reported issues with on this vehicle:
- Unbranded 'white box' solenoid packs from online marketplaces (Amazon, eBay). While cheap, they have a very high failure rate according to forum discussions and can fail shortly after installation, requiring the job to be done all over again.
Real Owner Stories
Aggregated from forums and TSBs cited above. Mileages and costs reflect what owners reported in those sources.
2006 Jeep Liberty 3.7L V6 — 100000 miles
Symptoms: Experienced P1775 and P1776 codes simultaneously, accompanied by vibration, loss of torque, and the transmission 'Hot Oil' light illuminating.
What fixed it: The owner replaced the solenoid pack and serviced the valve body, but the issues persisted, leading to the conclusion that a full transmission rebuild was necessary.
Source hint: Jeep KJ and KK Liberty Forum thread titled 'Transmission problem error P1775 AND P1776'
2005 Jeep Liberty 3.7L V6
Symptoms: The vehicle threw a P1775 code, though the owner noted no obvious driving issues at the time of the scan.
What fixed it: The owner was advised by a moderator not to replace the solenoid assembly, as the fault lies with the Solenoid Switch Valve located specifically within the valve body.
Source hint: Jeepz.com thread titled 'p1775 Solenoid switch & p0456 EVAP leak problems'
Related OBD-II Codes
Frequently Asked Questions
I have a P1775 code on my 2005 Jeep Liberty; should I replace the solenoid pack first?
What specific transmission fluid should I use for my 2003-2012 Jeep Liberty to avoid valve issues?
Is there a specific repair kit for the worn valve body bore in the 42RLE transmission?
My Jeep Liberty is stuck in 2nd gear and won't shift to 1st. Is this related to P1775?
Is there a trick to removing the valve body on a Jeep Liberty without breaking anything?
Why does the Solenoid Switch Valve fail so often on the 42RLE transmission?
Helpful Videos
We Have This Part in Stock

The information in this article is provided for general reference and educational purposes only. Vehicle specifications, procedures, and part compatibility can vary by production date, trim level, and region. Always consult your vehicle's factory service manual and verify part numbers before purchasing or performing repairs. Safety-critical components such as airbags, seat belts, and braking systems should be installed by a qualified professional.
- Jeep Liberty:
- 🧭 Diagnostic Flowchart
- 🎬 Helpful Videos
- 🛍️ Shop This Part
- What's Unique About the 2003-2012 Jeep Liberty
- Symptoms You May Notice
- Most Likely Causes
- Rare But Worth Checking
- Diagnosis Steps
- Parts You'll Likely Need
- Related Codes That Often Appear With This One
- Technical Service Bulletins (TSBs) & Recalls
- Platform-Specific Known Issues
- Mechanic-Grade Diagnostic Values
- Hidden / Shadow Codes Worth Checking
- Scan Tool Commands That Help
- Wiring & Ground Locations
- Real Owner Repair Stories
- "I Checked Everything" — The Actual Cause
- OEM Part Supersession History
- Model Year Variations Within This Range
- Other Known Issues on This Vehicle
- Used vs. New Parts: Buying Guide for This Vehicle
- Real Owner Stories
- 2006 Jeep Liberty 3.7L V6 — 100000 miles
- 2005 Jeep Liberty 3.7L V6
- Related OBD-II Codes
- Frequently Asked Questions
- 🎟️ Get 5% Off