
P2176 on 2006-2013 Chevrolet Suburban: Causes and Fixes for Idle Position Errors
On a 2006-2013 Suburban, code P2176 almost always points to a dirty throttle body causing the engine computer to lose the correct idle position. Carbon buildup physically blocks the throttle plate. The most common fix is to thoroughly clean the throttle body and perform an idle relearn procedure, which can often be done without any special tools. In some cases, a faulty throttle body assembly or a bad ground wire can be the cause.
- P2176 is most often caused by a dirty throttle body, not a broken part.
- The first step should always be to clean the throttle body, which costs very little and is a common DIY repair.
- After cleaning or replacing the throttle body, you MUST perform an idle relearn procedure for the fix to be successful.
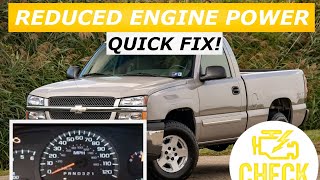
- Driving with this code is not recommended for long distances as the vehicle will be in a low-power safety mode.
- This is a well-documented issue on GM trucks, and TSB PIP4578B confirms the cause and effect.
What's Unique About the 2006-2013 Chevrolet SUBURBAN
This issue is very common on high-mileage GM trucks and SUVs from this era, including the Suburban and its platform mates like the Tahoe, Silverado, and Yukon. The V8 engines are prone to significant carbon buildup inside the throttle body from the PCV system, which physically blocks the throttle plate from closing properly. GM even issued a Technical Service Bulletin (TSB #PIP4578B) acknowledging that this carbon buildup can cause P2176 and other related codes, leading to 'Reduced Engine Power' mode. The problem spans both the final GMT800 (2006) and the entire GMT900 (2007-2013) generations covered in this range, as they use similar electronic throttle control systems.
Diagnostic Flowchart
Tap your situation to follow the diagnostic path that matches what you're seeing on this vehicle.
Generation note: The 2006 model year is the last of the 9th generation (GMT800) Suburban, while 2007-2013 models are the 10th generation (GMT900). While they are different platforms, they both use similar V8 engines and electronic throttle control systems, and are both highly susceptible to the carbon buildup that causes code P2176. The repair procedure is nearly identical for both generations. However, wiring and ground locations differ slightly. The GMT900 (2007+) platform has well-documented ground points like G103 on the front of the right cylinder head that are critical to the throttle system.
Symptoms You May Notice
- Check Engine Light is on
- "Reduced Engine Power" message displayed on the dash
- Unstable, surging, or high idle
- Engine may stall at stops or when idling
- Poor, delayed, or non-responsive acceleration
- Vehicle may not start, or may crank but not fire
- Vehicle may not shift gears properly
- Replacing the accelerator pedal position (APP) sensor. While the APP sensor is part of the throttle control system, P2176 specifically relates to the throttle body's idle position, not the pedal's input.
- Replacing Mass Airflow (MAF) or MAP sensors. While these can cause other performance issues, they do not typically cause the P2176 idle learning failure directly. However, a loose MAF sensor connector has been reported to cause this code in some cases.
Most Likely Causes
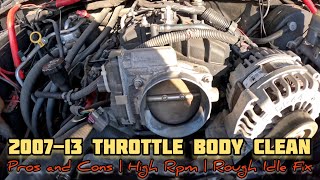
- Dirty Throttle Body 🔴 High Probability → Shop Fuel Injection Throttle Body As acknowledged in GM TSB PIP4578B, carbon from the crankcase ventilation (PCV) system builds up around the throttle plate and bore over time, especially on high-mileage vehicles. This physically prevents the plate from closing to its true idle position, which the PCM detects as a fault.
How to confirm: Remove the air intake duct from the throttle body. Visually inspect the throttle plate and the inside of the throttle bore for a thick, black, sticky layer of carbon. 🎬 Watch: How to clean the throttle body on GM trucks. The plate may be visibly stuck slightly open. A scan tool may show a throttle position percentage of over 9% at idle, when it should be closer to 3-5%.
Typical fix: Thoroughly clean the throttle body bore and both sides of the throttle plate using a dedicated throttle body cleaner and a soft brush or rag. An idle relearn procedure must be performed afterward.
Est. part cost: $5-$15 - Failed Throttle Body Assembly 🟡 Medium Probability → Shop Fuel Injection Throttle Body The electronic motor or the integrated throttle position sensors (TPS) within the assembly can fail over time due to heat and vibration. Internal plastic gears can also strip, causing a clicking or ratcheting noise and preventing the plate from moving. This is the next logical step if a thorough cleaning does not resolve the code.
How to confirm: If cleaning the throttle body and performing a relearn does not resolve the code, and the wiring is confirmed to be good, the throttle body assembly itself is the likely culprit. A diagnostic scan tool can monitor the commanded vs. actual throttle position to confirm a discrepancy. A ratcheting noise from the throttle body upon turning the key on is a strong indicator of internal failure.
Typical fix: Replace the entire throttle body assembly. This is a bolt-on part and usually comes as a complete unit 🎬 Watch this step-by-step guide to replacing the throttle body assembly. with a new motor and sensors. An idle relearn is required after replacement.
Est. part cost: $100-$300 - Needs Idle Relearn Procedure ⚪ Low Probability If the battery was recently disconnected or replaced, or if the PCM was reset, it may have lost its learned idle values. This can trigger P2176 even if there's no physical fault, as the computer needs to recalibrate.
How to confirm: If the code appeared immediately after a battery replacement, jump start, or clearing codes with a scanner, this is the most likely cause.
Typical fix: Perform a manual idle relearn procedure. This typically involves a sequence of turning the ignition on and off and letting the engine idle for specific periods.
Est. part cost: $0
Rare But Worth Checking
- Wiring or Connector Issue: The wiring harness to the throttle body can become damaged from engine vibration or heat. Check for frayed wires or corroded pins in the connector before replacing the throttle body. A broken wire inside the insulation near the connector is a known failure point.
- Poor Engine Ground: A loose or corroded ground strap on the engine block or firewall can cause erratic behavior in various electronic components, including the throttle body. One owner on a forum traced a recurring issue to a bad ground wire on the passenger side of the intake manifold. For GMT900 (2007+) models, grounds G103 (front of right cylinder head) and G104 (rear of cylinder head) are critical for the ECM and throttle control system.
- Powertrain Control Module (PCM) Fault: → Shop Engine Control Module (ECM) In very rare cases, the PCM itself can fail. This should only be considered after all other possibilities, including wiring and grounds, have been exhaustively ruled out by a professional.
Diagnosis Steps
- Verify the code with an OBD-II scanner. Note any other codes present.
- Visually inspect the wiring harness and connector at the throttle body. Gently tug on each wire at the back of the connector to check for breaks inside the insulation.
- Inspect major engine ground straps for tightness and corrosion, particularly any grounds near the intake manifold.
- Remove the air intake hose from the throttle body.
- Inspect the throttle bore and plate for carbon buildup. If significant carbon is present, this is the most likely cause.
- Clean the throttle body thoroughly using throttle body cleaner and a soft cloth or brush. To clean behind the plate, turn the ignition to 'ON' (engine off) and have a helper press the accelerator pedal to open the plate electronically. Avoid forcing it by hand. Clean both sides of the plate and the bore until all black residue is gone.
- Reconnect the intake hose and perform an Idle Relearn Procedure. A common manual method is: Start the engine and let it idle in Park for 3 minutes. Turn the engine off for at least 60 seconds. Start the engine again and let it idle in Park for another 3 minutes. The idle should stabilize. 🎬 See how to reset the idle after cleaning or replacement.
- If the code returns after cleaning and relearning, use a scan tool to monitor throttle position sensor data. If the readings are erratic or do not match the commanded position, the throttle body assembly is likely faulty and requires replacement.
Parts You'll Likely Need
- Throttle Body Assembly
(OEM #ACDelco 217-3151 (for many 5.3L/6.0L models, verify by VIN))— This is the most common part to replace if cleaning does not fix the issue. The internal motor or sensors fail, requiring replacement of the whole unit.
Trusted brands: ACDelco (OEM), Hitachi, Bosch, Standard Motor Products, Dorman
OEM price range: $200-$300
Aftermarket price range: $100-$220 - Throttle Body Cleaner — This is required for the first and most common fix: cleaning the carbon buildup from the original throttle body.
Trusted brands: CRC, Gumout, B-12 Chemtool
OEM price range: $5-$15
Aftermarket price range: $5-$15
Related Codes That Often Appear With This One
- P1516 — This code often appears with P2176 and indicates a mismatch between the PCM's command and the throttle actuator's actual position, reinforcing a throttle body issue.
- P2101 — Relates to a performance problem with the Throttle Actuator Control (TAC) motor, often set when the motor is struggling against carbon buildup or is failing internally.
- P0507 — Stands for 'Idle Air Control System RPM Higher Than Expected.' This can be triggered after cleaning a throttle body if an idle relearn is not performed, as the computer is still compensating for carbon that is no longer there.
- P0068 — Indicates a correlation problem between the MAP/MAF sensor and the throttle position. It can be set alongside P2176 when the throttle plate angle is not what the PCM expects for a given airflow reading.
Technical Service Bulletins (TSBs) & Recalls
- PIP4578B: SES Light, Idle Surge, and/or Reduced Engine Power Mode with DTCs P0068, P0121, P1516, P2101, P2119, and/or P2176 - Clean Throttle Body and Perform Idle Learn Reset. This TSB applies to dozens of GM V8 models, including the Suburban, Tahoe, Silverado, Sierra, Escalade, and more, from model years 2006 through 2018.
Platform-Specific Known Issues
- GM Technical Service Bulletin PIP4578B: GM issued TSB PIP4578B which directly addresses P2176, along with other codes, on a wide range of high-mileage V8 vehicles from 2006-2018. It confirms that carbon buildup can cause idle surge and Reduced Engine Power mode, and the official fix is to clean the throttle body and perform an idle learn reset using a dealer scan tool (Tech 2/GDS).
- Owner Experience: Cleaning vs. Replacing: On the Tahoe Yukon Forum, a user with a 2007 Tahoe experiencing P2176 and P2135 described intermittent no-start and limp mode issues. After checking connections and clearing codes, the problem persisted. The final fix was replacing the throttle body, which resolved all symptoms.
Mechanic-Grade Diagnostic Values
- Throttle Position Sensor (TPS) 1 Voltage at Rest — expected: 4.12V - 4.55V. Failure: Voltage outside this range after a learn procedure can trigger P2176.
- Throttle Position Sensor (TPS) 2 Voltage at Rest — expected: 0.34V - 0.99V. Failure: Voltage outside this range after a learn procedure can trigger P2176.
- Scan Tool Throttle Position Percentage at Idle — expected: Under 9% (ideally 3-5%). Failure: A reading of 16% or higher at idle strongly suggests carbon buildup is preventing the throttle plate from closing fully.
Scan Tool Commands That Help
- GM Tech 2 / GDS2: Idle Learn Reset / Reset Idle Learn — This function should be used after cleaning or replacing the throttle body. It erases the old learned throttle angle compensation values from the ECM, which is necessary because the PCM was compensating for carbon buildup that is no longer present. Failing to use this reset is a common cause of a high idle or a P0507 code after the repair.
- Professional Scan Tools (e.g., Snap-on, Autel): Module Setup > Idle Relearn Reset — This is the equivalent of the dealer tool function. It's used to force the ECM to start the idle learning process from a clean slate after a repair or battery disconnect. A mechanic noted that even after using this function, the code P2176 immediately returned until the underlying cause (a dirty throttle body) was fixed.
Wiring & Ground Locations
- Throttle Body Connector (Q38) — The 8-pin electrical connector on the electronic throttle body assembly.. This is the single point of connection for the throttle motor and both throttle position sensors. Corrosion or a broken wire at this connector will directly cause throttle control codes. Key pins for testing are: Pin G (Dark Green) for TP Sensor 1 Signal, Pin F (Purple) for TP Sensor 2 Signal, and Pins E & H for the 5V reference voltage.
- G103 — On GMT900 models (2007-2013), this critical ground is located on the front of the right (passenger side) cylinder head.. G103 is a primary ground point for the Engine Control Module (ECM). A loose or corroded G103 can cause a voltage drop, leading to a wide range of erratic electronic faults, including throttle-related DTCs. GM service information specifically mentions checking this ground when diagnosing TAC module codes.
- G104 — On GMT900 models (2007-2013), this ground is typically located on the rear of the cylinder head.. Like G103, this is another crucial ECM ground. Performing a voltage drop test on both G103 and G104 is a recommended diagnostic step for persistent, hard-to-trace electronic issues.
- G102 — On GMT900 models (2007-2013), this ground is located on the lower left front of the engine block.. This is another engine block ground point. While G103 and G104 are more directly cited for ECM issues, ensuring all major engine grounds are clean and tight is essential for stable sensor readings.
Real Owner Repair Stories
- Chevy HHR Network forum user (Chevrolet HHR (similar GM electronic throttle system)) — Codes P1516 and P2176, rough idle, Service ESC message, oil life monitor reset on its own.
❌ Tried (didn't work) Initial diagnosis pointed towards cleaning or replacing the throttle body.
✅ What actually fixed it The root cause was a faulty Mass Air Flow (MAF) sensor connection. The plug felt secure but was actually loose, causing the throttle-related codes. Securing the connector resolved the issue. - CVOHARLEY.com forum user (Harley Davidson with a drive-by-wire system (HPI 58mm throttle body using Harley electronics)) — Codes P1511 and P2176. Intermittent no-start, no throttle response. Throttle plate was physically stuck in the bore. A horrendous ratchet-type noise from the throttle body when turning the ignition on.
❌ Tried (didn't work) Cleaning the throttle body provided a temporary fix. Manually performing idle relearn procedures had no effect.
✅ What actually fixed it The actual problem was a stripped plastic gear inside the throttle body actuator. This prevented the motor from controlling the plate position correctly, causing it to stick and make a ratcheting noise. The entire throttle body assembly had to be replaced.
OEM Part Supersession History
12580760→12679524— This is a common supersession for the throttle body assembly on many GM V8 applications of this era. The new part is an updated design.
Heads up: The replacement part may require programming or special setup procedures to ensure proper operation in the vehicle.
Model Year Variations Within This Range
- 2007-2013 (GMT900): The location of critical engine grounds like G103 (front of right cylinder head) and G104 (rear of cylinder head) are specific to the GMT900 platform and are well-documented as potential culprits for throttle control issues. The 2006 GMT800 model has different ground locations and wiring schematics.
- 2006-2007: There were changes in the Throttle Actuator Control (TAC) system design around 2006 and again for the 2007 NNBS (New New Body Style) trucks. While the P2176 code's meaning is the same, the specific pinouts and diagnostic trees can vary slightly between a 2006 'Classic' and a 2007+ model.
Helpful Videos


We Have This Part in Stock

The information in this article is provided for general reference and educational purposes only. Vehicle specifications, procedures, and part compatibility can vary by production date, trim level, and region. Always consult your vehicle's factory service manual and verify part numbers before purchasing or performing repairs. Safety-critical components such as airbags, seat belts, and braking systems should be installed by a qualified professional.
- Chevrolet SUBURBAN:
- 🧭 Diagnostic Flowchart
- 🎬 Helpful Videos
- 🛍️ Shop This Part
- What's Unique About the 2006-2013 Chevrolet SUBURBAN
- Symptoms You May Notice
- Most Likely Causes
- Rare But Worth Checking
- Diagnosis Steps
- Parts You'll Likely Need
- Related Codes That Often Appear With This One
- Technical Service Bulletins (TSBs) & Recalls
- Platform-Specific Known Issues
- Mechanic-Grade Diagnostic Values
- Scan Tool Commands That Help
- Wiring & Ground Locations
- Real Owner Repair Stories
- OEM Part Supersession History
- Model Year Variations Within This Range
- 🎟️ Get 5% Off