
A Guide to Replacing the Automatic Transmission Mount on a 1970-1975 Dodge Challenger
Eliminate clunks and vibrations by choosing the correct new transmission mount for your classic Challenger.
- A clunking noise when shifting into gear is the most common symptom of a bad transmission mount.
- Choose a standard rubber mount (Anchor, DEA, Pioneer) for a factory-like smooth ride.
- Choose a polyurethane mount (Prothane) for performance applications, but expect more vibration.
- Always inspect your engine mounts when replacing the transmission mount, as they often wear out together.
Is Your Challenger's Transmission Mount Failing?
The transmission mount is a part that wears out over time. The original rubber can become oil-soaked, brittle, or simply tear from decades of use. When it fails, you'll likely notice some distinct symptoms. A loud "clunk" or "thud" when you shift from Park into Drive or Reverse is a classic sign. You might also feel excessive vibrations in the floor or shifter while driving. In severe cases, the transmission can sag, which can affect driveshaft angles and cause other components to wear out faster.
Choosing Your New Aftermarket Mount: Rubber vs. Polyurethane
Since new original Mopar parts for this era are generally unavailable, the aftermarket is your go-to source. For the 1970-1975 Challenger, you have two main choices: standard rubber mounts or polyurethane upgrades.
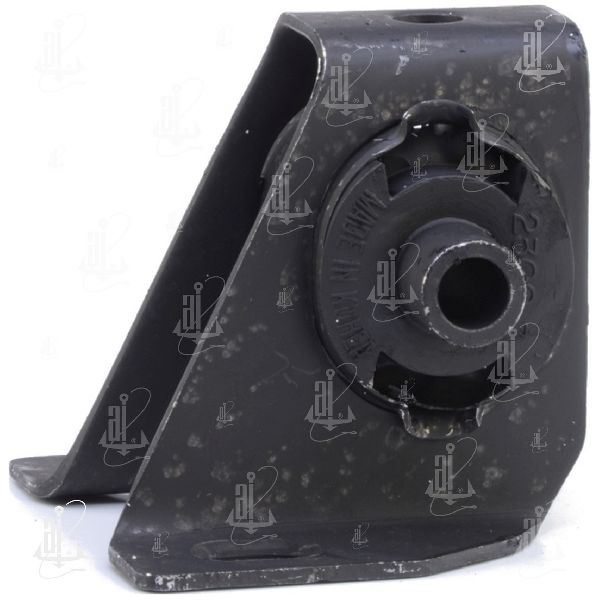
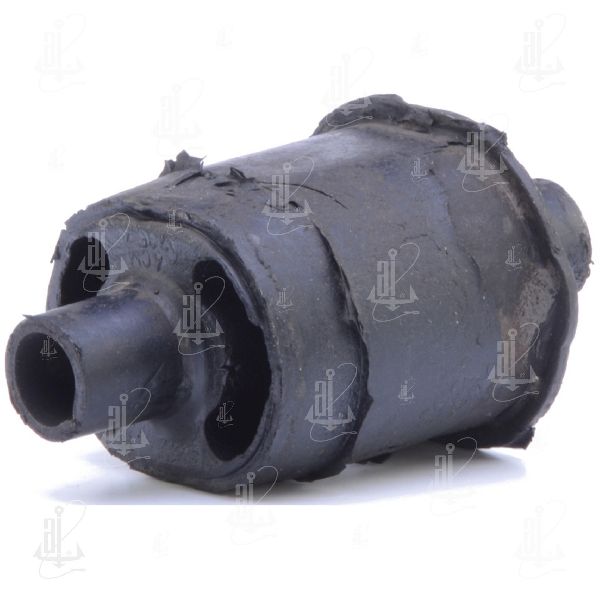
Standard Rubber Mounts (Anchor, DEA, Pioneer)
These brands offer direct replacements that are designed to function like the original part. They provide a factory-like feel, effectively absorbing vibrations for a smooth, quiet ride. Brands like Pioneer are often noted for looking very similar to the original factory part. Anchor and DEA are common, budget-friendly options that get the job done for a daily driver or stock restoration. However, some users in forums report that the quality of these budget brands can be inconsistent.
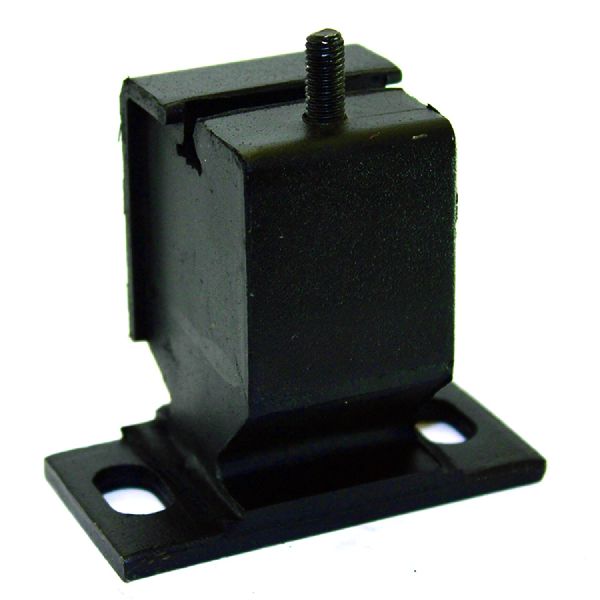
Performance Polyurethane Mounts (Prothane)
Prothane offers a mount made from polyurethane, a much stiffer material than rubber. This is an excellent upgrade for performance-oriented drivers. The stiffer material significantly reduces drivetrain movement, which can help put more power to the wheels. The trade-off is that polyurethane transmits more vibration into the cabin than rubber. If your Challenger is a weekend cruiser and you value a smooth ride, a standard rubber mount is likely the better choice. If it's a high-performance build and you want to minimize torque loss, polyurethane is the way to go.
Cost of a New Aftermarket Transmission Mount
| Part Type | Typical Cost |
|---|---|
| New Aftermarket (Rubber - Anchor, DEA, Pioneer) | $10 - $20 |
| New Aftermarket (Polyurethane - Prothane) | $20 - $30 |
| Shop Labor for Installation | $100 - $200 |
Frequently Asked Questions (FAQ)
How difficult is it to replace the transmission mount?
For a classic car like the 1970-1975 Challenger, this is a relatively easy job for a DIY mechanic. It involves safely supporting the transmission with a jack, unbolting the old mount, and bolting the new one in place. You will need to work under the vehicle, so proper use of jack stands is essential for safety.
What's the difference between the aftermarket brands?
Anchor and DEA are considered standard, budget-friendly replacement brands. Pioneer is also a standard replacement brand, with some reviews noting its appearance is very close to the original factory part. Prothane specializes in performance polyurethane parts, which are a step up in firmness and durability but will increase cabin vibration.
Is a polyurethane mount always better?
Not necessarily. It's better for performance applications where controlling drivetrain movement is a priority. However, it will make the ride harsher by transmitting more vibration. For a stock vehicle or a comfortable cruiser, a standard rubber mount provides better isolation and a smoother feel.
Are there any recalls for the transmission mount on my Challenger?
No. There are no specific recalls or technical service bulletins (TSBs) from the NHTSA related to the automatic transmission mount for the 1970-1975 Dodge Challenger. Any failure is due to the age and wear of the part.
Technical Specifications
OEM Part Numbers: 2932836
The mount connects the transmission extension housing to the transmission crossmember. It typically consists of two metal plates bonded together with a block of rubber or polyurethane, with studs and bolt holes for mounting.
We Have This Part in Stock


The information in this article is provided for general reference and educational purposes only. Vehicle specifications, procedures, and part compatibility can vary by production date, trim level, and region. Always consult your vehicle's factory service manual and verify part numbers before purchasing or performing repairs. Safety-critical components such as airbags, seat belts, and braking systems should be installed by a qualified professional.
- 🛍️ Shop This Part
- Is Your Challenger's Transmission Mount Failing?
- Choosing Your New Aftermarket Mount: Rubber vs. Polyurethane
- Standard Rubber Mounts (Anchor, DEA, Pioneer)
- Performance Polyurethane Mounts (Prothane)
- Cost of a New Aftermarket Transmission Mount
- Frequently Asked Questions (FAQ)
- 🎟️ Get 5% Off