
Brake Light Switch Guide for 1979-1983 GMC G2500 Vans
Having brake light problems on your G2500? This guide covers the common symptoms and how to choose the right replacement switch.
- A bad brake light switch is a critical safety issue; replace it immediately if symptoms appear.
- Symptoms are straightforward: lights don't work, lights stay on, or they work intermittently.
- For this vehicle, a quality aftermarket brand like Standard Ignition or Rostra is a reliable choice.
- This is a simple, low-cost repair that most owners can perform themselves with basic tools.
Is Your GMC G2500 Brake Light Switch Failing?
A faulty brake light switch is a major safety hazard. On a vehicle from this era, the symptoms are usually direct and easy to spot. Because the electronics are simple, you won't see confusing warning lights on the dash like in modern vans. You'll see the problem right on the back of your van.
Most Common Symptoms
- Brake Lights Don't Turn On: This is the most dangerous symptom. You press the pedal, but the lights don't illuminate. Other drivers get no warning you are stopping.
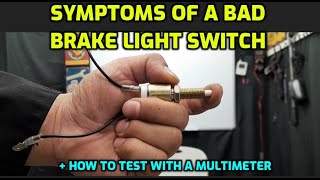
- Brake Lights Stay On: 🎬 Watch how a failing switch keeps your brake lights on. The switch can fail in the 'on' position, leaving your brake lights permanently lit. This can drain your battery overnight and confuse other drivers.
- Intermittent Brake Lights: The lights may flicker or only work sometimes when you press the pedal. This points to a worn-out switch or a loose connection.
Safety First
If your brake lights are not working correctly, the vehicle is not safe to drive. It is a primary safety feature required by law. Get the switch replaced as soon as possible.
Choosing a New Aftermarket Brake Light Switch
For a vintage vehicle like the '79-'83 G2500, an original equipment (OEM) part from GM is likely discontinued or very hard to find. Aftermarket parts are your main option, and for a simple switch like this, they are a reliable and cost-effective choice.
Brand Options: Good, Better, Best
When choosing a replacement, you have several quality tiers available. All will get the job done, but some offer greater peace of mind.
- Good - Economy Brands (Skyward): Skyward is a manufacturer that produces a wide range of aftermarket parts, often positioned as a value-oriented option. For a simple switch on an older vehicle, this can be a perfectly adequate choice to restore function at the lowest cost.
- Better - Reputable Aftermarket (Rostra Powertrain): Rostra is a known producer of vehicle electronics for both OEM and aftermarket applications. They engineer their parts to meet or exceed original specifications, offering a balance of quality and price.
- Best - Premium Aftermarket (Standard Ignition): Standard Motor Products (SMP), or Standard Ignition, is a long-standing, well-respected brand in the aftermarket. They are often considered a top-tier replacement part, known for reliability and durability. Many professional mechanics trust Standard for electrical components.
Pro Tip: Check the Connector
Before ordering, take a quick look at the switch under your dash. Confirm the number of electrical pins and the shape of the connector. While most parts for this year range are identical, it's a good 2-minute check to prevent ordering the wrong part.
Brake Light Switch Costs for 1979-1983 GMC G2500
| Part/Service | Estimated Cost |
|---|---|
| New Aftermarket Switch | $5.40 - $29.97 |
| Shop Labor for Installation | $50 - $100 |
| Total Professional Replacement | $55 - $130 |
Frequently Asked Questions (FAQ)
Can I replace the brake light switch myself?
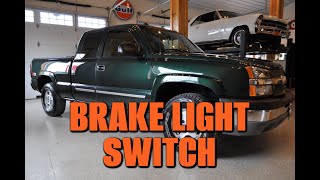
Yes, this is a very DIY-friendly job for most owners. The switch is located on the brake pedal support bracket under the dashboard. It is usually held in place by a clip or a small bolt. The job requires working in a tight space but typically only needs basic hand tools like a screwdriver or a small socket set.
🎬 Follow this step-by-step guide to replacing your GMC brake switch.Where is the brake light switch located on my G2500?
Look under the driver's side dashboard. Follow the brake pedal arm up towards the firewall. You will see a small switch with a plunger and an electrical connector mounted to the pedal's support structure.
Could a blown fuse be the problem, not the switch?
Absolutely. Always check the fuse for the brake lights first. It's a simple check that can save you the cost of a new switch. If the new fuse blows immediately, you may have a short circuit. If the fuse is good, the switch is the next most likely culprit.
Are there any recalls for the brake light switch on these vans?
Searches found a GM recall (NHTSA Campaign ID 99V025) for premature brake light switch wear, but it primarily affected later model trucks and SUVs. Given the age of the 1979-1983 G2500, this specific recall is unlikely to apply or be serviceable, but it highlights that switch failure is a known GM issue. Always rely on diagnosing the part itself.
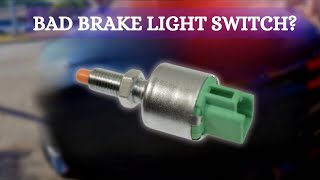
🎬 See a full breakdown of brake light switch symptoms and fixes.Helpful Videos

Technical Specifications
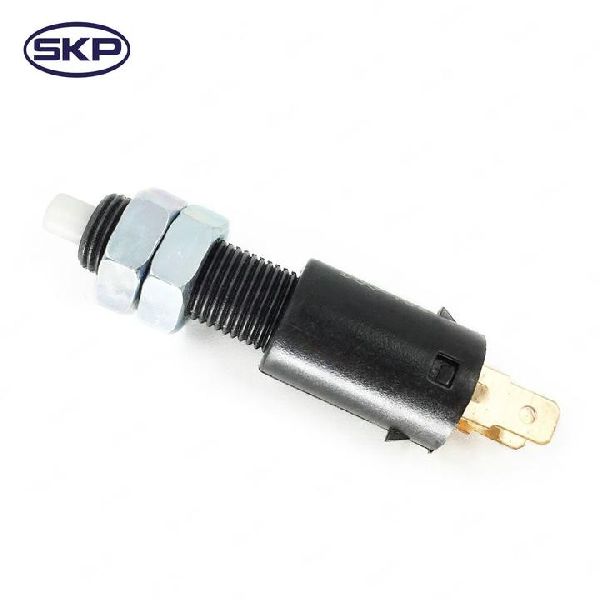
Typically a 2-terminal mechanical plunger switch mounted on the brake pedal support.
We Have This Part in Stock


The information in this article is provided for general reference and educational purposes only. Vehicle specifications, procedures, and part compatibility can vary by production date, trim level, and region. Always consult your vehicle's factory service manual and verify part numbers before purchasing or performing repairs. Safety-critical components such as airbags, seat belts, and braking systems should be installed by a qualified professional.
- 🎬 Helpful Videos
- 🛍️ Shop This Part
- Is Your GMC G2500 Brake Light Switch Failing?
- Most Common Symptoms
- Safety First
- Choosing a New Aftermarket Brake Light Switch
- Brand Options: Good, Better, Best
- Pro Tip: Check the Connector
- Brake Light Switch Costs for 1979-1983 GMC G2500
- Frequently Asked Questions (FAQ)
- 🎟️ Get 5% Off