
2012-2022 Ford Focus, Escape, Transit & C-Max Headlight Switch Issues & Solutions
This guide covers the common failures, replacement costs, and critical compatibility warnings for the headlight switch used in many popular Ford models.
- Compatibility is critical: You must buy a switch with the exact same functions (Auto headlights, Fog lights) as your original, or it will not work.
- Symptoms can be misleading: A bad switch can cause headlights to be stuck on, flicker, or not work at all. It can also affect the trunk release and dash dimmer.
- Easy DIY replacement: Replacing the switch is a simple, 15-minute job that only requires a trim tool, making a used OEM part a very cost-effective repair.
- Check fuses first: Before buying a new switch, always check the headlight fuses to rule out a simpler problem.
Symptoms of a Failing Headlight Switch
When the headlight switch begins to fail, it can cause a range of confusing and potentially dangerous lighting problems. Because the switch controls multiple functions, you might notice issues with more than just the headlights.
- Headlights Won't Turn On: The most obvious symptom is when the headlights, either low or high beams, fail to illuminate at all when you turn the switch.
- Inability to Switch Modes: You may find the switch is stuck in one mode. For example, the lights might be stuck on, or you might be unable to switch from low beams to high beams.
- Intermittent Operation: The headlights might flicker, or turn on and off randomly while driving. Sometimes, tapping the switch or the dashboard near it can temporarily make them work again, which points to a faulty switch.
- Headlights Stuck On: In some cases, the switch fails in the 'on' position, causing the headlights to stay on even when the switch is turned off. This can lead to a dead battery. Often, this is a default failure mode where the Body Control Module (BCM) turns the lights on as a safety measure when it receives an invalid signal from the switch.
- High Beams Don't Work: You might lose the ability to activate or flash the high beams, even if the low beams work correctly.
- Other Buttons Fail: Since this panel often includes the trunk release and dashboard dimmer, those functions may also stop working along with the lights.
- Warning Lights: In some instances, a failing headlight switch can trigger other seemingly unrelated warning lights, like the airbag light, due to communication errors on the vehicle's data network.
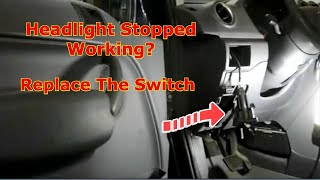
Important: Before condemning the switch, always check the headlight bulbs and fuses first. 🎬 Watch: How to check and replace the headlight switch. A blown fuse or burnt-out bulbs are common and much simpler to fix. However, if a new fuse blows immediately, it indicates a short circuit that could be in the switch itself.
Buying a Used Headlight Switch: What to Check
A used OEM headlight switch is an excellent, cost-effective alternative to an expensive new part. However, careful verification is essential to ensure you get the right one. Ford produced many variations of this switch for the same vehicles.
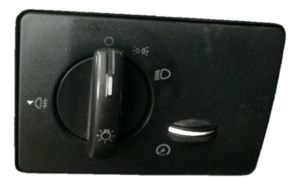
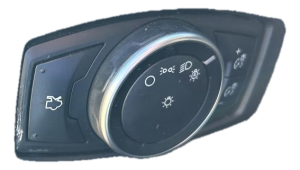
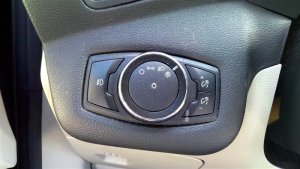
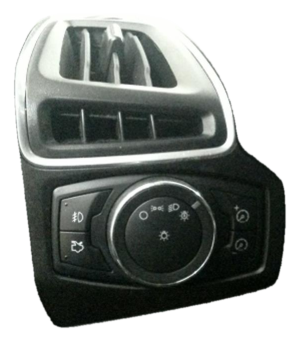
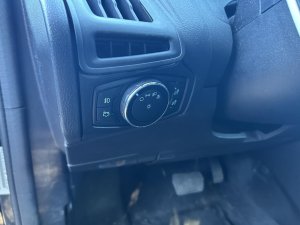
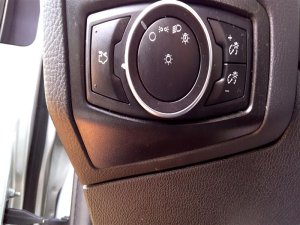
1. Match Functions and Buttons EXACTLY
This is the most critical step. These switches were configured based on the vehicle's factory options. Before purchasing, look at your original switch and compare it to the photos of the used part. You must match the following features:
- Automatic Headlights: Does your switch have an "Auto" position? The replacement must have it too.
- Fog Lights: Does your switch have a button for front fog lights? The replacement must match.
Installing a switch with different features will not add those features to your vehicle and will likely cause the switch not to work at all. The vehicle's Body Control Module (BCM) is programmed to communicate with a specific switch configuration.
2. Verify Part Numbers
If you can remove your original switch, the part number is usually on a sticker on the housing. Cross-referencing this number is the surest way to guarantee a match. Known compatible part numbers include BM5T-13A024-JD, CM5Z-11654-A, CM5Z-11654-B, CM5Z-11654-C, CV6Z-11654-K, CV6Z-11654-L, F1ET-13A024-EB, F1EZ-11654-E, JX7T-13D061-ED, SK4Z-11654-D, SK4Z11654A, and SW-7765 (Motorcraft).
3. Physical Inspection
When you receive the used part, check for the following:
- Rotary Knob Action: The dial should click firmly into each position. A loose or wobbly feel could indicate internal wear.
- Connector Pins: Look inside the electrical connector. The pins should be straight, clean, and free of any corrosion or signs of overheating (discoloration, melted plastic).
- Casing and Tabs: Ensure the plastic housing and all mounting tabs are intact and not cracked or broken. This is essential for it to clip securely into the dashboard.
Known Issues and Recalls
While there are no widespread recalls specifically for the headlight switch on these models, electrical issues related to the Body Control Module (BCM) and wiring harnesses are not uncommon. A Ford Transit Connect owner reported a B1130 fault code (lost signal from light module) which caused the headlights to stay on. In some cases, the problem may not be the switch itself but a wiring issue between the switch and the BCM, or a fault within the BCM. If a replacement switch does not solve the problem, a deeper electrical diagnosis may be required.
Installation Guide
Replacing the headlight switch is a straightforward DIY task for most owners.
- Difficulty: 1/5 (Beginner)
- Estimated Time: 15-20 minutes
- Tools Needed: Plastic trim removal tool or a small flathead screwdriver.
Replacement Steps:
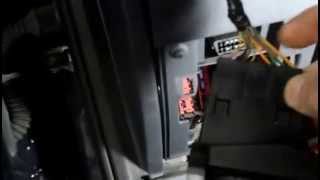
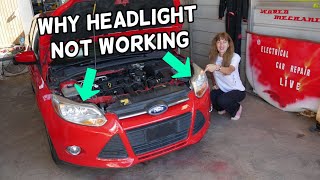
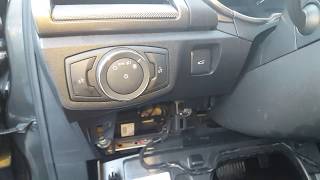
- Access the Switch: On most of these models (like the Escape, Focus, and Transit Connect 🎬 See this headlight fix for 2013-2019 Ford Escapes.), the switch is held in by clips. You can often access it by removing the fuse panel cover on the side of the dashboard or by carefully prying the trim panel surrounding the switch.
- Release the Switch: On the Ford Transit, for example, you can reach behind the dash through the fuse panel opening and squeeze retaining tabs on the top and bottom of the switch to push it out. On other models like the Fusion (which shares a similar design), you may need to pry the entire bezel out first.
- Disconnect Electrical Connectors: Once the switch is loose, you'll see one or two electrical connectors on the back. Press the release tab on each connector and pull it straight out. The headlights may turn on when the main connector is unplugged; this is normal.
- Install the New Switch: Plug the electrical connectors into the new switch until they click. Align the switch in the dashboard opening and press it firmly until the retaining clips snap into place. 🎬 Watch this walkthrough for Fusion, Escape, and Transit models.
- Test and Reassemble: Turn the ignition on and test all functions of the new switch—parking lights, headlights, high beams, fog lights (if equipped), and the dimmer. Once confirmed, reinstall any trim panels you removed.
Pro Tip: Before re-installing all the trim panels, test the new switch to make sure all functions work correctly. This saves you the trouble of taking everything apart again if there's an issue.
Cost Comparison
The cost for a replacement headlight switch can vary significantly depending on the source.
| Part Source | Estimated Price Range |
|---|---|
| New OEM (Dealer) | $95 - $145 |
| New Aftermarket | $30 - $70 |
| Used OEM | $25 - $60 |
| Shop Labor Cost | $50 - $90 |
Frequently Asked Questions (FAQ)
Can I add automatic headlights or fog lights by just changing the switch?
No. Simply installing a switch with more features will not enable those features. Options like automatic headlights and fog lights require additional components like light sensors, wiring harnesses, and specific programming in the Body Control Module (BCM). You must install a switch that matches your vehicle's original factory options.
My headlights are stuck on. Is it definitely the switch?
Not necessarily. While a failed switch is a common cause, this can also be a "fail-safe" mode triggered by the Body Control Module (BCM). If the BCM loses communication with the switch or detects a fault, it may default to keeping the low beams on for safety. This could be a wiring problem or a BCM issue. However, the switch is the most likely culprit and the easiest part to replace first.
Do I need to disconnect the battery to replace the headlight switch?
While it is always the safest practice to disconnect the negative battery terminal before working on any electrical component, it is not strictly necessary for this simple replacement. The circuit is not powered when the ignition is off. The most you might see is the headlights turning on when you unplug the old switch.
Why did my new switch not fix the problem?
If a new, correctly matched switch doesn't solve your lighting issue, the problem lies elsewhere in the circuit. The next steps would be to check for power and ground at the switch connector, inspect the wiring harness for damage, check the headlight relay, and potentially diagnose the Body Control Module (BCM).
Helpful Videos

Technical Specifications
OEM Part Numbers: BM5T-13A024-JD CM5Z-11654-A CM5Z-11654-B CM5Z-11654-C CV6Z-11654-K CV6Z-11654-L F1ET-13A024-EB F1EZ-11654-E JX7T-13D061-ED SK4Z-11654-D SK4Z11654A SW-7765
Rotary dial switch with integrated push buttons for optional features. Communicates with the Body Control Module (BCM) via a LIN-bus network.
We Have This Part in Stock

The information in this article is provided for general reference and educational purposes only. Vehicle specifications, procedures, and part compatibility can vary by production date, trim level, and region. Always consult your vehicle's factory service manual and verify part numbers before purchasing or performing repairs. Safety-critical components such as airbags, seat belts, and braking systems should be installed by a qualified professional.
- Ford Transit Connect:
- Ford C-Max:
- Ford Escape:
- Ford Focus:
- Ford Transit-150:
- Ford Transit-250:
- Ford Transit-350:
- 🎬 Helpful Videos
- 🛍️ Shop This Part
- Symptoms of a Failing Headlight Switch
- Buying a Used Headlight Switch: What to Check
- 1. Match Functions and Buttons EXACTLY
- 2. Verify Part Numbers
- 3. Physical Inspection
- Known Issues and Recalls
- Installation Guide
- Replacement Steps:
- Cost Comparison
- Frequently Asked Questions (FAQ)
- 🎟️ Get 5% Off