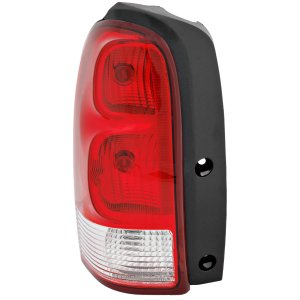
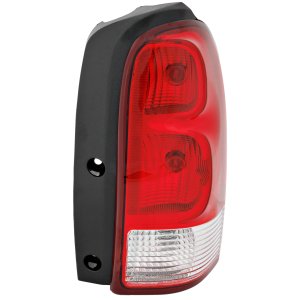
The Buick Terraza tail light is a vital component of the vehicle's rear lighting system. It ensures safety by signaling braking, turning, and maintaining visibility to other drivers at night or in low-light conditions. The tail light assembly typically includes rear lamps, brake lights, and turn signals, all housed within a protective lens.
Owners of the Buick Terraza may encounter certain issues with the tail light assembly:
Burnt-Out Bulbs: Over time, bulbs such as brake lights or turn signals may burn out and require replacement.
Cracked or Broken Lens: Physical damage from minor collisions or impacts can crack the tail light lens, affecting the brightness and clarity of the lights.
Moisture Inside the Assembly: Seal failures can allow water to enter the tail light housing, leading to condensation, electrical issues, or bulb failure.
Faulty Wiring: Wiring connections may become loose or corroded, causing intermittent functionality of the rear lamps or brake lights.
Proper maintenance of the tail light assembly can extend its lifespan and ensure optimal performance:
Regular Inspections: Periodically check all rear lamps and brake lights for proper operation. Have someone assist by observing the lights while you activate the brakes and signals.
Clean the Exterior Lens: Keep the tail light lens clean from dirt and grime to maintain maximum visibility. Use a non-abrasive cleaner and a soft cloth.
Check for Damage: Look for cracks or chips in the lens that could allow moisture to enter. Replace the lens or assembly if damage is found.
Seal Inspection: Examine seals and gaskets around the tail light assembly to prevent water ingress. Replace any damaged seals promptly.
Replace Bulbs in Pairs: If one bulb fails, consider replacing both to ensure consistent brightness and to avoid another failure shortly after.
Installing a new tail light assembly on a Buick Terraza can be straightforward with careful attention:
1. Safety First: Turn off the vehicle and disconnect the battery to prevent electrical shocks.
2. Access the Tail Light: Open the rear hatch to locate the tail light assembly. Remove any screws or fasteners securing the assembly.
3. Disconnect Wiring Harness: Gently unplug the wiring connectors from the tail light assembly.
4. Remove the Old Assembly: Carefully take out the old tail light housing without damaging the surrounding bodywork.
5. Install the New Assembly: Connect the wiring harness to the new tail light. Position it correctly and secure it with the original screws or fasteners.
6. Test the Lights: Reconnect the battery and test all functions, including brake lights, turn signals, and reverse lights.
7. Finalize Installation: Once everything is functioning properly, ensure all components are tightened and the rear hatch area is reassembled.
Q: What are the signs that my tail light assembly needs replacement?
A: Indicators include persistent bulb failures, condensation inside the lens, visible cracks or damage to the lens, and malfunctioning lights despite bulb replacement.
Q: Can I drive my Buick Terraza with a cracked tail light lens?
A: Driving with a cracked tail light lens is not recommended as it can reduce visibility and may be illegal due to safety regulations. It's best to replace a damaged tail light promptly.
Q: How often should I check my tail lights?
A: It's advisable to inspect your tail lights at least once a month or before long trips to ensure all lights are working correctly.
Q: Is it difficult to replace a tail light bulb myself?
A: Replacing a tail light bulb is usually a simple task that can be done with basic tools. Consult your vehicle's owner's manual for specific instructions.
Q: What causes moisture to accumulate inside the tail light assembly?
A: Moisture can enter the tail light housing due to damaged seals, cracks in the lens, or gaps in the assembly. Addressing these issues promptly can prevent electrical problems.