
2010-2017 Prius, Prius C, V & Plug-In Antenna: Solving Reception Issues & Nav/Sat Radio Confusion
This guide explains the common causes of poor radio reception and shows how to choose the correct used antenna for your specific audio system.
- Compatibility is the biggest challenge. You MUST verify if your car has standard radio, navigation, or satellite radio and match the connectors on the bottom of the antenna base.
- Poor reception is usually caused by a failed amplifier inside the antenna base, not the screw-on mast.
- Replacing the entire antenna base is a simple DIY job that requires lowering the back of the headliner and takes less than an hour.
- A used OEM antenna offers significant savings over a new dealer part and is often a better choice for signal quality than a cheap aftermarket alternative.
Symptoms of a Failing Antenna
A problem with the roof antenna assembly can manifest in several ways, often starting subtly. Here are the most common signs that your antenna needs attention:
- Poor Radio Reception: This is the most frequent complaint. You may notice increased static, difficulty tuning into stations that used to be clear, or a complete loss of signal, especially on the AM band first. Many owners report that this issue points to a failure of the internal amplifier within the antenna base, not the screw-on mast itself.
- Intermittent or No GPS Signal: If your Prius is equipped with factory navigation, a faulty antenna can cause the system to lose its satellite lock, take a long time to find your location, or display your position inaccurately.
- Satellite Radio Issues: For vehicles with satellite radio, you might experience frequent signal dropouts or a "No Signal" message on your display, even with a clear view of the sky.
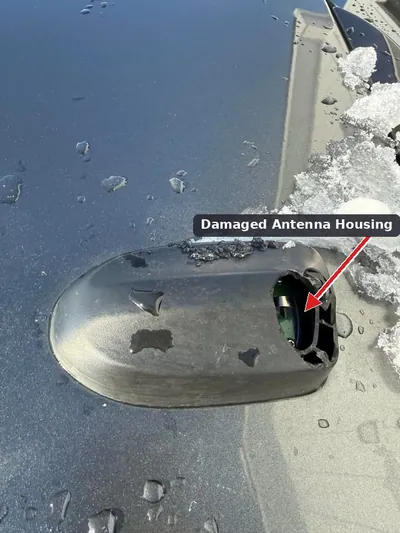
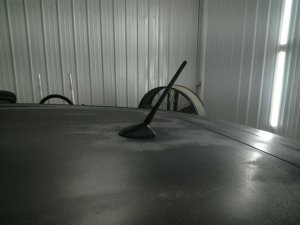
- Visible Damage: The most obvious symptom is physical damage. The plastic base can become brittle and crack from sun exposure, allowing water to leak into the vehicle or damage the internal electronics. The mast itself can also be broken off in car washes or by impacts.
Understanding Antenna Variations: The Key to Compatibility

Not all antennas for this generation of Prius are the same. Toyota used different antenna bases depending on the vehicle's factory-installed options. Choosing the wrong one is the most common mistake when buying a replacement. Before purchasing, you must identify which system your vehicle has.
Warning: The external appearance of the antenna base is very similar across all versions. You cannot reliably determine compatibility by looking at the outside of the part. You must verify the part number and, more importantly, the electrical connectors on the bottom of the antenna base.
| Part Number | Function / System | Notes |
|---|---|---|
| 86300-47061 | Standard AM/FM Radio | This is the base model antenna with a built-in amplifier for standard radio reception. |
| 86860-47070 | GPS / Navigation | This antenna is for vehicles equipped with the factory navigation system. |
| 86960-47011 | Satellite Radio (SiriusXM) | This antenna is for vehicles equipped with satellite radio. |
| 86309-47020 | Antenna Mast Only | This is only the screw-on whip portion. It is interchangeable between the different bases but does not contain any electronics. |
Vehicle-Specific Notes
While the antenna bases are largely shared, there can be minor differences. For example, the 2012-2017 Toyota Prius V may use different part numbers for its antenna assemblies depending on options. Always verify the part number and connector style for your specific model and year before buying.
Buying a Used Antenna
A used OEM antenna is an excellent, cost-effective alternative to an expensive new part. However, due to the compatibility variations, careful inspection is essential.
What to Check Before You Buy:
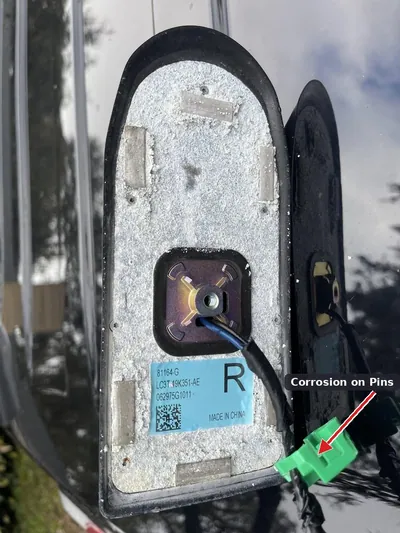
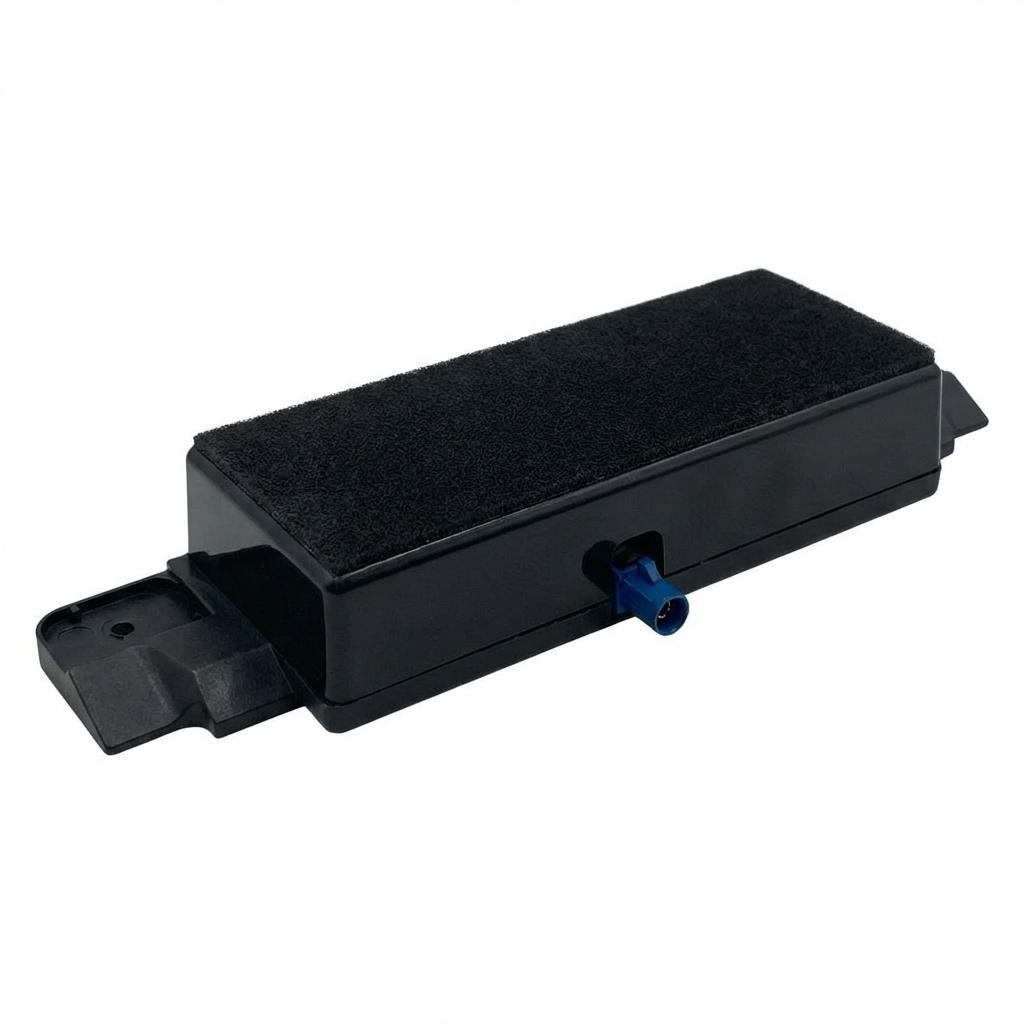
- Verify the Connectors: This is the most critical step. Ask for clear photos of the underside of the antenna base. Compare the number, shape, and color of the electrical connectors to your original part. A standard radio antenna will have fewer connectors than one equipped for both GPS and satellite radio.
- Inspect the Plastic Housing: Look for any cracks, especially around the mounting nut and where the mast screws in. Sun exposure can make the plastic brittle, and cracks can lead to water leaks into your headliner.
- Check for Corrosion: Examine the metal mounting stud and the electrical pins inside the connectors. Any green or white corrosion is a red flag that the part was exposed to moisture and may not function correctly.
- Confirm the Part Number: If possible, match the OEM part number stamped on the used part to the one you need.
Pro Tip: When buying a used antenna, focus on the condition of the base, not the mast. A mast is inexpensive and easy to replace if it's worn or broken, but the electronic base is the expensive and critical component.
Replacement Guide
Replacing the antenna base is a straightforward job that most DIY mechanics can complete in under an hour. 🎬 Watch: How to replace the antenna base on Gen 2 models The process involves lowering the rear of the interior headliner to access the mounting nut.
Difficulty: 2 out of 5 (Easy to Moderate)
Tools Needed:
- Trim removal tool
- 10mm socket or wrench
- 22mm deep socket or adjustable wrench/pliers
Step-by-Step Process:
🎬 See this walkthrough for removing the 2010-2015 antenna- Access the Headliner: Open the rear hatch. Using a trim removal tool, carefully pop out the three plastic clips holding the rear of the headliner to the roof.
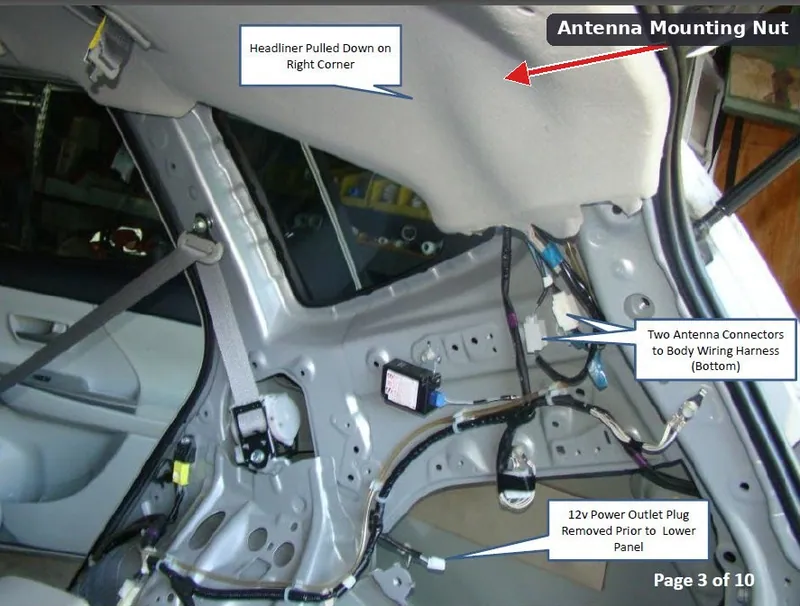
- Lower the Headliner: Gently pull down on the rear edge of the headliner. You only need to lower it a few inches to get your hands and tools inside. You do not need to remove the entire headliner.
- Disconnect Electrical Connectors: Locate the antenna wiring. There may be a 10mm bolt holding a bracket for the connectors. Remove it if necessary, then carefully unplug the connectors from the base of the antenna.
- Remove the Mounting Nut: Using a 22mm socket or wrench, unscrew the large nut holding the antenna base to the roof. Once the nut is off, the antenna base can be lifted off the car from the outside.
- Installation: Installation is the reverse of removal. Ensure the new antenna's gasket is seated properly to prevent leaks. Hand-tighten the mounting nut first, then give it a final snug turn with a wrench. Do not overtighten, as this can crack the plastic base. Reconnect the wiring, pop the headliner clips back in, and test the radio/GPS/satellite functions.
Cost Comparison
The cost of replacing a Prius antenna can vary significantly depending on the type of part you choose.
| Part Type | Estimated Cost | Notes |
|---|---|---|
| New OEM | $150 - $400+ | Price varies by function (Nav/Sat are more expensive). Ensures perfect fit and performance. |
| New Aftermarket | $20 - $80 | Mostly consists of cosmetic 'shark fin' covers or replacement masts. Complete base assemblies are less common and may have inferior reception compared to OEM. |
| Used OEM | $50 - $120 | Offers the best value, providing OEM quality at a significant discount. Careful verification of compatibility is required. |
| Shop Labor | $100 - $150 | Most repair shops will charge for approximately one hour of labor for this job. |
Frequently Asked Questions
My radio reception is terrible, but the antenna looks fine. What's wrong?
The most likely cause is a failure of the internal signal amplifier located inside the plastic antenna base. The external mast simply receives the signal, but the amplifier boosts it for the radio. When the amplifier fails, reception becomes weak and static-filled, even if the mast is in perfect condition.
Can I just replace the broken mast that got snapped off in a car wash?
Yes. The mast (part number 86309-47020) is sold separately and simply screws on by hand. If your only problem is a physically broken mast and your reception was fine before, a new mast is all you need.
How do I know for sure which antenna my Prius needs?
The only certain way is to gain access to the underside of your current antenna by lowering the rear of the headliner. Observe the number and type of connectors going into the base. Take a picture and compare it to the used part you plan to buy. This 15-minute check can save you from buying the wrong part.
Will an aftermarket 'shark fin' antenna improve my reception?
Generally, no. Most low-cost shark fin antennas are purely cosmetic covers that fit over the existing base. Functional shark fin antennas from reputable brands will typically provide reception that is equal to, but not necessarily better than, the original OEM antenna. Their main benefit is a modern look and avoiding the need to remove a mast for a car wash.
Helpful Videos


Technical Specifications
OEM Part Numbers: 86300-47061 (Standard AM/FM Base) 86309-47020 (Mast Only) 86860-47070 (Navigation Base) 86960-47011 (Satellite Radio Base)
Varies by function (AM/FM, GPS, Satellite Radio). All are roof-mounted and contain an internal signal amplifier.
We Have This Part in Stock

The information in this article is provided for general reference and educational purposes only. Vehicle specifications, procedures, and part compatibility can vary by production date, trim level, and region. Always consult your vehicle's factory service manual and verify part numbers before purchasing or performing repairs. Safety-critical components such as airbags, seat belts, and braking systems should be installed by a qualified professional.
- Toyota Prius:
- Toyota Prius C:
- Toyota Prius Plug-In:
- Toyota Prius V: