
Mazda Rain & Light Sensor Failure: 2022-2025 CX-30, CX-50, Mazda3 & More
Diagnose why your auto headlights and wipers are failing, and learn how to replace the sensor module without wasting money.
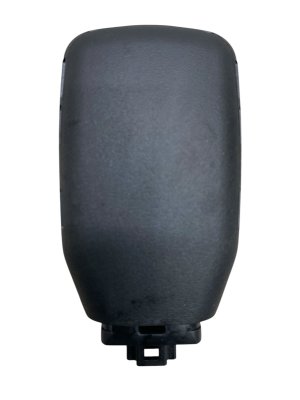
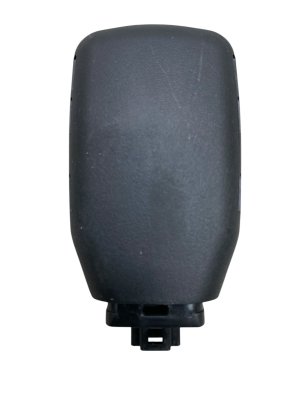
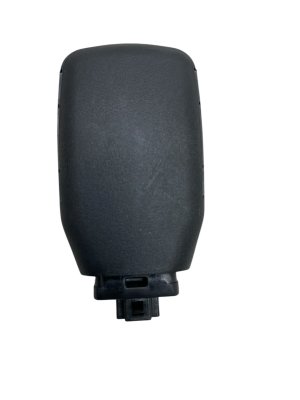
- This part is a combined Rain and Light Sensor that controls both auto headlights and auto wipers.
- Failure is often caused by a bad adhesive gel pad, not the sensor itself, especially after a windshield replacement.
- This sensor does NOT control the Automatic High Beams; that function is handled by the separate Forward Sensing Camera (FSC).
- Replacement is very easy (Difficulty 1/5) but requires a new, bubble-free installation of the adhesive pad for proper function.
Is it the Rain/Light Sensor or the Forward Camera?

Many owners confuse the function of two different windshield-mounted sensors. It's important to know which part does what before you start a repair.
- The Rain & Light Sensor (this part) controls the basic automatic on/off function of your headlights based on ambient light (dusk, tunnels) and the automatic operation of your windshield wipers when it rains.
- The Forward Sensing Camera (FSC) is a separate, more complex camera that manages driver-assist systems. This includes the Automatic High Beam Control (switching between high and low beams for traffic), Lane-Keep Assist, and Smart Brake Support (Automatic Emergency Braking).
Recall Notice: Mazda issued recall 6824H (NHTSA ID: 24V649) for a small number of 2024 Mazda 3, 2024 CX-30, and 2025 CX-50 vehicles due to a faulty Forward Sensing Camera (FSC). This recall specifically addresses failures in the automatic high beams and other i-ACTIVSENSE safety systems, not the basic auto on/off headlights controlled by the rain/light sensor.
Symptoms of a Failing Rain & Light Sensor


When this sensor fails, you'll notice issues with automatic functions. The most common symptoms include:
- Headlights Stay On All The Time: The sensor incorrectly reads the environment as dark, keeping the headlights and taillights on even in bright daylight. This can also cause the infotainment screen and Head-Up Display (HUD) to remain in their dim "night mode."
- Automatic Headlights Don't Turn On: The opposite of the above, the sensor fails to detect darkness, and you have to turn the headlights on manually.
- Automatic Wipers Don't Work: With the wiper stalk in the 'AUTO' position, the wipers will not activate when it rains.
- Erratic Wiper or Light Behavior: The systems may work intermittently or behave unpredictably.
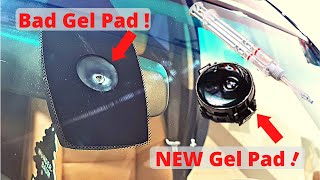
Pro Tip: Often, these symptoms are not caused by a failed sensor, but by a faulty adhesive gel pad between the sensor and the windshield. If air bubbles get trapped or the gel degrades, especially after a windshield replacement, the sensor can no longer get a clear reading.
Buying a Used Rain & Light Sensor
A used OEM sensor is an excellent, cost-effective alternative to an expensive new part. Because it's a genuine Mazda part, it's guaranteed to communicate correctly with your vehicle's other electronic modules, avoiding the compatibility headaches that can come with aftermarket electronics.
What to Inspect Before Buying
- Check the Lens: The clear lens on the face of the sensor should be free of cracks, deep scratches, or haziness.
- Inspect the Connector: Look at the electrical connector pins. They should be straight, clean, and free of any corrosion.
- Ask About the Donor Vehicle: If possible, find out the mileage of the vehicle the part came from. Lower mileage is always better for electronic components.
Compatibility and Part Numbers
This sensor is shared across the 2022-2025 Mazda CX-30, 2023-2025 Mazda CX-50, 2024-2025 Mazda CX-90, 2023-2025 Mazda 3, and 2025 Mazda CX-70. However, always verify the part number.
- The most current part number is BDGF-66-5G0J.
- This part supersedes (replaces) older versions like BDGF-66-5G0H.
Warning: You MUST use a new adhesive pad when installing the sensor. The part number for the pad is often TK80-66-5G2. Do not reuse the old pad, as it will not seal properly and will cause the sensor to malfunction.
Replacement Guide (Difficulty: 1/5)

Replacing the rain and light sensor is a simple job that most DIYers can complete in under 30 minutes. The process is nearly identical across all listed Mazda models.
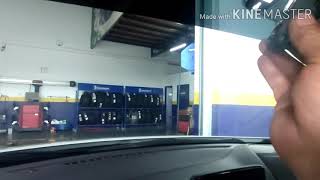
🎬 Watch this step-by-step walkthrough of the sensor and pad replacement.Tools Needed
- Small plastic pry tool or trim remover
- Clean, lint-free cloth
Step-by-Step Instructions
- For safety, disconnect the negative terminal from your vehicle's battery.
- The sensor is located behind the rearview mirror. Gently pry open the plastic cover surrounding the mirror's base. It is typically held on by clips.
- With the cover removed, you will see the sensor. Press the release tab on the electrical connector and pull it away from the sensor.
- Slide the locking tabs on the sensor's mounting bracket to release it from the windshield. Remove the sensor.
- Thoroughly clean the mounting area on the windshield to remove any old adhesive residue.
- Peel the backing from your new adhesive pad and carefully apply it to the new or used replacement sensor, ensuring there are no air bubbles.
- Peel the final backing from the pad and press the sensor firmly onto the windshield bracket. Ensure there are no air bubbles between the sensor and the glass.
- Reconnect the electrical connector, snap the plastic cover back into place, and reconnect the battery.
After Installation
After replacing the sensor, you may need to reset the auto light sensitivity. This can often be done in the vehicle settings menu on your Mazda Connect infotainment screen. If the system was set to something other than the default ('Medium'), it may not operate correctly until you re-select your desired setting.
Cost Comparison
| Part Type | Estimated Cost |
|---|---|
| New OEM | $220 - $320 |
| Used OEM | $50 - $125 |
| New Aftermarket | $75 - $150 (Verify compatibility carefully) |
| Shop Labor | $75 - $150 |
Frequently Asked Questions (FAQ)
Do I need to recalibrate the sensor after replacing it?
A full dealer-level recalibration is not usually necessary. However, you should check the auto light sensitivity settings in your infotainment system after installation to ensure it's set to your preference, as replacing the sensor can reset it to default.
My automatic high beams aren't working. Is this the right part to fix it?
No. Automatic high beam control is managed by the Forward Sensing Camera (FSC), a different part located nearby. The rain and light sensor only controls the standard automatic on/off function of the headlights.
Can I just replace the adhesive gel pad?
Yes. If your sensor is malfunctioning after a windshield replacement or you can see visible bubbles under the lens, replacing only the adhesive pad (Part No. TK80-66-5G2) is a very common and inexpensive first step that often solves the problem.
🎬 See how to properly replace the adhesive gel pad yourself.Why did my sensor fail right after a windshield replacement?
This is a very common issue. The technician may have accidentally damaged the sensor during removal, or more likely, they reused the old adhesive gel pad. An old pad that has been removed and reinstalled rarely creates the perfect, bubble-free seal required for the sensor to read through the glass correctly.
Helpful Videos


Technical Specifications
OEM Part Numbers: BDGF-66-5G0J BDGF-66-5G0H BDGF-66-5G0G BDGF-66-5G0
Integrated rain and ambient light sensor module. Mounts to windshield.
We Have This Part in Stock

The information in this article is provided for general reference and educational purposes only. Vehicle specifications, procedures, and part compatibility can vary by production date, trim level, and region. Always consult your vehicle's factory service manual and verify part numbers before purchasing or performing repairs. Safety-critical components such as airbags, seat belts, and braking systems should be installed by a qualified professional.
- Mazda CX-30:
- Mazda CX-50:
- Mazda CX-90:
- Mazda 3:
- Mazda CX-70:
- 🎬 Helpful Videos
- 🛍️ Shop This Part
- Is it the Rain/Light Sensor or the Forward Camera?
- Symptoms of a Failing Rain & Light Sensor
- Buying a Used Rain & Light Sensor
- What to Inspect Before Buying
- Compatibility and Part Numbers
- Replacement Guide (Difficulty: 1/5)
- Tools Needed
- Step-by-Step Instructions
- After Installation
- Cost Comparison
- Frequently Asked Questions (FAQ)
- 🎟️ Get 5% Off