
1995-2007 Ford, Lincoln & Mercury Blower Control Module Failure: Fan Stuck on High?
This guide covers the common failures, diagnosis, and replacement of the Electronic Automatic Temperature Control (EATC) blower speed control module for the Ford Taurus, Mercury Sable, Lincoln Continental, and more.
- This module is ONLY for vehicles with Electronic Automatic Temperature Control (EATC); it will not work with manual A/C.
- The most common failure symptom is the fan being stuck on the highest speed.
- This part is plug-and-play and does NOT require any programming or dealer visit for installation.
- To prevent repeat failures, it is highly recommended to replace the blower motor at the same time as the control module.
Is This a Body Control Module (BCM)?
While the initial prompt referred to this as a Body Control Module, it's important to clarify that this specific part is not the vehicle's main BCM. The main BCM is a central computer that manages various body functions like power windows, locks, and interior lighting. This part is a dedicated Blower Motor Control Module, sometimes called a Blower Motor Resistor or Speed Controller. Its sole job is to manage the fan speed for the climate system in cars with automatic temperature control (EATC). This guide focuses exclusively on this blower control module.
Symptoms of a Failing Blower Control Module
When this module begins to fail, the symptoms are usually very distinct and related directly to the HVAC fan's operation.
- Fan Only Works on High Speed: This is the most common failure symptom. The module fails in a way that sends full power to the blower motor, causing it to run at maximum speed regardless of the setting on your control panel.
- Fan Doesn't Work at All: The module can also fail completely, cutting all power to the blower motor. No air will come from the vents at any speed setting.
- Fan Runs with the Car Off: In some cases, a shorted module can cause the blower fan to continue running even after the ignition is turned off, draining the battery.
- Inconsistent or Erratic Fan Speed: The fan speed may change randomly on its own, or it might work intermittently.
- Burning Smell from Vents: An overheating module or its electrical connector can produce a distinct burning plastic or electrical smell through the vents. This is a serious sign that the part should be inspected and replaced immediately.
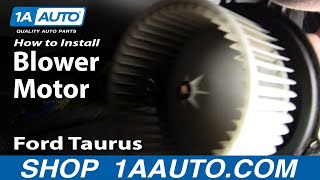
Pro Tip: A worn-out blower motor is a leading cause of repeated control module failure. The old motor draws too much electrical current, which overheats and destroys the new module. If you are replacing a failed module, it is highly recommended to replace the blower motor at the same time to prevent a comeback repair.
🎬 See how to replace the blower motor and fan cage.Vehicle-Specific Information & Known Issues
While this module was used across several platforms, there are some vehicle-specific details to be aware of.
Ford Taurus (1996-2007) & Mercury Sable (1996-2005)
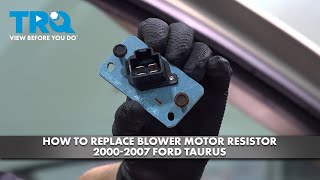
In these popular sedans, the blower control module is located under the passenger side dashboard, mounted to the HVAC plenum near the blower motor. Access is typically gained by removing the panel under the glove box. 🎬 Watch: How to replace the blower resistor on a Taurus. A common related issue on these cars is a failed blend door actuator, which controls temperature, not fan speed. If you have fan speed control but can't change from hot to cold, the blend door is the likely culprit, not this module.
Lincoln Continental (1995-2002)
The replacement process on the Continental is very similar, with the module located behind the glove box. It's a straightforward DIY job that can be completed in about an hour. A common symptom is the fan being stuck on high.
Lincoln Mark VIII (1997-1998)
The Mark VIII EATC system has a built-in self-diagnostic test that can help identify issues. To enter the test, with the engine running, press the 'OFF' and 'FLOOR' buttons simultaneously, then press the 'AUTOMATIC' button within two seconds. The display will show any stored trouble codes. While this test is more for the main EATC head unit, it can sometimes point to related system faults. A common failure on these cars is the blend door, which can get stuck on full heat or full cold.
Mercury Villager (1996-2002)
The Villager, a joint venture with Nissan, also uses this module for its automatic climate control system. The location and replacement procedure are similar to the Taurus, accessed from the passenger footwell. Problems with the heater core on these vans are also noted, but that is a much more involved repair.
Diagnosis & Replacement
Diagnosis
Diagnosing a failed module is usually straightforward based on the symptoms. If the fan is stuck on high, the module is almost certainly the cause. If the fan doesn't work at all, you should first check the fuse for the HVAC system. If the fuse is good, you can test for power at the blower motor itself. If there is voltage at the motor connector when the fan is turned on but the motor doesn't spin, the motor is bad. If there is no voltage, the problem is likely the control module or the wiring to it.
Replacement Walkthrough (General)
While the exact steps vary slightly by model, the general procedure is consistent:
- Disconnect the Battery: Always disconnect the negative battery terminal before working on electrical components.
- Access the Module: Remove the trim panel under the passenger side dashboard and/or the glove box assembly to gain access to the blower motor area.
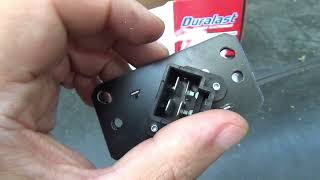
- Locate the Module: The blower control module is a small, rectangular part with a large finned aluminum heat sink. It is mounted directly in the airflow of the HVAC housing, held in by two screws (typically 8mm).
- Unplug and Remove: Disconnect the two electrical connectors from the module. Remove the two screws and pull the module out of the housing.
- Install the New Module: Installation is the reverse of removal. 🎬 Watch this video for a step-by-step replacement walkthrough. Ensure the electrical connectors are securely plugged in.
- Reconnect and Test: Reconnect the battery and test all functions of the HVAC system, running the fan through all its variable speeds.
Buying a Used Blower Control Module
This is an excellent part to buy used. Because it is a simple electronic component with no moving parts and no programming required, a tested OEM unit from a reputable recycler is a smart and cost-effective choice. Aftermarket versions are available, but their quality can be inconsistent.
- Verify Compatibility: The most important step is to ensure the module is for a vehicle with Electronic Automatic Temperature Control (EATC). This part will NOT work on vehicles with manual A/C and heater controls.
- Physical Inspection: When buying a used module, inspect the electrical pins for any signs of corrosion, melting, or burn marks. Check the aluminum heat sink for physical damage. Avoid any part that looks like it has been exposed to water or extreme heat.
- OEM is Best: An original Ford (Motorcraft) part is generally more reliable than a cheap aftermarket clone. A used OEM part that has been tested is often a better value than a new, unproven aftermarket brand.
- No Programming Needed: This module is a simple plug-and-play device. It does not need to be programmed, flashed, or coded to the vehicle. This makes replacement easy for DIYers and shops alike.
Cost Comparison
| Part Type | Estimated Cost |
|---|---|
| New OEM (Motorcraft) | $120 - $180 |
| New Aftermarket | $40 - $80 |
| Used OEM | $25 - $60 |
| Shop Labor | $75 - $150 |
Frequently Asked Questions
Does this module need to be programmed to my vehicle?
No. This blower control module is a plug-and-play part and does not require any programming or special calibration. You can simply install it and it will work immediately.
My fan only works on high. Is it the switch or this module?
In a vehicle with Automatic Temperature Control, when the fan is stuck on high, it is almost always a failure of this electronic blower control module. The module has failed in a way that provides full power to the fan motor continuously.
Where is this part located?
On all the listed vehicles, the blower control module is located in the passenger-side footwell, under the dashboard. It is mounted directly into the HVAC air duct near the blower motor fan itself, so the airflow can cool its heat sink.
Can I use a module from a car with manual A/C?
No. Manual A/C systems use a simpler, non-electronic part called a blower motor resistor, which has different wiring and is not compatible. You must use a module specifically designed for the Electronic Automatic Temperature Control (EATC) system.
Helpful Videos
Technical Specifications
OEM Part Numbers: F50F19E624CC F50F19E624CD F5OY19E624A YF3H19E624AA YF3Z19E624AA YH1836
This module is for vehicles with Electronic Automatic Temperature Control (EATC) only. It provides variable voltage to the blower motor.
We Have This Part in Stock

The information in this article is provided for general reference and educational purposes only. Vehicle specifications, procedures, and part compatibility can vary by production date, trim level, and region. Always consult your vehicle's factory service manual and verify part numbers before purchasing or performing repairs. Safety-critical components such as airbags, seat belts, and braking systems should be installed by a qualified professional.
- Ford Taurus:
- Mercury Sable:
- Lincoln Continental:
- Mercury Villager:
- Lincoln Mark VIII:
- 🎬 Helpful Videos
- 🛍️ Shop This Part
- Is This a Body Control Module (BCM)?
- Symptoms of a Failing Blower Control Module
- Vehicle-Specific Information & Known Issues
- Ford Taurus (1996-2007) & Mercury Sable (1996-2005)
- Lincoln Continental (1995-2002)
- Lincoln Mark VIII (1997-1998)
- Mercury Villager (1996-2002)
- Diagnosis & Replacement
- Diagnosis
- Replacement Walkthrough (General)
- Buying a Used Blower Control Module
- Cost Comparison
- Frequently Asked Questions
- 🎟️ Get 5% Off