
2015-2022 Ram ProMaster City Console: Fixing Rattles, Damage, and Replacement Guide
This guide covers the common failure points, replacement costs, and pre-purchase checks for the front floor console in the 2015-2022 Ram ProMaster City.
- The most common reasons for replacement are physical damage like cracks and broken latches, not electronic failure.
- When buying a used console, the most critical check is to ensure all mounting tabs and clips are intact to prevent future rattles.
- The main console body (5YL72LXHAA) and the shifter trim bezel (5YJ81LXHAA) are often sold as separate parts; verify which you need before purchasing.
- There are no direct recalls on the console, but a wiring recall for 2015-2016 models exists for a connector located in the same area.
Known Issues and Failure Symptoms
The console panel in the Ram ProMaster City is a durable plastic component, so failures are almost always physical or related to its integrated parts. Unlike electronic modules, you will not see any diagnostic trouble codes (DTCs) related to the console itself.
Most Common Symptoms of Failure
- Cracks and Scratches: Due to its location, the console is prone to being kicked, hit by cargo, or damaged by tools. This can lead to unsightly cracks, deep gouges, and broken mounting tabs.
- Rattling or Squeaking Noises: Loose mounting bolts or broken clips can cause the entire assembly to vibrate and rattle, especially when driving on rough surfaces. Forum users have also noted that the latch mechanism on storage lids can be a source of noise.
- Broken Storage Bin Latch or Hinge: The latch or hinge for the storage compartment lid can break from repeated use or excessive force. This can prevent the lid from closing securely. Some owners have developed DIY fixes for faulty latches.
- Faulty 12V Power Outlet or USB Port: The integrated power ports can fail, preventing you from charging devices. This is often due to a blown fuse, a loose internal connection, or physical damage to the port itself.
Pro Tip: A rattling noise from the center of the van may not be the console itself. Before replacing the console, check for loose items inside the storage bin and inspect nearby components like the heat shields under the vehicle, which can also cause rattling sounds.
Buying a Used 2015-2022 ProMaster City Console Panel
Since a new OEM console can be costly, a used unit is a popular and practical choice. However, careful inspection is crucial to ensure you get a good part.
Pre-Purchase Inspection Checklist
When buying a used console, whether online or in person, check the following:
- All Mounting Points Intact: Carefully inspect the bottom and sides of the console. Look for the plastic tabs and bolt holes. Ensure none are cracked, broken off, or stressed. A console with broken tabs will never fit securely and will likely rattle.
- Check for Cracks: Look for hairline cracks, especially around the cup holders, storage bin opening, and shifter cutout. Minor surface scratches are acceptable, but deep cracks compromise the part's structure.
- Test the Latch and Hinge: If buying in person, open and close the storage lid multiple times. The latch should click securely, and the hinge should operate smoothly without binding. If buying online, ask the seller for a video demonstrating its function.
- Verify Electrical Components: Confirm that the 12V power outlet and any USB ports are included and appear undamaged. Check for corrosion inside the ports.
- Confirm Part Numbers: The ProMaster City console assembly consists of several pieces that may be sold separately. The main body is often part number 5YL72LXHAA. The shifter trim bezel is a separate part, often 5YJ81LXHAA. Ensure you are buying the specific piece you need.
Why Used OEM is the Best Choice
For a large, model-specific interior trim piece like this, aftermarket options are virtually non-existent. A used OEM console is almost always the best option because it guarantees a perfect fit, correct color and texture match, and original factory durability. Cheap knock-offs, if you could find one, would likely use inferior plastic and have poor fitment, leading to gaps and rattles.
Replacement Overview
Replacing the center console is a straightforward job that most DIY mechanics can handle with basic tools.
- Difficulty: 2 out of 5
- Estimated Time: 1 - 1.5 hours
- Tools Required: Trim removal tool kit, socket set (likely 10mm), Phillips and Torx screwdrivers.
Abbreviated Step-by-Step Guide
- Disconnect the Battery: As a safety precaution, disconnect the negative battery terminal before working on interior components with electrical connections.
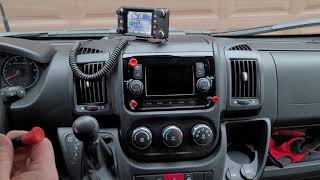
- Remove Shifter Trim: The trim piece around the gear shifter often needs to be unclipped and removed first. 🎬 Watch: How to remove the shifter trim and dash panels
- Locate and Remove Fasteners: Look for screws or bolts inside the storage compartment, under the cup holders (you may need to remove a rubber insert), and on the sides of the console.
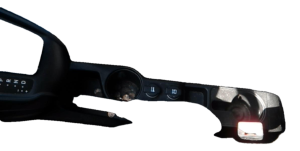
- Disconnect Electrical Connectors: Once the console is loose, carefully lift it and identify the wiring harness 🎬 See this guide for accessing dash components and wiring connected to the 12V outlet and/or USB port. Press the release tab and disconnect it.
- Remove the Console: With all fasteners and connectors removed, the console can be lifted out of the vehicle.
- Installation: Installation is the reverse of removal. Position the new console, reconnect the electrical harness, and secure all bolts and screws. Do not overtighten plastic fasteners.
Cost Comparison
Prices for a replacement console can vary significantly. A used OEM part offers the best value.
| Part Type | Estimated Cost |
|---|---|
| New OEM (Main Console - 5YL72LXHAA) | $220 - $332 |
| New OEM (Shifter Bezel - 5YJ81LXHAA) | $70 - $90 |
| Used OEM (Full Assembly) | $100 - $250 |
| Shop Labor | $120 - $225 |
Official Service Bulletins (TSBs) and Recalls
As of early 2026, there are no specific recalls or Technical Service Bulletins (TSBs) from Ram or the NHTSA that directly address the console panel itself. However, there is a notable recall for related wiring.
Recall Notice (Related Issue): Chrysler recalled 2015-2016 Ram ProMaster City vans for a low-voltage electrical harness connector near the driver's seat that was susceptible to water damage and corrosion. This corrosion could cause the transmission to unexpectedly shift into neutral. While replacing your console, it is wise to inspect this wiring for any signs of corrosion or improper repairs.
Frequently Asked Questions (FAQ)
Can I just fix my broken console latch?
Yes, in some cases. If the latch mechanism is merely sticking or misaligned, some owners have successfully fixed it by disassembling the latch and adjusting the internal components or by adding a small amount of material to help the latch catch properly. If the plastic itself is cracked, replacement is usually necessary.
Is the shifter trim bezel sold separately from the main console?
Yes. The gear shift indicator bezel (OEM part number 5YJ81LXHAA) is a separate component from the main console body (5YL72LXHAA) and can be purchased individually. This is useful if only your shifter trim is damaged.
My console rattles. What's the easiest way to fix it?
First, ensure the noise isn't from items stored inside. Next, check that all mounting bolts are tight. If the noise persists, it may be coming from the storage lid latch. Some owners have fixed this by applying a small piece of foam tape to the area where the latch makes contact with the console body, which dampens the vibration.
Will a console from a Tradesman fit in an SLT model?
Physically, the consoles are interchangeable as the mounting points are the same. However, there may be differences in color, finish, or the presence of a USB port versus a simple blanking plate. Always verify the features of the replacement console match your vehicle's original equipment or your desired setup.
Helpful Videos
Technical Specifications
OEM Part Numbers: 5YL72LXHAA (Main Floor Console Assembly) 5YJ81LXHAA (Gear Shift Indicator Bezel) 5YL68JXWAA (Console End Cap)
Fits 2015-2022 Ram ProMaster City models equipped with an automatic transmission and front bucket seats.
We Have This Part in Stock

The information in this article is provided for general reference and educational purposes only. Vehicle specifications, procedures, and part compatibility can vary by production date, trim level, and region. Always consult your vehicle's factory service manual and verify part numbers before purchasing or performing repairs. Safety-critical components such as airbags, seat belts, and braking systems should be installed by a qualified professional.
- Ram ProMaster City:
- 🎬 Helpful Videos
- 🛍️ Shop This Part
- Known Issues and Failure Symptoms
- Most Common Symptoms of Failure
- Buying a Used 2015-2022 ProMaster City Console Panel
- Pre-Purchase Inspection Checklist
- Why Used OEM is the Best Choice
- Replacement Overview
- Abbreviated Step-by-Step Guide
- Cost Comparison
- Official Service Bulletins (TSBs) and Recalls
- Frequently Asked Questions (FAQ)
- 🎟️ Get 5% Off