
2007-2015 Ford Edge & Lincoln MKX Door Panel and Latch Guide
Your complete guide to fixing rattles, addressing the common 'Door Ajar' light issue, and buying the right used interior door panel for your 2007-2014 Ford Edge or 2007-2015 Lincoln MKX.
- A 'Door Ajar' light that won't turn off is usually a failed door latch, not the panel, but requires panel removal to fix.
- Compatibility is critical when buying used. You must match the panel to your vehicle's trim level (SE, SEL, Sport), color, and options like ambient lighting or a premium sound system.
- Before buying a used panel, always inspect photos of the backside for broken mounting clips, which are the primary cause of rattles.
- Replacement is a DIY-friendly job, but a set of plastic trim removal tools is essential to avoid damaging the panel or door.
Symptoms of a Failing Door Interior Trim Panel

Problems with the door panel are typically easy to see, hear, or feel. While the panel itself is a simple part, its failure can be annoying and can also be a symptom of a related, more complex issue.
Rattling or Buzzing Noises
This is the most common complaint. The plastic clips holding the panel to the metal door frame can become brittle and break over time. When this happens, the panel is no longer held tightly, allowing it to vibrate against the door structure. You'll most likely hear these rattles and buzzes when driving on rough roads or when the audio system's bass is turned up.
Loose Fit and Visible Gaps
You may be able to physically move the panel with your hand or see a noticeable gap between the panel and the door frame. This is a clear sign that multiple mounting clips have failed or that retaining screws have backed out. This can also occur if the panel was not reinstalled correctly after a previous repair.
Worn or Peeling Armrest
The armrest area receives the most physical contact and wear. Over years of use, the vinyl or leather material can delaminate, bubble, or peel away from the underlying foam and plastic structure. This is primarily a cosmetic issue but can be unpleasant to the touch.
Malfunctioning Switches or Handle
While the switches and handle are separate parts, their stability depends on the integrity of the door panel. If the panel is broken where these components mount, they can become loose, recess into the panel, or stop working reliably.
Known Issues, Recalls, and Investigations

While the door panel itself has not been the subject of a recall, it is directly related to several major safety actions and common problems for the Ford Edge and Lincoln MKX. Accessing these related parts always requires removing the interior door panel.
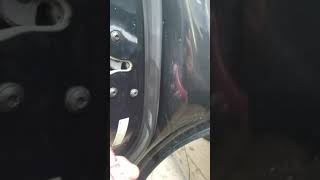
The "Door Ajar" Light and Latch Failures
One of the most widely reported electrical issues for these vehicles is a "Door Ajar" warning light that stays on even when all doors are securely shut. This is caused by a faulty switch located inside the door latch mechanism. This issue can lead to several problems:
- The interior dome lights may stay on, draining the battery.
- The vehicle may not allow the doors to be locked, either with the remote or the interior button.
- An alarm or chime may sound periodically while driving.
The National Highway Traffic Safety Administration (NHTSA) opened an investigation into 2011-2013 Ford Edge models after receiving over 1,560 complaints about this issue, which could lead to doors failing to lock or even opening while in motion. Ford has issued various recalls and customer satisfaction programs for door latches on numerous models from this era. If you are experiencing this problem, replacing the door latch assembly is the required fix, a job that starts with removing the door panel.
🎬 See how to replace the door latch and fix door ajar lightsTakata Airbag Recalls
Many 2007-2010 Ford Edge and Lincoln MKX vehicles were included in the massive Takata airbag recall. The driver and passenger frontal airbag inflators could degrade over time and explode during deployment, sending metal fragments into the cabin. Replacing these inflators, particularly the passenger side unit, often requires accessing areas behind the dashboard and trim panels.
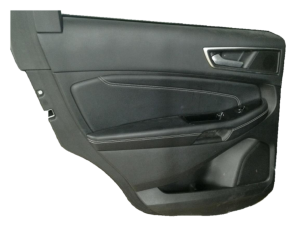
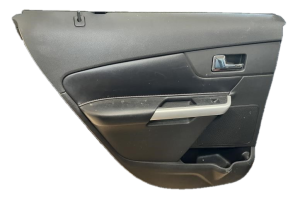
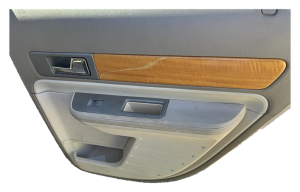
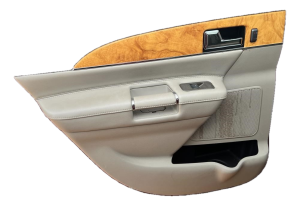
Buying a Used Door Interior Trim Panel
A used OEM panel is often the best choice, as new panels can be expensive and aftermarket options are rare. However, you must be extremely careful to buy the correct panel for your exact vehicle. Use this checklist before you buy.
Warning: There are many variations of this door panel. Fitment is determined by your vehicle's model year, trim level, and optional equipment. Always compare photos of the part—especially the back—to your original panel before ordering.
- Verify Vehicle and Position: Confirm the panel is for a Ford Edge or Lincoln MKX, the correct model year range, the correct door (front, rear, left/driver, 🎬 Watch: How to remove both front and rear door panels or right/passenger), and that it matches your body style.
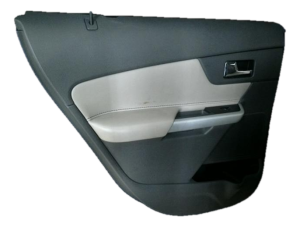
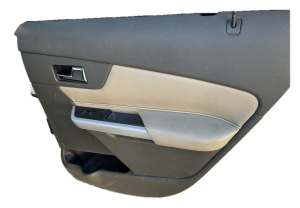
- Check for Trim Level Compatibility: Panels differ significantly between trim levels like SE, SEL, Limited, and Sport. Look for features specific to your trim. Does it have a cloth insert, a leather armrest, or wood/metal trim pieces?
- Account for Optional Features:
- Ambient Lighting: Higher trim levels offered an ambient lighting package. Panels for these vehicles will have a translucent plastic strip and extra wiring. A non-equipped vehicle will not have the wiring to power this feature.
- Audio System: The speaker grille cutout and design may differ for vehicles with the base audio system versus those with the premium Sony sound system.
- Inspect the Backside for Damage: This is the most critical inspection. Ask for clear photos of the back of the panel. Look for broken or missing plastic clip holders. If these mounting points are cracked or gone, the panel will never fit tightly and will rattle.
- Confirm Included Components: Does the used panel include the window switch, door lock switch, and interior handle? Often, these are sold separately. Verify what you are getting to avoid surprises.
- Match the Color: Ford and Lincoln used several interior colors like Charcoal Black and Stone (tan/gray). Be aware that photos can be misleading, and the color of a used part may have faded slightly. If possible, verify the color code.
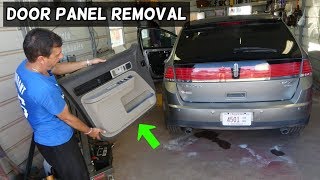
Replacement Walkthrough (DIY)
Replacing the door panel is a manageable 🎬 Watch: Step-by-step front door panel removal for Ford Edge and MKX DIY job for most people with basic tools. The key is to be patient and use the right technique to avoid breaking the plastic clips.
- Difficulty: 2 out of 5
- Estimated Time: 0.5 - 1 hour
- Required Tools:
- Plastic Trim Removal Tool Kit (essential to prevent scratches)
- Phillips Head Screwdriver
- Small Flathead Screwdriver or Pick
- Torx Bit Screwdriver (T20)
- 7mm or 7/32" Socket and Ratchet
Step-by-Step Guide
- Disconnect the Battery: While not always required, it's a good safety practice, especially since you'll be disconnecting electrical components.
- Remove Hidden Screws: The panel is held on by several screws that are usually hidden behind small covers. Pry these covers off gently with a small flathead or pick tool. Common locations are:
- Inside the door pull/armrest cup.
- Behind the interior door handle lever.
- On the very bottom edge of the panel.
- Remove Switch Panels (for 2011+ models): On 2011 and later models, the window switch panel in the armrest must be pried up and disconnected before the main panel can be removed.
- Pop the Perimeter Clips: Starting at the bottom, slide a plastic trim removal tool between the door panel and the metal frame. Gently pry outwards until you hear the first clip pop free. Work your way around the bottom and sides of the door, releasing all the clips.
- Lift the Panel Up and Off: Once all the clips are disengaged, the panel hangs from a lip in the window channel. Lift the entire panel straight up a few inches to unhook it from the top of the door.
- Disconnect Cables and Connectors: Don't pull the panel away yet. Tilt it back to access the electrical connectors for the window/lock switches and speaker. Press the release tabs and pull the connectors apart. Finally, unhook the cable that runs to the interior door handle.
- Installation: Installation is the reverse of removal. Reconnect the handle cable and electrical plugs first. Hang the panel on the top lip of the door, ensuring the lock pin aligns with its hole. Then, align the plastic clips with their holes in the door frame and firmly press the panel into place until the clips snap in. Reinstall all screws and covers.
Pro Tip: Before reinstalling the new panel, check if any of the white or yellow plastic clips pulled out of the panel and are still stuck in the door frame. If so, carefully remove them from the door and slide them back into their slots on the door panel. This ensures a tight fit.
Cost Comparison
| Part Type | Estimated Cost |
|---|---|
| New OEM | $400 - $800+ |
| New Aftermarket | Not commonly available |
| Used OEM | $100 - $350 |
| Shop Labor | $100 - $175 |
Frequently Asked Questions
Why is my "Door Ajar" light on when the door is closed?
This is a very common problem caused by a failed sensor inside the door latch assembly, not the door panel itself. The vehicle's computer thinks the door is open, which can also prevent the doors from locking and may drain the battery by keeping the interior lights on. The fix is to replace the entire door latch assembly, which requires removing the interior door panel to access it.
Can I just replace the peeling armrest?
No, the armrest is typically molded into the main door panel structure. It is not designed to be replaced separately. If your armrest is badly worn or peeling, you will need to replace the entire interior door panel assembly.
How do I make sure a used panel will fit my car's options?
You must visually match the panel to your own. Pay close attention to the speaker grille shape (for premium vs. standard audio), the presence of a light strip for ambient lighting, and the material (cloth vs. leather). The safest method is to get the part number from your original panel and find a used one with the exact same number.
Is it difficult to replace the door panel myself?
No, this is considered a beginner-to-intermediate level DIY task. The most important tool is a set of plastic trim removal tools, which are inexpensive and prevent you from scratching your paint or cracking the panel. The process involves removing a few screws and carefully prying the panel off. With patience and a video guide, most owners can do it in under an hour.
Helpful Videos


Technical Specifications
OEM Part Numbers: 7A1Z-7827406-BA 7T4Z7825556BA 8A1Z-7827406-CA BA1Z-7827406-BA BT4Z-7827406-BB BT4Z-7827406-BC BT4Z-7827406-CA BT4Z-7827406-CB BT4Z-7827406-CC BT4Z-7827406-CD BT4Z-7827407-BC DT4Z-7827406-ED DT4Z-7827407-EB
N/A
We Have This Part in Stock

The information in this article is provided for general reference and educational purposes only. Vehicle specifications, procedures, and part compatibility can vary by production date, trim level, and region. Always consult your vehicle's factory service manual and verify part numbers before purchasing or performing repairs. Safety-critical components such as airbags, seat belts, and braking systems should be installed by a qualified professional.
- Ford Edge:
- Lincoln MKX:
- 🎬 Helpful Videos
- 🛍️ Shop This Part
- Symptoms of a Failing Door Interior Trim Panel
- Rattling or Buzzing Noises
- Loose Fit and Visible Gaps
- Worn or Peeling Armrest
- Malfunctioning Switches or Handle
- Known Issues, Recalls, and Investigations
- The "Door Ajar" Light and Latch Failures
- Takata Airbag Recalls
- Buying a Used Door Interior Trim Panel
- Replacement Walkthrough (DIY)
- Step-by-Step Guide
- Cost Comparison
- Frequently Asked Questions
- 🎟️ Get 5% Off