
2001-2005 Lexus IS300 Door Panel: Fixing Sticky, Peeling & Worn Trim
Your complete guide to diagnosing common door panel issues, inspecting a used replacement, and understanding costs for your IS300 sedan.
- The most common failure is the soft-touch coating becoming sticky or 'melting' due to a factory material defect; this is a widely known issue for this vehicle generation.
- When buying a used panel, verify it is from a 4-door sedan, as rear panels from the 5-door SportCross wagon are not interchangeable.
- Thoroughly inspect used panels for stickiness, peeling material, and, most importantly, intact mounting points on the back to prevent future rattles.
- Replacement is a simple DIY task for most owners, requiring basic tools and about an hour per door.
Symptoms of Failure
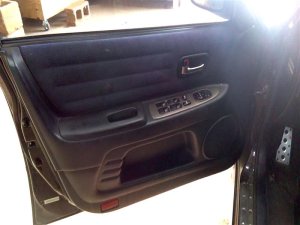
The door panels on the first-generation Lexus IS300 are known for a few common issues, most of which are cosmetic but can be very annoying for the owner. Understanding these symptoms can help you decide whether to repair, replace, or refinish your panel.
Sticky or Melting Surface
By far the most notorious problem is the soft-touch coating on the plastic portions of the door panel becoming sticky, gooey, or appearing to 'melt'. This is a well-documented issue on many Toyota and Lexus vehicles from this era, caused by the material degrading from prolonged exposure to heat and humidity. The surface becomes tacky, attracts dirt, and can even come off on hands and clothing. This same issue often affects the dashboard as well.
Peeling or Bubbling Material
The fabric or leatherette inserts, especially near the top edge by the window and on the armrest, can begin to peel, bubble, or separate from the main panel. The adhesive used from the factory fails over time, leading to a loose and unsightly appearance. This can also happen with the suede/Alcantara inserts found on some models.
Rattles and Squeaks
Over time, the plastic clips that hold the door panel to the metal door frame become brittle and can break during removal or from normal vibration. When these clips are broken or missing, the panel will not sit flush and will often rattle or buzz, especially when driving over rough roads or when the stereo is turned up.
Physical Damage
This includes more straightforward damage like cracks in the plastic, especially around the door pull handle or speaker grille from repeated use. Scuffs, scratches, and cigarette burns are also common on used panels. The armrest can also become compressed or torn from years of use.
Buying a Used Door Interior Trim Panel: What to Check
Since new OEM door panels are extremely expensive or potentially discontinued, buying a quality used OEM panel is the most common solution. However, it's crucial to inspect a used panel carefully to avoid buying a part with the same problems you're trying to fix.
Warning: Door panels from the 5-door SportCross wagon will NOT fit the 4-door Sedan. The rear doors are a different shape. Always confirm the panel you are buying is from a sedan.
- Inspect for Stickiness: This is the #1 issue. Look at pictures for a shiny, grimy, or uneven texture on the soft-touch areas. Ask the seller to run their finger across the surface and describe the feel. If it's tacky, you will need to refinish it.
- Check for Peeling: Closely examine the edges of all fabric, leather, or suede inserts. Pay special attention to the top edge that meets the window seal and the seams on the armrest.
- Verify Mounting Points: Ask for clear pictures of the BACK of the panel. All the plastic mounting bosses where the clips attach must be intact. If these are cracked or broken, the panel will never be secure and will rattle.
- Confirm Color and Material: The IS300 came with several interior color schemes (black, beige) and material options (full leather, partial suede/Alcantara). Ensure the panel is an exact match for your car's interior. The part number suffix often indicates color, for example, -C0 often denotes black.
- Check the Armrest: Look for cracks, deep indentations, or tears in the armrest vinyl or leather. This is a high-wear area.
- Side and Position: Double-check that you are buying the correct panel (e.g., Front Left for the driver's side in the US, Rear Right for the passenger rear).
Known Issues, TSBs, and Recalls
While there are no specific NHTSA recalls for the door trim panels on the 2001-2005 Lexus IS300, the 'sticky dash' and interior panel issue is widely recognized. Lexus did issue Technical Service Bulletins (TSBs) and warranty extensions for this problem on later model Lexus vehicles, such as L-SB-0016-19, but the first-generation IS300 was not typically covered under these programs due to its age. This means that any repair or replacement for this known issue is usually at the owner's expense.
Installation Guide (Difficulty: 2/5)
Replacing the door panel is a straightforward DIY job that requires only basic tools. The process takes about 30-60 minutes per door.
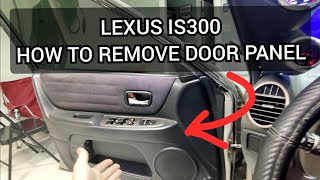
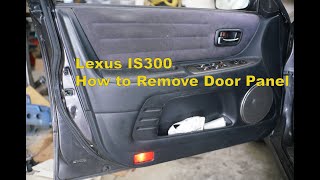
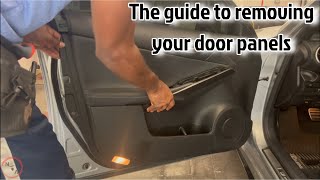
🎬 See this step-by-step walkthrough for removing the front door panelRequired Tools:
- Phillips Head Screwdriver
- Plastic Trim Removal Tool Set
- Small Flathead Screwdriver (for prying small covers)
Step-by-Step Process:
- Remove Screws: There are typically two Phillips head screws. One is located behind a small plastic cover in the door pull handle recess, and the other is in the armrest pull cup. Pry the small covers off to access them.
- Remove Tweeter Cover (Front Doors): The small triangular speaker cover at the top front of the door simply pulls straight off.
- Remove Handle Trim: The plastic bezel around the interior door latch handle needs to be popped off. Use a trim tool to carefully pry it loose.
- Disconnect Switches: Before fully removing the panel, you'll need to pry up the master window switch panel. Once it's loose, unplug the electrical connectors on the back.
- Release Clips: Starting from the bottom, use a plastic trim removal tool to pry the panel away from the door. You will hear the clips pop as they release. Work your way around the sides and bottom of the panel. 🎬 Watch a mechanic demonstrate how to safely pop the door clips
- Lift Panel Off: With all clips released, lift the panel straight up to unhook it from the top of the door frame by the window.
- Disconnect Cables & Lights: Disconnect the cable for the door lock and handle mechanism, and unplug the wire for the courtesy light at the bottom of the panel.
Pro Tip: It is highly recommended to purchase a new set of door panel clips before you begin. The original clips will be brittle and will likely break during removal. Using new clips ensures the panel will be tight and free of rattles when reinstalled.
Cost Comparison
The cost to replace a door panel can vary significantly based on the source of the part and who performs the labor.
| Part Type | Estimated Cost |
|---|---|
| New OEM | $700 - $1200+ (if available) |
| New Aftermarket (Custom) | $250 - $400 (Typically aluminum race panels) |
| Used OEM | $75 - $250 |
| Shop Labor | $100 - $150 |
Frequently Asked Questions (FAQ)
Why is my IS300 door panel sticky?
The sticky feeling is due to the degradation of the soft-touch coating used by Lexus during manufacturing. Over time, exposure to heat and UV rays causes the plasticizer in the material to break down and leach to the surface, creating a tacky, melting-like texture. This is a common issue and not the result of a spill or improper cleaning.
Can I repair my existing panel instead of replacing it?
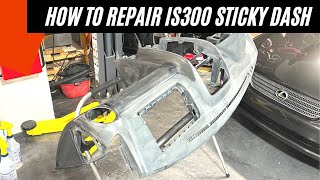
Yes. For the sticky surface issue, many owners successfully remove the degraded coating using a degreaser or acetone, and then repaint the panel with a vinyl and fabric paint. 🎬 Watch: How to strip and repaint your sticky interior panels For peeling inserts, you can remove the panel, peel the material back completely, scrape off the old adhesive, and re-apply the material using a high-strength spray adhesive. There are also pre-cut fabric inserts available to recover the panels.
Will a door panel from a Lexus IS300 SportCross fit my sedan?
No. While the front door panels may be interchangeable, the rear door panels are different and will not fit. It is essential to source parts specifically from a 4-door sedan to ensure proper fitment for the rear doors.
What is the part number for the black door panel?
The primary part number for the front left (driver side) black door panel is 67610-53080-C0. The '-C0' suffix typically denotes the black color code for Lexus interior parts. Part numbers will vary for passenger side, rear doors, and different interior colors.
Helpful Videos
Technical Specifications
OEM Part Numbers: 67610-53080-C0 67610-53090-A0 67763-53020
Fitment is specific to 4-door sedan models. Material options include plastic with soft-touch coating, leather inserts, and suede/Alcantara inserts. Panels are secured with screws and multiple plastic retaining clips.
We Have This Part in Stock

The information in this article is provided for general reference and educational purposes only. Vehicle specifications, procedures, and part compatibility can vary by production date, trim level, and region. Always consult your vehicle's factory service manual and verify part numbers before purchasing or performing repairs. Safety-critical components such as airbags, seat belts, and braking systems should be installed by a qualified professional.
- Lexus IS300:
- 🎬 Helpful Videos
- 🛍️ Shop This Part
- Symptoms of Failure
- Sticky or Melting Surface
- Peeling or Bubbling Material
- Rattles and Squeaks
- Physical Damage
- Buying a Used Door Interior Trim Panel: What to Check
- Known Issues, TSBs, and Recalls
- Installation Guide (Difficulty: 2/5)
- Required Tools:
- Step-by-Step Process:
- Cost Comparison
- Frequently Asked Questions (FAQ)
- 🎟️ Get 5% Off