
2019-2023 Mazda 3 Door Panel: Rattles, Trim Variants, and Sedan vs. Hatchback Differences
Your definitive guide to diagnosing common rattles, choosing the correct interior trim panel for your Sedan or Hatchback, and inspecting a used part.
- Front and rear door panels are NOT interchangeable between 2019-2023 Mazda 3 Sedan and Hatchback models; you must buy for your specific body style.
- Rattles are the most common complaint and can often be fixed with inexpensive felt or foam tape without replacing the entire panel.
- When buying a used panel, the most critical inspection points are the plastic mounting tabs and clip holes on the back.
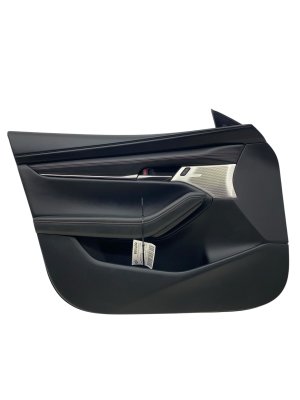
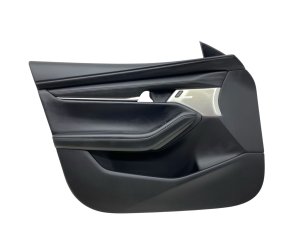
- The black panel with red stitching (e.g., BHAA-68-450A-02) is specific to higher trim levels; verify your car's original trim and color before purchasing.
Key Differences and Compatibility
Warning: Not all 2019-2023 Mazda 3 door panels are interchangeable. Fitment varies significantly based on body style, trim level, and optional equipment. Verifying your vehicle's exact specifications before purchasing a replacement is critical.
The most significant variations in door panels for the fourth-generation Mazda 3 are:
- Body Style: The front door panels for the Sedan and Hatchback models are different and are not interchangeable. The rear door panels are also completely different due to the different shapes of the rear doors and body. A Sedan door panel will not fit a Hatchback, and vice-versa.
- Trim Level and Color: The specific part number BHAA-68-450A-02 refers to a black door panel with red stitching, commonly found on higher trim levels like the Premium, Turbo, and Carbon Edition. Other trims feature different colors or materials, so it's essential to match the panel to your vehicle's original specification.
- Audio System: Vehicles equipped with the premium Bose® audio system have different speaker grilles on the door panels compared to those with the standard audio system. Ensure the replacement panel matches your car's sound system to ensure proper fitment of the speaker grille.
Common Symptoms and Failures
Since this is not a mechanical part, "failure" relates to physical, cosmetic, and noise-related issues. Here are the most common problems owners experience:
Rattling or Buzzing Noises
This is the most frequent complaint for this vehicle generation. Noises can come from loose internal components, wiring harnesses, or the plastic clips that hold the panel to the door frame, especially when driving over bumps or when music is playing. Many owners have successfully fixed these rattles by applying felt or foam tape to the clips and contact points inside the panel.
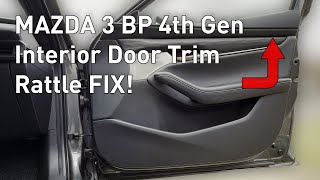
🎬 Watch: How to locate and fix interior door rattlesLoose Fit or Gaps
If the panel feels loose or has visible gaps between it and the door frame, it's a clear sign that mounting clips are broken or missing. This often happens after the panel has been removed for other repairs, like window regulator or speaker replacement, if the clips were not replaced or seated correctly.
Cosmetic Damage
The soft-touch materials and plastics can be prone to scratches, scuffs from shoes, and peeling or cracking on the armrest from regular use and sun exposure. This type of wear and tear is a common reason for replacement.
Malfunctioning Switches
While the window and lock switches are housed in the door panel, they are typically separate components. If a switch fails, you usually do not need to replace the entire door panel. However, damage to the switch mounting points on the panel itself would require a panel replacement.
Known Issues, TSBs, and Recalls
As of early 2024, there are no specific recalls or widespread Technical Service Bulletins (TSBs) for the main door interior trim panel itself. However, there are a few related items of note:
- TSB 09-039/20: This bulletin addresses potential water entry into the passenger compartment from the rear door, behind the door trim. The fix involves replacing the service hole cover seal. This issue is not a fault of the trim panel itself but requires its removal to perform the repair.
- TSB 09-007/21: For 2019-2020 Mazda 3 Hatchbacks, this TSB addresses interference between the front door glass run channel and the rear door garnish, which can cause damage. The repair involves adding adhesive or replacing parts, which may be adjacent to the door trim panel.
- Recalls: Several recalls exist for the 2019-2023 Mazda 3, including for seat belt indicators and wheel lug nuts, but none directly involve the replacement of the interior door trim panel.
Buying a Used 2019-2023 Mazda 3 Door Panel
A used OEM door panel is an excellent way to save money, as new panels can be very expensive. Because these are primarily cosmetic parts, a high-quality used panel is often indistinguishable from a new one once installed. Here is what to inspect before you buy:
Step 1: Verify Compatibility First
Before anything else, confirm the panel is from the same body style (Sedan or Hatchback), year range, and has the correct configuration for your audio system (Bose or standard) and trim color (e.g., black with red stitching). Using your vehicle's VIN on a dealer parts website can help confirm the exact part number you need.
Step 2: Inspect All Mounting Points
This is the most critical check. Turn the panel over and carefully examine every plastic tab and every hole where a clip is inserted. If multiple mounting points are cracked or broken, the panel will never fit securely and will likely rattle. A panel with all mounting points intact is far more valuable than one with cosmetic perfection but broken tabs.
Step 3: Check for Structural Cracks and High-Stress Areas
Look for any cracks in the main backing of the panel, especially around the armrest, door pull handle, and speaker mounts. Minor surface scratches can often be cleaned or ignored, but structural damage is a deal-breaker. Pay close attention to the upper edge that hooks over the window sill, ensuring it's not bent or cracked.
Installation Guide and Difficulty
- Difficulty Rating: 2/5 (Easy to Moderate)
- Estimated Time: 0.75 hours
- DIY Feasible: Yes
Replacing the door panel is a straightforward job for a DIYer. The process generally involves removing a few screws and carefully prying the panel off.
Basic Steps:
- Disconnect the negative battery terminal.
- Using a plastic trim tool, pry off the small cover behind the interior door handle and remove the Phillips screw underneath.
- Pry up the window switch assembly and disconnect its electrical connectors. There may be another screw underneath this assembly.
- Starting from the bottom, use a plastic trim removal tool to carefully pop the panel's clips out of the door frame.
- Once all clips are disengaged, lift the panel up and off the window sill.
- Disconnect the door handle cable and any remaining electrical connectors for lights or speakers. 🎬 Watch: Step-by-step front door panel removal guide
- Installation is the reverse of removal. Align the top of the panel first, then press firmly around the perimeter to engage the clips.
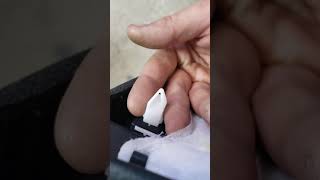
Pro Tip: It's highly recommended to purchase a bag of new door panel clips before you begin. It is very common for old clips to break during removal, even with proper tools. Replacing them ensures a tight, rattle-free fit.
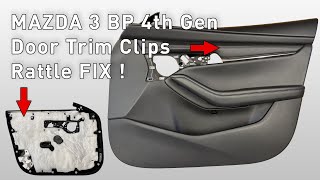
🎬 See how to silence vibrating door panel clipsCost Comparison
| Part Type | Estimated Cost |
|---|---|
| New OEM | $550 - $850 |
| New Aftermarket | Not commonly available |
| Used OEM | $140 - $300 |
| Shop Labor | $75 - $150 |
Frequently Asked Questions (FAQ)
Will a door panel from a Mazda 3 Hatchback fit my Sedan?
No. The front and rear door panels are different between the Sedan and Hatchback models and are not interchangeable.
How do I fix a door panel rattle without replacing it?
Most rattles can be fixed by removing the door panel and applying automotive-grade felt or foam tape to the plastic clips and any internal components or cables that may be vibrating against the panel. This is a common and effective DIY repair.
Does a replacement door panel include the window switch and handle?
Typically, no. A used door panel may come with these items if the seller includes them, but new panels are almost always sold as a bare panel. You will need to transfer your existing switches, handle, and related components to the new panel.
What tools do I need to replace the door panel?
You will need a Phillips head screwdriver, a small flathead screwdriver or pick, and a set of plastic trim removal tools. The plastic tools are essential to avoid scratching or damaging the panel and surrounding trim.
Helpful Videos
Technical Specifications
OEM Part Numbers: BHAA-68-450A-02 BHAA6846Z BHAB-68-450A-02 BHAH-68-450A-02 BHAK-68-450A-02
Varies by trim. Key variations include material (cloth, vinyl/leather), color (black, black with red stitching), and speaker grille type (Standard or Bose Audio).
We Have This Part in Stock

The information in this article is provided for general reference and educational purposes only. Vehicle specifications, procedures, and part compatibility can vary by production date, trim level, and region. Always consult your vehicle's factory service manual and verify part numbers before purchasing or performing repairs. Safety-critical components such as airbags, seat belts, and braking systems should be installed by a qualified professional.
- MAZDA 3:
- Mazda 3:
- 🎬 Helpful Videos
- 🛍️ Shop This Part
- Key Differences and Compatibility
- Common Symptoms and Failures
- Rattling or Buzzing Noises
- Loose Fit or Gaps
- Cosmetic Damage
- Malfunctioning Switches
- Known Issues, TSBs, and Recalls
- Buying a Used 2019-2023 Mazda 3 Door Panel
- Step 1: Verify Compatibility First
- Step 2: Inspect All Mounting Points
- Step 3: Check for Structural Cracks and High-Stress Areas
- Installation Guide and Difficulty
- Cost Comparison
- Frequently Asked Questions (FAQ)
- 🎟️ Get 5% Off