
2014-2017 Mazda6 Door Panel: Fixing Peeling Trim and Rattles
This guide covers the most common issues with the 2014-2017 Mazda6 interior door panel, including how to identify the correct trim, inspect a used part, and perform the replacement.
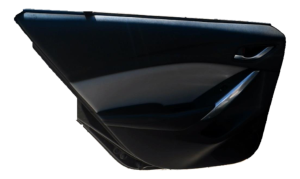
- The most critical step is to match your car's specific interior trim package (color, material) and speaker grille pattern (standard vs. Bose).
- A very common failure is the peeling or bubbling of the soft material on the armrest, caused by heat and adhesive failure.
- When buying a used panel, the most important inspection is to check the back for broken mounting clips and clip towers, as these cause rattles.
- Replacement is a simple DIY job requiring only a screwdriver and trim removal tools, typically taking less than an hour.
Symptoms of a Failing Door Interior Trim Panel
Failure of a door trim panel is typically cosmetic or results in annoying noises rather than mechanical breakdown. Here are the most common symptoms owners experience.
1. Peeling or Bubbling Upholstery
The most widely reported issue for this generation of Mazda6 is the delamination of the soft-touch material on the armrests and the vertical section near the window switches. The adhesive used from the factory can fail over time, especially with exposure to heat and sunlight. This causes the leatherette or cloth to lift away from the plastic backing, creating unsightly bubbles or loose flaps. Many owners report this happening during hot summer months.
2. Rattling, Buzzing, or Creaking Noises
Annoying noises from the door area are often traced back to the trim panel. These sounds are usually caused by broken or loose plastic retaining clips on the back of the panel. When these clips fail, the panel can vibrate against the metal door frame, especially when driving over bumps or when the audio system is playing. A Technical Service Bulletin (TSB 09-012/17) was issued for 2014-2016 Mazda6 models regarding noise from the front door panel, specifically related to the speaker damper corroding and coming loose.
3. Physical Damage
Like any interior component, the door panel is susceptible to cracks, scuffs, and punctures from daily use. Speaker grilles can be kicked and broken, and the main panel can be cracked from impacts. The plastic can also become brittle with age, making it more prone to damage, especially during removal for other repairs.
Buyer Warning: This vehicle was offered with several different interior trim packages. The most common colors are Black and Almond (a light beige/parchment color). Materials include cloth, leatherette, and leather, often in combination. Carefully compare the material, color, and speaker grille pattern of your original part to ensure the replacement is a perfect match.
Known Issues, TSBs, and Recalls
While there are no official recalls for the interior door trim panels themselves, Mazda has issued related service bulletins and campaigns for the 2014-2017 Mazda6.
- TSB 09-012/17: Addresses unusual noise from the front door panel when the audio system is playing. This is caused by corrosion on the speaker frame, leading to the damper detaching. The fix involves replacing the front door speakers.
- TSB 09-016-15-3041: Notes that some customers may complain about the white door armrests showing pink discoloration. The recommended solution is to replace all four door panels.
- Special Service Program (SSP) A5: This campaign was for the exterior door sash molding on 2014-2016 models. The metal part of the molding could become exposed, creating a potential for injury. While not part of the interior panel, this is a related door component issue to be aware of.
- No Recalls: There have been no safety recalls issued by the National Highway Traffic Safety Administration (NHTSA) for the interior door trim panels on these vehicles.
Buying a Used Door Interior Trim Panel
A used OEM door panel is often the best choice, as complete aftermarket panels are not commonly available and a used part ensures a perfect match for color and texture. Here’s what to inspect before buying:
- Verify Trim and Speaker Compatibility: This is the most important step. Confirm the color (Black or Almond) and material (cloth, leatherette) match your car's interior. Also, check the speaker grille; cars with the premium Bose audio system may have a different grille pattern or branding than the standard system.
- Inspect All Mounting Clips: Turn the panel over and carefully examine every plastic clip and, more importantly, the molded plastic towers they attach to. These are the primary cause of rattles. If the towers are cracked or broken, the panel will never fit securely.
- Check for Upholstery Separation: Closely inspect the edges of the soft armrest insert. Gently run your fingers along the seams and press on the surface to feel for any bubbling or looseness that indicates the adhesive is failing.
- Look for Water Damage: Check the fiberboard backing material for any stains or warping. Water marks could indicate the vehicle had a bad window seal, which could lead to other issues like mold or electrical problems.
Pro Tip: When removing the old panel, some of the plastic clips may remain in the metal door. Use a trim removal tool or a forked panel clip tool to carefully pry them out so they can be reused or replaced on the new panel.
Cost of a 2014-2017 Mazda6 Door Interior Trim Panel
| Part Type | Estimated Cost |
|---|---|
| New OEM | $450 - $600+ |
| New Aftermarket | Not Commonly Available |
| Used OEM | $100 - $250 |
| Shop Labor | $100 - $180 |
Step-by-Step Replacement Guide (DIY)
Replacing the door panel is a straightforward job that most DIYers can complete in under an hour with basic tools. The process is similar for front and rear doors.
- Gather Your Tools: You will need a Phillips head screwdriver, a small flathead screwdriver, and a set of plastic trim removal tools.
- Remove Screws: There are typically two screws holding the panel. One is behind a small plastic cover on the interior door handle latch. The other is under a small mat or cover in the armrest pull-cup area.
- Remove Window Switch Panel: Use a plastic pry tool to gently lift the power window switch panel. It is held in by clips. Disconnect the electrical connector(s) underneath and set it aside.
- Pop the Perimeter Clips: Starting from the bottom, use a trim removal tool to pry the panel away from the metal door frame. You will hear the clips pop as they release. There are about 8-9 clips around the sides and bottom.
- Lift Panel and Disconnect Cables: Once all clips are free, lift the panel straight up to unhook it from the top of the window sill. The panel will still be attached by the door handle and lock cables. Rotate the panel to access the back, and release the two cables from their plastic retaining clips.
- Installation: Installation is the reverse of removal. Reconnect the door cables first, then hang the panel on the top of the window sill. Align the clips and press firmly around the perimeter to snap the panel into place. Reinstall the screws and the window switch panel.
Frequently Asked Questions
Can I just repair my peeling armrest instead of replacing the whole panel?
Many owners have attempted to re-glue the peeling material using spray adhesives or superglue with mixed results. The repair often fails again, especially in high heat, because the original foam backing may have deteriorated. For a permanent fix, replacing the panel is the most reliable solution.
Will a door panel from a different year in the 2014-2017 range fit my car?
Yes, panels within the 2014-2017 model year range are generally interchangeable, provided you match the trim level (color, material) and speaker configuration (Bose vs. standard).
Why is my door panel rattling after I replaced it?
A rattle after installation is almost always due to broken or missing clips. Either a clip broke during installation, or one was already broken on the replacement panel. It can also be caused by a clip that stayed in the door frame instead of on the panel, preventing the panel from seating flush.
Do I need to disconnect the battery to replace the door panel?
It is always a best practice to disconnect the negative battery terminal before working on any component with electrical connections, such as the window and lock switches in the door panel. This prevents accidental short circuits.
Technical Specifications
OEM Part Numbers: GJS268520H04 GJS268550H01 GMN5-68-520B-39 GR6B6855YH81 GJS368450M01 GJS5-68-450M-04 GJS3-68-420L-24 GRT7-68-550B-01 GMN668420C
Varies by trim level. Key variations include color (Black, Almond/White), material (Cloth, Leatherette, Leather accents), and speaker grille configuration (Standard Audio or Bose Premium Audio).
We Have This Part in Stock

The information in this article is provided for general reference and educational purposes only. Vehicle specifications, procedures, and part compatibility can vary by production date, trim level, and region. Always consult your vehicle's factory service manual and verify part numbers before purchasing or performing repairs. Safety-critical components such as airbags, seat belts, and braking systems should be installed by a qualified professional.
- Mazda MAZDA6:
- 🛍️ Shop This Part
- Symptoms of a Failing Door Interior Trim Panel
- 1. Peeling or Bubbling Upholstery
- 2. Rattling, Buzzing, or Creaking Noises
- 3. Physical Damage
- Known Issues, TSBs, and Recalls
- Buying a Used Door Interior Trim Panel
- Cost of a 2014-2017 Mazda6 Door Interior Trim Panel
- Step-by-Step Replacement Guide (DIY)
- Frequently Asked Questions
- 🎟️ Get 5% Off