
2002-2017 Toyota Camry Door Panel: A Guide to Sticky Armrests, Compatibility, and Replacement
This guide details the common failure points, replacement costs, and critical compatibility checks needed when buying a used door panel for your 2002-2017 Toyota Camry.
- Compatibility is complex: You must match the vehicle generation (2002-06, 2007-11, 2012-17), build location (US or Japan via VIN), trim level (LE, SE, XLE), and color.
- The 2007-2011 Camry generation is known for sticky, melting armrests due to a material defect; this was the subject of a now-expired Toyota Warranty Enhancement Program.
- Before buying a used panel, always inspect the back for broken mounting clips, as this is the most common point of failure and will cause rattles.
- Replacement is a simple DIY job requiring only basic hand tools and about an hour of time.
Generational Differences and Key Issues
The 2002-2017 Toyota Camry spans three distinct generations, and the door panels are not interchangeable between them. It is critical to identify your vehicle's generation before searching for a replacement part.
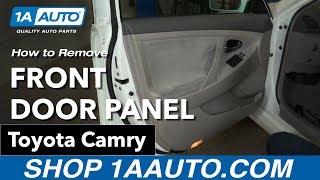
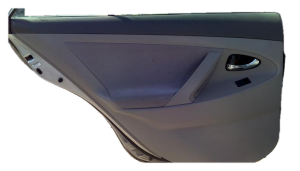
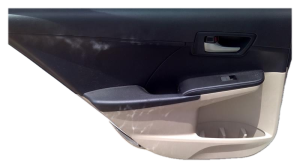
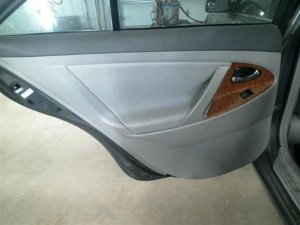
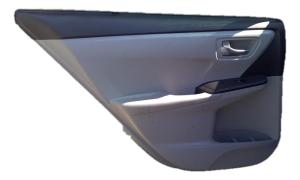
- XV30 (2002-2006): These panels are generally robust, with common failures limited to typical wear and tear such as scuffs, scratches, and broken mounting clips from age or improper removal. 🎬 Watch: Step-by-step door panel removal for 2002-2006 models.
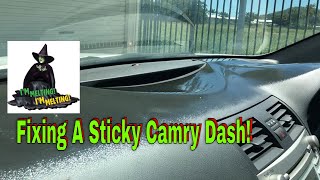
- XV40 (2007-2011): This generation is notorious for a material defect that causes the armrest and dashboard surfaces to become sticky, melt, or crack in high heat and humidity. Toyota acknowledged this with a Warranty Enhancement Program (ZE6), but it has since expired. This is the most common failure for this generation's panels.
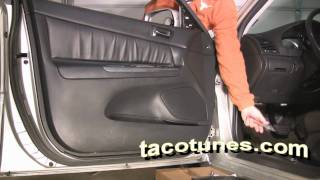
- XV50 (2012-2017): Toyota resolved the material issues of the previous generation. Failures on these panels are typically related to physical damage or electronic components housed within the panel. 🎬 Watch: Front and rear door panel removal for 2012-2017 Camrys.
Known Issues, TSBs, and Recalls
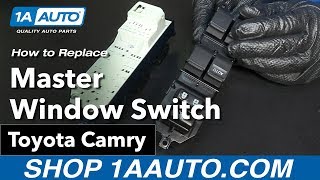
Related Recall: Power Window Master Switch
While the door panel itself has not been recalled, numerous Camry models from 2007-2011 were part of a massive recall for the driver's side power window master switch (NHTSA Recall 15V-688). The switch could short-circuit and cause a fire due to insufficient lubricant. The repair involves inspecting the switch and applying special grease or replacing the circuit board. Since replacing this switch requires removing the door panel, it's a good time to inspect the panel for other damage.
🎬 See how to replace the master window switch yourself.For the 2007-2011 models, Toyota issued Technical Service Bulletin T-SB-0039-15 related to the sticky/melting dashboard and door panel issue, which was covered under the now-expired Warranty Enhancement Program ZE6.
Symptoms of a Failing Door Interior Trim Panel
Failure of a door panel is almost always visible or audible. Here are the common symptoms:
- Physical Damage: Cracks in the plastic, punctures, or significant warping are the most obvious signs of failure.
- Peeling or Sticky Surfaces: On 2007-2011 models, the armrest material may become tacky to the touch, shiny, or appear to be melting.
- Loose or Rattling Panel: This is usually caused by broken mounting clips on the back of the panel. The panel may vibrate or buzz while driving.
- Malfunctioning Components: While not a failure of the panel itself, problems with window switches, door locks, or the interior handle may require panel removal for diagnosis and repair.
- Fabric or Leather Separation: The cloth or leather insert on the panel may begin to pull away from the backing, creating bubbles or sagging.
Buying a Used Door Interior Trim Panel
Because complete aftermarket door panels are not widely available, a used OEM panel is often the best and most cost-effective solution. However, due to the many variations, careful verification is essential.
Compatibility Checklist:
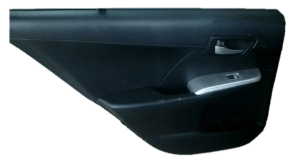
- Vehicle Generation: Ensure the donor panel is from the same Camry generation as your vehicle (XV30, XV40, or XV50).
- Build Location (US vs. Japan): Toyota produced the Camry in both the US and Japan, and there can be minor differences in mounting points. Check the first character of your VIN. A 'J' indicates a Japan-built vehicle, while '1', '4', or '5' indicates a US-built vehicle. Match the panel's origin to your vehicle's.
- Trim Level (LE, SE, XLE): Different trims used different materials (cloth, sport fabric, leather) and colors. An LE panel will not match the interior of an XLE.
- Color: Interior colors can be tricky. If possible, find your vehicle's interior color code on the driver's door jamb sticker and match it with the donor part. Otherwise, rely on high-quality photos.
- Side Airbags: Ensure the replacement panel is compatible with your vehicle's safety systems. Panels for cars with side airbags will have a small 'SRS' tag and are designed to tear away in a specific manner.
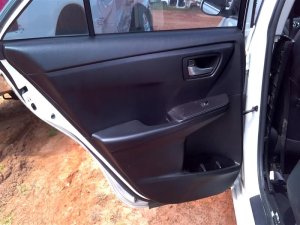
Physical Inspection:
Pro Tip: The most important part to inspect is the back of the panel. Ask the seller for clear photos of the back.
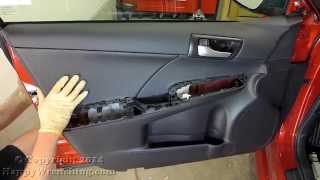
- Mounting Clips: Check that all the plastic mounting clips and their sockets on the panel are intact. These are brittle and often break on removal. A panel with broken mounting points will not sit flush and will rattle.
- Structural Integrity: Look for cracks, especially around the armrest, speaker grille, and upper window ledge.
- Backing Board: Check the fiberboard backing for any signs of water damage, which can cause it to swell and disintegrate.
- Armrest Condition: For XV40 (2007-2011) panels, specifically check for the sticky/melting condition. Do not buy a panel that already shows these signs.
Replacement Overview
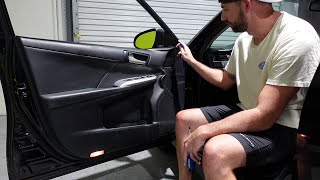
Replacing a Camry door panel is a straightforward DIY task suitable for beginners. The process generally takes 30-60 minutes per door.
Difficulty: 2/5
Tools Required: Phillips head screwdriver, flathead screwdriver, plastic trim removal tool.
General Steps:
- Disconnect the negative battery terminal.
- Locate and remove all screws. These are typically hidden behind small covers in the door handle recess and the armrest pull cup.
- Use a plastic trim removal tool to gently pry the panel away from the door frame, starting from the bottom. You will hear the clips pop as they release.
- Once all clips are free, lift the panel up and away from the window sill.
- Carefully disconnect the electrical connectors for the window/lock switches and the mechanical cables for the door handle and lock.
- Installation is the reverse of removal. Be sure to reconnect all cables and electrical harnesses before snapping the panel back into place.
| Part Type | Estimated Cost |
|---|---|
| New OEM | $400 - $700+ |
| New Aftermarket | Generally not available as a complete assembly. Components like handles or switches are sold separately. |
| Used OEM | $75 - $250 |
| Shop Labor | $75 - $150 per door |
Frequently Asked Questions
How do I know if my Camry was built in the US or Japan?
Check the first character of your Vehicle Identification Number (VIN), located on your dashboard (visible through the windshield) or on the driver's door jamb sticker. If it starts with 'J', it was assembled in Japan. If it starts with '1', '4', or '5', it was assembled in the United States.
Can I just fix the sticky armrest on my 2007-2011 Camry?
While replacement is the only permanent fix, some owners have had temporary success by repeatedly cleaning the surface with a high-quality interior cleaner or degreaser to remove the sticky top layer. This is a temporary solution, as the material will continue to degrade. Another option is to purchase an aftermarket armrest cover that goes over the affected area.
Will a door panel from an LE fit my XLE?
Physically, it will likely fit if it's from the same generation and build location. However, the materials and colors will not match. The LE typically uses cloth, while the XLE uses higher-grade cloth or leather, and the color schemes are different. For a proper restoration, you must match the trim level.
What happens if I use a panel with broken mounting clips?
A panel with broken clips will not be secure. It will likely sag, have a large gap between it and the door, and create constant rattles and buzzing noises while you drive. It is not recommended to install a panel with compromised mounting points.
Helpful Videos

Technical Specifications
OEM Part Numbers: 67603-06110 67610-06D20-E0 67620-06B30-E0 67630-06631-E2 67630-06780 67630-06780-B0 67630-06B22-B0 67630-06B50-B0 67630-06B50-E0 67630-06C70-C9 67630-06F50-A1 67630-06F50-B1 67630-06F50-C0 67630-06K61-B3 67630-33650-B1
Varies significantly by vehicle year, trim, color, and build location.
We Have This Part in Stock

The information in this article is provided for general reference and educational purposes only. Vehicle specifications, procedures, and part compatibility can vary by production date, trim level, and region. Always consult your vehicle's factory service manual and verify part numbers before purchasing or performing repairs. Safety-critical components such as airbags, seat belts, and braking systems should be installed by a qualified professional.
- Toyota CAMRY:
- 🎬 Helpful Videos
- 🛍️ Shop This Part
- Generational Differences and Key Issues
- Known Issues, TSBs, and Recalls
- Symptoms of a Failing Door Interior Trim Panel
- Buying a Used Door Interior Trim Panel
- Compatibility Checklist:
- Physical Inspection:
- Replacement Overview
- General Steps:
- Frequently Asked Questions
- 🎟️ Get 5% Off