
2004-2009 Toyota Prius Door Panel: Fixing Rattles, Worn Armrests, and Broken Handles
This guide covers the common failure points of the Gen 2 Prius interior door panel, from annoying rattles and peeling armrests to replacement costs and DIY repair.
- The most common failures are rattles from broken clips and cosmetic wear on the armrest; both are inexpensive DIY fixes.
- When buying a used panel, the most critical check is the condition of the plastic clip mounting points on the back of the panel.
- Verify the exact color (Dark Gray or Bisque) and position (e.g., Front Driver) before purchasing a used panel.
- A broken interior door handle or a peeling armrest can be replaced with cheap aftermarket parts without needing to buy a whole new panel.
Symptoms of a Failing Door Panel
Problems with the door panel on a second-generation Prius are rarely catastrophic. Instead, they usually manifest as cosmetic blemishes or annoying noises that degrade the driving experience.
Physical Damage & Wear
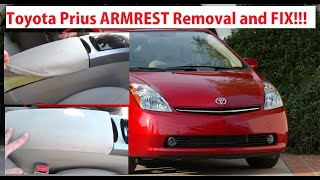
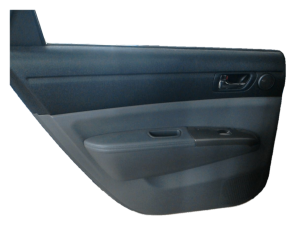
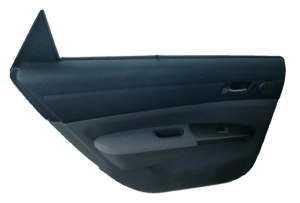
- Peeling or Worn Armrest: The fabric or vinyl on the armrest is a high-contact area. Over time, it can peel away from the backing foam, crack, or become worn and shiny. This is especially common on the driver's side.
- Scuffs and Scratches: The main plastic body of the panel is susceptible to scratches and gouges from daily use, such as from seatbelt buckles or items being loaded into the car.
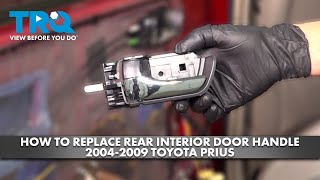
- Broken Interior Door Handle: The plastic interior release handle is a very common failure point. It can become loose or break off entirely, making it impossible to open the door from the inside.
- Damaged Speaker Grille: The integrated speaker grille can be cracked or pushed in by feet or cargo.
Noises
- Rattles and Buzzes: This is the most frequent complaint. Rattles are typically caused by broken or missing plastic retaining clips on the back of the panel, allowing it to vibrate against the metal door frame. The noise may be more noticeable when driving over bumps or when the stereo is playing.
- Creaks and Pops: The panel itself is often made of multiple pieces of plastic heat-welded together. If these welds break, the sections can rub against each other, creating creaking sounds.
Known Issues, TSBs, and Recalls
As of early 2026, there are no specific recalls or Technical Service Bulletins (TSBs) from Toyota for the interior door trim panel itself on the 2004-2009 Prius. However, several well-documented issues exist based on owner experiences:
- Brittle Plastics: The interior plastics on the Gen 2 Prius, in general, are known to become brittle with age and sun exposure. This can make trim pieces, including the door panel and its clips, more susceptible to breaking during removal or even from normal use.
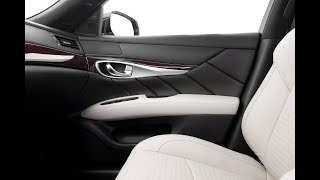
- Sensitive Paint: The silver-painted trim accents on the door panel can be easily damaged. Owners report that using cleaners like rubbing alcohol or even contact with sunscreen can soften and remove the paint.
- Unrelated Recalls: This generation of Prius had significant recalls for the steering intermediate shaft and potential floor mat interference with the accelerator pedal, but these do not involve the door panel.
Pro Tip: If your window's 'auto up/down' feature stops working after service, it's likely not a broken switch. This is a common issue after the 12V battery is disconnected. You can reset it by holding the switch for that window in the 'up' position for 5-10 seconds after the window is fully closed.
Buying a Used 2004-2009 Prius Door Panel: A Buyer's Checklist
A used OEM door panel is the best choice for a full replacement, offering a perfect fit and color match that aftermarket panels often lack. Here’s what to inspect before you buy.
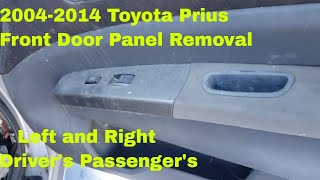
Step 1: Verify Compatibility
- Position: Panels are specific to each door: Front Driver, Front Passenger, Rear Driver, and Rear Passenger. They are not interchangeable.
- Color: The Gen 2 Prius primarily came with two interior colors: Dark Gray (trim code may appear as FE11) and Bisque (a beige/tan color). Ensure an exact match, as lighting in photos can be deceiving.
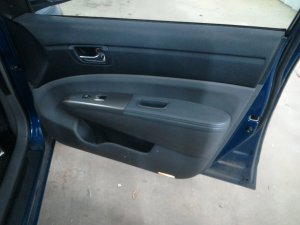
- Options: All US models of this generation came with power windows and locks, so this is not a major point of variation. However, the driver's door panel is unique due to the master switch assembly.
Step 2: Physical Inspection Checklist
- Check All Mounting Points: This is the most critical check. Flip the panel over and inspect the sockets where the plastic clips insert. If these molded plastic sockets are cracked or broken, the panel will not sit flush and will rattle. The clips themselves are replaceable, but the mounting points on the panel are not.
- Inspect the Armrest: Press firmly on the armrest. Check for cracks in the underlying plastic structure and look for signs of peeling or excessive wear on the surface material.
- Examine the Seams: Look for any separation along the seam where the upper and lower sections of the panel are joined. Broken heat-stake welds here can cause creaking.
- Test the Handle: If the panel includes the interior door handle, operate it. It should feel solid and retract smoothly. If it's broken, know that it can be replaced separately.
Cost Comparison: New vs. Used
| Part Type | Estimated Cost | Notes |
|---|---|---|
| New OEM Panel | $650 - $800+ | Very expensive and may need to be special-ordered. Price is for a bare panel; switches and handles are often extra. |
| Used OEM Panel | $75 - $200 | Best value. Sourced from a salvage vehicle and often comes complete with switches and handle. |
| New Aftermarket (Components) | $15 - $50 | Full aftermarket panels are not common. This price reflects components like a replacement interior handle or an armrest cover. |
| Shop Labor | $75 - $150 | A professional mechanic will typically charge for 0.5 to 1.0 hour of labor to swap the panel. |
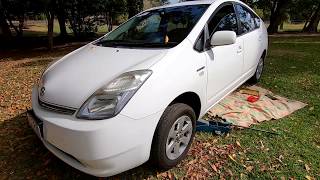
DIY Replacement Guide
Replacing the door panel is a straightforward job that is very achievable for a DIY mechanic.
- Difficulty: 2/5 (Easy)
- Time: 30-60 minutes per door 🎬 Watch: Step-by-step front door panel removal and installation guide
- Tools Needed: Phillips screwdriver, plastic trim removal tool, small flathead screwdriver.
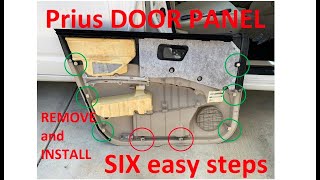
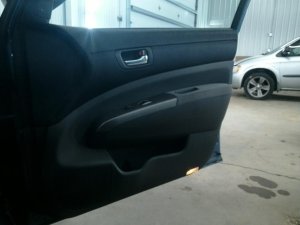
Step-by-Step Removal
- Remove Screw Covers: Use a small flathead screwdriver to pop off the small plastic cover behind the interior door release handle and the cover at the bottom of the door pull cup in the armrest.
- Remove Screws: Use a Phillips screwdriver to remove the two screws you just exposed.
- Remove Window Switch: Use a plastic trim removal tool to gently pry up the master window switch assembly (on the driver's door) or the single switch (on passenger doors). Start from the front edge and lift up. Disconnect the electrical connectors by pressing their release tabs.
- Pop the Clips: Starting at a bottom corner, slide your trim tool between the panel and the metal door frame. Pry outwards to pop the first clip. Work your way around the bottom and sides of the door, popping each clip. They can be tight and may make a loud noise.
- Lift and Disconnect: Once all clips are released, lift the panel straight up to unhook it from the top of the door near the window. The panel will still be attached by the door handle cables. Carefully rotate the panel to access and disconnect these cables.
Installation is the reverse of removal. Make sure all plastic clips are aligned with their holes before tapping the panel back into place.
Frequently Asked Questions (FAQ)
Can I just replace the broken plastic door handle?
Yes. You do not need to replace the entire door panel. Inexpensive aftermarket handles are widely available. You will still need to remove the door panel to access the screws and clips on the back of the handle assembly, but the handle itself can be swapped out in minutes.
My armrest is peeling. Do I need a whole new panel?
No. This is a very common problem, and many companies sell affordable aftermarket armrest covers in vinyl or leatherette. These covers can be installed over the existing armrest, often with adhesive or staples, after removing the old material. This is a much cheaper solution than replacing the entire panel.
🎬 See how to recover your peeling armrest for under $20How do I fix a rattling door panel?
A rattle is almost always caused by broken or missing retaining clips. You can buy a bag of these clips online for a few dollars. Remove the door panel, identify which clips are broken or missing from the back of the panel, replace them, and reinstall the panel. While the panel is off, you can also add foam tape to contact points for extra sound dampening.
🎬 Watch this quick fix for common Gen 2 door rattlesDo I need to disconnect the battery to replace the door panel?
While not strictly required by most mechanics for a simple panel swap, it is always the safest practice to disconnect the 12V battery when working with any electrical components, including the window switches. Be aware that disconnecting the battery will require you to reset the 'auto' window function.
Helpful Videos
Technical Specifications
OEM Part Numbers: 67620-47230-B0 67620-47231-B0
Interior Colors: Dark Gray, Bisque (Tan). All models are equipped with power windows and locks.
We Have This Part in Stock

The information in this article is provided for general reference and educational purposes only. Vehicle specifications, procedures, and part compatibility can vary by production date, trim level, and region. Always consult your vehicle's factory service manual and verify part numbers before purchasing or performing repairs. Safety-critical components such as airbags, seat belts, and braking systems should be installed by a qualified professional.
- Toyota Prius:
- 🎬 Helpful Videos
- 🛍️ Shop This Part
- Symptoms of a Failing Door Panel
- Physical Damage & Wear
- Noises
- Known Issues, TSBs, and Recalls
- Buying a Used 2004-2009 Prius Door Panel: A Buyer's Checklist
- Step 1: Verify Compatibility
- Step 2: Physical Inspection Checklist
- Cost Comparison: New vs. Used
- DIY Replacement Guide
- Step-by-Step Removal
- Frequently Asked Questions (FAQ)
- 🎟️ Get 5% Off