
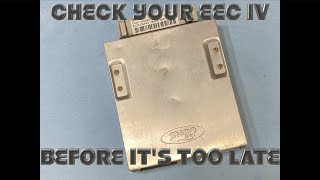
Ford EEC-IV ECM Failure: Solving No-Start & Fuel Pump Issues in 89-93 Taurus, Mustang & More
This guide covers the common failure points, symptoms, and replacement secrets for the EEC-IV engine computer found in the 1989-1993 Ford Taurus, Mustang, Lincoln Continental, Mercury Sable, and Ford Probe.
- The #1 cause of failure is leaking capacitors inside the module; always inspect a used unit for leaks before buying.
- These EEC-IV modules are PLUG-AND-PLAY and do NOT require programming, but you MUST match the calibration code from your original unit exactly.
- Common symptoms include a no-start condition, or a fuel pump that runs continuously when the key is on.
- Before blaming the ECM, always check for simple issues first, like bad wiring or poor ground connections.
The Inevitable Failure: Leaking Capacitors
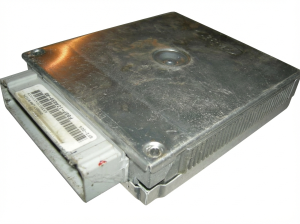
If you own one of these vehicles, the most important thing to know about your Engine Control Module (ECM) is that it has a built-in weak point: three electrolytic capacitors on its circuit board. After decades of heat and use, the seals on these capacitors dry out, allowing the acidic fluid inside to leak onto the circuit board. This acid is corrosive and eats away at the delicate copper pathways (called traces) on the board, causing short circuits and a wide range of bizarre, intermittent problems. This failure is so common that for many technicians, it's not a question of if the original ECM will fail, but when.
Symptoms of a Failing EEC-IV ECM
A failing EEC-IV computer can cause symptoms that might seem unrelated. Before you start replacing expensive sensors, check for these classic signs of ECM failure:
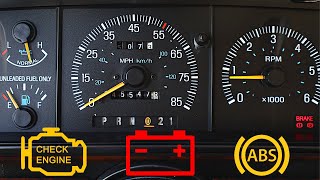
🎬 Watch: Real-world symptoms of a bad Foxbody Mustang ECU- Crank, No Start: The engine turns over but will not fire up.
- Fuel Pump Runs Constantly: When you turn the key to the 'On' position, the fuel pump should run for 1-2 seconds to prime the system and then shut off. A classic sign of a bad ECM is a fuel pump that never stops running as long as the key is on.
- Sudden Stalling: The engine shuts off while driving, as if you turned the key. This can be intermittent.
- Erratic Idle or Surging: The engine idle speed hunts up and down, or the engine surges while driving at a steady speed.
- No 'Check Engine' Light or No Codes: The 'Check Engine' light doesn't come on when it should, or you're unable to pull diagnostic codes using the self-test procedure.
- Harsh or Erratic Shifting (Automatic Transmissions): The ECM plays a role in transmission behavior, and a failure can cause hard shifts or other transmission problems.
- Burning Electrical Smell: A faint smell of burnt electronics from under the dashboard, especially near the passenger footwell, can indicate a failing ECM.
Diagnosing the Problem
Step 1: Visual Inspection (The Most Important Step)
Before doing any complex electrical testing, the first step is to physically remove and inspect the ECM. The location varies by vehicle:
- 1991-1993 Ford Mustang: Located in the passenger-side kick panel. You will need to remove the plastic panel to access it.
- 1989-1991 Ford Taurus / Mercury Sable: Located behind the center of the dashboard or near the passenger-side firewall. Access can be challenging.
- 1989-1991 Lincoln Continental: Typically found under the dashboard on the passenger side or in the engine compartment near the firewall.
- 1990-1992 Ford Probe: Often located behind the center console.
Once removed, use a screwdriver to open the metal case. Look closely at the three cylindrical capacitors (usually blue or black). You are looking for:
- Bulging or leaking fluid: The tops should be perfectly flat. Any bulging is a sign of failure.
- Corrosion at the base: Look for green, white, or black 'fuzz' or crust around the capacitor's legs where they meet the board.
- Damaged traces: Follow the thin copper lines leading away from the capacitors. The leaked acid can eat through these lines, causing a break in the circuit.
Pro Tip: Even if you don't see visible leakage, if the capacitors are original, they are over 30 years old and living on borrowed time. Replacing them (or the module) is good preventative maintenance.
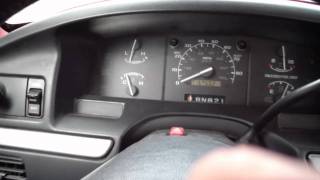
Step 2: Pulling Diagnostic Codes
These vehicles use a pre-OBD-II system called EEC-IV. You can retrieve two or three-digit trouble codes without a special scanner. You will need a small jumper wire.
- Locate the diagnostic connector under the hood. It's a black or grey plug, often near the driver-side shock tower, with 'EEC TEST' written on the cap.
- With the engine off, use a jumper wire to connect the 'Self-Test Input' (STI) pin to the 'Signal Return' (SIG RTN) pin.
- Turn the ignition key to the 'On' position (do not start the engine).
- The 'Check Engine' light will begin to flash. Count the flashes to get the codes. For example, two flashes, a pause, then three flashes means Code 23. 🎬 See how to read EEC-IV codes using a jumper wire
- A Code 11 means the system has passed the test. Other codes point to specific sensor or circuit faults.
Common codes associated with ECM failure itself include Code 15 (ROM test failed) or Code 19 (ECA voltage failure), but often a bad ECM will simply fail to produce any codes at all.
Warning: Before you condemn the ECM based on codes, always check the wiring and ground connections first. A loose or corroded ground wire can cause many of the same symptoms as a bad computer.
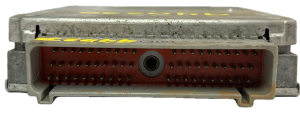
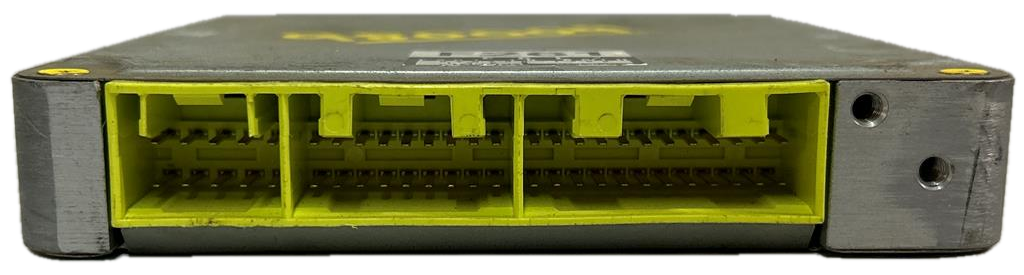
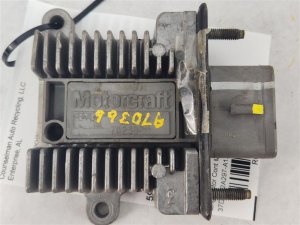
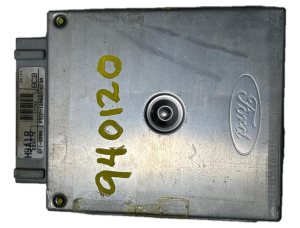
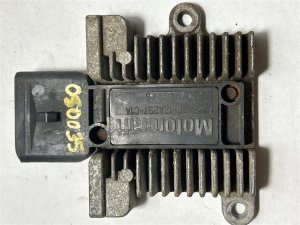
Buying a Used Engine Control Module (ECM)
Since new OEM units are no longer available, your main options are a remanufactured unit or a used OEM unit. For these specific vehicles, a good used OEM module that has been inspected is often a reliable choice.
The Most Important Rule: Match the Calibration Code!
These ECMs are NOT universally interchangeable. Every module has a specific calibration code printed on a sticker on its connector. This code (e.g., 'A9L' for a manual V8 Mustang, or 'J4J1' for a Taurus) tells the computer what engine, transmission, and emissions equipment it's for.
- You MUST match this code exactly. Failure to do so will result in poor performance, a no-start condition, or damage to other components.
- The code can be found on the sticker on the ECM itself or sometimes on a sticker in the driver's side door jamb.
- For 1991 Ford Mustang applications, it is absolutely critical to match this identification number.
Physical Inspection of a Used Unit
If buying a used module in person or from photos, insist on seeing the inside. Do not buy a used EEC-IV module without inspecting the capacitors. If you see any signs of leakage or corrosion, the module is either already bad or will fail soon. A good used unit will have a clean board with no signs of capacitor leakage.
Programming and Installation
Good news: No programming or flashing is required for these EEC-IV modules. They are completely plug-and-play, provided you have matched the calibration code correctly. There is no anti-theft system linked to the ECM on these models, so you will not need a dealer visit. Installation is the reverse of removal.
- Disconnect the negative battery terminal.
- Loosen the 10mm bolt in the center of the main ECM connector in the engine bay and unplug it.
- Remove the old ECM from inside the vehicle.
- Install the new ECM, reconnect the main connector, and tighten the bolt.
- Reconnect the negative battery terminal.
Cost of Replacement
The cost can vary significantly based on the part source and whether you do the work yourself.
| Item | Estimated Cost |
|---|---|
| New OEM | Not Available |
| Remanufactured | $150 - $400 (plus a refundable core charge of $75-$100) |
| Used OEM (Tested) | $50 - $250 (Mustang V8 units like the A9L can be $300+) |
| Shop Labor | $100 - $300 |
Frequently Asked Questions (FAQ)
Do I need to program a replacement ECM for my 1991 Mustang?
No. As long as you buy a replacement ECM with the exact same calibration code (e.g., A9L, A9P), it is a direct plug-and-play installation. No programming or dealer visit is needed.
Can I repair my original ECM instead of replacing it?
Yes. If the only issue is leaking capacitors and the board damage is not too severe, the capacitors can be replaced by someone skilled with soldering. You must replace them with capacitors of the same voltage (V) and microfarad (uF) rating, and they must be rated for high-temperature (105°C) use. If the acid has destroyed the circuit board traces, the repair is much more difficult.
🎬 Watch: Step-by-step guide to repairing Ford EEC-IV computer boardsWill a Mustang ECM work in my Taurus?
No. You must use an ECM with the correct calibration code for your specific vehicle, engine, and transmission combination. The internal software and sometimes hardware are different.
What are the A9L and A9P computers for the Mustang?
These are the most common and desirable ECMs for the 1989-1993 5.0L V8 Ford Mustang. The A9L is for the 5-speed manual transmission, and the A9P is for the automatic transmission. They are generally interchangeable, but there are some minor wiring differences to be aware of to prevent damage.
Helpful Videos

Technical Specifications
OEM Part Numbers: E9DF-12B577-DA E9DF-12B577-DB E9DF-12B577-EA E9DF-12B577-EB E9DF12B577DA E9DF12B577DB E9DF12B577EA E9DF12B577EB E9DZ-12B577-D E9DZ12B577D F1SF-12B577-AA E9ZF-12A650-AA E9DF-12A650-E1B F0DF-12A650-SA
Ford EEC-IV (Electronic Engine Control IV) architecture. Pre-OBD-II diagnostics. Typically contains three 105°C electrolytic capacitors (e.g., 47uF 16V, 10uF 63V) that are prone to failure.
We Have This Part in Stock

The information in this article is provided for general reference and educational purposes only. Vehicle specifications, procedures, and part compatibility can vary by production date, trim level, and region. Always consult your vehicle's factory service manual and verify part numbers before purchasing or performing repairs. Safety-critical components such as airbags, seat belts, and braking systems should be installed by a qualified professional.
- Ford Taurus:
- Ford Mustang:
- Lincoln Continental:
- Mercury Sable:
- Ford Probe:
- 🎬 Helpful Videos
- 🛍️ Shop This Part
- The Inevitable Failure: Leaking Capacitors
- Symptoms of a Failing EEC-IV ECM
- Diagnosing the Problem
- Step 1: Visual Inspection (The Most Important Step)
- Step 2: Pulling Diagnostic Codes
- Buying a Used Engine Control Module (ECM)
- The Most Important Rule: Match the Calibration Code!
- Physical Inspection of a Used Unit
- Programming and Installation
- Cost of Replacement
- Frequently Asked Questions (FAQ)
- 🎟️ Get 5% Off