
2014-2025 Charger, Grand Cherokee, Wrangler, Ram 1500 & More: The 3.6L/3.2L V6 Oil Cooler Leak
This guide explains the common oil cooler failure on Pentastar V6 engines, why it's often misdiagnosed as a rear main seal leak, and how to fix it properly.
- The most common symptom is oil pooling on top of the engine, which then leaks down the back, often being misdiagnosed as a costly rear main seal leak.
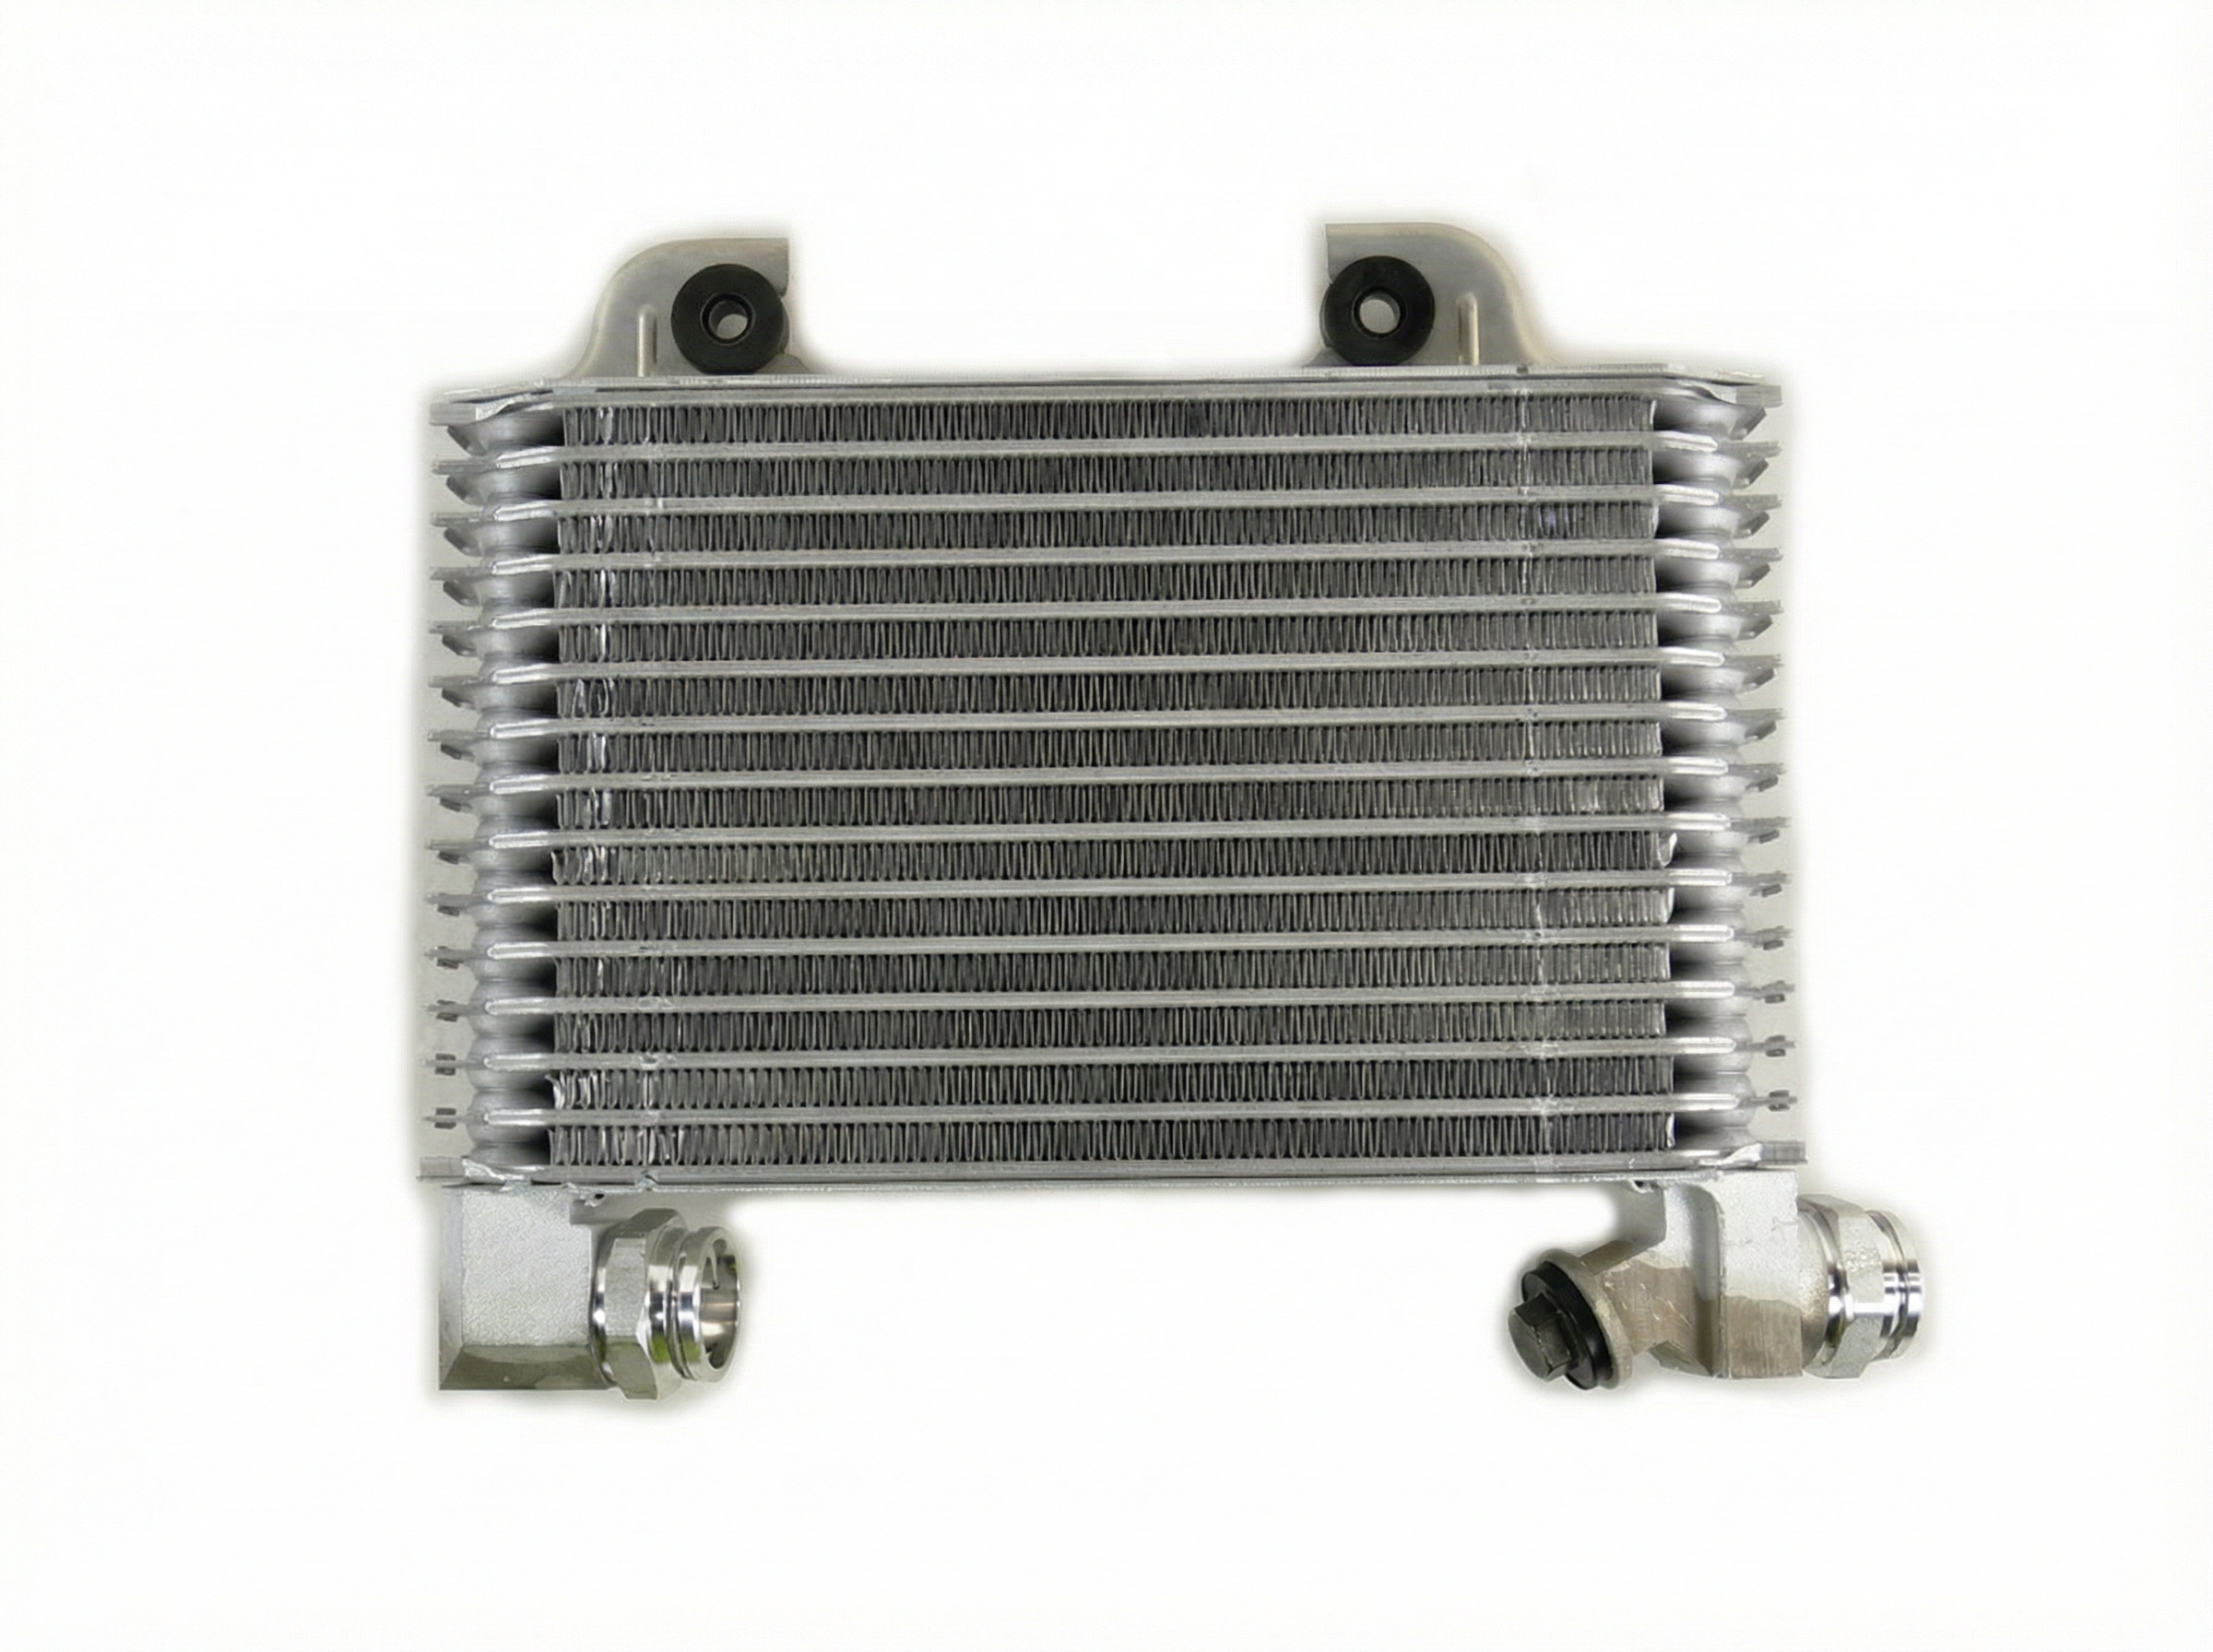
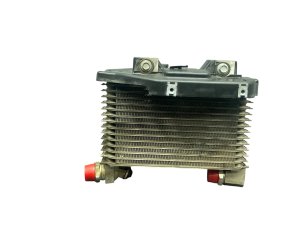
- The failure is caused by the OEM plastic housing cracking from engine heat; upgraded all-aluminum replacements are a popular and more durable fix.
- Replacement is a labor-intensive job (4/5 difficulty) requiring removal of the intake manifolds; it's wise to replace spark plugs at the same time.
- If your coolant looks milky or like gravy, the cooler has failed internally. Do not drive the vehicle to avoid catastrophic engine damage.
The Definitive Sign of Failure: Oil in the Engine Valley
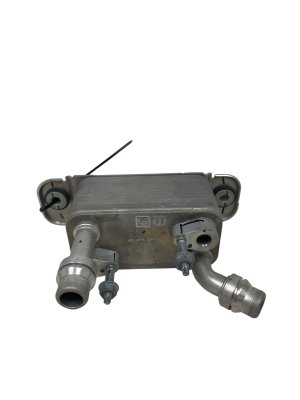
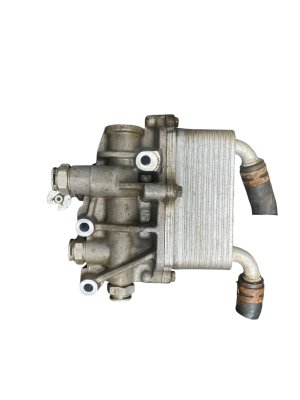
The most common and unmistakable symptom of a failing oil cooler on the 3.6L and 3.2L V6 engines is a pool of engine oil in the valley between the cylinder heads. Because the cooler is located directly under the intake manifold, a leak will cause oil to collect in this recessed area. Initially, you may only notice a burning oil smell as small amounts of oil drip onto hot exhaust components. However, as the leak worsens, the valley can fill with a significant amount of oil. Once the valley overflows, the oil typically runs down the back of the engine and drips from the transmission bellhousing.
Warning: This leak is very frequently misdiagnosed as a rear main seal leak. A rear main seal is a more expensive and labor-intensive repair. Before authorizing a rear main seal replacement, always insist that a technician first inspects the engine valley for pooled oil. If oil is present on top of the engine, the oil cooler assembly is almost certainly the culprit.
Common Symptoms of a Failing Oil Cooler
While oil in the engine valley is the primary sign, here are other common symptoms:
- Burning Oil Smell: Oil dripping from the overflowing valley onto the hot exhaust system will create a strong burning smell, especially when the vehicle is stopped.
- Oil Spots on the Ground: As the leak progresses, you will notice oil drips under your vehicle, typically appearing to come from the area where the engine and transmission meet.
- Low Engine Oil Level: A persistent leak will require you to add oil between regular oil changes. The dashboard may display a low oil level or low oil pressure warning.
- "Milky" or "Gravy-Like" Coolant: In cases of a severe internal failure of the cooler, oil and engine coolant can mix. This will create a thick, sludgy, milky-looking substance in your coolant overflow reservoir. This is a critical symptom that requires immediate attention to prevent catastrophic engine damage.
- Check Engine Light: The oil cooler assembly houses the oil pressure and oil temperature sensors. A failure in the housing or the integrated sensors can trigger diagnostic trouble codes (DTCs) like P0520 (Engine Oil Pressure Sensor Circuit) or P0198 (Engine Oil Temperature Sensor Circuit).
Known Issues, TSBs, and Recalls
This oil cooler leak is a widely known issue affecting a vast number of Chrysler, Dodge, Jeep, and Ram vehicles equipped with the 3.6L and 3.2L V6 engines.
- Design Flaw: The original equipment (OEM) housing is made of plastic. Constant exposure to extreme heat cycles in the engine valley causes the plastic to become brittle, warp, and develop hairline cracks. The rubber gaskets that seal the unit to the engine block also harden and fail over time.
- No Safety Recall: Despite thousands of owner complaints, there has never been a formal safety recall issued by the National Highway Traffic Safety Administration (NHTSA) for this specific oil cooler leak.
- Technical Service Bulletins (TSBs): The manufacturer has issued several part number revisions (e.g., 68105583AA, AB, AC, AD, etc.), indicating ongoing attempts to improve the design. More recently, TSB 09-022-24 was released for 2022-2025 models, advising technicians to use dye to confirm the leak source before replacing the entire assembly, as the issue could be a less severe problem like a bad oil filter cap O-ring or a valve cover gasket. This highlights how common the problem is.
Buying a Used Engine Oil Cooler
Given the high failure rate, purchasing a used OEM oil cooler can be risky, but it is a viable cost-saving option if you are thorough with your inspection. A recycled OEM part is often superior to a cheap, new aftermarket alternative.
- Physical Inspection is Key: Meticulously inspect the entire plastic housing for any hairline cracks. Pay special attention to the areas around the mounting bolt holes, sensor ports, and the threaded oil filter cap area.
- Check for Warping: Place the housing on a known flat surface (like a piece of glass or a machinist's straight edge) to check for any warping. If it doesn't sit perfectly flat, it will not seal properly against the engine block.
- Verify Sensors: Ensure the integrated oil pressure and temperature sensors are present and their connectors are not damaged. While you can transfer your old sensors, it's better if the used unit comes with known-good ones.
- Mileage and Source Vehicle: Prioritize a part from a low-mileage, late-model-year vehicle. A cooler from a 2020 or newer vehicle is likely to be in better condition than one from a 2014.
- ALWAYS Use New Gaskets: Never reuse the old gaskets that seal the cooler to the engine block or the intake manifold gaskets. A new gasket set is inexpensive and essential for a leak-free repair.
Pro Tip: Consider an all-aluminum aftermarket replacement. Several companies, like Dorman, offer upgraded housings made entirely of aluminum. These are not susceptible to the cracking and warping that plagues the OEM plastic design and are considered a more permanent solution by many mechanics.
Replacement Difficulty and Cost
Replacing the engine oil cooler is a labor-intensive job that requires significant disassembly of the top of the engine.
- Difficulty: 4 out of 5.
- DIY Feasibility: Possible for an experienced DIY mechanic, but challenging for a novice.
- Estimated Time: 3-5 hours.
- Procedure: The job requires removing the upper and lower intake manifolds to gain access to the cooler assembly in the engine valley. While the intake is off, it is highly recommended to replace the spark plugs and intake manifold gaskets at the same time to save on future labor costs.
Cost Comparison
| Item | Estimated Cost |
|---|---|
| New OEM (Mopar) Part | $200 - $350 |
| New Aftermarket (Aluminum Upgrade) | $125 - $200 |
| Used OEM Part | $50 - $125 |
| Shop Labor | $450 - $900+ |
| Total Dealer Repair Cost | $1,100 - $2,300+ |
Critical Torque Specs: Failure to use a torque wrench can cause the new housing to crack upon installation. The specs are low and easy to exceed.
- Oil Cooler Mounting Bolts: 106 in-lbs (inch-pounds), which is roughly 12 Nm. DO NOT use a foot-pound torque wrench.
- Oil Filter Cap: 18 ft-lbs (foot-pounds) or 25 Nm.
- Lower Intake Manifold Bolts: 106 in-lbs.
- Upper Intake Manifold Bolts: 89 in-lbs.
Frequently Asked Questions (FAQ)
My mechanic says I have a rear main seal leak. Could it be the oil cooler?
Yes, very likely. This is the most common misdiagnosis for this issue. Oil from the leaking cooler fills the engine valley and overflows down the back of the engine, perfectly mimicking a rear main seal leak. Before agreeing to a rear main seal repair, have the mechanic physically inspect the top of the engine, under the intake, for pooled oil.
Is an aluminum oil cooler better than the plastic OEM one?
Yes. Many mechanics and owners consider an all-aluminum replacement housing a permanent upgrade. The aluminum is not susceptible to the heat-related cracking and warping that causes the plastic OEM part to fail. Given the similar cost and increased durability, an aluminum unit is highly recommended if you are replacing the part.
Do I need to drain the coolant to replace the oil cooler?
Yes, it is highly recommended. The oil cooler has coolant passages running through it. If you do not drain the cooling system, coolant will spill into the engine valley and can contaminate the engine oil when you lift the old unit off. At a minimum, you should drain a couple of gallons from the radiator petcock before starting the job.
Can I just replace the gaskets instead of the whole assembly?
Sometimes. If the leak is minor and caused only by degraded gaskets, and the plastic housing shows no signs of cracks or warping, you can replace just the seals. However, given the high labor cost to access the part, and the high likelihood of the plastic housing failing in the future, most technicians recommend replacing the entire assembly as a preventative measure.
Technical Specifications
OEM Part Numbers: 68105583AA 68105583AB 68105583AC 68105583AD 68105583AE 68105583AF 68105583AG 68310865AA 68310865AB 68310865AC 68310865AF 68596317AA 68596317AB
Housing Mounting Bolt Torque: 106 in-lbs (12 Nm). Oil Filter Cap Torque: 18 ft-lbs (25 Nm).
We Have This Part in Stock


The information in this article is provided for general reference and educational purposes only. Vehicle specifications, procedures, and part compatibility can vary by production date, trim level, and region. Always consult your vehicle's factory service manual and verify part numbers before purchasing or performing repairs. Safety-critical components such as airbags, seat belts, and braking systems should be installed by a qualified professional.
- Dodge Charger:
- Dodge Challenger:
- Dodge Durango:
- Jeep Grand Cherokee:
- Jeep Wrangler:
- Chrysler 300:
- Chrysler Town & Country:
- Dodge Grand Caravan:
- Ram 1500:
- Jeep Cherokee:
- Jeep Gladiator:
- Chrysler Pacifica:
- Ram 1500 Classic: