
Tesla Model 3 & Y B-Pillar Trim and Camera Guide (2017-2026): Chrome, Black, and Highland/Juniper Differences
Your definitive guide to identifying, replacing, and calibrating the B-pillar appliqué, whether you have early chrome trim, factory black, or the new Highland/Juniper glass style.
- There are three incompatible generations of this part: chrome (2017-2020), black (2021-2023), and glass (2024+). You must buy the correct one for your vehicle.
- Camera calibration is mandatory after replacement. You must use the touchscreen to 'Clear Calibration' and then drive for up to 100 miles for Autopilot to be restored.
- This is a very DIY-friendly repair that can be completed in under an hour with basic trim tools.
- When buying used, verify the part number and inspect the camera lens for scratches and the mounting tabs for damage.
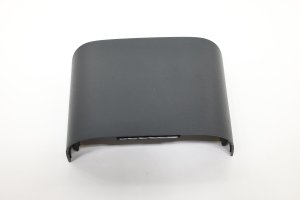
CRITICAL: Which B-Pillar Trim Fits Your Tesla?
This is NOT a one-size-fits-all part. Tesla has used three distinct versions of the B-pillar appliqué across different model years. Ordering the wrong part will result in an incorrect fit and finish. Verify your vehicle's production year before purchasing.
2017 – late 2020 Model 3: The Chrome Era
The earliest Model 3 vehicles came from the factory with bright chrome trim around the windows and on the B-pillars. Many owners choose to apply a vinyl "chrome delete" wrap for a blacked-out look. If you are replacing a damaged chrome part, you will need the original chrome version. If you want to switch to black, you can use the parts from the 2021-2023 generation.
Late 2020 – 2023 Model 3 & 2020-2024 Model Y: Factory Black Trim
Starting in late 2020 for the 2021 model year, Tesla began shipping the Model 3 and Model Y with black satin or matte finish trim from the factory. This is the most common version. These parts can also be used to replace the chrome trim on earlier 2017-2020 Model 3s for a factory "chrome delete" upgrade.
- Left (Driver's Side) Black Trim: 1083519-01, 1083519-01-D
- Right (Passenger's Side) Black Trim: 1083520-01, 1083520-01-D
2024+ "Highland" Model 3 & 2025+ "Juniper" Model Y: Glass Appliqué
The refreshed 2024+ Model 3 (codename "Highland") and the upcoming 2025+ Model Y (codename "Juniper") feature a completely redesigned B-pillar appliqué. This version has a glass finish and integrates a new generation of camera hardware (HW4). These parts are NOT backward compatible with earlier models.
- Left (Driver's Side) Glass Trim: 1711762-00-F, 1711762-00-G
- Right (Passenger's Side) Glass Trim: 1734279-00-F
Symptoms of a Failing B-Pillar Panel
Failure can be either cosmetic or functional. It's important to know which issue you're dealing with.
- Cosmetic Damage: This includes cracks, deep scratches, or peeling of the finish. The glass appliqué on Highland models can be shattered by an impact. While this may not immediately affect the camera, it compromises the vehicle's appearance and weather sealing.
- Camera Malfunction: You may see a notification on your touchscreen that a camera is blocked or unavailable. This will disable Autopilot, cruise control, and automatic lane changes. The blind spot camera view, which appears when you activate the turn signal, will also fail to display.
- Loose Trim: The panel itself may become loose or pop out of place, especially after a minor impact. This can create wind noise and expose the camera and its wiring to the elements.
Pro Tip: You can check the status of your cameras by putting the car into Service Mode. On the touchscreen, go to Software, then press and hold the 'Model 3' or 'Model Y' logo until a password prompt appears. Enter 'service'. Navigate to the Driver Assist section to view the status of each camera, including the left and right pillars.
Replacement Guide & Camera Calibration
Replacing the B-pillar appliqué is a manageable DIY task for most owners.
Step-by-Step Replacement
- Open Both Doors: Open the front and rear doors on the side you are working on to get clear access.
- Remove Lower Trim/Screws: On some models, you may need to remove a lower B-pillar cover and two screws that secure the bottom of the main appliqué.
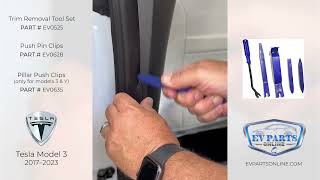
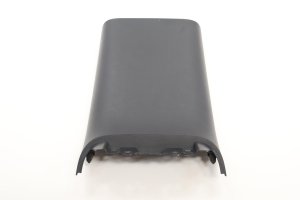
- Pry Off the Panel: Using plastic trim removal tools, carefully pry the panel away from the body. It is held on by clips and strong double-sided tape. Start from the bottom and work your way up.
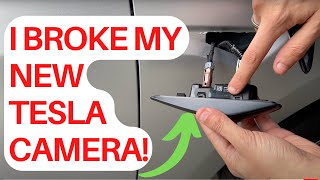
- Disconnect the Camera: Before fully removing the panel, carefully reach behind it and disconnect the single electrical connector for the camera. The harness may not have much slack.
- Clean the Surface: Remove all residue from the old double-sided tape from the car's B-pillar. Clean the area thoroughly with isopropyl alcohol to ensure the new adhesive will bond properly.
- Install the New Panel: Connect the camera on the new panel. Peel the backing from the new adhesive tape, align the panel carefully using the clips, and press it firmly into place. Reinstall any screws and lower trim pieces.
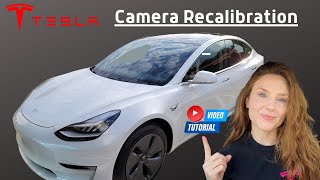
The All-Important Camera Calibration
Warning: After replacing any camera, you MUST perform a camera calibration. Failure to do so will result in Autopilot and other safety features being unavailable.
The process is initiated from the vehicle's touchscreen:
- Navigate to Controls > Service > Camera Calibration.
- Tap the Clear Calibration button. This erases the old camera's stored data.
- Drive the vehicle. The car will automatically begin to self-calibrate the new camera. For best results, drive on a multi-lane highway with clear, visible lane markings.
- A progress indicator will appear on the screen. Calibration typically completes within 20-25 miles (32-40 km), but can sometimes take up to 100 miles (160 km) depending on conditions. Once complete, all Autopilot features will be restored. 🎬 Watch: Step-by-step guide to recalibrating your Autopilot cameras
Buying a Used B-Pillar Appliqué: What to Inspect
A used OEM appliqué is an excellent, cost-effective option, as aftermarket versions often have issues with fit, finish, or camera quality. Here’s what to look for:
- Verify the Part Number: This is the most important step. Ensure the part number matches your car's generation (pre-Highland vs. Highland/Juniper).
- Check the Finish: For pre-2021 models, confirm if you need chrome or black. For all models, inspect for deep scratches, scuffs, or signs of fading from UV exposure.
- Inspect the Camera Lens: Look closely at the small camera lens. It should be clear and free of deep scratches, hazing, or condensation inside. A scratched lens can impair the camera's vision.
- Examine Mounting Points: Flip the panel over and check that all plastic mounting tabs and clip locations are intact. Broken tabs will prevent the panel from sitting flush against the body.
- For Highland/Juniper Parts: Inspect the glass surface carefully for any chips or cracks, especially around the edges.
Related Known Issues and Service Bulletins
While there are no direct recalls for the B-pillar appliqué, owners should be aware of two related TSBs for certain Model 3 years:
- SB-21-11-001: Affects some 2020 Model 3 vehicles where missing or improperly applied body sealant could cause water to leak into the trunk.
- SB-19-12-001: Notes that on some 2017-2018 Model 3s, the front and mid underbody aero shield panels could be damaged when driving through deep standing water.
Cost of Replacement
| Part Type | Estimated Cost (Part Only) |
|---|---|
| New OEM (Dealer) | $150 - $250 |
| New Aftermarket | $70 - $150 |
| Used OEM | $80 - $140 |
| Shop Labor | $100 - $200 |
Frequently Asked Questions (FAQ)
Can I swap my 2019 Model 3's chrome B-pillar trim for the black version?
Yes. This is a popular modification. You can purchase the black B-pillar appliqués for the 2021-2023 Model 3 (part numbers 1083519-01-D and 1083520-01-D) and they will fit perfectly on the earlier 2017-2020 models.
Do I need to calibrate the camera on a used part?
Yes. Any time a camera is disconnected and replaced, even with a used OEM part, you must clear the old calibration data via the service menu and allow the system to recalibrate by driving.
My interior B-pillar trim is loose. Is this the same part?
No. The interior B-pillar trim, which covers the seatbelt height adjuster, is a separate plastic piece. It is known for having clips that break easily, causing it to pop off. This is a different part and a much simpler fix, often just requiring new clips.
🎬 See this quick DIY fix for loose interior B-pillar trimWhere is the paint code on a Tesla?
The paint code is located on the Vehicle Identification sticker in the driver's side door jamb. However, this B-pillar appliqué is not a painted part; it comes in either a chrome, black, or glass finish, which you must match to your vehicle's existing trim.
Helpful Videos
Technical Specifications
OEM Part Numbers: 1083519-01 1083519-01-D 1083520-01 1083520-01-D 1711762-00-F 1711762-00-G 1734279-00-F
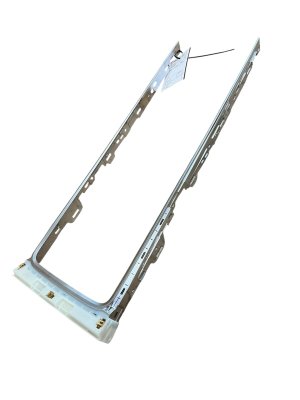
Houses side repeater camera for Autopilot/Sentry Mode. Attached with clips and double-sided adhesive tape.
We Have This Part in Stock

The information in this article is provided for general reference and educational purposes only. Vehicle specifications, procedures, and part compatibility can vary by production date, trim level, and region. Always consult your vehicle's factory service manual and verify part numbers before purchasing or performing repairs. Safety-critical components such as airbags, seat belts, and braking systems should be installed by a qualified professional.
- Tesla 3:
- TESLA Y:
- 🎬 Helpful Videos
- 🛍️ Shop This Part
- CRITICAL: Which B-Pillar Trim Fits Your Tesla?
- 2017 – late 2020 Model 3: The Chrome Era
- Late 2020 – 2023 Model 3 & 2020-2024 Model Y: Factory Black Trim
- 2024+ "Highland" Model 3 & 2025+ "Juniper" Model Y: Glass Appliqué
- Symptoms of a Failing B-Pillar Panel
- Replacement Guide & Camera Calibration
- Step-by-Step Replacement
- The All-Important Camera Calibration
- Buying a Used B-Pillar Appliqué: What to Inspect
- Related Known Issues and Service Bulletins
- Cost of Replacement
- Frequently Asked Questions (FAQ)
- 🎟️ Get 5% Off