
1997-2005 Buick Park Avenue Headlight: Solving Haze, Moisture & Replacement
Your complete guide to diagnosing common headlight failures, choosing a quality used assembly, and properly replacing it on your Park Avenue.
- The most common failure is lens hazing from UV damage; polishing is a temporary fix, while replacement is the permanent solution.
- When buying a used assembly, prioritize a clear, non-yellowed lens and intact mounting tabs over all else.
- These cars use simple halogen assemblies; there are no complex HID or LED systems, ballasts, or modules to worry about.
- Headlight aiming is a mandatory safety step after replacement and is easily done with basic hand tools.
Symptoms of a Failing Headlight Assembly
A failing headlight assembly can present several distinct symptoms. While a burned-out bulb is simple to fix, issues with the assembly itself can be more complex and require a full replacement.
- Dim or Yellowed Light Output: The most common issue is the polycarbonate lens becoming hazy, cloudy, or yellow from years of UV exposure. This significantly reduces the amount of light that can pass through, making it difficult to see at night.
- Moisture or Condensation Inside: If you see water droplets or a persistent fog inside the lens, the seal between the lens and the housing has failed. This moisture can cause bulbs to burn out prematurely and will corrode electrical connectors.
- Flickering or Intermittent Operation: Lights that flicker or cut out while driving often point to a problem with the internal wiring or the main connector on the back of the assembly. The connections can become corroded or loose over time.
- Cracked Lens or Housing: Physical damage from road debris or minor impacts can crack the lens or the rear housing. A cracked lens is a safety hazard and will allow moisture to enter, while a cracked housing can compromise the mounting integrity.
Known Issues for 1997-2005 Buick Park Avenue Headlights
This generation of Park Avenue is known for a few specific headlight-related problems that owners frequently encounter.
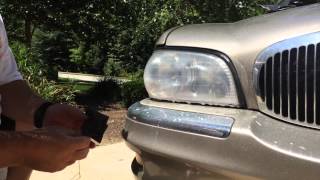
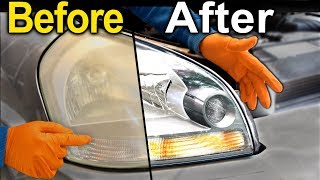
Lens Hazing and UV Damage
By far the most prevalent problem is the degradation of the outer lens surface. The original protective clear coat wears off, exposing the polycarbonate plastic to the sun's UV rays. This causes the plastic to oxidize, resulting in a cloudy, yellowed, or hazy appearance. While polishing kits can temporarily restore some clarity, it's often a short-term fix as the underlying plastic is still aged. Replacement of the 🎬 Watch: How to restore headlights for a permanent clear finish assembly is the only permanent solution for severe hazing.
Seal Failure and Moisture Intrusion
The butyl rubber seal that bonds the lens to the rear housing can dry out and crack with age. This allows water from rain or car washes to seep inside. Once moisture is present, it creates a cycle of condensation that is difficult to stop and leads to chronic bulb failure and poor visibility.
Brittle Mounting Tabs
After years of exposure to engine heat and environmental elements, the plastic mounting tabs on the assembly become brittle. They can easily snap during removal for a bulb change or from a very minor parking lot bump. A broken tab will prevent the headlight from being securely mounted and properly aimed.
Warning: A loose or improperly mounted headlight assembly can vibrate, causing the light beam to shake and potentially leading to premature bulb failure. It also cannot be aimed correctly, which is a safety and legal issue.
Buying a Used Headlight Assembly: What to Inspect
Purchasing a used OEM headlight can be a great value, offering better quality and fit than cheap aftermarket alternatives. However, a thorough inspection is crucial.
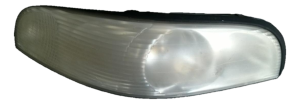
- Lens Clarity: This is the #1 priority. Hold the light up and look for any signs of hazing, yellowing, or internal cloudiness. Minor external scuffs can be polished, but avoid any with internal blemishes or deep crazing (a network of fine cracks).
- Mounting Points: Carefully inspect every mounting tab and bracket location. Look for hairline cracks, especially around the bolt holes. Reject any assembly with broken, missing, or repaired (e.g., with epoxy or glue) tabs.
- Housing and Seals: Check the black plastic rear housing for any cracks or damage. Examine the seam where the lens meets the housing; it should be clean and tight with no obvious gaps where the seal has failed.
- Wiring and Connectors: Look at the main electrical connector pins. They should be clean and free of any green or white corrosion. Ensure the wiring harness inside the assembly isn't brittle or frayed.
- OEM Markings: Look for a "GM" logo or the part number (like 25689660) molded into the housing to confirm it's a genuine factory part. OEM parts are designed with superior optics and will fit correctly without modification.
Headlight Variants and Interchangeability (1997-2005)
For the 1997-2005 model years, the Buick Park Avenue used a standard halogen headlight assembly. There were no optional HID/Xenon or LED versions from the factory. This simplifies replacement, as all trims (Base and Ultra) from this generation use the same type of assembly.
- Technology: These are basic halogen reflector headlights. They do not require any external components like ballasts, igniters, or LED driver modules.
- Bulb Types: The low beam typically uses a 9006 bulb, and the high beam uses a 9005 bulb.
- Interchangeability: Headlight assemblies are generally interchangeable across the entire 1997-2005 model year range.
Pro Tip: While you can buy aftermarket LED or HID "plug-and-play" bulbs, they are not recommended for these halogen housings. The reflector is not designed for the different light source, which results in a poor beam pattern, excessive glare for oncoming drivers, and often less effective road illumination.
Recalls and Technical Service Bulletins (TSBs)
A search of the National Highway Traffic Safety Administration (NHTSA) database shows no specific recalls or TSBs directly related to the headlight assemblies themselves for the 1997-2005 Buick Park Avenue. While many TSBs exist for this vehicle, none pertain to headlight hazing, moisture, or failure. Some owner complaints mention issues with a lamp control module that can affect headlight operation, but this is an electrical issue separate from the physical assembly.
Replacement and Aiming Guide
Replacing the headlight assembly on a Park Avenue is a straightforward job that most DIY mechanics can handle.
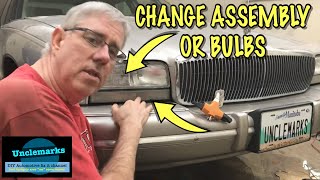
Replacement Steps:
- Open the hood to access the top of the headlight assembly.
- Locate and remove the two large, round plastic wing nuts that hold the top of the assembly in place. You can usually unscrew them by hand.
- Carefully pull the assembly forward to release it from the lower mounting points. 🎬 See this walkthrough for removing the headlight and signal bulbs
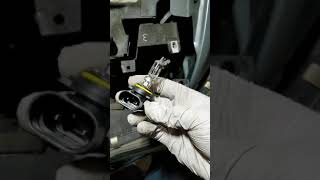
- Disconnect the main electrical connector from the back of the assembly.
- Twist and remove the bulb sockets from the old assembly and install them into the new one. It's a good idea to wear gloves to avoid touching the new bulbs with your bare hands, as skin oils can cause them to fail prematurely.
- Installation is the reverse of removal. Make sure the lower tabs on the new assembly slide correctly into their slots before tightening the top wing nuts.
Headlight Aiming (Crucial Step)
After installing a new headlight assembly, you must aim it correctly. Failure to do so is unsafe and illegal.
- Park the car on a level surface, about 25 feet away from a flat wall or garage door. Ensure your tire pressures are correct.
- Turn on the low-beam headlights.
- The 2004 owner's manual indicates the adjusters are located under the hood directly behind the headlamps. There are typically two adjuster screws or knobs on the back of the assembly: one for vertical (up/down) and one for horizontal (left/right) adjustment.
- The top of the main intensity of the beam pattern on the wall should be slightly below the height of the center of the headlight lens itself. A common rule is for the cutoff to be 2 inches below the headlight center height at 25 feet.
- Adjust each headlight so their patterns are level and aimed straight ahead. 🎬 Watch: A fast and easy guide to aiming your headlights
Cost Comparison
| Part Type | Estimated Cost (per assembly) |
|---|---|
| New OEM | $900+ (if available) |
| New Aftermarket | $40 - $185 |
| Used OEM | $75 - $200 |
| Shop Labor | $50 - $150 |
Frequently Asked Questions (FAQ)
Can I just replace the hazy plastic lens?
No, the headlight assembly is a sealed unit. The lens is permanently bonded to the housing, and they are not sold separately. The entire assembly must be replaced.
Do I need to replace my headlights in pairs?
It is highly recommended. If one headlight is yellowed and dim, the other is likely in similar condition. Replacing only one will result in uneven light output and an unbalanced appearance. A new assembly will be much brighter and clearer than the remaining old one.
What tools are needed for replacement?
For most 1997-2005 Park Avenues, the replacement is very simple and may not require any tools, as the assemblies are held in by large plastic wing nuts. A small screwdriver or trim tool might be helpful for the electrical connector clip. For aiming, you will need a Phillips screwdriver or a small socket/ratchet.
Is there a difference between the driver and passenger side?
Yes, headlight assemblies are side-specific. They are designated as Left (Driver Side) and Right (Passenger Side) and are not interchangeable.
Helpful Videos


Technical Specifications
OEM Part Numbers: 25689660
Technology: Halogen Reflector Low Beam Bulb: 9006 High Beam Bulb: 9005
We Have This Part in Stock

The information in this article is provided for general reference and educational purposes only. Vehicle specifications, procedures, and part compatibility can vary by production date, trim level, and region. Always consult your vehicle's factory service manual and verify part numbers before purchasing or performing repairs. Safety-critical components such as airbags, seat belts, and braking systems should be installed by a qualified professional.
- Buick Park Avenue:
- 🎬 Helpful Videos
- 🛍️ Shop This Part
- Symptoms of a Failing Headlight Assembly
- Known Issues for 1997-2005 Buick Park Avenue Headlights
- Lens Hazing and UV Damage
- Seal Failure and Moisture Intrusion
- Brittle Mounting Tabs
- Buying a Used Headlight Assembly: What to Inspect
- Headlight Variants and Interchangeability (1997-2005)
- Recalls and Technical Service Bulletins (TSBs)
- Replacement and Aiming Guide
- Replacement Steps:
- Headlight Aiming (Crucial Step)
- Cost Comparison
- Frequently Asked Questions (FAQ)
- 🎟️ Get 5% Off