
2012-2017 Buick Verano Headlight: Halogen-Only Design and Moisture Issues
This guide covers the standard halogen headlight assembly for the 2012-2017 Buick Verano, explaining common failure symptoms like moisture intrusion and how to buy a quality used replacement.
- This headlight assembly is for halogen systems only and is not interchangeable with the rarer Xenon (HID) headlights found on some premium trims.
- Moisture and condensation inside the lens is a very common failure point, caused by bad seals or clogged vents.
- When buying a used assembly, the most critical inspection is for the integrity of all mounting tabs; even one broken tab will prevent proper fitment and aiming.
- Replacing the assembly does not require removing the front bumper, and headlight aiming is a necessary final step for safety.
Symptoms of a Failing Headlight Assembly
A failing headlight assembly can present several distinct symptoms, ranging from minor annoyances to serious safety hazards. Recognizing these signs early can help you address the problem before it leads to a ticket or a dangerous situation on the road.
Dim or Yellowed Headlights
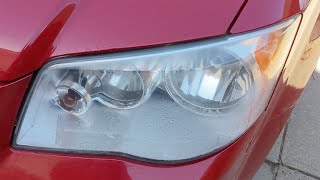
Over time, the polycarbonate lens on the exterior of the headlight assembly can become cloudy, hazy, or yellowed due to oxidation from UV sun exposure and wear from road debris. This deterioration significantly reduces the amount of light that can pass through, resulting in dim, scattered, and ineffective illumination. While lens restoration kits can sometimes temporarily improve clarity, a heavily damaged lens often requires replacing the entire assembly for safe night driving.
Moisture or Condensation Inside the Lens
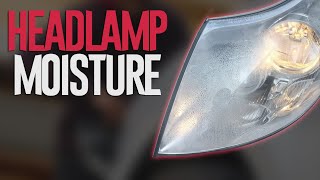
Finding moisture, fog, or water droplets inside the headlight lens is a common issue. Headlight assemblies are designed with small vents to allow heat to escape, but if these vents become clogged or the seal around the lens fails, moisture can get trapped inside. This can lead to corrosion of the reflective surfaces and electrical connectors, and can even cause bulbs to burn out prematurely. While minor condensation may clear on its own, persistent moisture indicates a bad seal that needs to be addressed.
🎬 Watch: Learn what causes headlight condensation and how to fix it.Electrical Malfunctions
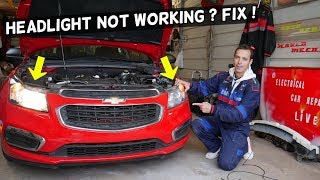
Problems like flickering lights, a bulb that works intermittently, or a completely dead headlight could be caused by issues within the assembly itself. This can include a corroded bulb socket, a faulty internal wiring harness, or a bad ground connection. While the first step is often to check the bulb and fuse, if those are fine, the problem likely lies within the headlight housing's electrical components.
🎬 See this guide for fixing common GM headlight electrical issues.Physical Damage
Cracks in the lens or housing, often from minor impacts or road debris, are a clear sign that the assembly needs replacement. A cracked lens will allow moisture to enter freely, leading to chronic condensation and electrical problems. Broken or damaged mounting tabs are also a serious issue, as they prevent the headlight from being securely fastened and aimed correctly, which is both unsafe and can cause the assembly to vibrate while driving.
Compatibility Warning: The 2012-2017 Buick Verano was primarily equipped with halogen headlight assemblies. Higher trim levels may have been equipped with Xenon (HID) headlights. These two types are NOT interchangeable without significant wiring modifications and additional components. This guide and the associated part numbers are for the standard halogen assemblies only. Always verify which system your car has before purchasing a replacement.
Buying a Used Headlight Assembly
Purchasing a used OEM headlight assembly can be a cost-effective alternative to buying a new part from the dealer. However, careful inspection is key to getting a quality part that will last.
What to Inspect on a Used Part
- Lens Clarity: Look for a clear, bright lens. Avoid assemblies with heavy hazing, deep scratches, or a yellowed appearance. Minor surface wear is acceptable, but severe UV damage cannot be easily repaired.
- Check for Moisture Signs: Inspect the inside of the lens for any water lines, mineral deposits, or signs of dried condensation. This indicates the seal has failed in the past and will likely leak again.
- Mounting Tabs and Housing Integrity: This is the most critical inspection point. Carefully check all mounting tabs for cracks, stress marks, or evidence of plastic-welded repairs. A headlight with even one broken tab will not mount securely or aim correctly. Inspect the rear housing for any cracks or holes.
- Seals and Gaskets: Check the condition of the rubber seals for the bulb access covers. They should be pliable and free of cracks to prevent future moisture intrusion.
Why Used OEM is Often Better Than New Aftermarket
Original Equipment Manufacturer (OEM) parts are built to the vehicle manufacturer's exact specifications. A used OEM headlight will have the correct beam pattern, use high-quality reflectors and plastics, and fit perfectly. Many new aftermarket headlights, especially budget-friendly options, can suffer from poor beam patterns that create glare for other drivers, use lower-quality materials that yellow quickly, and may have fitment issues that leave gaps or require modification to install.
Known Issues, TSBs, and Recalls
There are no specific recalls or Technical Service Bulletins (TSBs) directly related to the headlight assemblies for the 2012-2017 Buick Verano. However, several recalls were issued for the 2012 model year concerning the driver's side airbag. While not directly related to the headlights, it's important for owners to be aware of all safety campaigns for their vehicle. You can check for open recalls on your specific vehicle by using the NHTSA's website.
Headlight Aiming and Alignment
Proper aiming is required any time a headlight assembly is replaced to ensure the light illuminates the road correctly without blinding oncoming traffic. While the factory aim should be close, final adjustments are almost always necessary. The Verano headlight assembly has adjustment screws located on the back of the housing that control the vertical and horizontal aim. This can be done using a Phillips screwdriver. For accurate aiming, the vehicle should be on a level surface, facing a wall approximately 25 feet away. The goal is to have the most intense part of the low-beam cutoff line sit at or just below the height of the center of the headlight, and slightly to the right of center.
Pro Tip: When changing a halogen bulb, never touch the glass with your bare hands. The oils from your skin can create hot spots on the bulb, causing it to burn out prematurely.
Cost Comparison
| Part Type | Estimated Cost |
|---|---|
| New OEM | $415 - $460 per side |
| New Aftermarket | $125 - $250 per side |
| Used OEM | $75 - $150 per side |
| Shop Labor (Replacement) | $50 - $100 per side |
Frequently Asked Questions
Do I need to remove the bumper to replace the headlight assembly?
No, on the 2012-2017 Buick Verano, the headlight assembly can typically be replaced without removing the front bumper cover. Access is gained from under the hood, though some components like the windshield washer fluid spout may need to be moved for better access.
What bulbs does the halogen headlight assembly use?
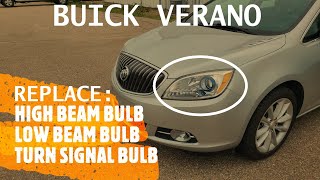
The standard halogen assembly for the Buick Verano uses an H11 bulb for the low beam and an H9 bulb for the high beam. Some sources may list H11 for both. Always confirm the correct bulb for your specific vehicle.
🎬 Watch: Step-by-step walkthrough for replacing Buick Verano headlight bulbs.Can I upgrade my halogen headlights to LED or HID?
You can replace the halogen bulbs with direct-fit LED bulbs, which can be much brighter. However, swapping the entire halogen assembly for a factory Xenon/HID assembly is not a simple plug-and-play process and would require significant and complex wiring modifications.
Why is only one of my headlights working?
The most common reason is a burned-out bulb. If a new bulb doesn't fix it, the next steps are to check the specific fuse for that headlight, the bulb socket for corrosion, and the wiring connector. Unlike older cars, the low beams on the Verano may be controlled by the Body Control Module (BCM).
Helpful Videos
Technical Specifications
OEM Part Numbers: 20913832 23216003 20913833 22944808 23216004
Bulb Type: Halogen Low Beam Bulb: H11 High Beam Bulb: H9
We Have This Part in Stock


The information in this article is provided for general reference and educational purposes only. Vehicle specifications, procedures, and part compatibility can vary by production date, trim level, and region. Always consult your vehicle's factory service manual and verify part numbers before purchasing or performing repairs. Safety-critical components such as airbags, seat belts, and braking systems should be installed by a qualified professional.
- Buick Verano:
- 🎬 Helpful Videos
- 🛍️ Shop This Part
- Symptoms of a Failing Headlight Assembly
- Dim or Yellowed Headlights
- Moisture or Condensation Inside the Lens
- Electrical Malfunctions
- Physical Damage
- Buying a Used Headlight Assembly
- What to Inspect on a Used Part
- Why Used OEM is Often Better Than New Aftermarket
- Known Issues, TSBs, and Recalls
- Headlight Aiming and Alignment
- Cost Comparison
- Frequently Asked Questions
- 🎟️ Get 5% Off