
2007-2013 Durango Headlights: A Guide to the Gen 2 vs. Gen 3 Divide
This guide clarifies the critical differences between the completely separate headlight systems used on 2007-2009 and 2011-2013 Dodge Durango models.
- The most critical factor is identifying the correct generation: 2007-2009 (Gen 2) and 2011-2013 (Gen 3) use completely different, non-interchangeable headlights.
- For 2011-2013 models, you must match the headlight type: Halogen or HID/Xenon. They are not cross-compatible without major modifications.
- When buying a used assembly, the most important inspection points are the lens clarity and the integrity of all plastic mounting tabs, which are easily broken.
- After any headlight replacement, the beams must be properly aimed to ensure road safety for you and other drivers.
Critical Compatibility Warning: Two Different Durangos
Warning: The 2007-2013 Dodge Durango model years span two completely different vehicle generations, and their headlight assemblies are NOT interchangeable. Before purchasing, you must correctly identify your vehicle's generation.
- 2nd Generation (WK): 2007, 2008, 2009 Dodge Durango
- 3rd Generation (WD): 2011, 2012, 2013 Dodge Durango (There was no 2010 model year)
Attempting to install a headlight from the wrong generation will result in improper fit, different wiring connectors, and incompatible mounting points. This guide is structured to address each generation separately.
2nd Generation: 2007-2009 Dodge Durango Headlight Assembly
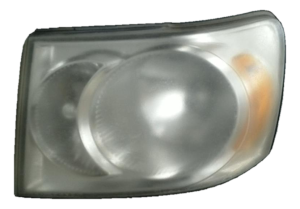
Overview and Design
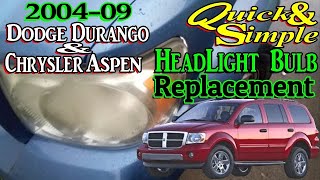
The second-generation Durango features a large, single-piece headlight assembly. These models were equipped exclusively with Halogen headlights from the factory. The design is straightforward, with a reflector-style housing for the main bulbs. Accessing the bulbs for replacement is uniquely done through a small door in the front of the fender well, which allows you to reach behind the assembly without removing it.
🎬 Watch: How to access and replace these headlight bulbs.Known Issues and Part Numbers
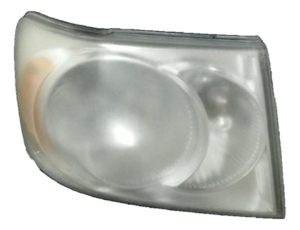
The most common issue for this generation is the same one that affects most vehicles of this age: oxidation of the plastic lens. Over time, UV exposure and road debris can cause the lens to become hazy, yellow, and cloudy, which significantly reduces light output and visibility. While restoration kits can sometimes improve the condition, a replacement assembly is often the best solution for restoring clarity and safety. Common OEM Part Numbers:
- Right / Passenger Side: 55078017AI
- Left / Driver Side: 55078018AI
3rd Generation: 2011-2013 Dodge Durango Headlight Assembly
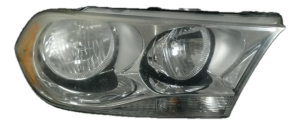
Variant Differences: Halogen vs. HID/Xenon
The third-generation Durango was offered with two distinct headlight technologies, and they are not directly interchangeable. It is crucial to identify which system your vehicle has before buying a replacement.
- Halogen Headlights: These are the standard-equipment lights, found on most trim levels. They use a filament-based bulb (typically H11 for the low beam and 9005 for the high beam) in a reflector or basic projector housing.
- High-Intensity Discharge (HID/Xenon) Headlights: Found on higher trim levels like the R/T and Citadel, these lights offer a brighter, whiter light output. They use a D1S bulb that creates light by igniting xenon gas in an arc. HID systems are easily identified by the prominent projector lens within the housing, which focuses the intense light.
Warning: You cannot simply swap a Halogen assembly for an HID assembly (or vice-versa). The wiring harnesses are different, and HID systems require an external ballast and igniter to function. Attempting to upgrade requires significant custom wiring and potentially computer reprogramming.
Ballasts, Igniters, and Known Issues
For HID-equipped models, the headlight system includes a critical component called a ballast (or HID control module). This is a small metal box, usually mounted to the bottom or back of the headlight assembly, that converts the car's 12V DC power into the high-voltage AC power needed to start and run the HID bulb.
If an HID headlight is flickering, slow to turn on, or completely dead, the ballast is a common point of failure, along with the bulb itself. These ballasts are often sold separately from the headlight assembly, but a used assembly may include one. Always confirm if the ballast is included with a used part. Some owners report intermittent headlight operation or flickering, which can sometimes be traced to a poor connection at the bulb, a failing ballast, or a wiring issue.
Recalls and Technical Service Bulletins (TSBs)
As of early 2026, there are no specific NHTSA recalls for the headlight assemblies themselves on 2011-2013 Dodge Durango models. However, owners have reported electrical issues, such as burnt or melted connection sockets, that can affect headlight operation. Always inspect the wiring harness connector for signs of overheating or corrosion when diagnosing a headlight problem.
Symptoms of a Failing Headlight Assembly
- Dim or Yellowed Light Output: The most common symptom is reduced visibility at night due to a hazy, oxidized lens.
- Flickering or Intermittent Operation: This can be caused by a failing bulb, a loose connection, a bad ground wire, or a failing ballast in HID models.
- Moisture or Condensation Inside: If the seal on the assembly fails, water can get inside, fogging the lens and potentially shorting out bulbs and electronics.
- One Beam Not Working: If the low beam or high beam stops working, the first step is to check the bulb and the fuse. If those are good, the problem could be in the internal wiring of the assembly or the vehicle's headlight switch or relay.
- Physical Damage: Cracks in the lens or housing, and broken mounting tabs, are common results of minor collisions and require replacement of the entire assembly.
Buying a Used Headlight Assembly: What to Look For
Purchasing a used OEM headlight can be a cost-effective alternative to expensive new parts, often providing better fit and quality than cheap aftermarket options. Here’s a detailed inspection checklist:
- Verify the Generation and Type: This is the most important step. Ensure the part is from the correct year range (2007-2009 or 2011-2013). For 2011-2013, confirm if it's a Halogen or HID assembly to match your vehicle.
- Inspect the Lens Condition: Look for deep scratches, rock chips, and internal cracks. Minor external hazing or yellowing can often be polished out, but severe oxidation or internal damage cannot.
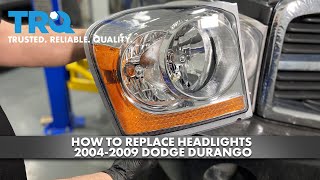
- Check All Mounting Tabs: Carefully inspect every mounting tab and bracket point on the housing. These are made of plastic and are notoriously easy to break during vehicle disassembly. A headlight with broken tabs will not sit securely, leading to vibration and improper beam alignment. 🎬 Watch: Step-by-step guide to replacing 2nd Gen headlight assemblies.
- Examine the Housing for Cracks: Check the black plastic body of the assembly for any cracks, especially around the seams where the lens is sealed to the housing. A cracked housing is a guaranteed entry point for moisture.
- Look for Signs of Moisture: Check for a 'water line' or dried mineral deposits inside the lens, which indicates it has leaked in the past and will likely leak again.
- For HID Models, Confirm Ballast Inclusion: If buying an HID assembly, ask if the ballast and bulb are included. Test them if possible, as they are expensive components to replace individually.
Replacement and Aiming
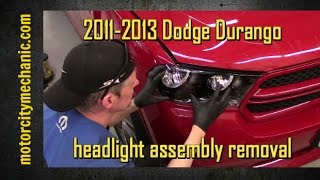
Replacing the headlight assembly on either generation Durango typically requires partial or full removal of the front bumper cover to access the mounting bolts. 🎬 See this walkthrough for removing the 3rd Gen bumper and assembly. While this is manageable for a DIY mechanic with basic tools, it can be time-consuming.
Pro Tip: After installing a replacement headlight assembly, you must have the beam pattern aimed correctly. Misaligned headlights can drastically reduce your own visibility and blind other drivers. Aiming is done by turning small adjustment screws on the back of the assembly. The general procedure involves parking the vehicle on a level surface 25 feet from a flat wall and adjusting the beam's cutoff line to a specific height.
Cost Comparison
| Part | New OEM | New Aftermarket | Used OEM |
|---|---|---|---|
| 2007-2009 Assembly | ~$350 - $450 | $150 - $250 | $75 - $150 |
| 2011-2013 Halogen Assembly | ~$220 - $325 | $140 - $270 | $50 - $125 |
| 2011-2013 HID/Xenon Assembly | ~$750 - $1000+ | N/A | $300 - $600 |
| Shop Labor (Replacement) | $150 - $250 | ||
Frequently Asked Questions
For my 2011-2013 Durango, how can I tell if I have Halogen or HID headlights?
The easiest way is to look at the headlight itself. HID headlights have a very distinct circular projector lens that looks like a small magnifying glass inside the housing. Halogen lights typically have a more open, mirrored reflector bowl behind the bulb. You can also check your vehicle's original window sticker or build sheet if available.
Can I upgrade my 2011-2013 Halogen headlights to the factory HID system?
This is not a simple plug-and-play swap. The wiring harnesses are different, and you would need to add the HID ballasts. The vehicle's body control computer may also need to be reprogrammed to recognize the HID system. It is a complex and expensive conversion.
My headlight isn't working. How do I know if it's the bulb, fuse, or the whole assembly?
Start with the simplest solutions first. 1) Check the fuse for the affected headlight in the vehicle's fuse box. 2) If the fuse is good, replace the bulb. If a new bulb doesn't work, the problem is likely more complex. 3) For HID lights, the next most likely culprit is the ballast. For any type, it could be a wiring issue or a problem within the assembly itself.
Is a little bit of condensation inside the headlight lens normal?
Minor, temporary fogging that appears in certain weather conditions and disappears quickly can be normal. However, if you see large water droplets, pooling water, or persistent condensation that doesn't go away, the assembly's seal has failed. This will lead to premature bulb failure and corrosion of the reflective surfaces.
Helpful Videos
Technical Specifications
OEM Part Numbers: 55078017AI 55078018AI 55079366AB 55079366AC 55079366AD 68084076AC 68084077AB 68084077AC
Bulb Types (2011-2013 Halogen): Low Beam H11, High Beam 9005. Bulb Type (2011-2013 HID): D1S.
We Have This Part in Stock


The information in this article is provided for general reference and educational purposes only. Vehicle specifications, procedures, and part compatibility can vary by production date, trim level, and region. Always consult your vehicle's factory service manual and verify part numbers before purchasing or performing repairs. Safety-critical components such as airbags, seat belts, and braking systems should be installed by a qualified professional.
- Dodge Durango:
- 🎬 Helpful Videos
- 🛍️ Shop This Part
- Critical Compatibility Warning: Two Different Durangos
- 2nd Generation: 2007-2009 Dodge Durango Headlight Assembly
- Overview and Design
- Known Issues and Part Numbers
- 3rd Generation: 2011-2013 Dodge Durango Headlight Assembly
- Variant Differences: Halogen vs. HID/Xenon
- Ballasts, Igniters, and Known Issues
- Recalls and Technical Service Bulletins (TSBs)
- Symptoms of a Failing Headlight Assembly
- Buying a Used Headlight Assembly: What to Look For
- Replacement and Aiming
- Cost Comparison
- Frequently Asked Questions
- 🎟️ Get 5% Off