
1992-1997 Ford Aerostar Headlight: Diagnosing Dim Lights, Hazy Lenses, and Melting Switches
A complete reference for troubleshooting, replacing, and buying a used OEM headlight assembly for the second-generation Ford Aerostar, including the common but confusing headlight switch issue.
- Before replacing headlights for electrical issues, inspect the dashboard headlight switch. It's a known failure point that melts from high current and causes flickering or dead lights.
- The plastic mounting tabs on original assemblies become very brittle with age and can easily break during removal. Inspect them carefully on used parts.
- These are composite halogen assemblies using a 9007 bulb. Modern LED or HID kits are not a direct fit and require modification.
- Always aim your headlights after replacement. This is a critical safety step that is done with a Phillips screwdriver and a wall 25 feet away.
Symptoms of a Failing Headlight Assembly
Diagnosing a headlight problem on an Aerostar can be tricky. While the assembly itself can fail, electrical issues elsewhere can present similar symptoms. Here’s what to look for:
- Dim or Yellowed Light Output: The most common issue is a hazy, yellowed, or cloudy outer lens caused by years of UV sun exposure. This significantly reduces the amount of light reaching the road, making nighttime driving less safe.
- Moisture or Condensation Inside: If you see water droplets or a foggy appearance inside the lens, the seal between the lens and the housing has failed. This moisture can cause the chrome reflector to peel or tarnish and will quickly burn out bulbs.
- Flickering or Intermittent Headlights: While this can be a bad bulb or loose connection, on the 1992-1997 Aerostar, this is a classic symptom of a failing main headlight switch on the dashboard. The switch is known to overheat and fail, cutting power to the lights.
- One Headlight is Out: This often points to a burned-out bulb or a bad wiring connection to that specific assembly. If a new bulb doesn't fix it, the problem could be the wiring connector or a ground wire issue.
- Physical Damage: Cracks in the lens or housing from impacts or debris can allow moisture to enter and will cause the vehicle to fail a safety inspection.
Warning: Before replacing a headlight assembly for an electrical issue, investigate the main headlight switch on the dashboard. Flickering lights, a burning plastic smell from the dash, or headlights that only work when you jiggle the knob are strong indicators that the switch, not the assembly, is the root cause.
Known Issues for 1992-1997 Ford Aerostar Headlights
The Melting Headlight Switch: A Common Point of Failure
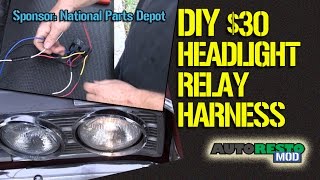
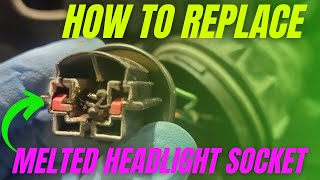
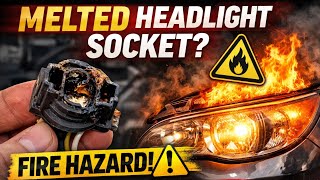
The single most important known issue related to the headlights on this generation of Aerostar is the main headlight switch. The factory design routes the full electrical current for the headlights directly through the switch without a separate relay. Over time, this high load generates significant heat, causing the switch and its electrical connector to melt, which can lead to intermittent or total headlight failure. This is a known fire hazard. Many owners install an aftermarket headlight relay harness to solve this problem permanently. This harness uses the original switch as a low-power trigger, drawing the actual headlight power directly from the battery, which takes the load off the weak dashboard switch.
🎬 Watch: How to build a DIY headlight relay harnessComposite Lens Hazing and UV Damage
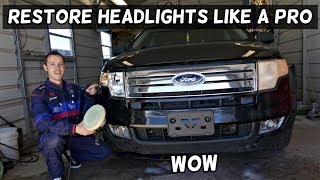
Like most vehicles from this era, the Aerostar uses composite plastic headlight lenses that are susceptible to oxidation from UV rays. This results in a yellow, hazy, or cloudy appearance that severely restricts light output. While headlight restoration kits can temporarily improve clarity, they are not a permanent solution. Once the factory UV-protective coating is gone, the hazing will return quickly. 🎬 See: How to restore cloudy Ford headlights Replacement of the assembly is the only long-term fix for severe hazing.
Brittle Mounting Tabs
After decades of heat cycles and environmental exposure, the plastic mounting tabs on the headlight assembly become extremely brittle. They can easily crack or snap during removal or installation. When inspecting a used part or removing your old one, handle it with extreme care. A broken mounting tab will prevent the headlight from being secured properly, leading to vibration and an unstable beam.
Buying a Used 1992-1997 Aerostar Headlight Assembly
Given that new OEM parts are likely discontinued, a quality used OEM assembly is often the best choice for fit and longevity compared to a cheap aftermarket part. Here is what to inspect:
- Check All Mounting Points: This is the most critical inspection point. Carefully examine every tab and mounting hole for hairline cracks or signs of a previous repair (like epoxy or glue). If a tab is broken, the headlight cannot be aimed or secured correctly.
- Lens Clarity: Look for deep pitting, internal crazing (spiderweb cracks), or severe yellowing. Minor external hazing can be polished, but a lens with deep internal damage cannot be saved.
- Reflector Condition: The internal chrome reflector should be bright and shiny. Any cloudiness, burn marks, or peeling indicates moisture damage or excessive heat, and the assembly should be rejected.
- Housing and Seal Integrity: Inspect the black plastic housing for any cracks. Check the rubber seal around the edge where the lens meets the housing to ensure it is pliable and intact, not dry-rotted or missing in sections.
- Part Number Verification: Ensure the part is for the correct side (driver or passenger) and for the 1992-1997 model years. Earlier Aerostar models used a different design.
Cost Comparison: Aerostar Headlight Assembly
| Part Type | Estimated Cost (per side) | Notes |
|---|---|---|
| New OEM | N/A | Likely discontinued and no longer available from Ford dealers. |
| New Aftermarket | $35 - $75 | Widely available from online retailers. Quality of plastic and lens coatings can vary. |
| Used OEM | $40 - $80 | Found on sites like eBay. Offers original factory fit and quality, but condition must be carefully inspected. |
Headlight Assembly Replacement & Alignment
Replacement Overview
Replacing the headlight assembly on an Aerostar is a manageable DIY job. While the process is similar to other Ford trucks of the era, access can be tight.
- Access the Assembly: You will likely need to remove the chrome trim piece that surrounds the headlight. This is typically held on by several Phillips head screws and two 11mm nuts at the bottom, which can be tricky to access.
- Remove the Assembly: The headlight assembly itself is held to a plastic support structure by three metal clips. These clips must be pried off, which can be difficult due to limited space. Some owners report that using snap-ring pliers or even drilling a small access hole can help release the clips.
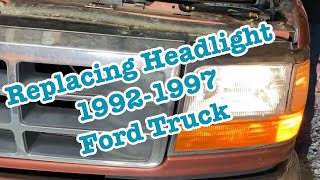
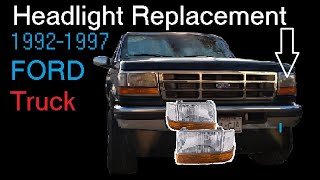
- Disconnect and Swap: Once the clips are off, pull the assembly forward and disconnect the main electrical harness from the bulb. Install the new assembly by reversing the process, ensuring the clips snap securely into place. 🎬 Watch: Step-by-step Ford headlight assembly replacement
Pro Tip: When installing a new or used headlight, it's the perfect time to install a new 9007 halogen bulb. This ensures maximum brightness and saves you from having to access the bulb again in the near future. Always handle new halogen bulbs with gloves to prevent oils from your skin causing premature failure.
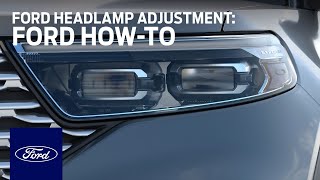
Headlight Aiming (Crucial for Safety)
Any time you replace a headlight assembly, you must aim it correctly. Misaligned headlights can blind other drivers or fail to illuminate the road properly. The process is simple:
- Park the van on a level surface, facing a flat wall or garage door from 25 feet away.
- Measure the height from the ground to the small center mark on your headlight lens. Place a horizontal strip of tape on the wall at this exact height.
- Turn on your low beams. You will see a distinct cutoff line at the top of the beam pattern.
- Locate the vertical adjustment screw on the back or top of the headlight assembly. Using a Phillips #2 screwdriver, turn the screw to move the beam's cutoff line up or down until it aligns perfectly with the tape on the wall.
Frequently Asked Questions (FAQ)
What type of headlight does the 1992-1997 Aerostar use?
It uses a composite-style assembly with a single 9007-type halogen bulb for both low and high beams. It is not an HID, Xenon, or LED headlight, and modern LED or HID conversion kits are not plug-and-play; they would require significant wiring modifications.
Will this headlight fit my 1991 or older Aerostar?
No. The 1992 model year marked a significant facelift for the Aerostar. Headlights from 1992-1997 are only interchangeable within that specific year range. Older models use a different design.
Can I just replace the cracked or hazy lens?
No, the lens and the housing are manufactured as a single, sealed unit. If the lens is cracked or severely hazed internally, the entire headlight assembly must be replaced.
Do I need to buy new bulbs with the assembly?
While some aftermarket assemblies come with bulbs, it is highly recommended to install a new pair of quality halogen bulbs (type 9007) when replacing the assemblies. This ensures you get the best possible performance and longevity. Replacing bulbs in pairs guarantees even brightness and color.
Technical Specifications and Part Numbers
| Specification | Value |
|---|---|
| Vehicle Fitment | 1992, 1993, 1994, 1995, 1996, 1997 Ford Aerostar |
| Headlight Type | Composite Halogen |
| Bulb Type | 9007 (for High and Low Beam) |
| Driver Side OEM Part # | F29Z13006AA, F29Z13008B, F69Z13008BA |
| Passenger Side OEM Part # | F29Z-13008A, F69Z13008AA |
| Driver Side Partslink # | FO2502120 |
| Passenger Side Partslink # | FO2503120, FO2503116 |
Helpful Videos


Technical Specifications
OEM Part Numbers: F29Z13006AA F29Z13008B F69Z13008BA F29Z-13008A F69Z13008AA
Fits 1992-1997 Ford Aerostar. Uses a composite lens design with a single 9007 halogen bulb for high and low beam functions.
We Have This Part in Stock


The information in this article is provided for general reference and educational purposes only. Vehicle specifications, procedures, and part compatibility can vary by production date, trim level, and region. Always consult your vehicle's factory service manual and verify part numbers before purchasing or performing repairs. Safety-critical components such as airbags, seat belts, and braking systems should be installed by a qualified professional.
- Ford Aerostar:
- 🎬 Helpful Videos
- 🛍️ Shop This Part
- Symptoms of a Failing Headlight Assembly
- Known Issues for 1992-1997 Ford Aerostar Headlights
- The Melting Headlight Switch: A Common Point of Failure
- Composite Lens Hazing and UV Damage
- Brittle Mounting Tabs
- Buying a Used 1992-1997 Aerostar Headlight Assembly
- Cost Comparison: Aerostar Headlight Assembly
- Headlight Assembly Replacement & Alignment
- Replacement Overview
- Headlight Aiming (Crucial for Safety)
- Frequently Asked Questions (FAQ)
- Technical Specifications and Part Numbers
- 🎟️ Get 5% Off