
1993-1997 Ford Ranger Headlight: Solving Haze, Moisture, and Dim Light Issues
A complete guide to diagnosing, replacing, and buying a used headlight assembly for your second-generation Ford Ranger.
- This headlight assembly fits ONLY the 1993-1997 Ford Ranger and is not interchangeable with 1998+ models.
- The most common failures are lens hazing/yellowing and moisture intrusion from failed seals.
- When buying used, prioritize clear lenses, intact mounting tabs, and a shiny internal reflector.
- Avoid putting LED or HID bulbs in the original halogen housing, as it will create a poor and unsafe beam pattern.
Anatomy of the 1993-1997 Ranger Headlight
The headlight assembly for the 1993-1997 Ford Ranger is a straightforward, non-electronic component. It's important to understand its basic characteristics, especially when considering a replacement.
- Headlight Type: These trucks use a standard halogen headlight system. They do not use HID/Xenon or LED technology from the factory. The assembly is designed specifically for the light pattern and heat produced by a halogen bulb.
- Bulb Type: The main headlight bulb for both high and low beams is a dual-filament 9007 (HB5) bulb. This single bulb handles both functions.
- Electronics: There are no ballasts, igniters, or LED driver modules required. The system is a simple 12-volt circuit running from the truck's wiring harness directly to the bulb.
- Compatibility: The headlight assemblies are the same for all trim levels and cab sizes of the Ford Ranger from 1993 to 1997. However, they are NOT interchangeable with the redesigned 1998-2000 models, which have a different shape and mounting system.
Symptoms of a Failing Headlight Assembly
While a burnt-out bulb is the most common headlight issue, the assembly itself can fail or degrade over time. The symptoms are almost always visual.
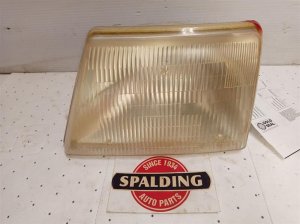
- Dim or Yellowed Light Output: The most common problem is the plastic lens becoming hazy, cloudy, or yellowed from years of exposure to UV sunlight. This significantly reduces the amount of light that can pass through, making your headlights dangerously dim.
- Moisture or Condensation Inside: If the factory seal between the lens and the housing fails, moisture can get inside. This can look like water droplets, fog, or a persistent haze on the inside of the lens. This moisture can cause the reflective chrome lining to peel and can short out bulbs.
- Poor Beam Pattern: Owners who install aftermarket LED or HID bulbs into these halogen housings often report a terrible beam pattern with dark spots and excessive glare for oncoming drivers. This is because the reflector is not designed for the way these bulbs emit light.
- Physical Damage: Cracks in the lens from road debris or minor impacts are a clear sign of failure. Broken or cracked mounting tabs are also common, which will cause the headlight to vibrate or sit loosely in the header panel.
Warning: Several recalls were issued by the NHTSA for aftermarket headlight assemblies sold for the 1993-1997 Ford Ranger. These units were missing the required amber side reflectors, reducing vehicle visibility and failing to meet Federal Motor Vehicle Safety Standards. When buying aftermarket parts, ensure they are DOT-compliant.
Buying a Used 1993-1997 Ranger Headlight Assembly
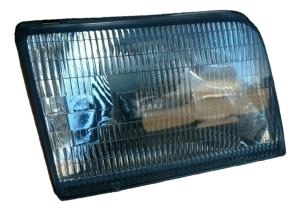
For a vehicle of this age, a quality used OEM headlight is often a better choice than a cheap, new aftermarket part. Original Ford parts typically have better optics, superior plastic quality, and a more precise fit. Here’s what to inspect:
- Check the Lens Clarity: Look for a clear, transparent lens. Avoid any assemblies that are heavily yellowed, hazy, or have a sandblasted appearance from road wear. Minor hazing can sometimes be polished out with a restoration kit, but a clear lens is always preferable.
- Inspect for Internal Moisture: Check the inside of the housing for water lines, mineral deposits, or a foggy film. These are signs the seal has failed and the unit will likely take on water again.
- Examine the Reflector: The internal chrome reflector is crucial for directing light. Ensure it is bright and shiny. Avoid any assembly where the chrome is peeling, burnt, or discolored.
- Verify All Mounting Tabs are Intact: The assembly is held in place by several mounting points and two metal retaining clips. These plastic tabs and mounting points are fragile and can break easily during removal. Carefully inspect every tab to ensure it's solid and free of cracks. A light with broken tabs will not sit securely and cannot be aimed correctly.
- Check the Bulb Retaining Ring: Make sure the plastic ring that holds the 9007 bulb in place is present and not broken. These can become brittle and crack over time.
Pro Tip: When you find a good used assembly, consider applying a UV-protectant film or ceramic coating to the lens. This will help prevent it from yellowing and keep it clear for years to come.
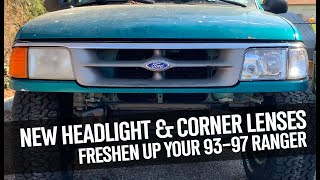
Replacement and Alignment Guide
Replacing the headlight assembly is a straightforward job that can be done with basic hand tools.
- Remove the Grille: Open the hood and remove the six to seven Phillips head screws along the top of the grille. Gently pull the grille forward to release the bottom clips.
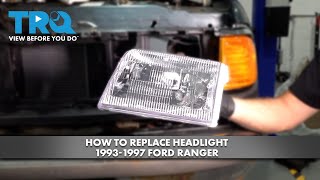
- Remove the Corner Light: To access the headlight, you must first remove the corner/parking light assembly. This is held by an 11mm (or 7/16") nut on a stud accessible from behind the header panel. 🎬 See how to remove the corner lights and main housing Once the nut is off, the corner light pulls straight out.
- Remove the Headlight: The headlight is secured by two long metal retaining clips that pull straight up. You can use pliers or a wrench to get leverage and pull them out. Once the clips are removed, the assembly can be pulled forward. 🎬 Watch: Step-by-step guide to removing the headlight assembly
- Disconnect the Bulb: Twist the large retaining ring to unlock the 9007 bulb, then unplug the electrical connector from the bulb.
- Installation & Alignment: Installation is the reverse of removal. After installing the new assembly, you MUST aim the headlights. Park the truck on level ground 25 feet from a flat wall. The center of the headlight beam should be a few inches lower than the center height of the headlight itself. The adjustment screws are on the back of the assembly; on most models, one adjusts vertical aim and the other adjusts horizontal aim.
| Part | Estimated Cost |
|---|---|
| New OEM (Ford) | $150 - $250+ (Largely discontinued) |
| New Aftermarket | $25 - $70 per side |
| Used OEM | $30 - $75 per side |
| Shop Labor to Replace (one side) | $50 - $100 |
Frequently Asked Questions
What years does this headlight fit?
This headlight assembly fits all Ford Ranger models from 1993, 1994, 1995, 1996, and 1997. It does not fit the 1998 or newer models due to a front-end redesign.
Can I just replace the hazy plastic lens?
No. The headlight is a sealed unit, and the lens is permanently bonded to the housing. To fix a hazy lens, you must either attempt a restoration using a polishing kit or replace the entire headlight assembly.
Can I upgrade to LED or HID headlights?
While you can buy LED or HID bulbs that fit the 9007 socket, it is not recommended for the original halogen housing. The reflector and lens are specifically designed for the light source of a halogen filament. Using a different type of bulb will result in a poor, scattered beam pattern that doesn't illuminate the road effectively and can blind oncoming drivers. For a proper upgrade, you would need to purchase a complete aftermarket assembly specifically designed for LED or projector-style HID use.
My new headlight doesn't seem to fit right. What's wrong?
First, double-check that you have the correct part for the 1993-1997 year range. If the fit is still off, the issue may be with the plastic adjuster studs. Some owners have found that the adjusters on aftermarket lights are poor quality and have swapped the original adjusters from their old OEM lights onto the new housing for a better fit.
Helpful Videos
Technical Specifications
OEM Part Numbers: F37Z13008A F37Z13008B
Headlight Bulb Type: 9007 / HB5 Halogen (Dual Filament)
We Have This Part in Stock

The information in this article is provided for general reference and educational purposes only. Vehicle specifications, procedures, and part compatibility can vary by production date, trim level, and region. Always consult your vehicle's factory service manual and verify part numbers before purchasing or performing repairs. Safety-critical components such as airbags, seat belts, and braking systems should be installed by a qualified professional.
- Ford Ranger: