
2005-2006 Honda CR-V Headlight Assembly: Japan vs. UK-Built Fitment Explained
Don't get stuck with the wrong part; this guide explains the critical VIN difference for your 2005-2006 CR-V headlight and covers common issues like hazing and moisture.
- The most critical factor is the vehicle's origin: check if your VIN starts with 'J' (Japan) or 'S' (UK) and order the corresponding headlight assembly.
- These vehicles use standard H1 halogen bulbs for both low and high beams; upgrading to LED/HID is complex and can result in a poor beam pattern.
- When buying a used assembly, prioritize clear lenses, intact mounting tabs, and no signs of internal moisture.
- Replacing the entire assembly requires removing the front bumper cover; aiming the headlights after installation is mandatory for safety.
The Single Most Important Check: Japan-Built vs. UK-Built
Warning: Before ordering a headlight assembly for a 2005-2006 Honda CR-V, you MUST verify where your vehicle was manufactured. There are two different versions of this part, and they are not fully interchangeable.
- Japan-Built Models: The Vehicle Identification Number (VIN) starts with the letter 'J'. These use part numbers like 33101-S9A-A11.
- UK-Built Models: The VIN starts with the letter 'S'. These use part numbers like 33101-SCA-A11.
While the assemblies may physically bolt on to either vehicle, the internal reflectors are designed for different traffic patterns. A Japan-built headlight is designed for left-hand traffic and will produce an incorrect and potentially unsafe beam pattern when used in North America (a right-hand traffic region). Always confirm your VIN before purchasing.
Headlight Technology: Simple and Reliable Halogen
All trim levels of the 2005-2006 Honda CR-V came from the factory with standard halogen headlight assemblies. This system uses a bulb with a tungsten filament, similar to a traditional incandescent light bulb. It is simple, reliable, and inexpensive to replace.
- Bulb Type: Both the low beam and high beam use an H1 type bulb. This is different from the 2002-2004 models, so be sure to purchase the correct bulb for your year.
- No Ballasts or Modules: As a halogen system, it does not require any external ballasts, igniters, or LED driver modules like HID or modern LED systems do. Power is supplied directly to the bulb via a simple wiring connector.
Symptoms of a Failing Headlight Assembly
Failure of the assembly is typically related to the housing itself, not the electrical components within, unless the wiring connector has been damaged.
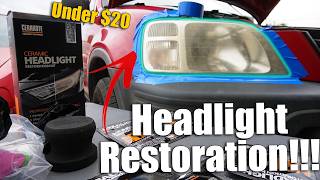
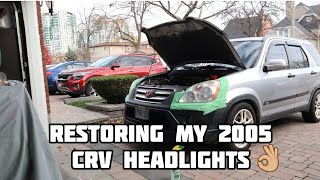
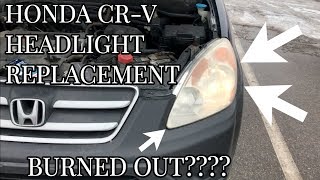
- Dim or Yellowed Light Output: The most common issue is oxidation of the polycarbonate lens. UV radiation from the sun breaks down the outer protective layer, causing the lens to become hazy, cloudy, or yellow. 🎬 Watch: How to restore clarity to your yellowed headlight lenses. This severely restricts the amount of light passing through, reducing nighttime visibility.
- Moisture or Condensation Inside: If you see water droplets, fog, or pooling water inside the lens, the factory seal between the lens and the back housing has failed. This moisture can cause corrosion on the bulb connectors and will cause bulbs to burn out prematurely. A small amount of fog that appears in certain weather and disappears quickly can be normal, but persistent moisture indicates a leak.
- Cracked Lens or Housing: Physical damage from road debris or a minor impact can crack the lens or break the rear housing, allowing water to enter and compromising the light's aim.
- Melted Wiring Connector: While often related to the wiring harness itself, a poor connection at the bulb can generate extreme heat, melting the plastic connector on the harness and sometimes damaging the input on the assembly. This can cause the headlight to work intermittently or fail completely.
Known Issues, Recalls, and Technical Service Bulletins (TSBs)
There are no active recalls or widespread TSBs from the National Highway Traffic Safety Administration (NHTSA) for the headlight assembly itself on the 2005-2006 Honda CR-V.
- Frequent Bulb Burnout: Some owners have reported a tendency for the H1 low beam bulbs to burn out frequently. While sometimes caused by touching the glass on the new bulb during installation, it can also indicate a problem with moisture in the housing or a poor electrical connection causing voltage spikes.
- Headlight Switch Recall (Older Models): An earlier recall for the headlight switch wiring affected 2002-2004 CR-V models, but did not include the 2005-2006 model years.
Buying a Used Headlight Assembly: What to Inspect
A used OEM headlight is often a better choice than a cheap aftermarket alternative due to superior materials, better beam pattern accuracy, and longer-lasting seals. Here’s what to look for:
- Confirm the VIN! This is the first and most important step. Get the VIN from the donor vehicle or a clear picture of the part number sticker to ensure it matches your Japan-built ('J') or UK-built ('S') CR-V.
- Lens Clarity: Inspect the lens for deep pitting, yellowing, or 'crazing' (a network of fine cracks). Minor surface haze can often be polished out, but internal yellowing or deep crazing is permanent.
- Mounting Tabs and Points: Carefully check that all plastic mounting tabs are intact and not cracked. These tabs are brittle and often break when an assembly is removed from a vehicle. A broken tab will cause the headlight to vibrate, fit poorly, and make proper aiming impossible.
- Seal Integrity: Look for a 'water line' or mineral deposits on the inside of the lens. This is a clear sign that the seal has failed and the assembly will leak. Reject any unit with signs of past water intrusion.
- Wiring Connector: Ensure the main electrical connector port on the back of the housing is clean, free of corrosion, and not melted or cracked.
Replacement and Installation Guide
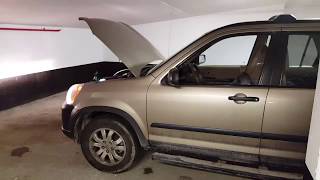
Replacing the entire headlight assembly is a more involved job than simply changing a bulb because it requires removing the front bumper cover.
Difficulty: 3/5
Estimated Time: 1.5 - 2 hours
Tools Needed: Socket set (10mm), Phillips screwdriver, flathead screwdriver, trim removal tool.
General Steps:
- Open the hood. Remove the plastic clips holding the top of the front bumper cover to the radiator support.
- Remove the screws securing the bumper cover to the fenders in each wheel well.
- Remove any clips or screws holding the bottom of the bumper cover to the splash shield.
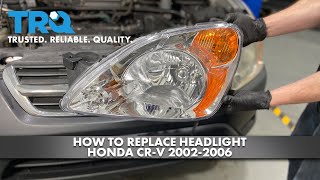
- Carefully pull the sides of the bumper cover away from the fenders to release the clips, then pull the entire cover forward and off the vehicle. 🎬 See this walkthrough for removing the bumper and headlight assembly. Disconnect fog lights if equipped.
- With the bumper removed, you will have clear access to the three 10mm bolts holding the headlight assembly in place: two on top and one on the side/bottom.
- Remove the bolts, disconnect the main electrical connector, and pull the assembly straight out.
- Installation is the reverse of removal.
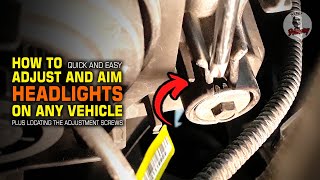
Pro Tip: After installing the new assembly, it is critical to aim your headlights. Failure to do so can result in poor visibility and blinding oncoming traffic. Park the vehicle on a level surface 25 feet from a flat wall. The top of the low beam's horizontal cutoff line should be about 2 inches below the measured center height of your headlight bulb. The adjustment screws are typically found on the back of the headlight housing.
🎬 Watch: A quick guide to properly aiming and aligning headlights.| Part Type | Estimated Price Range |
|---|---|
| New OEM (Honda) | $310 - $350 |
| New Aftermarket | $75 - $220 |
| Used OEM (Recycled) | $100 - $200 |
| Shop Labor Cost | $180 - $300 |
Frequently Asked Questions (FAQ)
Can I upgrade to LED or HID bulbs in my stock halogen housing?
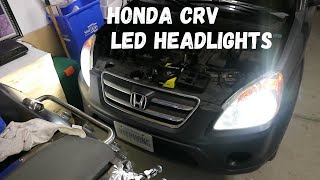
While you can physically install some aftermarket LED or HID bulbs, it is often not recommended. The halogen reflector bowl is specifically designed to focus light from an H1 halogen filament. An LED or HID light source has a different shape and size, which results in an uncontrolled, scattered beam pattern that creates excessive glare for other drivers and can actually reduce your effective down-road visibility. For 2005-2006 models, installing aftermarket H1 LED bulbs also requires a special adapter to hold the bulb in place correctly.
I installed a new headlight and now there's condensation inside. Is it defective?
Not necessarily. It's common for a brand new assembly to show a small amount of condensation after the first few temperature cycles. The housings have vents to equalize pressure, and some moisture can get in. Turn on your headlights for 20-30 minutes; the heat should evaporate this minor condensation. If it persists or if you see water pooling at the bottom, the unit may have a bad seal and should be exchanged.
Can I just replace the foggy plastic lens?
No, the headlight assembly is manufactured as a single, permanently sealed unit. The clear polycarbonate lens is bonded to the rear housing. To replace a foggy lens, you must replace the entire headlight assembly.
How do I know for sure if my CR-V is Japan- or UK-built?
Look at the VIN (Vehicle Identification Number) on the sticker inside the driver's side door jamb or on the plate at the base of the windshield on the driver's side. The very first character of the VIN tells you the country of origin. If it starts with 'J', it's Japan-built. If it starts with 'S', it's UK-built.
Helpful Videos


Technical Specifications
OEM Part Numbers: 33101-S9A-A11 33151-S9A-A11 33101-SCA-A11 33151-SCA-A11
Technology: Halogen, Low Beam Bulb: H1, High Beam Bulb: H1
We Have This Part in Stock

The information in this article is provided for general reference and educational purposes only. Vehicle specifications, procedures, and part compatibility can vary by production date, trim level, and region. Always consult your vehicle's factory service manual and verify part numbers before purchasing or performing repairs. Safety-critical components such as airbags, seat belts, and braking systems should be installed by a qualified professional.
- Honda CR-V:
- 🎬 Helpful Videos
- 🛍️ Shop This Part
- The Single Most Important Check: Japan-Built vs. UK-Built
- Headlight Technology: Simple and Reliable Halogen
- Symptoms of a Failing Headlight Assembly
- Known Issues, Recalls, and Technical Service Bulletins (TSBs)
- Buying a Used Headlight Assembly: What to Inspect
- Replacement and Installation Guide
- Frequently Asked Questions (FAQ)
- 🎟️ Get 5% Off