
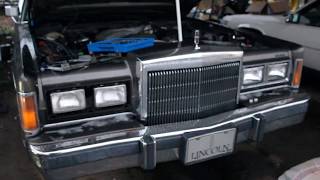
1981-1989 Lincoln Town Car Headlight: A Guide to Sealed Beams and Bezels
This guide covers the diagnosis, replacement, and unique characteristics of the sealed beam headlights and surrounding trim used on the 1981-1989 Lincoln Town Car.
- This vehicle uses H6054 sealed beam headlights, where the bulb and lens are one piece. The entire unit must be replaced when it burns out.
- The chrome bezel surrounding the light is a separate, critical part required for mounting. Inspect used bezels for intact mounting tabs.
- Intermittent headlight failure is often caused by a faulty dashboard switch or relay, not the sealed beam unit itself.
- Aiming is required after replacement and is done by turning two adjustment screws on the headlight mounting bucket.
Symptoms of a Failing Headlight
Failure in the 1981-1989 Town Car's headlight system can manifest in several ways. Because the system is simple, diagnosis is usually straightforward.
- Dim Headlights: Over many hours of use, the halogen filament in a sealed beam will degrade, causing the light output to become noticeably dimmer. If both lights appear dim, it's likely due to age.
- One Beam Out: The H6054 sealed beam contains two filaments: one for the low beam and one for the high beam. It's common for one filament to burn out while the other still works. If you've lost either your low or high beams, a new sealed beam unit is needed.
- Complete Burnout: The headlight does not illuminate at all on either high or low beam. This indicates both filaments have failed or there is an electrical issue.
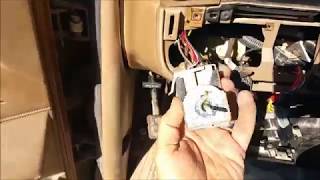
- Flickering or Intermittent Operation: If your headlights flicker or cut out intermittently, especially when switching between high and low beams, the problem may not be the sealed beam itself. This symptom often points to a failing headlight switch on the dashboard or a faulty headlight relay.
- Cracked or Damaged Glass: A rock or other road debris can easily crack the glass lens. This not only affects the beam pattern but also allows moisture to enter, which will quickly cause the reflector to corrode and the filament to fail.
Known Issues, Recalls, and TSBs
For the 1981-1989 production run, there are no major Technical Service Bulletins (TSBs) or recalls issued by the National Highway Traffic Safety Administration (NHTSA) specifically for the headlight assemblies themselves. The sealed beam technology is very mature and reliable.
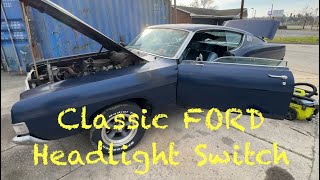
However, owners have reported electrical issues that can be mistaken for headlight failure. The most common culprit is the main headlight switch located in the dashboard, which can wear out internally and cause intermittent power loss to the headlights. If both headlights cut out at the same time, investigating the switch and its related wiring should be the first step 🎬 See how to replace a failing Ford headlight switch. before replacing the sealed beam units.
Understanding the 1981-1989 Town Car Headlight Assembly
The term "headlight assembly" for this vehicle can be confusing. It consists of two primary, separate components:
- The Sealed Beam Unit: This is the light itself. It's a standard rectangular H6054 halogen sealed beam. These units are universal for many vehicles from this era and are not specific to Lincoln. They contain both high and low beam filaments and plug directly into the vehicle's wiring harness. They do not use any external ballasts, igniters, or control modules.
- The Headlight Bezel (or Door): This is the decorative chrome trim that surrounds the sealed beam unit. It is a critical component, as it holds the sealed beam in place and mounts to the vehicle's header panel. These bezels are specific to the Town Car and are often what gets damaged in minor front-end impacts.
Pro Tip: When replacing a headlight, always replace them in pairs. Sealed beams dim over time, and replacing only one will result in uneven light output and color, which can be distracting and unsafe.
Buying a Used Headlight Assembly
When shopping for a used headlight for a 1981-1989 Town Car, you are most likely looking for the chrome bezel, not the sealed beam unit itself. New H6054 sealed beams are inexpensive and widely available, so installing a new bulb is always the best practice.
Here’s what to inspect when buying a used OEM headlight bezel:
- Chrome Condition: Check the chrome finish for deep pitting, peeling, or hazing. High-quality used bezels should have a bright, reflective finish with only minor signs of age.
- Mounting Points: Carefully inspect the back of the bezel. Look for any broken or cracked plastic mounting tabs. These are essential for securing the bezel to the car, and if they are broken, the bezel will be loose or impossible to install correctly.
- Cracks and Physical Damage: Check the entire bezel for cracks, especially around the screw holes. These plastic parts can become brittle with age and sun exposure.
- Verify the Side: Ensure you are buying the correct side (driver or passenger). While they look similar, they are not interchangeable.
Buying a used OEM bezel is often preferable to new aftermarket parts, which may have a lower quality chrome finish and fitment issues. A good-condition used OEM part will maintain the car's original look and value.
Cost Breakdown
| Part | Estimated Cost |
|---|---|
| New Aftermarket Sealed Beam (H6054) | $15 - $35 each |
| Used OEM Headlight Bezel | $40 - $80 each |
| New Aftermarket Headlight Bezel | $50 - $100 each |
| Shop Labor to Replace One Sealed Beam | $50 - $100 |
Step-by-Step Replacement & Aiming
Replacing a sealed beam on this Town Car is a simple DIY task that requires basic hand tools.
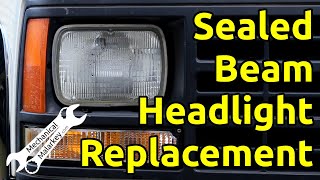
🎬 Watch this step-by-step headlight replacement on an '88 Town Car.Part 1: Replacement
- Remove the Chrome Bezel: Using a screwdriver, remove the screws holding the outer chrome headlight bezel. Set it aside carefully to avoid scratching it.
- Remove the Retaining Ring: You will now see a metal ring holding the sealed beam unit in place. Remove the screws holding this ring. Do not touch the larger adjustment screws.
- Unplug the Old Unit: The sealed beam can now be pulled forward. Unplug the electrical connector from the back.
- Install the New Unit: Plug the new H6054 sealed beam into the connector. Place it into the housing, ensuring the small guide notches on the back of the unit line up with the openings in the mounting bucket.
- Re-install Components: Secure the new sealed beam with the metal retaining ring, then re-install the outer chrome bezel.
Part 2: Aiming
Proper aiming is required after installation to ensure you can see clearly without blinding other drivers.
- Prepare the Vehicle: Park the car on a level surface, 25 feet away from a flat wall or garage door. Ensure the tires are properly inflated and the car has about a half tank of gas to simulate normal weight.
- Mark the Centerlines: Turn on the low beams. On the wall, use painter's tape to mark the vertical and horizontal centerlines of each headlight beam, creating a cross for each.
- Adjust the Beams: Locate the two adjustment screws on the headlight mounting bucket. One controls vertical (up/down) aim, and the other controls horizontal (left/right) aim.
- Turn the screws to adjust the beam. The goal is to have the most intense part of the beam fall just below and to the right of the center of the tape crosses you made on the wall.
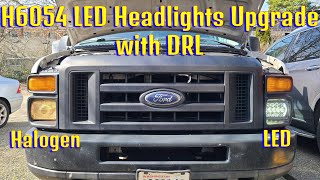
Warning: Aftermarket LED conversion sealed beams are available. While they produce a whiter, brighter light, many are not DOT-compliant and can create excessive glare for oncoming traffic, which is both dangerous and illegal.
🎬 Watch a demonstration of installing H6054 LED headlight upgrades.Frequently Asked Questions (FAQ)
Why can't I just replace the bulb inside the headlight?
The 1981-1989 Town Car uses sealed beam headlights, where the bulb, reflector, and lens are a single, integrated unit. It is not designed to be opened. When the bulb burns out, the entire sealed unit must be replaced.
Are the driver and passenger side headlights the same?
The H6054 sealed beam units themselves are identical and can be used on either side. However, the chrome headlight bezels (doors) that surround them are specific to the driver's (LH) and passenger's (RH) side and are not interchangeable.
My headlights flicker or turn off sometimes. Is it the bulb?
While possible, it's unlikely to be the sealed beam unit if the issue is intermittent. Flickering or sudden failure of both lights often points to a problem with the headlight switch in the dashboard, a relay, or a poor ground connection in the wiring harness.
What tools do I need to replace my headlight?
You will typically only need a Phillips head screwdriver to remove the bezel and retaining ring screws. No special tools are required for the replacement itself, though you may want a tape measure for the aiming procedure.
Helpful Videos
Technical Specifications
OEM Part Numbers: H6054 (Sealed Beam Unit)
Headlight Type: Rectangular Sealed Beam Technology: Halogen Functions: High and Low Beam Voltage: 12V
We Have This Part in Stock


The information in this article is provided for general reference and educational purposes only. Vehicle specifications, procedures, and part compatibility can vary by production date, trim level, and region. Always consult your vehicle's factory service manual and verify part numbers before purchasing or performing repairs. Safety-critical components such as airbags, seat belts, and braking systems should be installed by a qualified professional.
- Lincoln Town Car:
- 🎬 Helpful Videos
- 🛍️ Shop This Part
- Symptoms of a Failing Headlight
- Known Issues, Recalls, and TSBs
- Understanding the 1981-1989 Town Car Headlight Assembly
- Buying a Used Headlight Assembly
- Cost Breakdown
- Step-by-Step Replacement & Aiming
- Part 1: Replacement
- Part 2: Aiming
- Frequently Asked Questions (FAQ)
- 🎟️ Get 5% Off