
Mini Cooper & Clubman Bumper Fog Light Guide (2002-2015)
This guide covers the lower bumper-mounted fog and parking light assembly for 2002-2015 Mini Cooper and 2008-2014 Mini Cooper Clubman, clarifying common issues and critical generation-specific differences.
- This guide is for the lower bumper-mounted fog/parking light, NOT the main headlight.
- First generation (2002-2008) and second generation (2007-2015) parts are NOT interchangeable. Verify your vehicle's specific model and year.
- On second-generation models, lighting problems are frequently caused by a failed Footwell Module (FRM), not the light assembly itself.
- When buying a used assembly, prioritize units with clear, crack-free lenses and intact mounting tabs.
Part Identification: Fog Light vs. Headlight
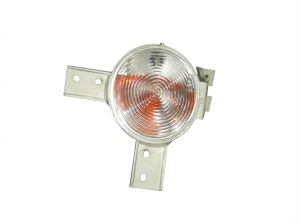
It is crucial to understand that this guide covers the lower, bumper-mounted fog and parking light assembly, not the main headlight assembly located higher up on the vehicle. Owners often confuse the two. The main headlights provide primary driving illumination (low and high beams), while these lower lamps are for supplemental visibility in conditions like fog, or for use as parking lights. The part numbers listed in this guide, such as 63172751295, refer specifically to this lower combination lamp.
Generation-Specific Differences are Critical
The 2002-2015 model years span two distinct Mini Cooper generations, and the parts are not interchangeable. It is essential to identify your vehicle's generation before purchasing a replacement.
First Generation (Gen 1): 2002-2008 Models
The first-generation design applies to the following models:
- 2002-2006 Mini Cooper & Cooper S Hardtop (R50, R53)
- 2005-2008 Mini Cooper & Cooper S Convertible (R52)
Compatibility Warning: For 2007 and 2008, this Gen 1 style lamp ONLY fits the Convertible (R52) models. It will NOT fit the redesigned 2007+ Hardtop (R56) models.
Known Issues for Gen 1
- Lens Pitting and Cracks: The glass or plastic lenses are low to the ground and frequently get damaged by rocks and road debris.
- Corrosion: The bulb sockets and connectors can corrode over time, leading to intermittent or total failure.
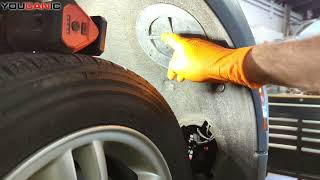
- Difficult Bulb Replacement: Changing the bulbs often requires removing the front wheel 🎬 Watch: Gen 1 lens and bulb replacement walkthrough and wheel well liner for access.
Second Generation (Gen 2): 2007-2015 Models
The second-generation design applies to these models:
- 2007-2013 Mini Cooper & Cooper S Hardtop (R56)
- 2008-2014 Mini Cooper & Cooper S Clubman (R55)
- 2009-2015 Mini Cooper & Cooper S Convertible (R57)
Known Issues for Gen 2
- Footwell Module (FRM) Failure: This is the most significant issue for Gen 2 lighting. The FRM is a computer that controls the lights, windows, and mirrors. A voltage drop (like from a weak or disconnected battery) can corrupt its software, causing bizarre lighting behavior such as lights staying on, turn signals not working, or fog lights failing to activate, even with good bulbs and assemblies. A dashboard warning like "Lighting System Failure!" is a common symptom. This often requires professional repair or replacement of the FRM module itself.
- Condensation/Moisture Intrusion: The seals on the assembly can fail over time, allowing moisture to enter the housing. This can cause the lens to fog up and will eventually lead to bulb and socket corrosion.
- Melted Sockets/Connectors: The heat from the halogen bulbs can sometimes melt the plastic bulb sockets or the wiring harness connector, causing a poor connection.
- Corroded Bulb Holders: Similar to Gen 1, the bulb holders can become corroded, making bulb replacement difficult and causing poor electrical contact.
Pro Tip: Before replacing a non-working Gen 2 fog light assembly, check for other electrical symptoms like non-functioning windows or other lights. If multiple issues are present, the Footwell Module (FRM) is the likely culprit, not the light assembly itself.
Symptoms of a Failing Fog Light Assembly
- Dim or No Light Output: The most obvious symptom is a fog light that doesn't turn on. This could be a burnt-out bulb, a corroded socket, or a wiring issue.
- Flickering Light: A flickering light often points to a loose connection at the bulb, the main connector, or a failing bulb.
- "Bulb Out" Warning on Dash: The vehicle's computer monitors the lighting circuits and will display a warning if it detects a burnt-out bulb or an open circuit.
- Visible Moisture or Condensation: Water droplets or a foggy appearance inside the lens indicates a failed seal. If left unaddressed, this will lead to electrical failure.
- Cracked or Damaged Lens: Physical damage from impacts is common and is a safety hazard that can also allow moisture to enter.
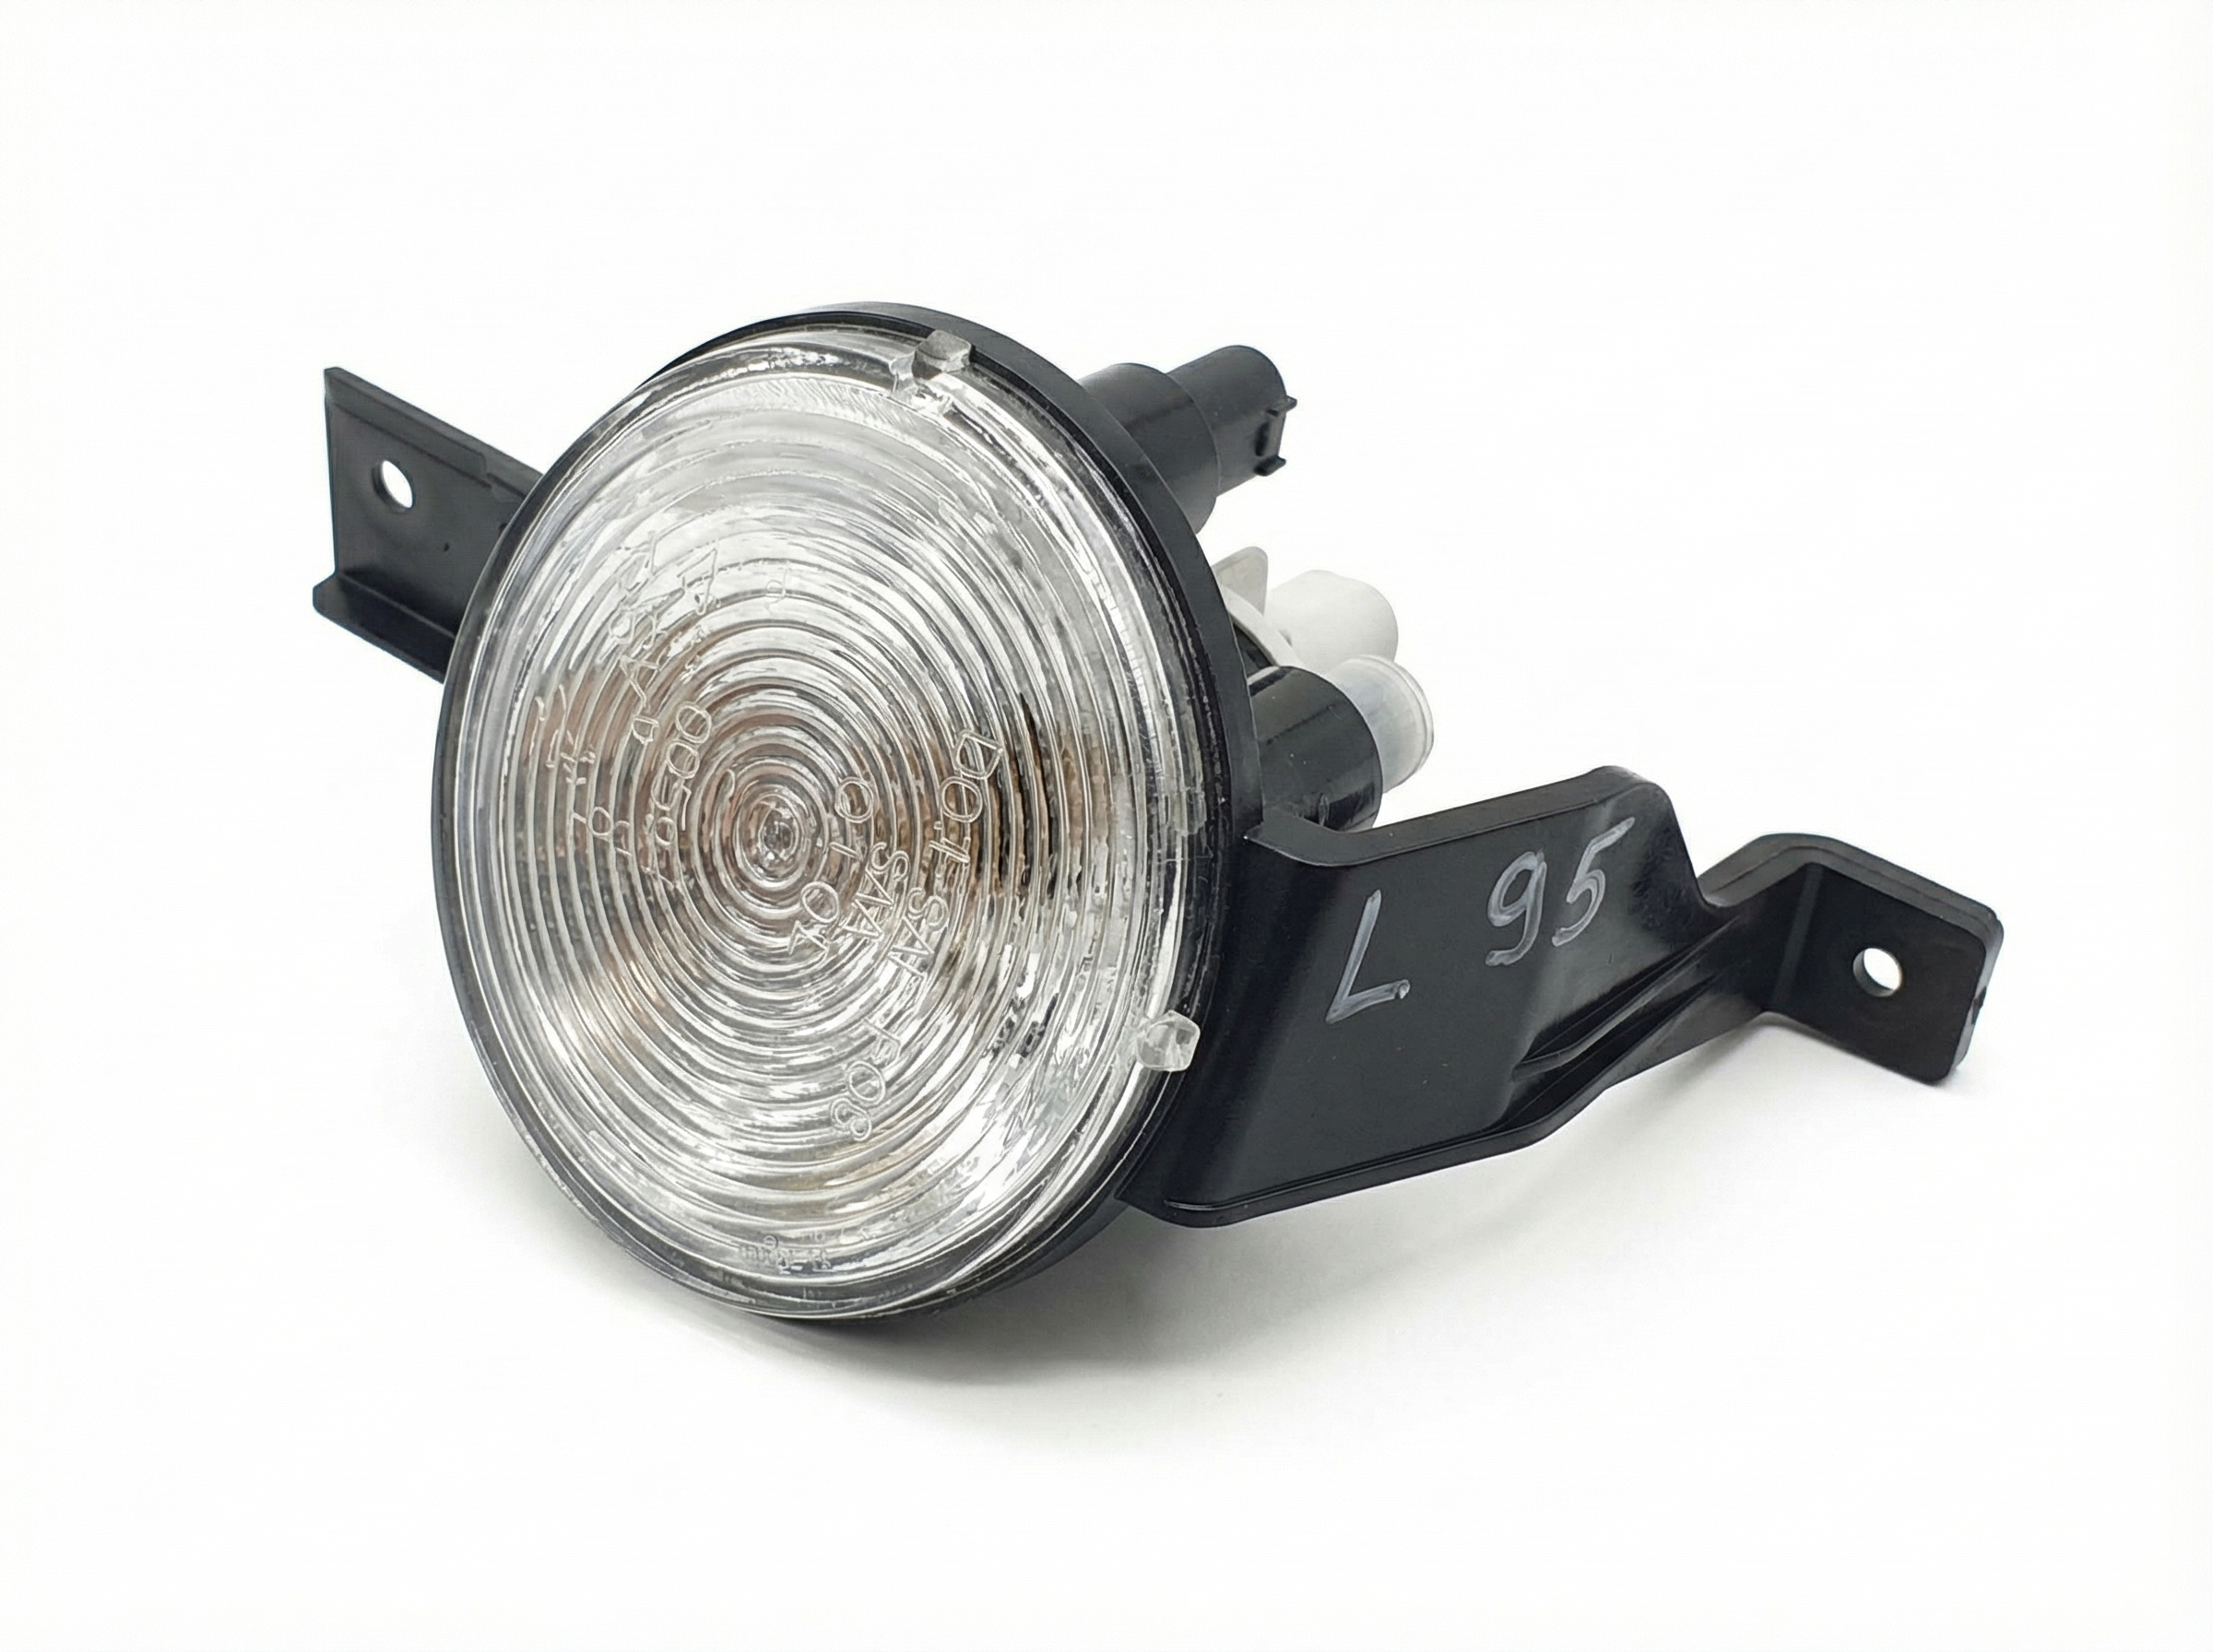
Buying a Used Fog Light Assembly: What to Inspect
A used OEM assembly is often a better choice than a cheap aftermarket part due to superior materials and fitment. However, careful inspection is key.
- Check the Lens: Look for deep scratches, rock chips (pitting), and cracks. Minor surface haze can sometimes be polished out, but any cracks mean the assembly should be rejected.
- Inspect for Moisture: Check for a "water line" or mineral deposits inside the housing. This is a clear sign of a bad seal. Do not buy an assembly that has evidence of water intrusion.
- Verify All Mounting Tabs: The plastic mounting tabs are brittle and can easily break during removal. Ensure all tabs are intact and have not been repaired with glue or epoxy, which will likely fail.
- Examine the Bulb Sockets and Connector: Look inside the bulb sockets for any green or white corrosion. Check the main electrical connector pins for corrosion or signs of melting from overheating.
- Confirm OEM Markings: Look for manufacturer markings like "Hella" or "Valeo" and a Mini/BMW logo on the housing. This helps confirm it's a genuine OEM part and not a lower-quality aftermarket unit.
Replacement Overview
Replacing the fog light assembly is a feasible DIY task for most owners.
- Access: Access is typically gained through the front of the wheel well liner. You will need to turn the steering wheel to one side, remove several plastic rivets or screws, and peel back the liner to reach the back of the assembly.
- Removal: The assembly is usually held in place by three screws. After disconnecting the electrical connector, these screws can be removed, and the unit will come out from the back of the bumper.
- Aiming: After installation, the fog lights should be aimed to ensure they illuminate the road correctly without glaring at oncoming traffic. There is typically an adjustment screw on the back of the assembly for vertical aiming. The top of the beam pattern should be aimed slightly below the horizontal centerline of the lamp when the car is 25 feet from a flat wall.
Cost Breakdown
| Part Type | Estimated Cost (Per Side) |
|---|---|
| New OEM | $120 - $180 |
| New Aftermarket | $50 - $100 |
| Used OEM | $40 - $90 |
| Shop Labor (Replacement) | $95 - $150 |
| Shop Labor (Bulb Only) | $54 - $95 |
Frequently Asked Questions
Can I upgrade my halogen fog light bulbs to LED?
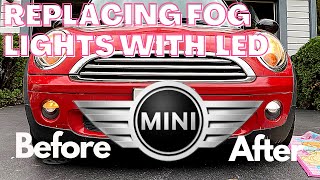
Yes, you can upgrade to LED bulbs, and many owners do for improved brightness and a more modern look. However, be aware that because LEDs draw less power, they can trigger a "bulb out" warning on the dashboard. To prevent this, you may need to install "CAN bus compatible" or "error-free" LED bulbs, which have built-in resistors, or code the vehicle's computer to recognize the LEDs.
🎬 Watch: How to upgrade your fog lights to LEDsMy fog lights don't work, but the bulbs are good. What's the problem?
On a Gen 2 Mini (2007+), the most likely cause is a failed Footwell Module (FRM). This module controls the lighting, and when it fails, it can stop sending power to the fog lights even though the switch and indicator on the dash work. Check for other electrical issues like inoperable windows or other lights not working. If multiple systems are affected, the FRM needs to be diagnosed.
Is a little bit of condensation inside the lens normal?
A small amount of light misting that appears in damp weather and disappears quickly after turning the lights on can be normal, as the housings are vented. However, if you see large water droplets or the moisture persists for a long time, it indicates a seal has failed and the assembly should be repaired or replaced to prevent electrical damage.
Do I need to replace the assembly if only the lens is cracked?
Yes. The lens is typically integrated into the housing and is not sold as a separate part. A cracked lens will allow moisture to enter, which will quickly ruin the reflector, bulb, and socket. The entire assembly must be replaced.
Helpful Videos


Technical Specifications
OEM Part Numbers: 63172751295 51112751295 63136917846 63137165861 63137165862 63171477670 63176911721 63176925049
Bulb Type (Gen 1): H11. Bulb Type (Gen 2): H8 for fog light, 2825/W5W for parking light.
We Have This Part in Stock

The information in this article is provided for general reference and educational purposes only. Vehicle specifications, procedures, and part compatibility can vary by production date, trim level, and region. Always consult your vehicle's factory service manual and verify part numbers before purchasing or performing repairs. Safety-critical components such as airbags, seat belts, and braking systems should be installed by a qualified professional.
- Mini Cooper:
- Mini Cooper Clubman:
- 🎬 Helpful Videos
- 🛍️ Shop This Part
- Part Identification: Fog Light vs. Headlight
- Generation-Specific Differences are Critical
- First Generation (Gen 1): 2002-2008 Models
- Second Generation (Gen 2): 2007-2015 Models
- Symptoms of a Failing Fog Light Assembly
- Buying a Used Fog Light Assembly: What to Inspect
- Replacement Overview
- Cost Breakdown
- Frequently Asked Questions
- 🎟️ Get 5% Off