
2015-2023 Dodge Challenger HVAC Control: Button Layouts and Failure Diagnosis
This guide explains common failures of the Challenger's climate control panel, how to diagnose related issues, and why matching the exact button layout is critical when buying a replacement.
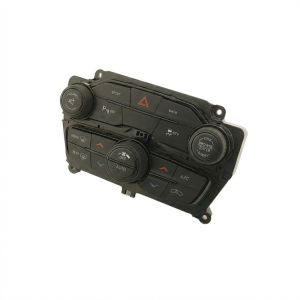
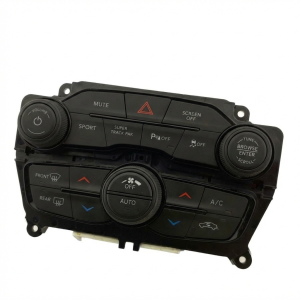
- The button layout on a replacement HVAC control MUST be an exact visual match to the original part, as they are programmed for specific vehicle options.
- Many common issues, like one side blowing hot and the other cold, are caused by inexpensive blend door actuators under the dash, not the control panel itself.
- Replacement of the control panel is a simple DIY task, but a system calibration with a scan tool may be required for full functionality.
- A Technical Service Bulletin (TSB #24-008-14) exists for 2015 models where the blower cuts out on high, requiring a software update.
Symptoms of a Failing HVAC Control System

Problems with the climate system in a 2015-2023 Dodge Challenger can stem from the main control panel itself or from related components like blend door actuators. Understanding the specific symptoms can help you pinpoint the source of the issue.
Control Panel Failure Symptoms:
- Unresponsive or Intermittent Buttons: Buttons for fan speed, temperature, or specific features like heated seats may not respond when pressed, or may only work sporadically.
- Flickering Backlights: The backlighting for the buttons and knobs may flicker, dim, or go out completely, indicating an internal electronic fault in the panel.
- System Inoperative After Battery Disconnect: In some cases, the control panel may fail to power on or function correctly after the vehicle's battery has been disconnected or replaced. A system reset may be required.
- Blower Motor Cuts Out on High: A known issue, documented in a Technical Service Bulletin (TSB #24-008-14), involves the blower fan cutting out intermittently when set to its highest speed. The fix often requires a software update to the HVAC control module.
Related Component Failure Symptoms (Blend Door Actuators):
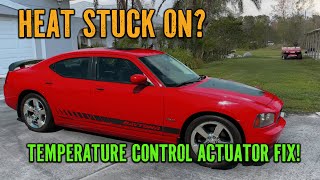
- Temperature Difference Side-to-Side: The most common symptom is one side of the cabin blowing hot air while the other blows cold, regardless of the temperature settings. 🎬 Watch: Troubleshooting the common heat stuck on problem. This points to a failed or stuck blend door actuator for one of the zones.
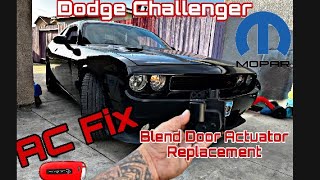
- Clicking or Ticking Noises from the Dash: A repetitive clicking sound from behind the dashboard when changing temperature settings is a classic sign of a blend door actuator 🎬 See this walkthrough on fixing a broken blend door actuator. with a broken internal gear.
- Airflow Stuck on One Vent Setting: If the system is unable to switch between defrost, dash vents, and floor vents, it's likely a failed mode door actuator.
Known Issues, TSBs, and Recalls

While there are no major recalls specifically for the HVAC control panel on these Challengers, there are a few related service items to be aware of:
- TSB #24-008-14: Released for 2015 models, this bulletin addresses an issue where the HVAC blower motor intermittently cuts out when on the high setting. The solution involves reprogramming the HVAC Control Module with updated software or, in some cases, replacing the module.
- NHTSA Recall 15V-461: This 2015 safety recall addressed a software security vulnerability in the Uconnect radio system, which is integrated with the climate controls. An exploit could potentially allow unauthorized remote access to vehicle control systems. Dealers performed a software update to fix this.
- Actuator Failures: While not a recall, the failure of blend door and mode door actuators is a widely reported issue on forums and among mechanics. These small electric motors contain plastic gears that can strip or break over time.
Warning: Many symptoms, like incorrect temperature blending, are caused by faulty blend door actuators, not the control panel itself. A clicking noise from the dash is a strong indicator of a bad actuator.
Buying a Used 2015-2023 Challenger HVAC Control


Buying a used OEM control panel is a great way to save money, as these units are generally reliable. However, due to the high number of variations, careful selection is crucial.
The Golden Rule: Match the Buttons Exactly
The single most important factor is that the button layout on the replacement unit must be an exact visual match to your original panel. These panels are designed for specific vehicle option packages. If your car has heated and ventilated seats, a Sport mode, and Park Assist, your replacement unit must have those exact same buttons. A panel from a car without those options will not work correctly, even if it looks similar. The internal software is different and it will not be able to control features it wasn't designed for.
What to Inspect
- Button Graphics: Check for excessive wear on the button icons, which can indicate high usage.
- Connectors: Inspect the electrical connector ports on the back for any bent, corroded, or broken pins.
- Part Number: The OEM part number is usually on a sticker on the back or side of the unit. While a visual match of the buttons is more important, verifying the part number adds another layer of confirmation.
- Why Used OEM is a Good Choice: The HVAC control panel is not a high-wear mechanical part. A used OEM unit from a reputable supplier is often a better choice than a cheap new aftermarket part, which may have issues with button feel, backlight quality, or software compatibility.
Replacement and Programming
Control Panel Replacement
Replacing the main HVAC control panel is a relatively simple job suitable for most DIY mechanics.
- Difficulty: 2 out of 5
- Estimated Time: Less than 1 hour
- Tools Needed: Plastic trim removal tools, Phillips screwdriver or 7mm socket.
Basic Steps:
- Disconnect the negative terminal of the car battery to prevent electrical issues.
- Carefully pry off the large dash bezel that surrounds the infotainment screen and HVAC controls. It is held in by clips.
- Remove the screws securing the HVAC control unit to the dash.
- Pull the unit out, disconnect the electrical connectors from the back, and remove it.
- Installation is the reverse of removal.
Programming and Calibration
While many aftermarket units are advertised as "plug-and-play," a calibration may be necessary for full functionality, especially when using an OEM replacement. After installation, some owners report that a simple battery disconnect for 30 minutes can help the system reset. However, the official procedure often involves using a dealership-level scan tool (like wiTECH) to run an "Actuator Calibration" or to reprogram the module, which ensures all the blend and mode doors learn their correct positions.
Pro Tip: If your climate control is acting strange after a dead battery, try a system reset. Disconnecting the negative battery cable for at least 30 minutes can sometimes resolve software glitches and force the module to recalibrate on the next startup.
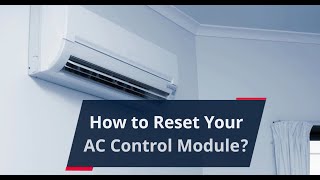
🎬 Watch: How to reset your AC control module.Cost Comparison
Prices can vary based on the specific part number and features. The costs below are estimates for common configurations.
| Part Type | Estimated Cost |
|---|---|
| New OEM | $550 - $920 |
| New Aftermarket (Remanufactured) | $150 - $450 (often includes a core charge) |
| Used OEM | $75 - $250 |
| Shop Labor (Control Panel) | $120 - $160 |
Frequently Asked Questions (FAQ)
Can I upgrade to a control panel with more features, like heated seats?
This is not a simple plug-and-play swap. You would need to install the features themselves (e.g., the seat heating elements, wiring, and any required modules) and then have the vehicle's Body Control Module (BCM) programmed by a dealer to recognize the new hardware. Simply swapping the control panel will not work.
Why are my control panel lights flashing?
Flashing lights on a Mopar climate control unit often indicate that the system is running a self-diagnostic or calibration test, or that it has detected a fault. This can happen after a battery replacement. If the flashing persists, it usually points to a failed component, most commonly a blend door actuator.
Does a replacement HVAC control module need to be programmed?
It depends. Sometimes a direct-match replacement will work immediately or after a battery reset. However, to ensure all actuators are properly calibrated and to prevent future issues, it is highly recommended to perform an HVAC actuator calibration procedure with a compatible diagnostic scan tool.
My A/C blows cold on the passenger side but hot on the driver's side. Is the control panel bad?
This is almost always caused by a failed blend door actuator for the driver's side, not the control panel itself. The actuator is a small motor under the dash that controls the flap blending hot and cold air. When it fails, it gets stuck in one position.
Helpful Videos
Technical Specifications
OEM Part Numbers: 68188878AA 68188878AB 68188879AA 68188879AB 68293606AB 68293606AC 68293606AD 68293606AE 68415454AB
Varies by part number. Integrated module communicating over CAN bus network. Controls dual-zone climate, heated/ventilated seats, and various performance/driver-aid functions depending on vehicle configuration.
We Have This Part in Stock


The information in this article is provided for general reference and educational purposes only. Vehicle specifications, procedures, and part compatibility can vary by production date, trim level, and region. Always consult your vehicle's factory service manual and verify part numbers before purchasing or performing repairs. Safety-critical components such as airbags, seat belts, and braking systems should be installed by a qualified professional.
- Dodge Challenger:
- 🎬 Helpful Videos
- 🛍️ Shop This Part
- Symptoms of a Failing HVAC Control System
- Control Panel Failure Symptoms:
- Related Component Failure Symptoms (Blend Door Actuators):
- Known Issues, TSBs, and Recalls
- Buying a Used 2015-2023 Challenger HVAC Control
- The Golden Rule: Match the Buttons Exactly
- What to Inspect
- Replacement and Programming
- Control Panel Replacement
- Programming and Calibration
- Cost Comparison
- Frequently Asked Questions (FAQ)
- 🎟️ Get 5% Off