
2008-2009 Ford Taurus, Sable & Taurus X HVAC Control: Solving Blank Screens & Fan Issues
This guide covers the critical differences between manual and automatic (EATC) climate controls to help you diagnose failures and buy the correct used replacement part.
- The biggest compatibility trap is Manual vs. Automatic (EATC) controls; they are not interchangeable. You must buy the correct type for your vehicle.
- For Automatic (EATC) units, a blank screen with the fan stuck on high is the classic sign of a failed control module.
- For Manual (3-knob) units, if the fan only works on high, the problem is the blower motor resistor, NOT the control head.
- A clicking noise from the dash is a failed blend door actuator, a separate part from the control module.
Is Your HVAC Control Manual or Automatic? The Critical First Step
Before diagnosing any issue or buying a part for your 2008-2009 Ford Taurus, Mercury Sable, or Ford Taurus X, you must identify which type of climate control system you have. The two versions are NOT interchangeable, and installing the wrong one will not work. This is the most common mistake buyers make.
Manual Climate Control
- Appearance: Features three large, simple rotary dials for fan speed, temperature, and airflow direction (e.g., defrost, vents, floor).
- Part Numbers: The base part number is typically 19980 (e.g., 8G13-19980-AB, 8G13-19980-BA).
- Common Issues: Problems with these systems are RARELY the control head itself. If the fan only works on high, the issue is almost always the blower motor resistor. If air is coming from the wrong vents, it's likely a failed mode door actuator.
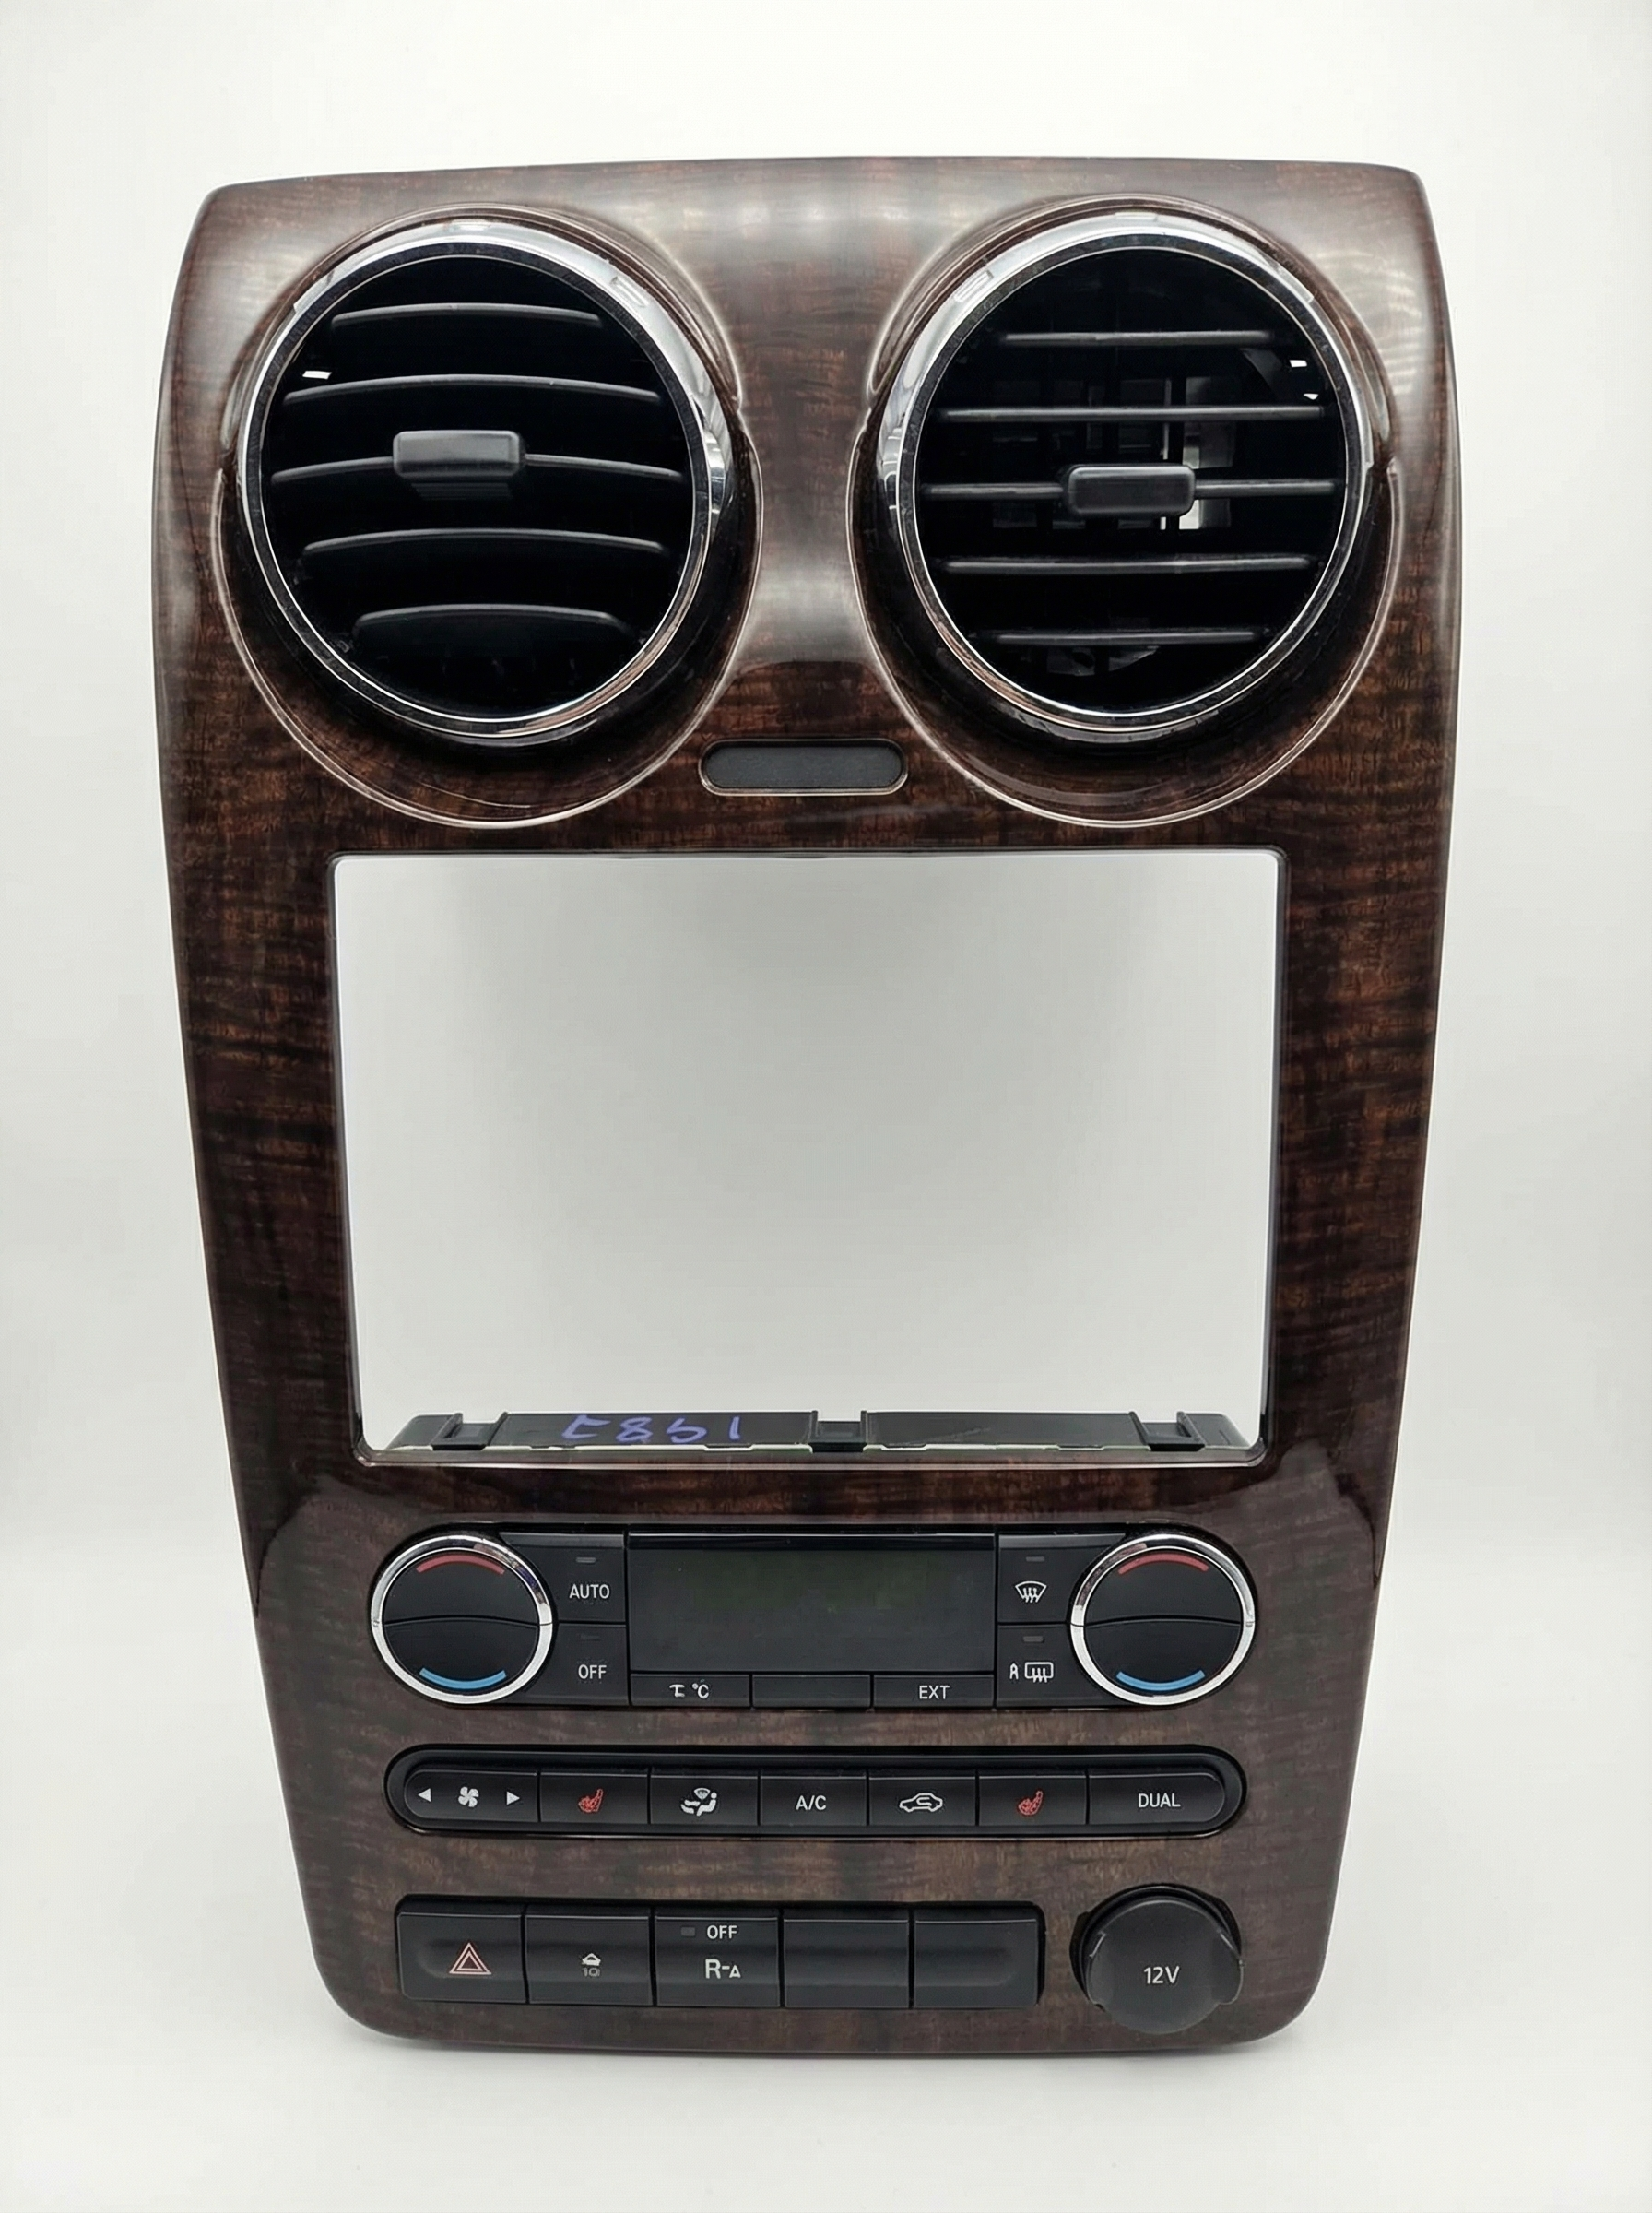
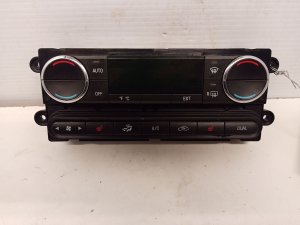
Electronic Automatic Temperature Control (EATC)
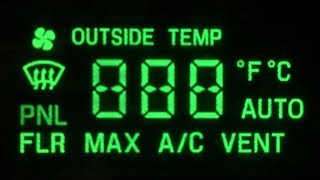
- Appearance: Features a digital display that shows the temperature. It has an "AUTO" button and smaller push buttons for temperature and fan speed.
- Variants: These units come in two main styles: one for models WITH heated seats and one for models WITHOUT. You must match this to your vehicle's options.
- Part Numbers: The base part number is typically 18C612 (e.g., 8G13-18C612-EC, 8G13-18C612-DD).
- Common Issues: These electronic units are known to fail. The most common symptom is the digital display going blank or flickering, often while the blower fan gets stuck running on high speed.
Warning: Physically inspect your vehicle's control unit before ordering a replacement. Do not rely on a vehicle description alone. The Manual and Automatic (EATC) units are not compatible with each other.
Symptoms of a Failing HVAC Control Module
Symptoms differ significantly depending on which control unit your vehicle has.
For Automatic (EATC) Systems:
- Blank or Flickering Display: This is the most common sign of internal failure in the EATC module. The screen may go completely dark or flash intermittently, making it impossible to see your settings.
- Blower Fan Stuck on High: Often occurring with a blank screen, the system defaults the blower motor to its highest setting as a fail-safe. You won't be able to adjust the fan speed.
- Unresponsive Buttons: The buttons for temperature, fan speed, mode, or heated seats may stop responding entirely or only work sporadically.
- Incorrect Temperature Output: The system may blow only hot air when you want cold, or vice-versa, because the module is not sending the correct signal to the temperature blend door actuator.
For Manual Systems:
If you have a manual system with three knobs, the control unit itself is very simple and rarely fails. The symptoms you are experiencing are likely caused by a different part in the HVAC system:
- If Fan Only Works on High Speed: This is the classic symptom of a failed blower motor resistor. The highest fan setting bypasses the resistor, which is why it's the only one that works.
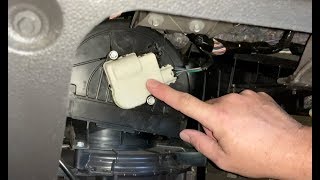
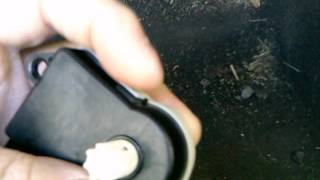
- If You Hear a Clicking/Tapping Noise From the Dash: This is caused by a failed blend door actuator or mode door actuator. These small electric motors control temperature and airflow direction, and the plastic gears inside can strip and break, causing a clicking sound as they try to move. 🎬 See how to diagnose and fix a clicking air door actuator
- If Air is Stuck Coming From One Vent (e.g., Defrost Only): This is typically a failed mode door actuator, not the control knob itself.
Known Issues, TSBs, and Recalls
As of mid-2024, there are no specific recalls or widespread Technical Service Bulletins (TSBs) from Ford or the NHTSA related to the HVAC control modules for the 2008-2009 Ford Taurus, Mercury Sable, or Ford Taurus X. While the failure of the EATC unit is a well-documented issue among owners in online forums, it has not prompted a formal recall.
Recalls issued for these vehicles primarily concern the driver's side frontal airbag.
Buying a Used HVAC Control: What to Look For
A used OEM control module is often a reliable and cost-effective solution, especially since new OEM units can be expensive and aftermarket quality can be inconsistent. Here’s what to check before you buy.
Pro Tip: All three vehicles—the 2008-2009 Taurus, Sable, and Taurus X—are built on the same platform and share the same HVAC control modules. A part from a Sable will fit a Taurus and vice-versa, as long as you match the control type (Manual vs. EATC) and options (Heated Seats).
- Confirm Your Control Type: This is the most important step. Does your vehicle have the three-knob manual unit or the digital EATC unit? Buy the one that matches.
- Check for Heated Seats (EATC Only): If you have the automatic EATC unit, verify if your car has heated front seats. The control panels are different. The heated seat version has two extra buttons with a seat icon. You must match this feature.
- Inspect the Part Number: The best practice is to remove your original unit and match the part number. The number is printed on a sticker on the unit's housing. Look for the base number (e.g., 8G13-18C612-xx for EATC or 8G13-19980-xx for manual) to ensure you have the right family of parts. The last two letters are revision codes; they are often interchangeable, but matching the full number is safest.
- Physical Inspection: When inspecting a used unit, look for:
- Button/Knob Condition: Check for excessive wear on the buttons that might indicate very high mileage or abuse. Ensure knobs turn smoothly.
- Screen Condition (EATC): Look for any signs of delamination, deep scratches, or cracks on the digital display.
- Connectors: Check that the electrical connector ports on the back are clean and free of corrosion or bent pins.
- No Signs of Liquid Damage: Look for any staining or sticky residue that might suggest a spilled drink caused a short circuit.
Cost Comparison
Prices can vary, but here is a general breakdown of what to expect when replacing your HVAC control module.
| Part Type | Estimated Cost | Notes |
|---|---|---|
| New OEM | $250 - $400+ | Purchased from a dealership. Highest cost but comes with a factory warranty. |
| New Aftermarket | $150 - $250 | Available from brands like Dorman. Quality can be variable. |
| Used OEM | $50 - $150 | A cost-effective option. Look for sellers with good ratings and a return policy. |
| Remanufactured | $100 - $200 | Your original unit is rebuilt, or you buy a pre-rebuilt one. Often includes a core charge. |
| Shop Labor | $60 - $130 | Typically less than one hour of labor for a professional to install. |
Replacement Guide (DIY Difficulty: 1/5)
Replacing the HVAC control module is a straightforward job that most DIYers can complete in under 30 minutes with basic tools.
- Disconnect the Battery: As a safety precaution, disconnect the negative terminal of your car battery.
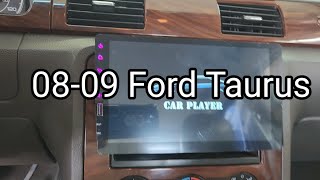
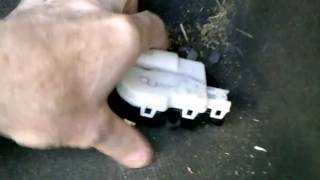
- Remove the Center Trim Bezel: The large plastic trim piece surrounding the radio and HVAC controls is held in by clips. Use a plastic trim removal tool to gently pry around the edges of the bezel until it pops loose. 🎬 Watch this video to see how to remove the center trim bezel Start from the bottom and work your way up.
- Unplug Connectors: You may need to unplug the connectors for the passenger airbag light or other switches at the top of the bezel before you can fully remove it.
- Unscrew the HVAC Module: The control module is held in place by four 7mm screws. Remove these screws.
- Disconnect the Module: Pull the module forward and unplug the two large electrical connectors from the back.
- Installation: Installation is the reverse of removal. Plug in the new unit, screw it into place, reconnect the trim bezel connectors, snap the bezel back on, and finally, reconnect the battery.
Pro Tip: HVAC System Calibration: After replacing the module or disconnecting the battery, it's a good idea to let the system recalibrate. After reconnecting the battery, turn the ignition key to the 'ON' position (without starting the engine) and leave it for 1-2 minutes. You may hear faint whirring or clicking from the dash as the blend door actuators cycle through their positions to re-learn their limits.
Frequently Asked Questions (FAQ)
Do I need to program a replacement HVAC control module?
No. For the 2008-2009 Taurus, Sable, and Taurus X, the HVAC control module is a plug-and-play part. It does not require any special programming or a trip to the dealer.
My fan only works on the highest speed. Is the control module bad?
It depends. If you have the manual three-knob system, the problem is almost certainly a bad blower motor resistor, which is a separate, inexpensive part located behind the glove box. If you have the automatic (EATC) system with a digital display, then yes, a fan stuck on high is a primary symptom of a failed control module itself.
What is the clicking noise coming from my dashboard?
A repetitive clicking or tapping noise from behind the dash, especially when you start the car or change temperature settings, is the sound of a broken blend door actuator. These actuators control airflow, and when their internal gears fail, they make this noise. This is not a failure of the main control unit, but a failure of a motor that the unit controls.
Will a control unit from a Ford Taurus fit my Mercury Sable?
Yes. As long as the model years are 2008-2009, the parts are interchangeable between the Ford Taurus, Mercury Sable, and Ford Taurus X. The most important factor is matching the type of control (Manual vs. Automatic) and, for automatic units, the heated seats option.
Helpful Videos

Technical Specifications
OEM Part Numbers: 8G13-18C612-EC 8G13-18C612-DA 8G13-18C612-DB 8G13-18C612-DC 8G13-18C612-DD 8G13-18C612-FA 8G13-18C612-FB 8G13-18C612-FC 8G13-19980-AB 8G13-19980-AC 8G13-19980-AD 8G13-19980-BA 8G13-19980-DA
Two main variants exist: Manual Control (three large knobs, base P/N 19980) and Electronic Automatic Temperature Control (EATC) with a digital display (base P/N 18C612). EATC units also vary based on the presence of heated seats.
We Have This Part in Stock

The information in this article is provided for general reference and educational purposes only. Vehicle specifications, procedures, and part compatibility can vary by production date, trim level, and region. Always consult your vehicle's factory service manual and verify part numbers before purchasing or performing repairs. Safety-critical components such as airbags, seat belts, and braking systems should be installed by a qualified professional.
- Ford Taurus:
- Mercury Sable:
- Ford Taurus X:
- 🎬 Helpful Videos
- 🛍️ Shop This Part
- Is Your HVAC Control Manual or Automatic? The Critical First Step
- Manual Climate Control
- Electronic Automatic Temperature Control (EATC)
- Symptoms of a Failing HVAC Control Module
- For Automatic (EATC) Systems:
- For Manual Systems:
- Known Issues, TSBs, and Recalls
- Buying a Used HVAC Control: What to Look For
- Cost Comparison
- Replacement Guide (DIY Difficulty: 1/5)
- Frequently Asked Questions (FAQ)
- 🎟️ Get 5% Off