
2011-2023 Dodge Charger Instrument Panel Bezel: A Guide to Screen Size & Fitment
This guide covers the common failures, replacement costs, and critical compatibility checks for the Dodge Charger's main radio and instrument panel trim bezel.
- Fitment is NOT universal. You must match BOTH the year range (2011-2014 vs. 2015-2023) and the infotainment screen size (e.g., 4.3" vs. 8.4").
- When buying a used bezel, the most important inspection is for broken mounting tabs on the back; broken tabs will cause rattles.
- Common failures are cosmetic (peeling finish) or structural (broken clips causing rattles). The part itself is not essential for driving.
- Replacement is a simple DIY job for most owners, requiring only basic plastic trim tools and a screwdriver.
Generational Differences: 2011-2014 vs. 2015-2023
Before diagnosing issues or buying a replacement, it's crucial to understand that the Dodge Charger had a major interior redesign for the 2015 model year. This means the dashboard and its components are not the same across the entire 2011-2023 range.
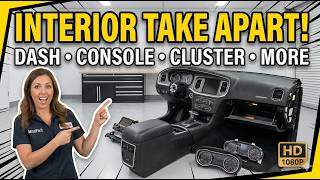
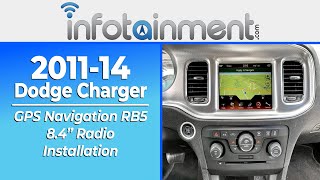
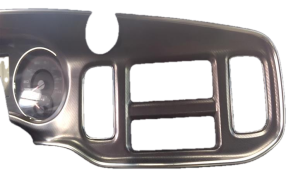
- 2011-2014 (LD Platform): These models have a distinct dash layout. The instrument panel bezel is a separate piece from the trim 🎬 Watch: 2011-2014 Dodge Charger interior and dash disassembly guide around the instrument cluster itself.
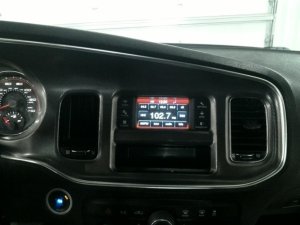
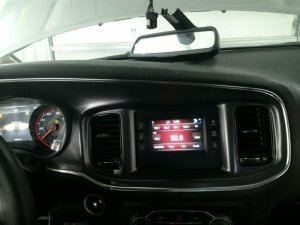
- 2015-2023 (LD Platform Facelift): The dashboard was completely restyled. The instrument panel bezel is a larger, more integrated piece that often includes the trim around the instrument cluster.
Warning: Bezels from a 2011-2014 Charger will NOT fit a 2015-2023 Charger, and vice versa, without significant modification. Always ensure you are buying a part from the correct year range for your vehicle.
Symptoms of a Failing Instrument Panel Bezel
Failure of the instrument panel bezel is typically cosmetic or structural, and will not prevent the vehicle from being driven. However, the symptoms can be annoying and detract from the interior's appearance.
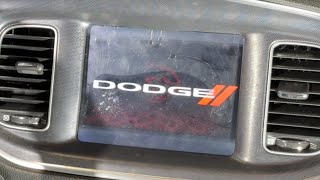
1. Cosmetic Damage: Peeling, Scratches, and Fading
The most common issues are purely visual. Over time, exposure to sunlight and cleaning products can cause the finish to fail. You may notice the soft-touch coating becoming sticky or peeling, the chrome trim delaminating, or the plastic itself fading or becoming brittle. Deep scratches from normal use or previous repair attempts are also common.
2. Rattles and Squeaks
A rattling sound coming from the center of your dashboard is a strong indicator that the bezel's mounting tabs are broken. These plastic clips are fragile and often break when the bezel is removed without proper tools. Once broken, the bezel can no longer sit tightly against the dashboard, causing it to vibrate and rattle, especially when driving over rough roads.
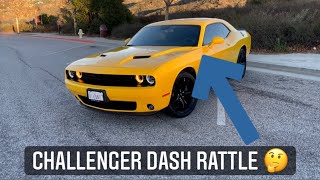
🎬 See how to identify and solve common dashboard rattles3. Poor Fitment or Gaps
If a previous owner installed an aftermarket radio or attempted a repair, they may have broken or incorrectly re-installed the bezel. This can result in visible gaps between the bezel and the dashboard, or one side sticking out further than the other. This is often a sign of broken clips or an incorrectly sized part.
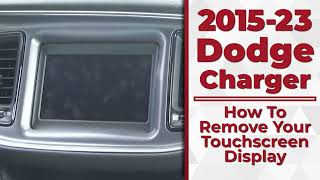
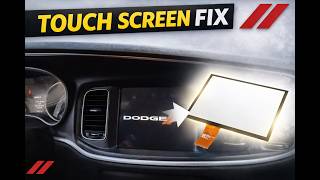
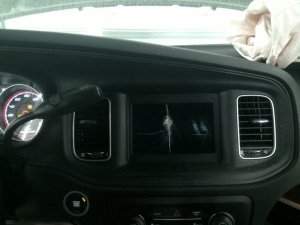
Pro Tip: A common issue on Chargers with the 8.4-inch Uconnect screen is delamination, where the screen's top layer bubbles and separates. This looks like a bubble under a screen protector. This is a failure of the screen assembly itself, not the plastic bezel around it. 🎬 Watch: How to replace a delaminating Uconnect touchscreen Replacing the bezel will not fix a delaminating screen.
Buying a Used Instrument Panel Bezel: What to Check
Due to the high cost of new OEM bezels, a used part is an excellent value. However, careful inspection is required to ensure you get a good part that fits correctly.
THE CRITICAL CHECKS: Screen Size and Year Range
This is the most important step. Failure to verify these two things will result in a part that does not fit.
- Verify Your Year Range: Is your Charger a 2011-2014 or a 2015-2023 model? Buy a bezel from the same range.
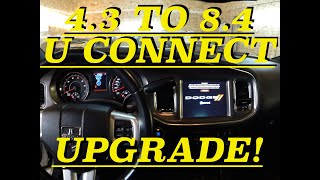
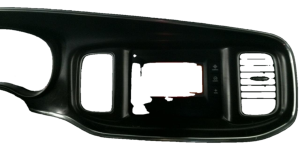
- Verify Your Screen Size: Dodge offered multiple screen sizes, primarily the 4.3-inch (RA2) and the 8.4-inch (RA3/RA4) Uconnect systems. The openings in the bezels are different and are not interchangeable. Before ordering, confirm which screen your vehicle has. You cannot upgrade from a 4.3-inch to an 8.4-inch screen by only changing the bezel; it requires additional hardware and programming.
Physical Inspection Points
- Check All Mounting Tabs: This is the most critical inspection point after confirming fitment. Turn the bezel over and inspect every single plastic tab and clip location. They should all be present and free of stress marks or cracks. A bezel with even one or two broken main clips will likely rattle once installed.
- Inspect the Finish: Look for deep scratches, peeling clear coat, or sticky soft-touch material. Hold the part under a light and view it from different angles to spot imperfections.
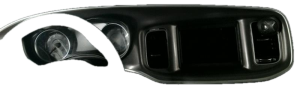
- Check Vent and Switch Integrity: The bezel often includes the center HVAC vents. Make sure the vent louvers move freely and aren't broken. If any switches (like the hazard light button) are included, ensure they are not damaged.
- Match Your Trim Color/Style: Chargers were available with several interior trim finishes (e.g., matte black, gloss black, silver, carbon fiber pattern). Ensure the bezel you are buying matches your vehicle's existing trim for a consistent look.
Cost of Dodge Charger Instrument Panel Bezels (2011-2023)
Prices for this part vary dramatically based on condition and source.
| Part Source | Estimated Cost | Notes |
|---|---|---|
| New OEM | $225 - $1,500+ | Prices from Mopar dealers are extremely high, varying wildly by part number and trim level. |
| Used OEM | $75 - $350 | The best value. Prices on sites like eBay depend on condition, year, and screen size configuration. |
| New Aftermarket | $100 - $400+ | These are typically stick-on overlay kits (dash kits) or carbon fiber replacements, not direct OEM-style replacements. Quality and fit can be inconsistent. |
| Shop Labor | $75 - $150 | Most independent shops can perform the replacement in under an hour. |
Replacement Information
Replacing the instrument panel bezel is a relatively simple DIY task that can be completed with basic tools.
- Difficulty: 2/5
- Estimated Time: 0.5 - 1 hour
- Tools Required: Plastic trim removal tools, Phillips head screwdriver.
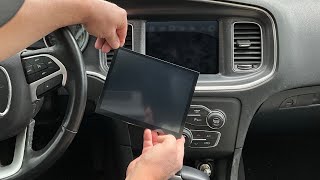
The general process involves using plastic pry tools to carefully release the clips holding the bezel to the dash. On some models, there may be screws behind the HVAC control panel or around the radio that need to be removed first. Once the clips are loose, you will need to disconnect the electrical connectors for the hazard switch and any other integrated controls before fully removing the bezel. Installation is the reverse of removal, being careful to align all clips before pressing the panel firmly into place.
Warning: The plastic clips are brittle. Use steady pressure and proper trim tools to avoid breaking them. The HVAC vents can sometimes pop out of the bezel during removal; they can be snapped back into place before reinstallation.
Known Issues, TSBs, and Recalls
There are no official recalls or Technical Service Bulletins (TSBs) for the physical failure of the instrument panel bezel itself. While TSBs exist for issues related to the instrument cluster's software or the radio's performance, they do not address cosmetic or structural problems with the plastic trim. A significant recall (NHTSA 24V-198) was issued for 2018-2021 models concerning side curtain airbag inflators, but this is unrelated to the dash panel.
Frequently Asked Questions (FAQ)
How do I know if I have the 4.3-inch or 8.4-inch screen?
The easiest way is to measure diagonally. The 8.4-inch screen is noticeably larger and fills most of the bezel opening. The 4.3-inch screen is much smaller, with large black areas or physical shortcut buttons flanking it. A quick visual comparison to online images will make the difference obvious.
Can I upgrade my 4.3-inch screen to an 8.4-inch screen by just swapping the bezel?
No. While you will need the corresponding 8.4-inch bezel, the screen upgrade is much more complex. It requires the new screen, a new radio module, and potentially custom wiring harnesses and programming to make all features work correctly. The bezel is just one of many parts needed for the conversion.
My bezel is rattling. Do I need to replace the whole thing?
Most likely, the rattle is caused by broken mounting clips on the back of your existing bezel. You can try removing the bezel and adding foam tape to the contact points to dampen the noise, but the only permanent fix for broken clips is to replace the bezel with an unbroken one.
Why is a used OEM bezel better than a new aftermarket one?
A used Original Equipment Manufacturer (OEM) bezel is guaranteed to fit exactly like the original part because it was made by Mopar for the Charger. It will have the correct mounting points, color, and texture. Most aftermarket options are thin stick-on covers that can look cheap and may peel over time, while the few full replacements may not have the same quality or precise fit as an OEM part.
Helpful Videos


Technical Specifications
OEM Part Numbers: 1190415xssae 68092614AA 68270828AA 68294120AA 68294122AA 68322969AA 68377778AA 68416829AA 68494905AA 6ZH80AAAAA 7BC92AAAAA 7BC93AAAAA 7BC94AAAAA 7JR52AAAAA l0199608ab
Material: Automotive-grade plastic. Finish varies by trim level (matte, gloss, silver, carbon fiber pattern). Designed for either 4.3-inch or 8.4-inch screen openings.
We Have This Part in Stock

The information in this article is provided for general reference and educational purposes only. Vehicle specifications, procedures, and part compatibility can vary by production date, trim level, and region. Always consult your vehicle's factory service manual and verify part numbers before purchasing or performing repairs. Safety-critical components such as airbags, seat belts, and braking systems should be installed by a qualified professional.
- Dodge Charger:
- 🎬 Helpful Videos
- 🛍️ Shop This Part
- Generational Differences: 2011-2014 vs. 2015-2023
- Symptoms of a Failing Instrument Panel Bezel
- 1. Cosmetic Damage: Peeling, Scratches, and Fading
- 2. Rattles and Squeaks
- 3. Poor Fitment or Gaps
- Buying a Used Instrument Panel Bezel: What to Check
- THE CRITICAL CHECKS: Screen Size and Year Range
- Physical Inspection Points
- Cost of Dodge Charger Instrument Panel Bezels (2011-2023)
- Replacement Information
- Known Issues, TSBs, and Recalls
- Frequently Asked Questions (FAQ)
- 🎟️ Get 5% Off