
OBD-II Code B0066: Driver Pretensioner Deployment Loop Voltage Out of Range
An Expert's Guide to Diagnosing and Fixing B0066
- Code B0066 indicates a voltage fault in the driver's seat belt pretensioner circuit, instantly disabling 100% of the vehicle's airbag system.
- Inspect the door jamb and under-seat wiring harnesses first, as broken wires cause over 80% of B0066 faults on affected GM extended cab trucks.
- Never drive with an active B0066 code; a 0% deployment rate for airbags and pretensioners during a crash drastically increases the risk of fatal injury.
- Use an SRS-capable OBD-II scanner costing $70 or more to read and clear this code, as standard $20 engine code readers cannot communicate with the airbag module.
- Disconnect the negative battery terminal and wait exactly 15 minutes before touching any yellow SRS connectors to prevent accidental, explosive airbag deployment.
What Does B0066 Mean?
Code B0066 indicates the Supplemental Restraint System (SRS) module detected an electrical fault in the driver's seat belt pretensioner circuit. The pretensioner uses a pyrotechnic charge to instantly tighten the seatbelt during a collision. This code means the circuit voltage is outside the manufacturer's specified range, pointing directly to a short to ground, a short to power, or an internal component failure.
Technical definition: The official SAE/ISO definition for B0066 is "Left Front/Driver Pretensioner Deployment Loop Voltage Out of Range". The SRS control module continuously monitors deployment loop integrity. On many GM vehicles, this code sets if the module detects voltage greater than 6 volts for 500 milliseconds (short to power) or less than 2.4 volts with circuit resistance under 6 ohms for 500 milliseconds (short to ground).
Can I Drive With B0066?
No — Do Not Drive. While the vehicle will physically drive, it is critically unsafe. This code signifies the entire Supplemental Restraint System (SRS) — including all airbags and seat belt pretensioners — is disabled. In a crash, no safety restraints will deploy, drastically increasing the risk of severe injury or death. The cost of potential injury far outweighs the cost of immediate repair.
Common Causes
- Broken wires in door jamb or under the seat (Very Common) — The yellow-sheathed pretensioner wiring frequently passes through high-movement areas like the flexible door boot or under the driver's seat. Constant bending causes metal fatigue, leading the wires to chafe, fray, and break.
- Faulty seat belt pretensioner assembly (Common) — The pretensioner unit contains a pyrotechnic squib that fails internally. The squib develops an internal short or open, pushing the circuit resistance outside the acceptable 1.5 to 3.5 ohm range.
- Compromised electrical connectors (Common) — Yellow SRS connectors under the seat or in the B-pillar loosen from vibrations, corrode from moisture, or suffer spread terminals from improper probing. This creates high-resistance connections the SRS module flags as a fault.
- Previous improper repair (Common) — Shoddy prior repairs guarantee recurring faults. Using household wire nuts, improper solder joints, or failing to stagger wire splices in a high-flex area creates a weak point that breaks again.
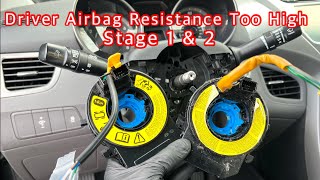
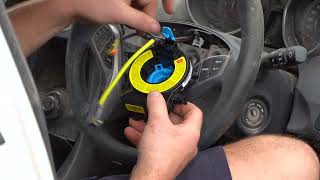
- Damaged clock spring (Less Common) — The clock spring maintains electrical contact for steering wheel components. While primarily associated with the driver's airbag, its wiring is part of the SRS harness and a failure within it affects the pretensioner circuit on specific Hyundai and Kia models.
- Water damage to the SDM or connectors (Rare) — Water intrusion from a clogged sunroof drain or flood corrodes the main SRS/SDM module and its connectors. This triggers a host of false SRS codes, including B0066.
- Faulty Sensing and Diagnostic Module (SDM) (Very Rare) — The SDM is a robust computer. Failure of the module itself is the absolute last item to consider after exhaustively ruling out wiring and component faults.
Symptoms
- Airbag warning light and DIC message — The primary symptom is an illuminated airbag icon on the instrument cluster, often accompanied by a "Service Safety Restraint System" text warning on the Driver Information Center.
- Intermittent airbag light — The light turns on and off when the driver's door opens or the seat adjusts. This confirms a wiring problem, such as a frayed wire making and breaking contact.
- Audible warning chime — Some vehicles sound a recurring chime, often in a pattern of five beeps, to alert the driver of a critical SRS fault if the dashboard bulb burns out.
- Airbag system is disabled (also visible on scanner) — When the airbag light is on, the SDM disables the entire safety system as a fail-safe. No airbags or pretensioners will deploy in a crash.
Diagnostic Flowchart
Tap your situation to follow the diagnostic path that matches what you're seeing on this code.
Common Fixes & Costs
- Repairing broken wires in door jamb — Parts: $5-$20 for wire, solder, and heat shrink., Labor: $150-$300 for 1.5-2.5 hours of diagnostic and repair time., ~2 hr book time (Intermediate)
- Replacing the seat belt pretensioner assembly — Parts: $250-$500 for an OEM part., Labor: $150-$300 for installation and system check., ~1.5 hr book time (Intermediate)
- Cleaning or securing under-seat connectors — Parts: $5-$15 for electrical contact cleaner and zip ties., Labor: $75-$150 for diagnosis and securing the connector., ~0.8 hr book time (DIY)
- Replacing the entire door wiring harness — Parts: $150-$400 for the OEM harness., Labor: $250-$500 for removing the door panel and feeding the new harness., ~3 hr book time (Professional)
- Replacing the SRS Control Module (SDM) — Parts: $500-$1000+ for a new OEM module., Labor: $150-$300 for removal, installation, and mandatory VIN programming., ~1.8 hr book time (Professional)
Used vs. New Parts: Buying Guide
When a used part is worth it: For a safety-critical, pyrotechnic device like a seat belt pretensioner, buying a used part is strongly discouraged. It should only be considered if a new OEM part is completely unavailable. A 'rebuilt' unit from a certified specialist is a viable, cost-effective alternative to new.
Donor-vehicle mileage cap: roughly under 20000 miles for the part to have meaningful remaining life.
Donor quality checklist:
- Never buy a used pretensioner with an unknown history; there is no reliable way to tell if it has been deployed.
- Only purchase from certified automotive recyclers who guarantee the part is non-deployed and provide the donor VIN.
- Avoid parts from vehicles with flood damage, as internal corrosion renders the unit useless.
- Match the part number exactly to ensure compatibility with the SRS module.
Decision logic:
- If The vehicle was in a collision where the pretensioner may have fired → Buy a new OEM part or have the original unit professionally rebuilt. Do not buy used.
- If The fault is purely electrical and the vehicle has not been in a crash → A professionally rebuilt unit offers a good balance of cost and safety.
- If Budget is the absolute primary concern → A rebuilt unit from a specialist is significantly cheaper ($80-$150) and safer than a random used part from a salvage yard.
Warranty tradeoff: Used parts offer a 30-90 day warranty covering only the part. New OEM offers a 1-year/12,000-mile warranty. Rebuilt services often come with a lifetime warranty from reputable providers.
Worst-case if a used part fails: $500-$1,000,000+. The worst-case failure is the unit not deploying in a crash, leading to severe injury or death.
What Happens If You Wait — Timeline
- Immediate (0 seconds): The SRS module detects the voltage fault, logs code B0066, illuminates the airbag warning light, and disables the entire Supplemental Restraint System as a fail-safe. (MPG impact: 0%% · Added cost: $0. The primary cost is the immediate and total loss of passive safety systems.)
- 0-12 months: The vehicle fails its annual state safety inspection in states where an airbag light is an automatic failure. This results in re-inspection fees and potential fines. (MPG impact: 0%% · Added cost: $50-$200 in inspection fees and fines. The underlying fault may worsen, but the primary safety system remains disabled.)
- At any moment: A low-to-moderate speed collision occurs. Due to the disabled SRS, neither the pretensioner nor any airbags deploy. The driver impacts the steering wheel, causing preventable injuries. (MPG impact: 0%% · Added cost: $5,000 - $100,000+ in medical bills and lost wages. The repair cost of the original B0066 fault is dwarfed by the cost of a single injury.)
- At any moment: A moderate-to-severe high-speed collision occurs. The complete failure of the SRS to deploy results in catastrophic or fatal injuries. (MPG impact: 0%% · Added cost: $1,000,000+. The cost includes life-altering medical care, permanent disability, loss of life, and potential denial of insurance payouts.)
Cost of Not Fixing It
- Immediate: The entire Supplemental Restraint System (SRS) is disabled. No airbags or seat belt pretensioners will deploy in a crash. (Added cost: The cost of the repair ($200-$800) vs. the potential for severe or fatal injury. Settlements for airbag failure cases range from $50,000 to over $1,000,000.)
- 0-6 months: Failure to pass mandatory state safety inspections, resulting in fines or inability to legally operate the vehicle. (Added cost: $50-$200 in inspection re-test fees and potential fines.)
- 6+ months: In the event of an accident, there is a significantly increased risk of traumatic brain injury, spinal cord injury, or death. The vehicle's safety rating is effectively void. (Added cost: Potentially life-altering medical bills and loss of income running into hundreds of thousands of dollars.)
Diagnosis Steps
- Read SRS Codes with a Bi-Directional Scanner
A standard engine code reader cannot communicate with the SRS module. Use an SRS-capable OBD-II scanner to confirm B0066 is active. Look for accompanying codes like B0065, which points directly to an open circuit.
Tools: SRS-capable OBD-II Scanner (Intermediate) - Check for Technical Service Bulletins (TSBs)
Search for TSBs related to your vehicle's make, model, and year. Manufacturers release bulletins for known issues, saving hours of diagnosis. GM has a prominent TSB (#14609) for broken wires on Colorado and Canyon trucks.
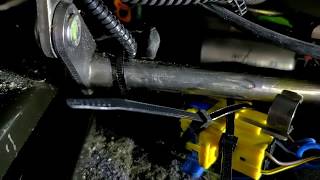
Tools: Internet access (Beginner) - Visual Inspection of Harness and Connectors
Peel back the rubber boot in the driver's door jamb and examine the yellow-sheathed wires for breaks or chafing. Move the driver's seat all the way up and back to inspect the yellow connectors underneath for looseness or corrosion.
Tools: Flashlight, trim tool (Beginner) - Test Circuit Resistance at the Pretensioner
CRITICAL SAFETY STEP: Disconnect the negative battery terminal and wait 15 minutes. Disconnect the yellow connector at the pretensioner. Using a multimeter, measure resistance across the two pins on the pretensioner. A healthy squib reads between 1.5 and 3.5 ohms. An infinite reading (OL) indicates a bad pretensioner.
Tools: Multimeter, basic hand tools (Advanced) - Test Harness Integrity with a Resistor
With the battery disconnected, plug a 2.0-3.0 ohm airbag diagnostic resistor into the vehicle-side harness connector. Reconnect the battery and turn the ignition on. If the airbag light goes out, the wiring and SDM are good, confirming the pretensioner is faulty. If the light remains, the fault is in the wiring.
Tools: Airbag system diagnostic resistor (2-3 ohm) (Advanced) - Harness Load Testing
A multimeter continuity test is misleading if a wire cannot carry current under load. Connect one side of the pretensioner harness wire to a 12V bulb and the other end to a power source. If the bulb lights up brightly, the wire is good. If it is dim, the wire has high resistance.
Tools: 12V test light or bulb, jumper wires, 12V power source (Professional) - Live Data Analysis
Navigate to the SRS live data stream on a scan tool and locate 'Driver Pretensioner Loop Resistance'. A stable reading is 1.5 to 3.5 ohms. Wiggle the wiring harness in the door jamb and under the seat. If resistance jumps to OL (open), you have pinpointed the exact location of the wiring fault.
Tools: Professional bi-directional scan tool (Advanced) - Waveform Analysis with Oscilloscope
For elusive intermittent faults, back-probe the pretensioner circuit signal and ground wires at the SDM with an oscilloscope. A faulty circuit shows voltage spikes or dropouts when the harness is wiggled, providing indisputable visual proof of a wiring issue.
Tools: Automotive Oscilloscope, back-probe pins (Professional)
When This Code Triggers (Freeze-Frame Conditions)
- System Voltage: 10-16 Volts (The SRS module runs a self-test every time the ignition turns on; this code sets if the voltage is out of range during the test.)
- Fault Duration: 500 milliseconds (The specific voltage fault (too high or too low) must be present for exactly half a second before the code logs.)
- Ignition Status: ON / RUN (The diagnostic test for this code runs exclusively when the ignition is in the ON or RUN position.)
- Component Resistance: < 6 ohms (For a short-to-ground condition, the module must see both low voltage (<2.4V) and low resistance in the circuit simultaneously.)
Related Codes
- B0065 — This code for "Driver Pretensioner Deployment Loop Open" is the most common companion to B0066. B0065 indicates high resistance from a severed wire. Seeing both codes together is a near-certain indicator of a wiring harness failure.
- B0058 / B0059 — These codes mirror B0065/B0066 but for the passenger-side seat belt pretensioner. The diagnostic process is identical, but performed on the passenger side.
- B0064 — This code indicates "Driver Pretensioner Deployment Loop Resistance Below Threshold," meaning a short circuit. This is caused by wires melting together or an internal failure within the pretensioner's squib.
- B0092 — This code relates to the Passenger Presence System (PPS). While not directly part of the pretensioner circuit, its wiring is routed in the same under-seat harness and fails under similar conditions.
Climate & Environmental Factors
- High Humidity / Road Salt: In coastal regions or the 'Salt Belt', moisture and salt penetrate wire insulation and connectors. This accelerates corrosion, leading to high resistance and intermittent faults.
- Extreme Cold: Low temperatures cause electrical connectors to contract, creating loose connections. It makes older wire insulation brittle and prone to cracking when flexed, breaking the circuit.
- Water Ingress: Moisture from heavy rain, clogged sunroof drains, or spills directly damages under-seat connectors or the main SRS module, causing short circuits.
How to Talk to a Mechanic About This Code
Say this: "I have an airbag light on and my scanner shows code B0066 for the driver's pretensioner. I know this is often a wiring issue in the door jamb or under the seat, not the pretensioner itself. I'd like to schedule a diagnostic to confirm the location of the fault. Please start by inspecting the wiring harness and testing the circuit before quoting a replacement pretensioner."
This signals to the shop that you are an informed consumer. It directs them to perform a proper diagnosis to find the common, cheaper-to-fix wiring fault instead of immediately quoting the expensive replacement of the pretensioner assembly.
Avoid saying:
- My airbag light is on, can you fix it?
- Just replace the part for the B0066 code.
- I need a price for a new seatbelt.
Questions to ask before authorizing the repair:
- What was the result of the pretensioner's resistance test? What was the ohm reading?
- Did you find a broken wire or a bad connector? Can you show me?
- Did you test the harness by substituting a diagnostic resistor to confirm the fault isn't in the pretensioner itself?
- What is the warranty on this specific repair, including both parts and labor?
Where to Take It: Dealer vs Independent vs Chain
- Dealer:
A safe but expensive choice. Best if you suspect the issue is a known TSB or warranty item, as they have the most direct access to that information and are obligated to perform the correct repair.
Best for: Vehicles under warranty., Repairs covered by a Technical Service Bulletin (TSB) or recall., Complex, model-specific electrical issues.
Downsides: Highest labor rates., May prefer to replace an entire harness ($$$) rather than repair a single wire ($). (Typical cost: +50% vs. baseline) - Independent Shop:
Excellent fit, often the best choice. A good independent shop specializing in electrical diagnostics is more likely to perform a cost-effective wire repair instead of a full component replacement.
Best for: Out-of-warranty vehicles where cost is a factor., Diagnosing and repairing common wiring failures.
Downsides: Quality and expertise vary widely. Must vet the shop based on reviews and ASE certifications., May not have access to the very latest manufacturer-specific TSBs. (Typical cost: +0% vs. baseline) - Chain Shop:
AVOID. SRS repair is a safety-critical task that requires specific expertise. This is not a job for a generalist, quick-lube, or tire shop.
Best for: Simple, routine maintenance like oil changes, tires, and brakes.
Downsides: Technicians often lack the specialized training for SRS diagnostics., High pressure to sell parts rather than perform detailed diagnostics. (Typical cost: -10% vs. baseline)
When to Walk Away From the Repair
If the estimated repair cost exceeds 50% of the car's Kelley Blue Book (KBB) private-party value, consider selling the car as-is. Unlike other codes, a B0066 fault makes the car unsafe and unable to pass a safety inspection, drastically reducing its value until repaired.
- Car worth $5000, fix is $800: Fix it. The repair cost is well below the threshold, and fixing it restores the vehicle's safety and full market value.
- Car worth $3000, fix is $1600: Walk away. The repair cost is over 50% of the car's value. The money is better put toward a replacement vehicle.
What Scan Tool You Need for This Code
Minimum: An OBD-II scanner with SRS/Airbag diagnostic capability.
A standard $20 engine code reader CANNOT read or clear SRS codes like B0066. The SRS is a separate computer module. Attempting to diagnose this with a basic scanner is a waste of time.
Budget: Autel AutoLink AL619 (~$70) — Reads and clears engine, ABS, and SRS codes. It successfully identifies B0066 and allows you to clear the light after the repair is complete.
Mid-range: Foxwell NT630 Plus (~$130) — In addition to reading/clearing SRS codes, this tool displays live data for the pretensioner circuit. This allows you to watch the resistance value in real-time as you wiggle wires to pinpoint a break.
Professional: Autel MaxiCOM MK808 (~$500) — Offers full bidirectional control and all OEM-level diagnostic functions. It provides comprehensive live data and can perform programming functions if you need to replace a module.
Rent vs buy: Auto parts stores offer free code scanning, but typically only provide basic engine code readers. Due to liability, it is very rare to find an SRS-capable scanner for rent. For this code, you must buy your own.
How to Clear the Code After You Fix It
- Ensure the repair is complete (e.g., wire soldered and insulated, or component replaced).
- Reconnect the negative battery terminal.
- Turn the ignition key to the ON position (without starting the engine).
- Observe the airbag light; it should illuminate for a few seconds for a self-test and then turn off.
- If the light stays on, use an SRS-capable OBD-II scan tool to read and clear any stored 'hard' codes.
Drive cycle (~10 minutes): The SRS system does not require a complex drive cycle. The module performs a complete self-test of all components each time the ignition turns on. If the repair was successful, the light turns off immediately. A short 10-minute test drive confirms the light does not return intermittently.
Readiness monitors affected: None. SRS systems do not use readiness monitors.
Watch out for:
- Assuming the light will always go off by itself; some systems require a scanner to clear a stored history code.
- Using a basic engine code reader, which cannot communicate with the SRS module.
- Fixing only one broken wire when multiple wires in the same harness are frayed.
Will This Fail Emissions / State Inspection?
Yes — this code typically fails an OBD-II emissions inspection.
- California: An illuminated airbag light is considered a safety defect and causes the vehicle to fail its safety inspection, a component of the overall smog check process.
- New York: An illuminated SRS/airbag warning light is grounds for an automatic failure of the annual safety inspection.
- Texas: As of 2025, most non-commercial vehicles are no longer subject to a mandatory safety inspection. An airbag light is not an emissions-related item and does not cause a failure of the required emissions test.
Most Commonly Affected Vehicles
- Chevrolet Colorado (Extended Cab) (2004-2012) — Extremely common failure of wires breaking in the rear extended cab door jamb. GM issued TSB #14609 to replace the rear door harness. A VIN lookup is essential.
- GMC Canyon (Extended Cab) (2004-2012) — Identical issue to the Chevrolet Colorado. Constant flexing from the rear 'suicide' door fatigues and breaks the pretensioner circuit wires.
- Hyundai / Kia Elantra, i30, Sonata, Optima (2010-2018) — Highly susceptible to clock spring failures causing this code, often along with non-functional steering wheel buttons. Hyundai offers extended warranties (up to 15 years/unlimited miles) on this part.
- Cadillac CTS (2003-2007) — Failures are common in either the pretensioner assembly itself or the under-seat connectors. The pretensioner is integrated into the seat belt retractor assembly.
- Subaru Legacy, Outback (2005-2009) — A well-documented issue is cracked solder joints on the circuit board inside the overhead map light console. This fault in the passenger airbag indicator circuit causes the SRS module to set pretensioner faults.
- Volkswagen Jetta, Golf, Passat (2005-2015) — VW systems are sensitive to faults in the seat belt buckle sensor. Wiring issues send an implausible signal to the SRS module, triggering a fault light.
- Chrysler / Dodge / Jeep 200 / Town & Country / Grand Cherokee (2011-2017) — Known for loose wiring harness connectors under the seats. Disconnecting, cleaning, and securely reconnecting the main yellow connector resolves intermittent codes.
- Ford F-150 / Fusion / Escape (2004-2018) — Ford SRS modules are highly sensitive to resistance changes. A small amount of corrosion in a pretensioner connector increases resistance enough to flag a high resistance fault.
Manufacturer-Specific Notes
- General Motors (Chevrolet/GMC): On 2004-2012 extended cab trucks, the fault is almost always broken wires in the flexible boot for the small rear door. Technicians should never replace the pretensioner until the rear door harness is proven intact.
- General Motors (Corvette): On C6 Corvettes (2005-2013), a poor connection at the yellow under-seat connector is so common that GM released TSB 16-NA-110 instructing technicians to eliminate the connector entirely and permanently solder the wires.
- Subaru: For 2005-2009 Legacy and Outback models, a persistent airbag light is frequently caused by cracked solder joints on the circuit board in the overhead console. Repairing these joints fixes the problem when all other tests fail.
- Hyundai / Kia: Hyundai has issued warranty extensions for clock spring assemblies on many models, extending coverage to 15 years/unlimited miles. Always check with a dealer to see if your vehicle is covered before paying out of pocket.
Real Owner Stories
2012 Chevy Colorado with B0065 & B0066
Airbag light stayed on. A scanner pulled codes B0065 (Driver Pretensioner Open) and B0066.
What they tried:
- Inspected the wiring in the driver's side rear extended cab door jamb based on forum advice.
Outcome: Multiple wires in the flexible boot between the door and the body were broken. The owner soldered in new sections and protected them with heat shrink. The airbag light went off upon the next startup.
Lesson: On GM extended cab trucks, the fault is almost always broken wires in the rear door harness due to repeated flexing. Inspect this specific area before buying parts.
2006 Cadillac CTS with B0065 & B0066
Airbag light was on. A bi-directional scanner revealed B0065 and B0066.
What they tried:
- Inspected under-seat wiring and connectors; found no visible damage.
- Used a 2.8-ohm diagnostic resistor to bypass the pretensioner. The light stayed on.
- Tested the wiring harness for continuity; the harness tested fine.
- Replaced the driver's seat belt pretensioner assembly.
Outcome: After replacing the pretensioner assembly, the codes cleared and did not return. The original pretensioner had failed internally.
Lesson: Using a diagnostic resistor proves whether the fault is in the component or the wiring. In this case, the owner's initial resistor test was flawed, but process of elimination led to the correct fix.
C6 Corvette (2005-2013) with intermittent airbag light
Airbag light came on and off, finally staying on permanently. Scanner showed B0065 and B0066.
What they tried:
- Cleaned and re-seated the large yellow connector under the driver's seat.
- Removed the seat and traced the pretensioner wiring harness into the carpet.
- Found the plastic wire loom had kinked and chafed through the insulation.
Outcome: The damaged wire section was cut out and repaired using heat-shrink butt connectors. The light stayed off.
Lesson: Even when a specific connector is a known issue, the problem can be further up the harness. A thorough physical inspection of the entire wire path is necessary for intermittent faults.
Hyundai Elantra with airbag light
Airbag light on, code B0066 present. The horn and steering wheel buttons also failed intermittently.
What they tried:
- Dealership misdiagnosed the issue, quoting a repair for the pretensioner.
- Owner contacted corporate regarding a warranty extension for the clock spring.
- Filed a complaint with the Bureau of Automotive Repair.
Outcome: The dealership acknowledged the clock spring was the true cause and covered it under an extended warranty. The clock spring replacement resolved the B0066 code and steering wheel symptoms.
Lesson: Always check for TSBs and warranty extensions for pattern failures like Hyundai clock springs. Escalating to corporate can save thousands on misdiagnosed repairs.
How to Prevent This Code From Triggering
- Apply dielectric grease to critical connectors (Once, or during any related service) — Applying non-conductive dielectric grease to the seals of under-seat and door jamb SRS connectors blocks moisture and prevents corrosion, a primary cause of high resistance faults.
- Secure loose wiring harnesses (During inspection or service) — Using zip ties to secure under-seat wiring harnesses prevents them from getting snagged or stretched by seat movement, eliminating physical strain on the wires.
- Carefully manage door and seat movement (Daily habit) — Avoiding slamming the door or swinging it to its absolute limit reduces stress on the wires in the flexible boot. Avoiding rapid, repeated full-range seat adjustments prolongs under-seat wiring life.
- Protect harnesses from abrasion and heat (During any repair or modification) — Ensuring wiring is properly routed in protective loom and secured away from sharp metal edges prevents future chafing and melting.
- Address water leaks immediately (As needed) — Promptly fixing a clogged sunroof drain or bad window seal prevents water from pooling under carpets and corroding SRS modules and connectors.
Frequently Asked Questions
Can I drive my car with a B0066 code?
No. While the engine will run, it is not safe. The airbag warning light confirms the entire SRS is offline, meaning no airbags or seat belt pretensioners will deploy in an accident.
What is the most common misdiagnosis for B0066?
On GM extended cab trucks, the number one mistake is replacing the expensive seat belt pretensioner assembly when the actual problem is a broken wire in the rear door harness.
Will the airbag light go off by itself after I fix the problem?
In most cases, yes. The SRS module performs a self-check every time the car starts, and once the electrical fault is repaired, the light turns off within a few seconds.
I repaired the broken wire, but the light is still on. What now?
First, re-inspect your repair for poor crimps or cold solder joints. Second, check the same harness for additional broken wires and ensure you used the correct gauge wire. Finally, clear the codes with an SRS-capable scanner, as some systems store a 'hard code' that requires manual erasure.
Is it safe to work on the airbag system myself?
Working on the SRS is extremely dangerous without proper training due to explosive charges. You MUST disconnect the negative battery terminal and wait 15 minutes to allow backup power to discharge. Never use a standard test light on an airbag circuit, as it provides enough current to trigger deployment.
Why are the airbag system connectors always yellow?
This is an industry-wide safety standard. The bright yellow color serves as an immediate visual warning to technicians that they are working with the Supplemental Restraint System.
Can a bad clock spring cause just the pretensioner code?
Yes. It is possible for only the specific wires dedicated to the pretensioner circuit within the clock spring to break, leading to an isolated B0066 code.
Key Takeaways
- Code B0066 indicates a voltage fault in the driver's seat belt pretensioner circuit, instantly disabling 100% of the vehicle's airbag system.
- Inspect the door jamb and under-seat wiring harnesses first, as broken wires cause over 80% of B0066 faults on affected GM extended cab trucks.
- Never drive with an active B0066 code; a 0% deployment rate for airbags and pretensioners during a crash drastically increases the risk of fatal injury.
- Use an SRS-capable OBD-II scanner costing $70 or more to read and clear this code, as standard $20 engine code readers cannot communicate with the airbag module.
- Disconnect the negative battery terminal and wait exactly 15 minutes before touching any yellow SRS connectors to prevent accidental, explosive airbag deployment.
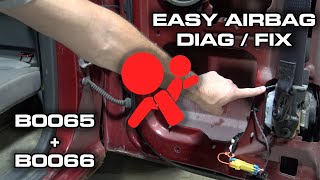
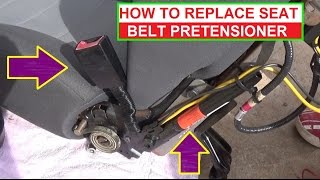
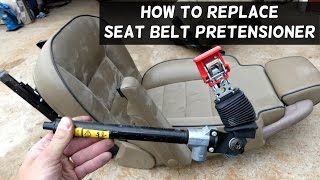
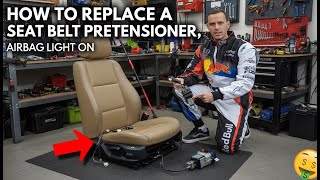
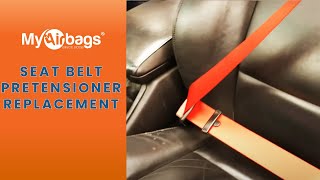
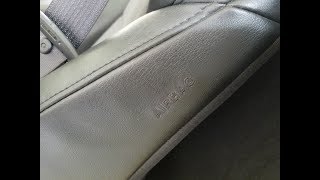
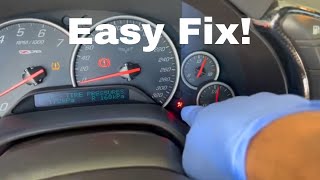
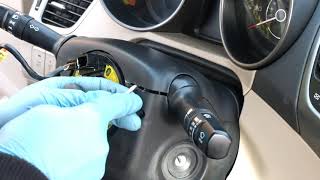
Helpful Videos


Shop the Parts Behind B0066
Below are the parts most often responsible for code B0066, ranked by how frequently each one is the actual culprit (per the diagnosis above). Tap any to see what we have for your vehicle.


The information in this article is provided for general reference and educational purposes only. Vehicle specifications, procedures, and part compatibility can vary by production date, trim level, and region. Always consult your vehicle's factory service manual and verify part numbers before purchasing or performing repairs. Safety-critical components such as airbags, seat belts, and braking systems should be installed by a qualified professional.
- 🧭 Diagnostic Flowchart
- 🎬 Helpful Videos
- 🛍️ Shop This Part
- What Does B0066 Mean?
- Can I Drive With B0066?
- Common Causes
- Symptoms
- Common Fixes & Costs
- Used vs. New Parts: Buying Guide
- What Happens If You Wait — Timeline
- Cost of Not Fixing It
- Diagnosis Steps
- When This Code Triggers (Freeze-Frame Conditions)
- Related Codes
- Climate & Environmental Factors
- How to Talk to a Mechanic About This Code
- Where to Take It: Dealer vs Independent vs Chain
- When to Walk Away From the Repair
- What Scan Tool You Need for This Code
- How to Clear the Code After You Fix It
- Will This Fail Emissions / State Inspection?
- Most Commonly Affected Vehicles
- Manufacturer-Specific Notes
- Real Owner Stories
- 2012 Chevy Colorado with B0065 & B0066
- 2006 Cadillac CTS with B0065 & B0066
- C6 Corvette (2005-2013) with intermittent airbag light
- Hyundai Elantra with airbag light
- How to Prevent This Code From Triggering
- Frequently Asked Questions
- Can I drive my car with a B0066 code?
- What is the most common misdiagnosis for B0066?
- Will the airbag light go off by itself after I fix the problem?
- I repaired the broken wire, but the light is still on. What now?
- Is it safe to work on the airbag system myself?
- Why are the airbag system connectors always yellow?
- Can a bad clock spring cause just the pretensioner code?
- Key Takeaways
- 🎟️ Get 5% Off