
OBD-II Code B1087: LIN Bus 'A' Communication Failure
The Ultimate 2026 Guide: What B1087 means, why it triggers, and how to fix it for good.
- Code B1087 indicates a communication failure on the single-wire LIN bus, typically disabling a specific accessory like the driver's power window switch or infotainment knob.
- Inspect the flexible rubber boot between the driver's door and the vehicle frame first, as broken wires here cause over 50% of B1087 faults.
- Test the LIN bus wire with a multimeter; a healthy circuit fluctuates between 6 and 9 volts, while a constant 0V or 12V indicates a dead short.
- Do not ignore this code if accompanied by a battery warning light, as it signals a failing alternator voltage regulator that will deplete the battery within 1 to 3 months.
What Does B1087 Mean?

B1087 means a main computer (like the Body Control Module or Door Control Module) lost communication with a smaller electronic part it controls. This communication happens over a single-wire network called the Local Interconnect Network (LIN bus). When the master module sends a command and receives no answer from the component for a few seconds, it triggers this code.
Technical definition: The SAE/ISO definition for B1087 indicates a communication fault on a Local Interconnect Network (LIN) Bus 'A'. The master control module lost communication with a slave module on the LIN bus for a specified period (typically 2-5 seconds), indicating an open circuit, short circuit, or invalid signal. Suffixes like ':87' (Missing Message), ':88' (Bus Off), or ':86' (Invalid Signal) provide specific failure data.
Can I Drive With B1087?
Yes, But With Caution. Yes, the vehicle is safe to drive as the code does not affect primary engine, braking, or steering control. However, disabled electronic features pose safety risks; a dead driver's door switch prevents quick window operation in an emergency, and an inoperative power mirror creates dangerous blind spots. If the code relates to a failing alternator, the vehicle will stall once the battery depletes, adding a $200-$400 battery replacement to the repair cost.
Common Causes

- Damaged or Broken Wiring (Very Common) — The single LIN bus wire frequently breaks inside the flexible rubber boot between a door and the car's body due to constant bending. Pinched or chafed wires under trim panels are also primary culprits.
- Water Intrusion in Connector (Common) — Moisture entering a key electrical connector in the A-pillar, B-pillar, or door causes corrosion that interrupts the low-voltage LIN signal. Ford and Lincoln vehicles have specific TSBs for water bypassing harness grommets.
- Failed Component Switch (Common) — The component itself, most often the master power window switch on the driver's door, fails internally. Liquid spills or rain entering the switch cause internal short circuits.
- Failed Alternator Voltage Regulator (Less Common) — Modern alternators communicate with the ECU/BCM over a LIN bus. A failure in the alternator's internal voltage regulator disrupts this communication, triggering B1087 before significant charging problems become noticeable.
- Failed Slave Module (Less Common) — A slave module on the LIN bus, such as a battery sensor, seat heater module, or infotainment control knob, fails internally. A faulty slave pulls the entire LIN bus network down, preventing other components from communicating.
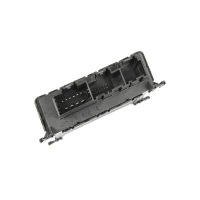
- Failed Master Control Module (Less Common) — The main computer controlling the LIN bus, such as the Driver Door Module (DDM) or Body Control Module (BCM), fails. This requires module replacement and dealer-level programming.
- Poor Ground Connection (Rare) — The main ground wire for the affected module is loose or corroded. Bad grounds cause unpredictable electrical problems and communication faults that mimic a total module failure.
- Aftermarket Accessory Interference (Rare) — Improperly installed remote starters, alarms, or audio systems interfere with the LIN bus network. Swapping modules between vehicles with different LIN configurations also triggers this code.
Symptoms

- Driver's Door Accessories Inoperative — The entire driver's door switch panel for windows, mirrors, and locks is dead, but individual switches on other doors still function. This is the classic sign of a LIN bus failure at the driver's door.
- Infotainment Controls Fail — The main control knob ('commander switch') for the radio and navigation system stops working, a highly common symptom on Mazda vehicles.
- Charging System Warning Light On — A battery or charging system warning appears on the dash. This occurs when the alternator uses a LIN bus to communicate with the engine computer, and that connection breaks.
- Heated or Cooled Seat Malfunction — The climate-controlled seat button does not respond. This points to a fault in the seat switch circuit, common on Dodge, Chrysler, and Jeep vehicles.
- Auto Start/Stop System Unavailable — If the code is caused by a faulty intelligent battery sensor communicating over the LIN bus, the vehicle disables auto start/stop because it cannot determine battery health.
Diagnostic Flowchart
Tap your situation to follow the diagnostic path that matches what you're seeing on this code.
Common Fixes & Costs
- Repair Broken Wire(s) in Door Jamb — Parts: $5-$20, Labor: $150-$300, ~1.5 hr book time (Intermediate)
- Clean or Repair Corroded Connector — Parts: $10-$30, Labor: $100-$300, ~1.5 hr book time (Intermediate)
- Replace Master Window Switch Assembly
— Parts: $75-$150, Labor: $50-$150, ~0.6 hr book time
(DIY)
Ford F-150 (2015-2020): OEM FL3Z-14529-BA (Alt: Dorman 901-349) - Replace Failed Component (e.g., Infotainment Controller)
— Parts: $150-$300, Labor: $100-$200, ~1.0 hr book time
(Intermediate)
Mazda 3 (2014-2018): OEM BHN1-66-CM0D (Alt: Unbranded Replacements) - Replace Alternator
— Parts: $300-$800, Labor: $200-$500, ~2.5 hr book time
(Professional)
Land Rover Discovery 4 (2010-2016): OEM LR072764 (Alt: Denso DAN1114) - Replace Door Control Module (DDM or PDM) — Parts: $200-$600, Labor: $200-$450, ~1.5 hr book time (Professional)
Used vs. New Parts: Buying Guide
When a used part is worth it: For a common failure item like a master window switch, a used OEM part from a reputable salvage yard offers original factory fit for a fraction of the new price. It is ideal for older vehicles where budget is a primary concern.
Donor-vehicle mileage cap: roughly under 100000 miles for the part to have meaningful remaining life.
Donor quality checklist:
- Match the part number exactly, including suffixes.
- Ask for the donor vehicle's mileage.
- Inspect photos for cosmetic wear on buttons.
- Ensure the seller offers a 30-90 day warranty.
Decision logic:
- If The part is a simple switch and an OEM new part is over $150 → Consider a used OEM part or a high-quality aftermarket part.
- If The failed part is a programmable control module (BCM, DDM) → Buy new. A used module requires expensive reprogramming and may lack compatibility.
- If Vehicle is newer or you prioritize reliability → Buy a new OEM part. Aftermarket switches feel cheap and fail faster.
Warranty tradeoff: Used parts typically include a 30-90 day warranty. Aftermarket new parts offer 1-year to limited lifetime warranties. New OEM parts carry the manufacturer's standard 1-2 year warranty.
Worst-case if a used part fails: $200-$400 if a used switch fails shortly after installation, requiring repeat labor costs.
What Happens If You Wait — Timeline
- 0-4 weeks: Code B1087 sets. If related to the alternator, a 'Charging System Warning' appears, and the alternator enters a default 13.8V charging state. For accessory faults, the component stops working. (MPG impact: 0%% · Added cost: $0)
- 1-3 months: If caused by an alternator fault, the battery is chronically undercharged or overcharged. This leads to sulfation, reducing battery capacity. The driver notices slower engine cranking. (MPG impact: 1-3%% · Added cost: $20-$50)
- 3-6 months: The battery fails completely due to the improper charging cycle, resulting in a no-start condition. If the root cause was water intrusion, corrosion spreads to adjacent pins. (MPG impact: N/A% · Added cost: $250-$500)
- 6+ months: Ignored water intrusion causes corrosion to migrate to critical network wires (like CAN bus) within the same harness. This causes multiple system failures or a total no-communication state. (MPG impact: N/A% · Added cost: $500-$2000)
Cost of Not Fixing It
- Immediate: Loss of function for the affected accessory (e.g., power windows, mirrors). This is an inconvenience but carries safety implications, such as the inability to clear a foggy window. (Added cost: 0)
- 1-3 months: If the fault relates to a LIN-controlled alternator, ignoring it leads to improper battery charging. The battery depletes, causing a no-start condition and requiring a tow. (Added cost: $100-$500)
- 3+ months: Continued moisture intrusion at a faulty connector leads to corrosion spreading to other pins, causing complex electrical issues that are expensive to diagnose. (Added cost: $300-$1000)
Diagnosis Steps

- Confirm Symptoms and Scan for All Codes
Test all related functions. If the driver's window switch fails, test the passenger window from its own switch. Use a professional scan tool to read codes from ALL modules. Note any U-series codes, as they take diagnostic priority over B1087.
Tools: Professional Scan Tool (Beginner) - Perform a Visual Inspection of Wiring
Open the door where the fault is present and pull back the rubber boot running between the door and the car's body. Look closely for broken, cracked, or pinched wires. This is the most common failure point.
Tools: Flashlight, Trim removal tools (Beginner) - Inspect Connectors for Corrosion
Remove trim panels to access the master switch or door module. Unplug the electrical connectors and look for green or white corrosion on the pins. Pay close attention to connectors in the A-pillar and B-pillar kick panels.
Tools: Trim removal tools, Screwdrivers/sockets (Intermediate) - PRO TIP: Check LIN Bus Voltage with Multimeter
Set your multimeter to DC Volts. Connect the black lead to a chassis ground and the red lead to the LIN bus wire. With the key on, you should see a fluctuating voltage between 6 and 9 volts. A constant 0V indicates a short to ground; a constant 12V indicates a short to power.
Tools: Multimeter, Vehicle-specific wiring diagram (Intermediate) - Check for Power and Ground at the Component
Using a multimeter, check for proper battery voltage and a solid ground at the connector for the non-working component. A lack of either points to a primary power/ground wiring problem, not a LIN bus fault.
Tools: Multimeter, Vehicle-specific wiring diagram (Intermediate) - Test the LIN Bus Wire for Integrity
With the battery disconnected and modules unplugged, use a multimeter set to ohms to test the LIN bus wire from end to end. Resistance must be under 1 ohm. Check for a short by testing for continuity between the LIN wire and ground, and the LIN wire and power; both should read OL (open loop).
Tools: Multimeter, Vehicle-specific wiring diagram (Advanced) - Isolate the Faulty Module
If the LIN bus is shorted or shows no activity, disconnect the slave modules on that bus one by one. Re-check the bus voltage after each disconnection. When the voltage returns to normal (6-9V), the last component disconnected is the source of the fault.
Tools: Scan tool, Multimeter (Advanced) - ADVANCED: Quantitative LIN Bus Voltage Analysis
Use a multimeter with a Min/Max recording feature. A healthy LIN bus shows a maximum voltage greater than 80% of battery voltage (>10.1V) and a minimum voltage less than 20% of battery voltage (<2.5V). Ensure the battery is fully charged before testing.
Tools: High-quality Multimeter with Min/Max, Battery Maintainer (Advanced) - PRO TIP: Analyze LIN Bus Signal with Oscilloscope
Connect an oscilloscope to the LIN wire and ground. A healthy LIN bus shows clean square waves. A noisy signal, or a signal where the low state doesn't drop below 20% of battery voltage, points to failing module hardware corrupting the data.
Tools: Oscilloscope, Wiring diagram (Advanced)
When This Code Triggers (Freeze-Frame Conditions)
- System Voltage: 11.8V - 14.8V (Code sets with low voltage during cranking or normal voltage during operation.)
- Ignition Status: ACC or ON (The fault is detected within seconds of the ignition turning on as the master module polls the slave devices.)
- Module Status: No Communication (The master module logs the code when it fails to receive a response from a specific slave module for 5 seconds.)
- Time Since Ignition On: > 10 seconds (The fault is continuous and detected shortly after every startup.)
Related Codes
- B1088 — This code is for 'LIN Bus B'. If B1087 and B1088 appear together, it suggests a fault common to both networks, like a power, ground, or internal BCM issue. A TSB for the 2019 Lincoln MKC notes water entering a B-pillar connector causes both.
- U-Series Codes (e.g., U0140, U0131) — U-codes indicate broader network communication failures. A U0140 (Lost Communication with BCM) takes diagnostic priority. You must fix the reason the BCM is offline before diagnosing the secondary B1087 LIN bus fault.
- P0A1A / U0120 — These codes for 'Generator Control Module Communication' often appear with B1087. When seen together, the alternator and its dedicated LIN wire to the ECU must be the primary focus of the diagnosis.
- B1471 / U024B / U024C — On Ford vehicles with multi-contour seats, these codes appear alongside B1087. They point to a fault with the seat control modules or their wiring, addressed in TSB 19-2390.
Climate & Environmental Factors
- High Humidity / Rain: Moisture seeps into door jamb connectors, A-pillar connectors, and switch assemblies, causing corrosion on the LIN bus pin. This corrosion increases resistance or creates a short.
- Cold Weather: Low temperatures make wire insulation brittle and prone to cracking in high-flex areas like door jambs. Cold also increases electrical load, exposing underlying weaknesses in the alternator.
- Road Salt (Winter Climates): Salty mist penetrates under-hood and chassis connectors. Saltwater is highly conductive and corrosive, accelerating the degradation of connectors for components like the alternator or battery sensor.
Where to Take It: Dealer vs Independent vs Chain
- Dealer:
Best for: Vehicles still under warranty, Complex cases where a Technical Service Bulletin (TSB) exists, When a control module replacement and manufacturer-specific programming are required
Downsides: Highest labor rates, More likely to replace a full wiring harness rather than repair a single broken wire (Typical cost: +50% vs. baseline) - Independent Shop:
Best fit for most situations. An independent shop specializing in electrical work provides a more cost-effective and targeted repair than a dealer.
Best for: Out-of-warranty vehicles where cost is a factor, Common B1087 faults like broken wires in a door jamb or a simple switch replacement, Shops with a good reputation for electrical diagnostics
Downsides: Quality and expertise vary widely, May not have the specific tools to program a new module if one is needed (Typical cost: +0% vs. baseline) - Chain Shop:
AVOID for B1087 diagnosis. This code requires specific electrical troubleshooting skills that are not the focus of chain repair shops.
Best for: Simple, unrelated maintenance like oil changes or tires
Downsides: Technician skill for complex electrical diagnosis is highly inconsistent, Business model encourages replacing parts quickly rather than performing detailed wiring diagnostics (Typical cost: -10% vs. baseline)
When to Walk Away From the Repair
If the estimated repair cost exceeds 40% of the car's private-party value, seriously consider selling the car as-is or trading it in.
- Car worth $4000, fix is $2100: Walk away. A $2100 repair for a new alternator and battery on a $4000 car is over the 50% threshold.
- Car worth $15000, fix is $450: Fix it. A $450 repair for a broken wire in the door jamb is well below the threshold.
- Car worth $3000, fix is $900: Borderline. A $900 fix for a door control module is a significant percentage of the car's value. Get a second opinion before proceeding.
What Scan Tool You Need for This Code
Minimum: A scanner that reads and clears Body (B-series) fault codes from modules like the BCM and DDM. A basic engine-only code reader will not see a B1087 code.
The cheapest $20 scanners only read 'P' (Powertrain) codes and show 'No Codes Found' even when a B1087 is active. You need a tool that communicates with the Body Control Module.
Budget: BlueDriver Pro (~$100) — Connects to your smartphone and reads/clears enhanced codes, including B-codes. It views live data to confirm if a module is communicating.
Mid-range: Foxwell NT510 Elite (~$150) — Offers brand-specific diagnostics and bi-directional control, allowing you to command components like window motors to function, isolating the fault to the switch or wiring.
Professional: Autel MaxiCOM MK808BT (~$500) — A professional-level wireless tablet scanner providing full OE-level system coverage, comprehensive live data, and full bi-directional control to test any component on the LIN bus.
Rent vs buy: Many auto parts stores offer free code scanning, but their basic tools may not read B-codes. For a one-time issue, paying a shop for a proper diagnosis is more effective than buying a tool.
How to Clear the Code After You Fix It
- Reconnect the battery if it was disconnected for the repair.
- Use an OBD-II scan tool to clear the Diagnostic Trouble Code (DTC) from the master module.
- Turn the ignition to the 'ON' position and wait 15 seconds for modules to re-establish communication.
- Operate the repaired component to verify functionality.
Drive cycle (~30 minutes): A specific drive cycle is not required for a B1087 code. The fault is present immediately upon startup or it is fixed. However, if the battery was disconnected, a general drive cycle is needed to reset emissions readiness monitors: a cold start, 10 minutes of city driving, and 15 minutes of highway driving.
Readiness monitors affected: All non-continuous monitors (Catalyst, Evap, O2 Sensor) reset to 'Not Ready' if the battery is disconnected.
Watch out for:
- Clearing the code does not fix the issue; the code returns immediately if the physical fault is not repaired.
- Disconnecting the battery clears the code but resets all emissions readiness monitors, causing an automatic failure at a smog check.
Will This Fail Emissions / State Inspection?
No — by itself this code doesn't fail OBD inspection (but it can keep readiness monitors from setting, which causes a separate fail).
- California: A B1087 code will not fail the smog check, as it is a Body code and does not illuminate the Check Engine Light. However, if the repair involved disconnecting the battery, the vehicle fails for having 'Not Ready' monitors.
- New York: NYS inspection checks for an illuminated Check Engine Light. B1087 alone does not cause a failure. Resetting readiness monitors will result in a failure.
- Texas: In emissions testing counties, the OBD-II scan fails a vehicle if the MIL is commanded on. B1087 does not cause a failure on its own. The vehicle fails if readiness monitors are not set to 'Ready'.
Most Commonly Affected Vehicles
- Ford F-150 (2015-2020) — Extremely common for broken wires in the driver's door jamb to cause a B1087 in the Driver Door Module (DDM). TSB 19-2390 notes issues with multi-contour seat modules causing communication faults.
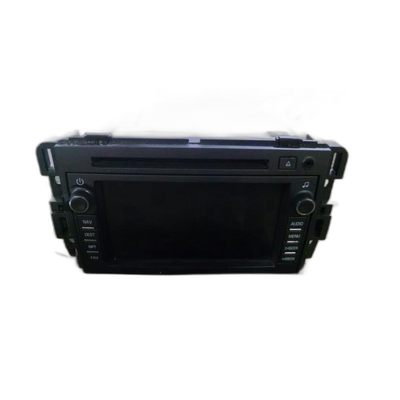
- Mazda 3, 6, MX-5 (2014-2018) — Almost exclusively relates to the central 'commander switch' for the infotainment system losing connection with the Connectivity Master Unit (CMU).
- Land Rover Discovery 4 / Range Rover Sport (2010-2016) — Triggered by a failing alternator's voltage regulator communicating via LIN bus. Typically sets a P0A1A code alongside B1087. A corroded main ground strap is another known cause.
- Chevrolet / GMC Silverado, Sierra (2007-2014) — Caused by a failing Body Control Module (BCM). On some models, B1087 is defined as 'Audio Output 7 Circuit Low Voltage', pointing to an audio system issue.
- Ford Focus (2012-2018) — Fault occurs between the front and rear door modules, causing rear windows to fail. A U0120 code indicates the alternator LIN bus is the source.
- Jaguar XF (2013-2017) — Logged as a 'LIN Bus A' failure related to body control modules. A failing alternator is a primary cause if charging system warnings are present.
- Hyundai Sonata, Elantra (2010-2020) — Relates to a communication failure with a door module. On newer models, the intelligent battery sensor fails and causes communication codes.
- Volvo XC70, XC90 (2010-2016) — Triggered by a loss of communication with an anti-tamper device on the radiator. Its failure presents as a 'Charging System Failure' message along with code B1087.
Manufacturer-Specific Notes
- Ford / Lincoln: TSB 19-2092 addresses 2019 Lincoln MKC vehicles where water intrusion into the C315 B-pillar connector causes intermittent B1087/B1088 codes. Swapping a SYNC APIM module with an unmatched unit also causes a persistent B1087.
- Mazda: The code almost exclusively points to a communication failure between the Connectivity Master Unit (CMU) and the commander switch in the center console. Diagnosis focuses entirely on the single wire between them.
- Land Rover / Jaguar: B1087 is an early sign of a failing alternator. The alternator's voltage regulator uses a LIN bus to report status, and a fault here triggers the code before significant charging problems occur.
- Dodge / Chrysler / Jeep: This code is defined specifically as a 'Heated Seat Switch Input Circuit Performance' fault. The problem is typically the switch itself or the heating module under the driver's seat.
- Volvo: A unique cause is the failure of a small 'anti-tamper' module glued to the radiator. Its failure logs a B1087 and a 'Charging System Failure' message, misleading diagnosis towards the alternator.
Real Owner Stories
2016 Ford F-150 at 136K miles
Driver's side window intermittently stopped halfway while closing. Code B1087-01 was found during a routine scan.
What they tried:
- Ignored the code initially.
- Researched forum advice pointing to the LIN wire between the master switch and the Driver Door Module.
- Visually inspected the door jamb wiring and found cracked insulation and one broken wire.
Outcome: Owner spliced in new sections of wire to repair the broken connections. Window function was restored and the code cleared.
Lesson: On Ford trucks, intermittent window issues are almost always caused by broken wires in the door jamb. Inspect the wiring boot before replacing the switch.
2014 Mazda 3 at ~75K miles
The main infotainment control knob became 'mushy' and stopped responding to rotational inputs. Code B1087:87 was stored.
What they tried:
- Disassembled the center console to check for physical breakage.
- Researched the part number and identified it as a common failure item.
Outcome: Replaced the entire commander switch assembly. The plug-and-play repair resolved the communication code and restored full function.
Lesson: For Mazda vehicles, B1087 almost exclusively points to the commander switch. A replacement switch assembly is the standard fix.
2012 Land Rover Discovery 4 with ~110K miles
Vehicle would not crank. Scan revealed codes B1087-93 and P0A1A-87 (Generator Control Module Communication Fault).
What they tried:
- Replaced the battery with no change.
- A shop replaced the alternator, but the fault persisted.
- Found a forum post suggesting checking the main ground strap.
Outcome: The main ground strap from the engine to the chassis was corroded. Cleaning the contact points and tightening the strap allowed the vehicle to start immediately.
Lesson: On Land Rover/Jaguar, B1087 paired with charging codes is misleading. Always check basic power and ground connections before replacing the alternator.
2010 Volvo XC70 with intermittent warnings
Intermittent 'Charging System Failure' message on the dash with code B1087. Battery voltage was a stable 13.8V.
What they tried:
- Monitored voltage with an OBD-II logger and confirmed the charging system was working.
- Discovered a forum thread discussing a unique cause for this symptom on Volvos.
Outcome: The fault traced to a failed 'anti-tamper' module connected to the radiator via a LIN bus. Replacing the $40 module fixed the issue.
Lesson: Be aware of manufacturer-specific quirks. On Volvos, a B1087 and charging message is often caused by a failed radiator anti-tamper module, not the alternator.
How to Prevent This Code From Triggering
- Clean door and sunroof drain plugs (Annually) — Clogged drains cause water to pool inside doors and A-pillars, seeping into electrical connectors and causing corrosion.
- Apply dielectric grease to key connectors (Whenever a relevant connector is disconnected) — Applying dielectric grease to the seal of connectors in wet areas waterproofs the connection, preventing moisture and road salt from reaching the pins.
- Lubricate door jamb wiring boot (Every 2-3 years) — Applying a silicone-based rubber lubricant keeps the door jamb boot flexible, reducing friction and stress on the wires inside.
- Periodically inspect visible wiring harnesses (During regular oil changes) — A visual check of harnesses in the door jambs spots early signs of trouble, like cracked insulation, before a wire breaks completely.
Frequently Asked Questions
Can a low battery cause code B1087?
Yes. Low system voltage causes communication modules to drop offline and generate B1087. Always ensure your battery is fully charged (above 12.4V) before diagnosing complex electrical faults.
What does the suffix B1087:87 or B1087:88 mean?
These suffixes provide specific failure data. ':87 - Missing Message' means the master module received no response from a slave module. ':88 - Bus Off' means the bus shut down, typically due to a short circuit.
Why does my charging system warning light come on with B1087?
This occurs when the alternator uses the LIN bus to communicate with the engine computer. The code indicates the computer lost communication with the alternator's voltage regulator. The system then illuminates the warning light and enters a 13.8V fail-safe charging mode.
If I clear the code, will it come back?
Yes. B1087 indicates a hard physical fault with the wiring or a component. Clearing the code only hides it temporarily; it returns immediately when the module fails to communicate again.
Can I reset the LIN bus?
You can perform a hard reset by disconnecting the battery for 20 minutes to force all modules to reboot. Some professional scan tools also feature network reset functions. However, resets will not fix an underlying broken wire or failed module.
Is a LIN bus the same as the CAN bus?
No. The CAN bus is a high-speed, two-wire network for critical systems like the engine and brakes. The LIN bus is a slower, single-wire network used for non-critical accessories to reduce wiring complexity.
What is the most common misdiagnosis for B1087?
The most common mistake is replacing the non-working component, like a window switch, without testing its wiring. Owners often replace a $150 switch only to find the code remains because the actual fault was a broken $5 wire in the door jamb. Always test power, ground, and LIN voltage first.
Can I use a module from a junkyard to fix a B1087 code?
Using junkyard modules is risky because control modules like the BCM are programmed specifically to the vehicle's VIN. An unmatched used module causes a persistent B1087 code or fails to work entirely. Stick to new OEM parts for programmable modules.
Key Takeaways
- Code B1087 indicates a communication failure on the single-wire LIN bus, typically disabling a specific accessory like the driver's power window switch or infotainment knob.
- Inspect the flexible rubber boot between the driver's door and the vehicle frame first, as broken wires here cause over 50% of B1087 faults.
- Test the LIN bus wire with a multimeter; a healthy circuit fluctuates between 6 and 9 volts, while a constant 0V or 12V indicates a dead short.
- Do not ignore this code if accompanied by a battery warning light, as it signals a failing alternator voltage regulator that will deplete the battery within 1 to 3 months.
Shop the Parts Behind B1087
Below are the parts most often responsible for code B1087, ranked by how frequently each one is the actual culprit (per the diagnosis above). Tap any to see what we have for your vehicle.


The information in this article is provided for general reference and educational purposes only. Vehicle specifications, procedures, and part compatibility can vary by production date, trim level, and region. Always consult your vehicle's factory service manual and verify part numbers before purchasing or performing repairs. Safety-critical components such as airbags, seat belts, and braking systems should be installed by a qualified professional.
- 🧭 Diagnostic Flowchart
- 🛍️ Shop This Part
- What Does B1087 Mean?
- Can I Drive With B1087?
- Common Causes
- Symptoms
- Common Fixes & Costs
- Used vs. New Parts: Buying Guide
- What Happens If You Wait — Timeline
- Cost of Not Fixing It
- Diagnosis Steps
- When This Code Triggers (Freeze-Frame Conditions)
- Related Codes
- Climate & Environmental Factors
- Where to Take It: Dealer vs Independent vs Chain
- When to Walk Away From the Repair
- What Scan Tool You Need for This Code
- How to Clear the Code After You Fix It
- Will This Fail Emissions / State Inspection?
- Most Commonly Affected Vehicles
- Manufacturer-Specific Notes
- Real Owner Stories
- 2016 Ford F-150 at 136K miles
- 2014 Mazda 3 at ~75K miles
- 2012 Land Rover Discovery 4 with ~110K miles
- 2010 Volvo XC70 with intermittent warnings
- How to Prevent This Code From Triggering
- Frequently Asked Questions
- Can a low battery cause code B1087?
- What does the suffix B1087:87 or B1087:88 mean?
- Why does my charging system warning light come on with B1087?
- If I clear the code, will it come back?
- Can I reset the LIN bus?
- Is a LIN bus the same as the CAN bus?
- What is the most common misdiagnosis for B1087?
- Can I use a module from a junkyard to fix a B1087 code?
- Key Takeaways
- 🎟️ Get 5% Off