
OBD-II Code B1186: Air Bag Driver Pretensioner Circuit Open
The Ultimate 2026 Guide to Meaning, Diagnosis, and Fixes
- Code B1186 disables the driver's seat belt pretensioner due to an open electrical circuit, significantly increasing injury risk in a frontal collision.
- The most common cause is a loose or damaged yellow wiring connector under the driver's seat, often triggered by adjusting the seat position.
- Always disconnect the negative battery terminal and wait 15 minutes before touching any yellow SRS connectors to prevent accidental airbag deployment.
- On many Toyota vehicles, B1186 specifically refers to the passenger side airbag circuit, requiring diagnosis on the opposite side of the car.
What Does B1186 Mean?
B1186 means the Restraints Control Module (RCM) detects a break or high resistance in the driver's seat belt pretensioner circuit. The pretensioner is a pyrotechnic device that instantly tightens the seat belt during a crash. An 'open' circuit prevents the firing signal from reaching the pretensioner's squib, disabling it.
Technical definition: The official SAE/ISO definition for B1186 is "Air Bag Driver Pretensioner Circuit Open". This indicates the Restraints Control Module (RCM) detects resistance in the driver's side seat belt pretensioner squib circuit above the manufacturer's specified threshold (typically >4.0-5.0 ohms). A squib is the small explosive charge that activates the pretensioner. An 'open' circuit is interpreted as a complete electrical break, rendering the component non-functional.
Can I Drive With B1186?
Yes, But With Caution. Yes, the vehicle is drivable, but its primary safety system is severely compromised. With code B1186, the driver's seat belt pretensioner will not fire in an accident, and the driver's airbag is often disabled. This dramatically increases the risk of the driver's head and torso striking the steering wheel, causing severe or fatal injury. The vehicle automatically fails any safety inspection with the airbag light on.
Common Causes
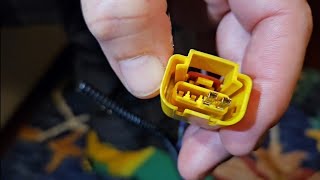
- Damaged or Corroded Under-Seat Wiring Connector (Very Common) — The yellow connector under the driver's seat is the most frequent culprit. Constant seat movement, items stored underneath, or moisture from spills causes wires to chafe, pins to spread, or corrosion to form, breaking the circuit.
- Faulty Seat Belt Pretensioner Assembly (Common) — The pretensioner unit itself, integrated into the seat belt buckle or retractor, fails internally. The small explosive charge (squib) or its internal wiring develops an open circuit over time or due to manufacturing defects.
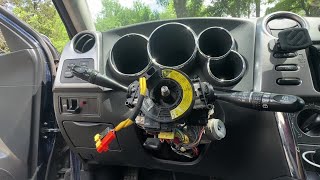
- Faulty Clockspring (Common) — The clockspring is a coiled ribbon cable behind the steering wheel that maintains electrical connections for the driver's airbag, horn, and steering wheel controls. A break in this ribbon interrupts the pretensioner circuit, 🎬 Watch: How to replace a clock spring and fix the horn. often triggering codes for the airbag as well (e.g., B0026).
- Faulty Driver's Seat Belt Buckle Switch (Honda) (Less Common) — On models like the 2001-2005 Honda Civic, the switch inside the seat belt buckle that detects if the belt is latched fails. This switch is part of the SRS system, and its failure logs a fault code (often Honda-specific code 9-3 🎬 See this complete procedure for fixing the Honda buckle switch.) and illuminates the SRS light.
- Corroded Front Crash Sensor (Ford F-150) (Less Common) — On 2004-2008 Ford F-150s, the single front crash sensor on the radiator support is highly susceptible to corrosion. This causes the sensor to crack or the wiring pigtail to fail, creating an open circuit and triggering the airbag light.
- Cracked Solder Joints in Overhead Console (Subaru) (Less Common) — A known issue in 2005-2009 Subaru models (Outback, Legacy) is that cracked solder joints on the overhead console circuit board, which contains the passenger airbag status lights, causes a high-resistance fault in the SRS system.
- Faulty Restraints Control Module (RCM) (Rare) — In rare cases, the control module that monitors and fires the safety systems fails. It falsely reports an open circuit when the wiring and components are fine. This is a last resort diagnosis considered only after exhaustively testing all other possibilities.
Symptoms
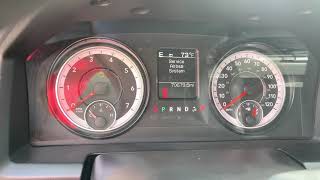
- Airbag Warning Light On — The most common symptom is a continuously illuminated airbag or SRS (Supplemental Restraint System) warning light on the dashboard. This light does not turn off until the fault is repaired.
- Service Airbag System Message — Your vehicle's information display shows a text warning like "Service Airbag System" or "Passenger Restraint System Fault".
- Flashing Airbag Light Followed by Solid Light — Upon starting the vehicle, the airbag light flashes a specific pattern (a Light Flash Code or LFC) for a few seconds before staying on permanently. This code pinpoints the fault area before using a scanner.
- Horn or Steering Wheel Controls Not Working — If the clockspring is the cause, you lose function of the horn, radio controls, or cruise control buttons located on the steering wheel.
- Seat Belt Light Behaves Abnormally — In vehicles where a buckle switch is the root cause (like older Honda Civics), the seat belt warning light stays on even when buckled, or fails to illuminate at all.
Diagnostic Flowchart
Tap your situation to follow the diagnostic path that matches what you're seeing on this code.
Common Fixes & Costs
- Repairing Damaged Wire/Connector Under Seat
— Parts: $5-$30, Labor: $125-$250, ~1 hr book time
(DIY)
2007-2012 Chevrolet Silverado 1500: OEM - Replacing the Seat Belt Pretensioner Assembly
— Parts: $200-$450, Labor: $150-$300, ~1.5 hr book time
(Intermediate)
Chevrolet/GMC Trucks/SUVs (2019-2020): OEM
Chevrolet/GMC Trucks (Extended Cab): OEM
Chevrolet/GMC Trucks: OEM - Replacing the Clockspring
— Parts: $75-$400, Labor: $200-$350, ~2 hr book time
(Professional)
Various Ford/Lincoln/Mercury: OEM - Replacing the Seat Belt Buckle Assembly (Honda) — Parts: $250-$400, Labor: $100-$200, ~1 hr book time (Intermediate)
- Replacing the Restraints Control Module (RCM)
— Parts: $500-$800, Labor: $150-$300, ~1.5 hr book time
(Professional)
2018-2020 Ford F-150: OEM
DIY vs Professional
- Repairing Damaged Wire/Connector — Beginner: Yes
Tools: Wrench set (for battery), flashlight, zip ties, electrical contact cleaner. For wire repair: wire strippers, solder, heat shrink tubing or quality butt connectors. - Replacing Seat Belt Pretensioner — Beginner: No
Tools: SRS-capable scanner, wrench and socket set, Torx bit set, trim removal tools, torque wrench. - Replacing the Clockspring — Beginner: No
Tools: SRS-capable scanner, socket set, torque wrench, steering wheel puller, trim removal tools, screwdriver set. - Replacing the RCM — Beginner: No
Tools: Socket set, trim removal tools, advanced scan tool for programming.
Used vs. New Parts: Buying Guide
When a used part is worth it: Buying a used seat belt pretensioner is NOT recommended. These are one-time-use pyrotechnic safety devices. You have no way of knowing if a used part from a salvage yard has been exposed to moisture, stress from a minor accident, or has internal faults. The small cost savings do not justify the immense safety risk.
Donor-vehicle mileage cap: roughly under 10000 miles for the part to have meaningful remaining life.
Donor quality checklist:
- Only consider a 'used' part if it is from a very low-mileage vehicle scrapped for reasons completely unrelated to the body or interior (e.g., severe engine failure).
- Never buy a pretensioner 'rebuilt' by anyone other than a certified remanufacturing service that provides a warranty.
- Avoid parts from flood-damaged or high-humidity climate vehicles due to corrosion risk.
Decision logic:
- If The part is a pyrotechnic safety device (pretensioner, airbag). → Always buy new OEM or a professionally remanufactured unit with a warranty.
- If The part is purely electronic (like an RCM) and the budget is extremely tight. → A used module from a reputable salvage yard with a return policy and exact part number match is an option, but it requires costly programming at a dealership.
- If The part is a clockspring. → New aftermarket is often the best value. Used is risky as you don't know its remaining lifespan.
Warranty tradeoff: Used parts from salvage yards typically have a 30-90 day warranty at best, which only covers the part itself, not the labor to install it. New OEM or high-quality aftermarket parts come with a 1-year or longer warranty.
Worst-case if a used part fails: $250-$500 if a used pretensioner is faulty. This includes the cost of repeat labor for installation plus the cost of buying the correct new part you should have bought initially.
What Happens If You Wait — Timeline
- Immediate (0 seconds): The RCM detects the open circuit during its startup self-test. The airbag/SRS warning light illuminates and stays on. The driver's seat belt pretensioner is immediately disabled. The driver's airbag is often disabled as a fail-safe. (MPG impact: 0%% · Added cost: $0)
- First Drive: The vehicle is drivable but the driver is exposed to a significantly higher risk of injury in a frontal collision. Studies show pretensioners reduce the risk of severe injury by over 12%. There is no mechanical damage or performance loss. (MPG impact: 0%% · Added cost: N/A (Risk of injury is the 'cost'))
- Next Vehicle Inspection: The vehicle automatically fails the safety inspection in any state that checks the SRS system. You are unable to legally register the vehicle until the fault is repaired. The cost is the failed inspection fee plus the mandatory repair cost. (MPG impact: 0%% · Added cost: $20-$50 (failed inspection fee) + $150-$700 (eventual repair cost))
- In the event of a collision: The disabled pretensioner fails to remove seatbelt slack. The driver's body moves further forward, increasing the likelihood and severity of impact with the steering wheel and airbag. This is the point where the non-financial cost of not fixing the issue is realized through preventable injury. (MPG impact: 0%% · Added cost: Potentially catastrophic (medical bills, loss of life))
Cost of Not Fixing It
- Immediate: The driver's seat belt pretensioner and possibly the entire airbag system are disabled. In a collision, the risk of serious or fatal injury to the driver is significantly increased. (Added cost: N/A)
- Next Vehicle Inspection: The vehicle automatically fails its safety inspection in most states that have one. This prevents you from legally registering or selling the vehicle. (Added cost: $20-$50 (for the failed inspection fee) + cost of required repair)
- Long-Term: There is no direct mechanical damage to other components from ignoring B1186. The cost is entirely related to compromised safety and the eventual necessity of repair to pass inspection or sell the car. The primary cost is the extreme and unnecessary safety risk to the driver. (Added cost: N/A)
Diagnosis Steps
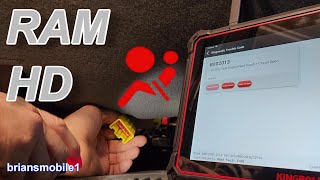
- Scan for Codes with an SRS-Capable Scanner
Use an OBD-II scanner that reads SRS/Airbag codes (B-codes, C-codes, and U-codes, not just P-codes for the engine). Confirm that B1186 is the active code and note any other related codes. This is the critical first step to avoid guessing.
Tools: SRS-capable OBD-II Scanner (Beginner) - Safety First: Depower the SRS System
Disconnect the negative battery terminal and wait at least 15 minutes. This discharges the system's backup power capacitors and prevents accidental deployment of the airbags or pretensioners, which causes serious injury. Always err on the side of waiting longer.
Tools: Wrench set (Beginner) - Visual Inspection Under the Seat
Look under the driver's seat for a bright yellow connector and its associated wiring loom. Check for obviously broken wires, pinched wires between the seat rails, or a connector that is unplugged or loose. Reconnecting it securely or using a zip-tie to prevent it from pulling loose often solves the problem.
Tools: Flashlight (Beginner) - Inspect and Clean the Connector
With the system depowered, unplug the yellow connector under the seat. Visually inspect the male and female pins for any green or white corrosion, or for female pins that look spread apart. Clean the pins carefully with a small brush and electrical contact cleaner. Reconnect it firmly until it clicks.
Tools: Electrical contact cleaner, small brush (Intermediate) - Test Pretensioner Circuit Resistance
Using a quality multimeter set to Ohms (Ω), carefully probe the two pins on the pretensioner side of the connector. A healthy pretensioner squib reads between 2.0 and 3.5 ohms. A reading of 'OL' (Open Loop) or infinite resistance indicates the pretensioner failed and must be replaced. A reading below 1.0 ohm indicates a short (a different code, like B1185).
Tools: Multimeter (Advanced) - Pro Tip: Circuit Test with SRS Resistor
Mechanics use a special SRS-safe resistor (typically 2.2 to 3.0 ohms) as a diagnostic tool. With the pretensioner disconnected, plug the test resistor into the vehicle-side harness connector. Reconnect the battery, clear the codes, and see if code B1186 returns. If the code is gone, it proves the wiring and RCM are good, and the fault is in the pretensioner itself. If the code returns, the fault is upstream in the wiring or RCM.
Tools: SRS diagnostic resistor tool (Professional) - Advanced: Check Live Data PIDs
Using an advanced bidirectional scan tool, navigate to the SRS/RCM module and view live data. Look for PIDs labeled 'Driver Pretensioner Resistance' or similar. The value should be stable and within the typical 2.0-3.5 ohm range. Wiggle the under-seat connector and harness; if the reading jumps to 'Open' or a very high value, you located an intermittent connection.
Tools: Advanced bidirectional scan tool (Advanced) - Pro Tip: The 'Wiggle Test'
While a helper watches a live data stream of the pretensioner circuit resistance on a high-end scan tool, systematically wiggle and manipulate the wiring harness. Start at the pretensioner connector, move along the harness under the carpet, and up towards the RCM. A sudden spike in resistance or an 'Open' reading on the scanner when you wiggle a specific spot reveals the exact location of the intermittent break.
Tools: Advanced scan tool with live data, an assistant (Professional) - Test Wiring Continuity to RCM
This advanced step involves checking for a break in the wire between the Restraints Control Module (RCM) and the pretensioner connector. You need a vehicle-specific wiring diagram to identify the correct pins at the RCM connector. With both ends disconnected, check for continuity (a reading near 0 ohms) on each wire. An 'OL' reading means the wire is broken somewhere in the harness.
Tools: Multimeter, vehicle-specific wiring diagram (Advanced)
When This Code Triggers (Freeze-Frame Conditions)
- System Self-Test: Key On, Engine Off (The Restraints Control Module (RCM) performs a primary check of all SRS components for six to ten seconds immediately after the ignition is turned to the 'ON' position. If the open circuit is detected during this initial self-test, the airbag light remains illuminated.)
- Continuous Monitoring: Vehicle in Operation (After the initial startup check, the RCM continuously monitors the resistance of all safety device circuits while the vehicle is running. A fault triggers instantly if a wire breaks or a connector comes loose during driving.)
- Battery Voltage: 11.5V - 14.5V (The SRS self-test runs when the vehicle is started. Low battery voltage during cranking sometimes causes erroneous fault codes in sensitive electronic modules, although B1186 typically points to a physical circuit break.)
- Vehicle State: Stationary or Driving (Unlike engine codes that trigger under specific load or temperature conditions, an SRS circuit fault like B1186 is detected and stored whether the vehicle is parked or in motion.)
Related Codes
- B1185 — This code means 'Driver Pretensioner Circuit Short to Ground.' B1186 indicates a break in the wire (open), while B1185 indicates the wire is touching the vehicle's metal frame (short). The diagnostic approach is different; testing for a short involves checking for continuity between the signal wire and a known good ground.
- B1193 — This is a more general code for 'Driver/Passenger Air Bag Circuit Short to Ground or Open'. It often appears with B1186 if the fault is in a shared component like the clockspring or RCM. If B1193 is present, diagnosis focuses on components common to both the airbag and pretensioner circuits.
- B0026 — This code, 'Driver Frontal Deployment Loop Open', points specifically to the driver's airbag circuit. If it appears with B1186, the clockspring is the most likely cause as it contains the wiring for both components. Diagnosing involves testing continuity of both circuits through the clockspring.
- Honda Code 9-3 — This is a manufacturer-specific code for 2001-2005 Honda Civics that directly translates to a 'Faulty driver's seat belt buckle switch.' It is a common cause of the SRS light in these vehicles and is diagnosed by observing the switch's status with a scan tool while latching and unlatching the belt.
- Dodge Codes B1B02 / B1B06 — On many Dodge/Ram/Chrysler vehicles, these codes are used for 'Driver Pretensioner Circuit Open' for stage 1 and stage 2 squibs, respectively. They are functionally identical to B1186 and follow the same diagnostic path.
Climate & Environmental Factors
- High Humidity / Moisture: Moisture, from humidity, spills, or water leaks, is a primary catalyst for corrosion on connector pins and circuit boards. Road salt in winter climates dramatically accelerates this corrosion, leading to high resistance or open circuits.
- Extreme Cold: Very cold temperatures make the plastic insulation on wires and connectors brittle. As the materials contract and become less flexible, they are more likely to crack or break, especially if stressed by seat movement or vibration.
How to Talk to a Mechanic About This Code
Say this: "I have an airbag light on, and my scanner is showing code B1186, which I believe is for the driver's seat belt pretensioner circuit. Before we look at replacing any expensive components, could you please start by performing a thorough visual inspection of the wiring and the yellow connector under the driver's seat? I understand this is the most common point of failure."
This signals to the shop that you are informed and directs them to the most likely, and cheapest, fix first. It prevents them from immediately quoting an expensive pretensioner or clockspring replacement without proper diagnosis and establishes a logical, cost-effective diagnostic path.
Avoid saying:
- 'My airbag light is on, can you fix it?' (This is too vague and invites a high quote for the worst-case scenario.)
- 'Just replace the seat belt thing.' (This encourages part-swapping without diagnosis, and you pay for a part you don't need.)
- 'Do whatever you think is best.' (This gives up all control over the diagnostic process and cost.)
Questions to ask before authorizing the repair:
- If you are recommending a pretensioner replacement: Did you measure the resistance across the old pretensioner's pins, and did it read open or out of spec?
- If you are recommending a clockspring replacement: Did you also find codes for the driver's airbag (like B0026), or did you lose horn/steering wheel controls?
- Before replacing any parts, did you test the vehicle-side harness with a circuit load tester (SRS resistor) to confirm the wiring and module are good?
- Can you show me the damaged wire or corroded connector pin causing the problem?
- What is the warranty on both the parts and the labor for this specific repair?
Where to Take It: Dealer vs Independent vs Chain
- Dealer:
A strong choice, especially for Honda, Ford, and Dodge/Ram owners, due to the high likelihood of warranty or recall coverage for this specific issue. The safest, but most expensive, option for out-of-warranty repairs.
Best for: Vehicles under any kind of warranty., Checking for open recalls or secret warranty extensions related to SRS wiring (common on Ford, Dodge/Ram)., Complex manufacturer-specific issues (e.g., the Toyota B1186 definition quirk)., Repairs you want backed by a nationwide corporate warranty.
Downsides: Highest labor rates, typically $150-$250 per hour., Defaults to replacing a full assembly rather than repairing a simple wire to minimize risk. (Typical cost: +50% vs. baseline) - Independent Shop:
Excellent choice if you find a well-regarded shop with strong electrical diagnostic skills. Ask if they are ASE-certified in electrical systems (A6) and comfortable working on SRS systems. They are more likely to perform a cost-effective wire repair instead of a full component replacement.
Best for: Out-of-warranty vehicles where cost is a major factor., Shops that specialize in automotive electrical systems., Building a long-term relationship with a mechanic you trust.
Downsides: Quality and expertise vary widely; you must vet the shop's reviews and certifications (ASE)., Lacks access to the very latest manufacturer-specific service bulletins. (Typical cost: +0% vs. baseline) - Chain Shop:
AVOID. An SRS fault is a safety-critical, complex electrical issue. This is not the type of repair suited to the chain shop model. The risk of misdiagnosis or improper repair is too high.
Best for: Simple, high-volume jobs like tires, brakes, and oil changes.
Downsides: Technicians are often not equipped or trained for complex electrical or SRS diagnostics., Business model pressures technicians to upsell, potentially leading to misdiagnosis of a nuanced electrical fault. (Typical cost: -10% vs. baseline)
When to Walk Away From the Repair
If the total estimated repair cost for the B1186 fault exceeds 50% of your car's private-party value (from a source like Kelley Blue Book), it's time to seriously consider selling or scrapping the vehicle. Unlike a check engine light, an airbag light makes the car unsellable to most private buyers and guarantees a failed safety inspection, forcing your hand.
- Car worth $8000, fix is $250: Fix it. A simple wiring repair is a tiny fraction of the car's value and makes it safe and sellable again.
- Car worth $4000, fix is $750: Borderline, but likely worth fixing. This represents about 19% of the car's value. Get a second opinion to confirm the diagnosis before proceeding.
- Car worth $2500, fix is $1200: Walk away. The repair cost is nearly 50% of the car's value. It's very likely that a car of this value has other expensive needs soon. Do not sink this much money into it.
What Scan Tool You Need for This Code
Minimum: A scanner that reads and clears Supplemental Restraint System (SRS) / Airbag codes. These are typically 'B' codes, and a basic $20 engine code reader will not work.
A standard OBD-II engine code reader does not communicate with the SRS control module. It shows 'No Codes Found' even with the airbag light on, leading to wasted time and confusion. You MUST use a tool that explicitly lists ABS and SRS/Airbag system compatibility.
Budget: Autel AutoLink AL619 (~$70) — Reads and clears engine, ABS, and SRS (airbag) codes. It correctly identifies the B1186 code and allows you to clear it after the repair is complete. An excellent value for DIYers who need to diagnose safety system lights.
Mid-range: FOXWELL NT604 Elite / BlueDriver Pro (~$120) — In addition to reading/clearing SRS codes, these tools display live data streams from the SRS module. This is extremely useful for diagnosing B1186, as you watch the 'Driver Pretensioner Resistance' value in real-time while wiggling the under-seat connector to pinpoint an intermittent open circuit.
Professional: Autel MaxiCOM MK808 / Launch X431 Series (~$450-900) — Offers full bidirectional control, allowing a technician to command modules and test circuits directly from the tool. For an RCM replacement, these tools perform the necessary programming and calibration required to make the new module work with the vehicle. This is professional-level equipment.
Rent vs buy: Most auto parts stores like AutoZone offer a free 'code reading' service, but their basic tools typically CANNOT read SRS/Airbag codes. They offer a more capable scanner through a 'loan-a-tool' program, where you pay a deposit refunded upon return. Call your local store and specifically ask if their loaner tool reads 'SRS' or 'Airbag' codes before making the trip. If you plan to do your own repairs more than once, buying a budget pick like the Autel AL619 is a worthwhile investment.
How to Clear the Code After You Fix It
- Ensure the physical fault (e.g., broken wire, faulty component) has been correctly repaired.
- Reconnect the negative battery terminal.
- Use an SRS-capable OBD-II scan tool to access the Restraints Control Module (RCM).
- Select the function to 'Clear Codes' or 'Erase DTCs'.
- Turn the ignition off, then turn it back to the 'ON' position and observe the airbag light. It illuminates for its self-test (approx. 6-7 seconds) and then turns off.
Drive cycle (~10 minutes): Unlike engine codes, the SRS system does not require a complex drive cycle. After clearing the code, the RCM performs a self-test at every key-on event. A short test drive of about 10 minutes is sufficient to confirm that the light stays off and the fault does not reappear during normal operation.
Readiness monitors affected: SRS System Monitor
Watch out for:
- Simply disconnecting the battery does not clear a hard SRS fault code like B1186; a scanner is required.
- Using a basic OBD-II scanner that only reads 'P' (powertrain) codes cannot communicate with the SRS module or clear the code.
- If the airbag light returns immediately after clearing, the root cause of the open circuit has not been fixed, and further diagnosis is required.
Will This Fail Emissions / State Inspection?
No — by itself this code doesn't fail OBD inspection (but it can keep readiness monitors from setting, which causes a separate fail).
- California: An airbag light does NOT cause a failure of the California Smog Check, as the emissions test is separate from the safety inspection. However, a DMV examiner refuses to conduct a driving test in a vehicle with an active airbag light.
- New York: As of recent regulations, an illuminated airbag warning lamp is noted as an advisory during the safety inspection but is NOT a cause for rejection or failure.
- Texas: An airbag light is NOT an inspected item and does not cause a vehicle to fail the Texas state safety inspection. The inspection focuses on other items like brakes, lights, horn, and emissions in applicable counties.
Most Commonly Affected Vehicles
- Ford F-150 (2004-2014) — Extremely common. In addition to under-seat wiring, 2004-2008 models frequently suffer from a corroded front crash sensor on the radiator support or a burnt-out passenger airbag indicator bulb, which triggers a system fault. Recalls were issued for 2004-2006 models for wiring issues that cause accidental deployment.
- Dodge / Ram 1500 / 2500 (2009-2018) — Highly prone to this code from wiring damage under the driver's seat caused by normal seat adjustment. The related codes B1B02 and B1B06 are often used by Dodge for the same fault. Recalls like NHTSA 15V-467 (Chrysler R36) were issued for 2012-2014 trucks for steering wheel wiring that shorts and deploys the airbag.
- Chevrolet / GMC Silverado / Sierra (2007-2013) — The large connector block under the power driver's seat is a known weak point. The plastic housing becomes brittle and cracks, leading to a poor connection and a 'Service Air Bag' message.
- Honda Civic (2001-2005) — Very common for the SRS light to be caused by a faulty driver's seat belt buckle switch, which logs a manufacturer-specific code 9-3. Honda offers a lifetime warranty on seat belt components that fail during normal use, which often covers this repair.
- BMW 3-Series (E46, E90), 5-Series (E60) (2002-2012) — Airbag lights are frequently caused by a failed passenger seat occupancy sensor mat (often code 93C3). While not a B1186 cause, it's the most common SRS fault on these cars. The fix is often a bypass emulator that keeps the passenger airbag permanently active.
- Subaru Outback, Legacy (2005-2009) — A unique and common cause is cracked solder joints on the circuit board for the passenger airbag status lights in the overhead map light console. This is often repairable with basic soldering skills.
- Ford Escape (2008-2012) — Similar to other Fords, the under-seat connector is a frequent failure point leading to this code. Check for spread pins or corrosion.
- Dodge Challenger / Charger (2011-2014) — Often experiences open circuits in the side airbag or pretensioner connectors within the seat itself, requiring seat disassembly to access and repair. Safety Recall N07 (NHTSA 13V-118) was issued for 2011-2012 models for intermittent connections in the front seat airbag wiring harness.
Manufacturer-Specific Notes
- Ford: Ford systems are very sensitive to small changes in resistance. The pins in the under-seat connector often spread apart, creating a poor connection. On 2004-2008 F-150s, a burnt-out bulb in the Passenger Airbag Deactivation (PAD) light assembly sets a fault code. Multiple recalls (e.g., NHTSA 11V-198) have been issued for 2004-2006 F-150s for wiring harness issues.
- General Motors (GM): On many GM trucks and SUVs, the main failure point is the large connector block under the driver's seat. The constant back-and-forth motion of a power seat stresses the wiring, leading to breaks inside the insulation where they are not visible. The plastic connector housing itself also cracks.
- Toyota: CRITICAL: On many Toyota vehicles (Sienna, Corolla, 4Runner), code B1186 is defined as 'Open in P Squib Circuit,' which refers to the PASSENGER side airbag, not the driver pretensioner. It is absolutely essential to use a scanner that specifies the location (Driver vs. Passenger) to avoid misdiagnosing and replacing the wrong, expensive part.
- Hyundai / Kia: Do not confuse with code P1186. On Hyundai/Kia vehicles, P1186 is a common code for 'Fuel Pressure Too Low' and is completely unrelated to the airbag system. Airbag system faults have a 'B' prefix. A high resistance code for a pretensioner is something like B1346.
- Honda: Honda provides a lifetime warranty on seat belts that fail to function properly during normal use. This often covers the common failure of the driver's seat belt buckle switch on models like the 2001-2005 Civic, which causes the SRS light to illuminate. Owners should contact a dealer to check for coverage before paying for repairs.
- Dodge / Ram / Chrysler: Numerous recalls exist for wiring issues. NHTSA campaign 13V-118 (Recall N07) addresses intermittent connections in front seat airbag wiring on 2011-2012 Challengers, Chargers, and 300s. NHTSA 15V-467 (Recall R36) addresses steering wheel wiring that rubs and shorts out on 2012-2014 Ram trucks. A warranty extension (X69) was also issued for the upper seat belt guide on some 2014-2015 Durango and Grand Cherokee models.
Real Owner Stories
2012 Ram 1500 with recurring airbag light
Airbag light came on. The owner paid the dealership $900 for two recall-related repairs, but the light returned a week later.
What they tried:
- The owner found a loose wire in the connector under the driver's seat and secured it with electrical tape, which fixed the problem for several months.
- The light returned after an object got tangled in the under-seat wires.
- The owner performed a permanent repair by rewiring the connector themselves.
Outcome: The initial DIY fix of securing the loose wire worked temporarily, confirming the fault was in the under-seat connector, not the expensive components replaced by the dealer.
Lesson: Always perform a thorough visual inspection of the under-seat wiring before paying for major component replacement. A loose connector or damaged wire is the most common cause, and a simple, secure repair saves hundreds of dollars.
2005-2009 Subaru Outback/Legacy with airbag light
The airbag light came on without any other symptoms. The cause was not immediately obvious from a visual inspection of the seats or steering column.
What they tried:
- Initial diagnosis with a standard scanner failed to pinpoint the unique cause.
- Forum research indicated a common problem in these specific models related to the overhead console.
Outcome: The root cause was identified as cracked solder joints on the circuit board inside the overhead map light console, which contains the passenger airbag status lights. Re-soldering the cracked joints permanently fixed the problem and turned off the airbag light.
Lesson: For certain vehicles like 2005-2009 Subarus, the cause of an SRS fault is in an unusual location. Searching forums for your specific make, model, and year reveals common, non-obvious fixes repairable with basic skills.
2001-2005 Honda Civic with SRS light and code 9-3
The SRS light illuminated on the dashboard. A scan with an SRS-capable tool revealed Honda-specific code 9-3.
What they tried:
- Research showed that code 9-3 translates to a 'Faulty driver's seat belt buckle switch'.
- Some owners attempted to fix this by spraying electrical contact cleaner into the buckle mechanism, which worked temporarily.
- The owner contacted a Honda dealership to inquire about warranty coverage.
Outcome: The owner discovered Honda has a lifetime warranty on seat belt components that fail during normal use. The dealership confirmed the buckle switch was covered and replaced the driver's seat belt buckle assembly free of charge.
Lesson: Before paying for repairs on seat belt components, especially on a Honda, always check with a dealership about potential warranty coverage. Honda's lifetime seat belt warranty covers common failures like the buckle switch, saving the entire cost of the repair.
How to Prevent This Code From Triggering
- Secure Under-Seat Harness (Once, or after any seat adjustment) — Use zip-ties to secure the yellow connector's wiring harness to a non-moving part of the seat frame. This creates slack and provides strain relief, preventing the wires from being pulled or stressed during seat movement, which is the #1 cause of this code.
- Apply Dielectric Grease to Connectors (During any SRS-related repair) — Applying a thin layer of non-conductive dielectric grease to the connector pins and seals creates a barrier against moisture, oxygen, and road salt. This prevents the corrosion that leads to high resistance and open circuit faults.
- Avoid Storing Items Under the Seat (Daily habit) — Objects stored under the driver's seat shift and snag, pinch, or disconnect the delicate SRS wiring harness and connector. Keeping this area clear is a simple way to prevent physical damage.
- Use Protective Conduit or Sleeving (If wiring is exposed or in a harsh environment) — For wiring harnesses routed in vulnerable areas, adding a layer of automotive-grade flexible conduit or woven sleeves protects the wires from abrasion, impact from road debris, and moisture.
- Regularly Clean Vehicle Interior (Seasonally) — Regularly cleaning and drying the vehicle's carpets, especially in winter or humid climates, reduces ambient moisture. This prevents a corrosive environment from developing around low-lying electrical connectors under the seats.
Frequently Asked Questions
What does 'squib' mean in an airbag system?
A squib is a small, precise pyrotechnic initiator. When the Restraints Control Module detects a crash, it sends an electrical current to ignite the squib's chemical propellant. This instantly generates gas pressure to forcefully retract the seatbelt pretensioner or inflate the airbag.
Why are airbag system connectors always yellow?
The bright yellow color is a universal automotive safety standard indicating the Supplemental Restraint System (SRS). It serves as a visual warning to technicians to follow proper safety procedures, like disconnecting the battery. This prevents accidental deployment and severe injury during service.
Can I use a regular multimeter to test airbag components?
Yes, but with extreme caution and only when the battery is fully disconnected. A standard multimeter sends a small electrical current that is usually too low to deploy an airbag, but it carries a slight risk. The safest method is using a dedicated 2.2-3.0 ohm SRS diagnostic resistor tool on the circuit side.
How long should I disconnect the battery before working on the SRS system?
Service manuals require waiting between 90 seconds and 30 minutes for the RCM capacitors to fully discharge. To guarantee safety, disconnect the negative battery terminal and wait a minimum of 15 minutes. Never touch any yellow SRS connector before this time elapses.
I have a Hyundai/Kia with code P1186, is this an airbag problem?
No, code P1186 on Hyundai and Kia vehicles indicates a fuel system problem, specifically 'Minimum Pressure at Engine Speed Too Low.' Airbag codes always start with a 'B' for Body, not 'P' for Powertrain. Diagnose your fuel filter, pump, and pressure sensor instead.
Can I just clear the B1186 code?
No, B1186 is a hard fault indicating a persistent open electrical circuit. The RCM continuously monitors this circuit, so the code returns instantly upon startup if the physical break is not repaired. The airbag light remains illuminated until the underlying issue is fixed.
Will my car pass inspection with the B1186 code?
No. In jurisdictions with vehicle safety inspections, an active airbag or SRS warning light is an automatic failure. You must repair the fault and clear the code to legally register or pass inspection.
Key Takeaways
- Code B1186 disables the driver's seat belt pretensioner due to an open electrical circuit, significantly increasing injury risk in a frontal collision.
- The most common cause is a loose or damaged yellow wiring connector under the driver's seat, often triggered by adjusting the seat position.
- Always disconnect the negative battery terminal and wait 15 minutes before touching any yellow SRS connectors to prevent accidental airbag deployment.
- On many Toyota vehicles, B1186 specifically refers to the passenger side airbag circuit, requiring diagnosis on the opposite side of the car.
Helpful Videos


Shop the Parts Behind B1186
Below are the parts most often responsible for code B1186, ranked by how frequently each one is the actual culprit (per the diagnosis above). Tap any to see what we have for your vehicle.


The information in this article is provided for general reference and educational purposes only. Vehicle specifications, procedures, and part compatibility can vary by production date, trim level, and region. Always consult your vehicle's factory service manual and verify part numbers before purchasing or performing repairs. Safety-critical components such as airbags, seat belts, and braking systems should be installed by a qualified professional.
- 🧭 Diagnostic Flowchart
- 🎬 Helpful Videos
- 🛍️ Shop This Part
- What Does B1186 Mean?
- Can I Drive With B1186?
- Common Causes
- Symptoms
- Common Fixes & Costs
- DIY vs Professional
- Used vs. New Parts: Buying Guide
- What Happens If You Wait — Timeline
- Cost of Not Fixing It
- Diagnosis Steps
- When This Code Triggers (Freeze-Frame Conditions)
- Related Codes
- Climate & Environmental Factors
- How to Talk to a Mechanic About This Code
- Where to Take It: Dealer vs Independent vs Chain
- When to Walk Away From the Repair
- What Scan Tool You Need for This Code
- How to Clear the Code After You Fix It
- Will This Fail Emissions / State Inspection?
- Most Commonly Affected Vehicles
- Manufacturer-Specific Notes
- Real Owner Stories
- 2012 Ram 1500 with recurring airbag light
- 2005-2009 Subaru Outback/Legacy with airbag light
- 2001-2005 Honda Civic with SRS light and code 9-3
- How to Prevent This Code From Triggering
- Frequently Asked Questions
- What does 'squib' mean in an airbag system?
- Why are airbag system connectors always yellow?
- Can I use a regular multimeter to test airbag components?
- How long should I disconnect the battery before working on the SRS system?
- I have a Hyundai/Kia with code P1186, is this an airbag problem?
- Can I just clear the B1186 code?
- Will my car pass inspection with the B1186 code?
- Key Takeaways
- 🎟️ Get 5% Off