
OBD-II Code B1275: Headlight Switch 'Off' Circuit Problem
The Ultimate Guide: What B1275 Means, Why It Triggers, and Exactly How to Fix It
- Code B1275 indicates a failure in the headlight switch 'Off' circuit, with a faulty combination switch causing over 80% of these faults.
- Headlights stuck in the 'On' position are the primary symptom, requiring immediate battery disconnection to prevent a $150-$350 replacement.
- The simultaneous presence of codes B1276, B1277, or B1278 guarantees the entire combination switch assembly has failed and requires replacement.
- Verify your vehicle's specific code definition, as Ford and Hyundai use B1275 to indicate a climate control blend door failure rather than a headlight issue.
What Does B1275 Mean?
Code B1275 indicates the Body Control Module (BCM) is receiving an incorrect or missing signal from the headlight switch's 'Off' position. The computer detects an electrical circuit fault, causing headlights to stay on, flicker, or fail completely.
Technical definition: The SAE/OBD-II definition is "Headlight Switch OFF Position Circuit Malfunction". The BCM continuously monitors switch input signals and sets this DTC when it detects an illogical condition, such as simultaneous 'On' and 'Off' signals, or unexpected resistance on the 'Off' monitoring circuit.
Can I Drive With B1275?
Yes, But With Caution. Daytime driving is safe. However, this fault presents a severe safety risk at night or in poor visibility, as headlights can fail to turn on, turn off unexpectedly, or flicker. If the headlights remain stuck on after parking, they will drain the battery, requiring a jump-start or a $150-$350 battery replacement.
Common Causes
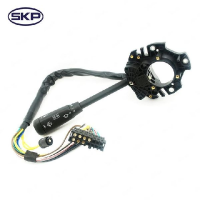
- Faulty Combination Light Switch (Very Common) — The internal contacts of the headlight switch wear out, break, or corrode over time. This sends an erratic or constant 'On' signal to the BCM, making it the root cause in over 80% of B1275 cases.
- Wiring Harness or Connector Failure (Common) — A broken wire, short to ground, or corroded connector interrupts the signal between the switch and the BCM. High humidity accelerates corrosion at the switch connector pins.
- Blown Fuse or Faulty MICU/Relay (Less Common) — A blown fuse cuts power to the circuit. On modern Hondas and Acuras, a failing Multiplex Integrated Control Unit (MICU)—integrated into the under-dash fuse box—mimics a bad switch.
- Faulty Body Control Module (BCM) (Rare) — The BCM suffers an internal hardware failure or software glitch, preventing it from interpreting a valid switch signal. This is a last-resort diagnosis after ruling out the switch and wiring.
- Incorrectly Installed Aftermarket Accessories (Rare) — Improperly wired remote starters, alarms, or LED/HID kits back-feed voltage into the lighting circuit, altering resistance and confusing the BCM.
Symptoms
- Headlights will not turn off — The headlights remain illuminated even when the switch is turned to 'Off' and the key is removed, rapidly draining the battery.
- Erratic headlight behavior — Headlights flicker, turn on and off randomly, or fail to respond to the 'Auto' setting due to unstable switch signals.
- Headlights fail to turn on — The circuit failure prevents the headlights from activating in any position, creating an immediate nighttime driving hazard.
- Dashboard warning light — A general electrical fault or specific exterior lighting warning indicator illuminates on the instrument cluster.
Diagnostic Flowchart
Tap your situation to follow the diagnostic path that matches what you're seeing on this code.
Common Fixes & Costs
- Replacing the Combination Light Switch — Parts: $40-$150, Labor: $100-$200, ~1.2 hr book time (Intermediate)
- Repairing Damaged Wiring or Connectors — Parts: $5-$25, Labor: $125-$400, ~2.5 hr book time (Advanced)
- Replacing the MICU / Under-Dash Fuse Box (Honda/Acura) — Parts: $200-$600, Labor: $150-$300, ~2 hr book time (Advanced)
- Replacing the Body Control Module (BCM) — Parts: $150-$800, Labor: $125-$300, ~2.2 hr book time (Professional)
- Electrical System Diagnosis — Parts: $0, Labor: $100-$200, ~1.5 hr book time (Professional)
Used vs. New Parts: Buying Guide
When a used part is worth it: For older vehicles on a strict budget. A used OEM switch from a low-mileage donor is often superior to a cheap, unbranded aftermarket part.
Donor-vehicle mileage cap: roughly under 70000 miles for the part to have meaningful remaining life.
Donor quality checklist:
- Match the part number exactly, including suffixes for 'Auto' or fog light features.
- Visually inspect connector pins for green corrosion or heat discoloration.
Decision logic:
- If Vehicle is newer or has low mileage → Buy a new OEM part for guaranteed longevity and warranty.
- If Budget is tight and the vehicle is older → Source a low-mileage used OEM part.
- If Multiple new aftermarket switches have failed → Purchase a new OEM part, as aftermarket quality control is notoriously poor for electrical switches.
Warranty tradeoff: Salvage yards offer 30-90 days. New OEM parts offer 1-year warranties and the highest reliability.
Worst-case if a used part fails: $100-$250 in repeated labor if a cheap part fails prematurely.
What Happens If You Wait — Timeline
- 0-1 month: Intermittent fault. Headlights flicker occasionally or fail to turn off on the first try. (Added cost: $0)
- 1-3 months: Fault becomes frequent. Headlights regularly stay on after parking. Code becomes 'active'. (Added cost: $0-$50 for jump-start services.)
- 3-6 months: Hard fault. The 'Off' circuit fails completely. Headlights stay on every time the car is parked. (Added cost: $150-$350 for a prematurely worn-out battery.)
- 6+ months: Catastrophic failure. Internal contacts break entirely, causing a total loss of headlight function. (Added cost: $500-$900+ for battery and alternator replacement.)
Cost of Not Fixing It
- Immediate: Severe safety risk if headlights fail to turn on or flicker off while driving at night. (Added cost: N/A)
- 0-1 Month: Dead battery due to headlights staying on after parking, leaving you stranded. (Added cost: $150-$350 for a new battery if deep-cycled beyond recovery.)
- 1-6+ Months: Permanent failure of the headlights in either the 'on' or 'off' state. Repeated jump-starts strain the alternator. (Added cost: $400-$800 for premature alternator replacement.)
Diagnosis Steps
- Read Codes and Observe Symptoms
Use a scanner capable of reading Body (B-prefix) codes to confirm B1275. Note if B1276, B1277, or B1278 are also present, as this guarantees a faulty combination switch.
Tools: OBD-II Scanner (with BCM capability) (Beginner) - Inspect Fuses and Relays
Check the cabin and under-hood fuse boxes for blown lighting or BCM fuses. On Hondas, visually inspect the Multiplex Integrated Control Unit (MICU) for signs of burning or water intrusion.
Tools: Fuse puller, owner's manual (Beginner) - [PRO TIP] Analyze Live Data to Isolate the Switch
View the BCM live data stream. Monitor the 'Headlight Switch OFF' parameter. If it reads 'ON' while the switch is physically off, unplug the switch connector. If the parameter changes to 'OFF', the switch is internally shorted and must be replaced. If it stays 'ON', the wiring harness has a short to ground.
Tools: Advanced OBD-II Scanner with Live Data (Intermediate) - Inspect the Switch Connector
Remove the steering column covers. Disconnect the combination switch and inspect the pins for green corrosion, moisture, or melted plastic. Clean or replace the pigtail if damaged.
Tools: Screwdrivers, trim removal tools (Intermediate) - Test Switch Circuit Continuity
Using a wiring diagram, test for continuity at the switch connector. With the switch off, verify continuity (< 1.0 ohm) between the 'OFF' signal wire and ground. Turning the switch should break continuity (OL).
Tools: Digital multimeter, wiring diagram (Advanced) - Check for Harness Shorts or Opens
Disconnect both the switch and BCM connectors. Check for continuity on the 'OFF' signal wire from end to end (< 1.0 ohm). Test for a short by checking continuity between the signal wire and a known good ground (must read OL).
Tools: Digital multimeter, wiring diagram (Advanced) - Perform a Voltage Drop Test
Back-probe the ground wire at the combination switch connector with the multimeter's positive lead, and connect the negative lead to the battery negative. Turn the circuit on. A reading above 0.2 volts indicates excessive ground resistance requiring repair.
Tools: Digital multimeter with back-probe pins (Advanced) - Isolate the BCM
If the switch, wiring, and connections test perfectly, the BCM is faulty. Take the vehicle to a specialist for module replacement and programming.
Tools: Professional diagnostic tools (Professional)
When This Code Triggers (Freeze-Frame Conditions)
- System Voltage: > 10.5V (Ignition is ON (II), ensuring the BCM is powered.)
- Headlight Switch Position: Any position other than OFF (Fault logs when the BCM sees a signal on the 'OFF' circuit while the switch is physically in another position.)
- Fault Duration: 2-6 seconds (The illogical signal must be present continuously before the BCM flags the code.)
Related Codes
- B1276 — Indicates a 'Parking Position Circuit Malfunction'. Often appears with B1275 because it monitors a different position on the same failing switch.
- B1277 — Means 'Headlight AUTO Position Circuit Malfunction'. Triggered when the BCM receives illogical data from the automatic headlight setting.
- B1278 — Stands for 'Headlight ON Position Circuit Malfunction'. Seeing B1275, B1276, B1277, and B1278 together guarantees the entire combination switch assembly is dead.
Climate & Environmental Factors
- High Humidity and Temperature Swings: Moisture penetrates electrical connectors and the switch assembly, causing condensation. This corrodes sensitive internal contacts and circuit boards, creating the high resistance or short circuits that trigger B1275. Coastal and tropical climates see higher failure rates.
How to Talk to a Mechanic About This Code
Say this: "I have a B1275 code and my headlights are staying on. I'd like to schedule a diagnostic. Can you check the live data from the BCM to confirm if it's a bad switch, a wiring short, or a module problem before replacing parts?"
This proves you understand the system and forces the mechanic to perform a logical diagnostic process rather than blindly firing the parts cannon at the switch.
Avoid saying:
- 'My headlights are acting weird.' (Invites expensive exploratory diagnostics).
- 'Just replace the headlight switch.' (You will pay for the switch even if the problem is actually a broken wire).
Questions to ask before authorizing the repair:
- Did you check the live data from the BCM to verify the switch position signals?
- If recommending a switch, how did you rule out a wiring short?
- What is the warranty on the parts and labor?
Where to Take It: Dealer vs Independent vs Chain
- Dealer:
A safe but expensive choice. Best reserved for complex module failures after an independent shop has ruled out the switch.
Best for: Vehicles under warranty., Complex Honda cases requiring MICU/BCM replacement and proprietary HDS software programming.
Downsides: Highest labor rates., Tendency to replace entire expensive assemblies rather than repairing a single wire. (Typical cost: +50% vs. baseline) - Independent Shop:
The best fit. An experienced independent specialist can diagnose this efficiently without the dealer price tag.
Best for: Out-of-warranty vehicles., Shops specializing in Honda/Acura electrical diagnostics.
Downsides: Expertise varies. General mechanics may lack the advanced scan tools required to view BCM live data. (Typical cost: +0% vs. baseline) - Chain Shop:
AVOID. The risk of misdiagnosis and unnecessary parts replacement is extremely high.
Best for: Tires and oil changes.
Downsides: Technicians lack electrical diagnostic training., Basic scan tools cannot read Body (B-prefix) codes. (Typical cost: -10% vs. baseline)
When to Walk Away From the Repair
If the estimated repair cost exceeds 40-50% of the car's private-party value, consider selling it.
- Car worth $8000, fix is $250: Fix it. This is a low-cost repair on a valuable vehicle.
- Car worth $3000, fix is $1200: Borderline. Get a second opinion. If the BCM is truly dead, weigh it against other pending maintenance.
- Car worth $2000, fix is $1500: Walk away. The repair cost is 75% of the car's value.
What Scan Tool You Need for This Code
Minimum: A scanner capable of reading and clearing manufacturer-specific Body Control Module (BCM) codes.
A standard $20 engine code reader only reads Powertrain (P-codes). It will display 'No Codes Found' while your headlights malfunction.
Budget: BlueDriver Pro (~$119) — Connects via Bluetooth. Reads BCM codes and displays live data, allowing you to verify if the computer recognizes the switch position.
Mid-range: Foxwell NT510 Elite (~$150) — Provides OE-level diagnostics for one chosen manufacturer (e.g., Honda). Excellent for reading B-codes and viewing advanced live data.
Professional: Autel MaxiCOM MK808BT (~$450) — Professional tablet scanner offering comprehensive diagnostics, full B-code reading, and bidirectional controls across all makes.
Rent vs buy: AutoZone's free loaner tools typically cannot read B-codes. Buying a capable tool like the BlueDriver is required for DIY diagnosis.
How to Clear the Code After You Fix It
- Use an OBD-II scan tool capable of accessing the BCM to clear the DTC.
- Turn the ignition switch to LOCK (0), then back to ON (II).
- Cycle the combination light switch through all positions (Off, Parking, On, Auto), holding each for 6 seconds.
- Re-scan for codes to confirm the fix was successful.
Drive cycle (~5 minutes): No driving required. A 'key-on, engine-off' function test of the switch verifies the repair.
Readiness monitors affected: None
Watch out for:
- Disconnecting the battery will not permanently clear B-codes.
- The code returns instantly upon the first switch use if the underlying short or bad switch remains.
- Basic $20 code readers cannot see or clear B-codes.
Will This Fail Emissions / State Inspection?
No — by itself this code doesn't fail OBD inspection (but it can keep readiness monitors from setting, which causes a separate fail).
- General Note: B1275 is a Body code, not a Powertrain code. It will not cause a failure on the OBD-II plug-in emissions test.
- New York & Texas: These states mandate safety inspections of all required lighting. Inoperative or stuck headlights guarantee a safety failure, regardless of emissions status.
Most Commonly Affected Vehicles
- Honda Accord (2007-2023) — Extremely common. Often appears alongside B1276, B1277, and B1278, pointing directly to a failed combination switch.
- Honda CR-V (2012-2022) — Frequently reported. Causes are split between the combination switch and the under-dash fuse box (MICU).
- Honda Odyssey (2011-2017) — Triggers due to a faulty headlight switch assembly. Diagnostic procedures are identical to the Accord.
- Honda Civic (2012-2015) — Exhibits this code frequently, with diagnostics pointing to the combination switch or the integrated MICU.
- Acura All Models (2010-2020) — Shares Honda's electrical architecture (BCM, MICU) and suffers the exact same combination switch failures.
- Chevrolet / GM Various Models (2005-2015) — Relates to the headlight switch circuit. Diagnosis requires checking switch inputs to the BCM via live data.
- Ford Various Models (2000-2010) — CRITICAL: On older Fords, B1275 is defined as 'Servo Motor Potentiometer Vent Circuit Short To Ground'—an HVAC fault, NOT headlights.
- Hyundai / Kia Various Models (2005-2015) — CRITICAL: Often defined as 'Air Mix Potentiometer-VENT Open', indicating a climate control blend door failure, not a headlight issue.
Manufacturer-Specific Notes
- Honda/Acura: The BCM/MICU is highly sensitive to switch signals. Codes B1275, B1276, and B1278 usually appear together, confirming a dead switch. If a new switch fails to fix it, the MICU (under-dash fuse box) is the next most likely culprit.
- Ford & Hyundai/Kia: CRITICAL: Generic scanners misdiagnose this code. On these brands, B1275 almost always refers to a climate control blend door actuator failure, completely unrelated to the headlights.
- Chrysler/Jeep/Dodge: Headlight circuit problems frequently trace back to a faulty ground wire in the engine bay or a failing Front Control Module (FCM), mimicking a switch failure.
Real Owner Stories
2013 Honda Accord - The Classic Fix
Headlights stayed on after parking. Scan revealed B1275, B1276, and B1278.
Outcome: A $120 aftermarket switch installed in 45 minutes permanently solved the problem.
Lesson: On Hondas, simultaneous B1275, B1276, and B1278 codes guarantee the combination switch is the sole failure point.
2017 Honda CR-V - The MICU Misdiagnosis
Headlights flickered. A general shop quoted $1,000 for a new BCM. A second shop replaced the switch, but the code returned.
Outcome: The specialist traced the fault to the under-dash fuse box (MICU). Replacing the $400 MICU resolved the issue.
Lesson: If a new switch fails to fix a Honda, suspect the MICU before authorizing a massive BCM replacement.
2012 Honda Insight - The Wiring Gremlin
Headlights stayed on. Replacing the switch did nothing.
Outcome: Found the wiring harness rubbed through against a metal dash bracket, shorting the signal wire to ground. A $5 wire repair fixed it.
Lesson: Live data is crucial. If the fault remains with the switch unplugged, you have a wiring short, not a bad part.
How to Prevent This Code From Triggering
- Apply Dielectric Grease to Connectors (During any related repair) — Seals the connector housing from moisture, preventing the corrosion that creates high resistance and triggers circuit faults.
- Use High-Quality Sealed Connectors for Repairs (When repairing wiring) — Heat-shrink butt connectors with internal sealant create a waterproof barrier, preventing moisture from wicking into the wire.
- Avoid Installing High-Load Accessories on Switch Circuit (During accessory installation) — Never tap light bars directly into switch wiring. The switch handles low-amperage signals; overloading it burns out internal contacts.
Frequently Asked Questions
Can a bad battery cause code B1275?
No. This code points to a specific problem in the headlight switch input circuit. However, if your headlights stay on because of this fault, it will rapidly drain and ruin your battery.
I replaced the headlight switch, but the B1275 code came back. What now?
The fault lies elsewhere in the circuit. Meticulously inspect the wiring harness between the switch and the BCM for shorts to ground. If the wiring is perfect, suspect an internal fault within the BCM or the Honda MICU.
What's the difference between B1275, B1276, B1277, and B1278?
They all monitor the same combination headlight switch, just in different positions (Off, Parking, Auto, On). Seeing them together proves the entire switch assembly has failed and requires replacement.
What are the most common misdiagnosis mistakes for B1275?
The biggest mistake is ignoring manufacturer-specific definitions, as Ford and Hyundai use B1275 for HVAC faults. The second is replacing the expensive BCM before testing the $50 headlight switch.
Is it safe to drive with code B1275?
Daytime driving is safe. It becomes a severe hazard at night or in rain if your headlights behave erratically or fail to turn on.
How much does it cost to diagnose this code?
Most auto repair shops charge a diagnostic fee of $100 to $200. This fee is typically applied toward the total repair cost if you authorize them to perform the work.
Can I just replace the headlight bulb?
No. This code indicates an electrical communication failure between the cabin switch and the computer, completely unrelated to the bulbs themselves.
Why did my headlights stay on and drain my battery?
The B1275 fault prevents the computer from receiving the 'Off' signal. The computer assumes you still want the lights on and keeps them powered while parked.
Key Takeaways
- Code B1275 indicates a failure in the headlight switch 'Off' circuit, with a faulty combination switch causing over 80% of these faults.
- Headlights stuck in the 'On' position are the primary symptom, requiring immediate battery disconnection to prevent a $150-$350 replacement.
- The simultaneous presence of codes B1276, B1277, or B1278 guarantees the entire combination switch assembly has failed and requires replacement.
- Verify your vehicle's specific code definition, as Ford and Hyundai use B1275 to indicate a climate control blend door failure rather than a headlight issue.
Helpful Videos

Shop the Parts Behind B1275
Below are the parts most often responsible for code B1275, ranked by how frequently each one is the actual culprit (per the diagnosis above). Tap any to see what we have for your vehicle.


The information in this article is provided for general reference and educational purposes only. Vehicle specifications, procedures, and part compatibility can vary by production date, trim level, and region. Always consult your vehicle's factory service manual and verify part numbers before purchasing or performing repairs. Safety-critical components such as airbags, seat belts, and braking systems should be installed by a qualified professional.
- 🧭 Diagnostic Flowchart
- 🎬 Helpful Videos
- 🛍️ Shop This Part
- What Does B1275 Mean?
- Can I Drive With B1275?
- Common Causes
- Symptoms
- Common Fixes & Costs
- Used vs. New Parts: Buying Guide
- What Happens If You Wait — Timeline
- Cost of Not Fixing It
- Diagnosis Steps
- When This Code Triggers (Freeze-Frame Conditions)
- Related Codes
- Climate & Environmental Factors
- How to Talk to a Mechanic About This Code
- Where to Take It: Dealer vs Independent vs Chain
- When to Walk Away From the Repair
- What Scan Tool You Need for This Code
- How to Clear the Code After You Fix It
- Will This Fail Emissions / State Inspection?
- Most Commonly Affected Vehicles
- Manufacturer-Specific Notes
- Real Owner Stories
- 2013 Honda Accord - The Classic Fix
- 2017 Honda CR-V - The MICU Misdiagnosis
- 2012 Honda Insight - The Wiring Gremlin
- How to Prevent This Code From Triggering
- Frequently Asked Questions
- Can a bad battery cause code B1275?
- I replaced the headlight switch, but the B1275 code came back. What now?
- What's the difference between B1275, B1276, B1277, and B1278?
- What are the most common misdiagnosis mistakes for B1275?
- Is it safe to drive with code B1275?
- How much does it cost to diagnose this code?
- Can I just replace the headlight bulb?
- Why did my headlights stay on and drain my battery?
- Key Takeaways
- 🎟️ Get 5% Off