
Ultimate Guide to OBD-II Code B1276: A Manufacturer-Specific Electrical Fault
The Most Comprehensive B1276 Guide: What it means for Honda, Toyota, BMW, Hyundai, and more, and how to fix it.
What Does B1276 Mean?
B1276 is a manufacturer-specific body trouble code with entirely different definitions based on your vehicle. For Honda and Acura, it signals a fault in the headlight switch's parking light circuit. For Toyota and Lexus, the main body ECU lost communication with the power mirror control module. For Hyundai and Chevrolet, it indicates Electric Power Steering (EPS) system faults.
Technical definition: The SAE/ISO standard designates B1276 as a generic "Body" code, allowing manufacturers to assign its specific meaning. Common definitions include "Combination Light Switch Parking Position Circuit Malfunction" (Honda/Acura), "Power Mirror Control ECU Communication Stop" (Toyota/Lexus), and "Power Steering Control Module Fault" (Hyundai/GM).
Can I Drive With B1276?
Yes, But With Caution. Yes, but with caution. This code does not affect the engine, but it disables critical safety systems. On Hondas, you lose parking lights or headlights. On Toyotas, inoperative mirrors reduce visibility. On Hyundais and GMs, a sudden loss of power steering assist requires immediate attention. Limit driving to reaching a repair shop.
Common Causes
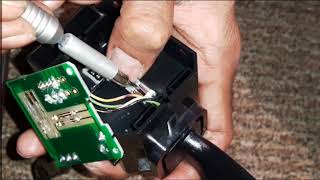
- Faulty Combination (Headlight) Switch (Very Common) — The most frequent cause on Honda and Acura vehicles. The internal resistive contacts of the switch wear out, causing the Body Control Module (BCM) to detect an out-of-range signal when parking lights are selected.
- Wiring or Connector Issues (Common) — A damaged wire or corroded connector interrupts the signal. On Hondas, this occurs in the steering column harness. On Toyotas, it is typically a broken CAN bus wire in the door jamb connector leading to the mirror module.
- Intermittent Software/Firmware Glitch (Common) — On Hyundai and GM vehicles, the fault is often a software glitch within the Electric Power Steering module. Manufacturers frequently resolve this via a dealer-installed software update (re-flash) under an active recall.
- Faulty Power Mirror Control ECU (Less Common) — Specific to Toyota and Lexus, the electronic module controlling the power mirrors fails internally, stopping communication with the vehicle's main body ECU.
- Faulty Footwell Module (FRM) (Less Common) — On BMW and Mini models, the FRM controls lights, windows, and mirrors. It is highly sensitive to voltage fluctuations and corrupts easily after a battery replacement or jump-start.
- Faulty Body Control Module (BCM) or MICU (Rare) — The BCM/MICU is the central computer for electronic features. It rarely fails, but when it does, it loses the ability to interpret switch signals or communicate with other modules.
- Low Battery Voltage (Rare) — A weak battery causes communication errors between modules during the vehicle's startup sequence, triggering false body codes.
- Blown Fuse (Rare) — A blown fuse for the affected circuit causes a complete loss of function for that system, though it rarely triggers this specific communication code on its own.
Symptoms
- Parking lights or headlights malfunctioning — On Honda/Acura models, parking lights fail to turn on, stay on permanently, or headlights flicker erratically.
- Power mirrors inoperative — On Toyota/Lexus models, the power adjustment for side mirrors fails. Memory seat functions linked to the mirrors also stop working.
- Loss of Electric Power Steering (EPS) — On Hyundai and GM vehicles, power steering assist suddenly drops out, illuminating the 'EPS' light and making low-speed steering extremely heavy.
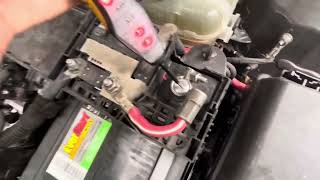
- Dashboard Warning Light or Message — A general body electrical fault light, check engine light, or specific text like 'Check Headlight System' or 'Service Power Steering' appears. 🎬 See a mechanic explain common causes for Chevy power steering failure.
- Multiple simultaneous electrical failures — On BMWs with a failed Footwell Module (FRM), lights, windows, and turn signals stop working all at once.
- Communication Error in Scan Data (scan-tool only — no driver-felt sign) — Advanced scan tools show a 'No Comm' status with a specific module or illogical input data from a switch.
Common Fixes & Costs
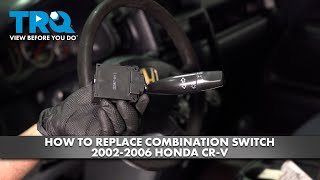
- Replace Combination (Headlight/Turn Signal) Switch 🎬 Watch this step-by-step guide on replacing a Honda combination switch.
— Parts: $40-$150, Labor: $95-$175, ~1 hr book time
(Intermediate)
: OEM - Reprogram or Re-flash Control Module — Parts: $0, Labor: $0-$250, ~1 hr book time (Professional)
- Replace Power Mirror Control ECU
— Parts: $70-$250, Labor: $80-$160, ~1 hr book time
(Intermediate)
: OEM - Replace/Repair Footwell Module (FRM)
— Parts: $150-$400, Labor: $100-$200, ~1.2 hr book time
(Professional)
: OEM - Repair Damaged Wiring or Connectors — Parts: $10-$50, Labor: $125-$350, ~2.5 hr book time (Professional)
- Replace Body Control Module (BCM) / MICU — Parts: $400-$800, Labor: $150-$300, ~1.5 hr book time (Professional)
Used vs. New Parts: Buying Guide
When a used part is worth it: For the common Honda combination switch failure, a used OEM part from a low-mileage vehicle saves money with minimal risk.
Donor-vehicle mileage cap: roughly under 80000 miles for the part to have meaningful remaining life.
Donor quality checklist:
- Verify the donor vehicle had the exact same options (e.g., fog lights, auto headlights).
- Inspect electrical connector pins for melting, corrosion, or heat damage.
- Avoid parts from extreme weather regions which make plastics brittle.
Decision logic:
- If The cost of a new aftermarket switch is close to a used OEM switch. → Buy the new aftermarket part for the longer warranty.
- If The vehicle is over 10 years old and budget is tight. → A used OEM part offers the best value.
- If The part is a complex electronic module like a BCM or FRM. → Favor a new part or professional repair service, as used modules require expensive reprogramming.
Warranty tradeoff: Salvage yards offer 30-90 day warranties. New aftermarket parts carry 1-year to lifetime warranties. New OEM parts have a 1-year warranty.
Worst-case if a used part fails: $200-$400 if a used switch fails early, requiring repeat labor and a new part.
Cost of Not Fixing It
- Immediate: Safety hazard. Hondas lose headlights, Toyotas lose mirror adjustment, and Hyundais/GMs lose power steering, drastically increasing accident risk. (Added cost: Varies (Traffic citation or insurance deductible))
- 1-3 months: On Hondas, a faulty switch leaves lights on, draining the battery and causing no-start situations. On Toyotas, intermittent shorts cause further damage to the door wiring harness. (Added cost: $150-$400)
- 6+ months: Ignoring persistent electrical faults leads to cascading issues. A faulty switch or module with an internal short overheats, creating a fire risk or destroying the Body Control Module (BCM). (Added cost: $800-$2000+)
Diagnosis Steps
- Identify Your Vehicle's Manufacturer
Determine if your car is a Honda/Acura, Toyota/Lexus, GM/Chevrolet, Hyundai, or BMW. The diagnostic path is completely different for each brand.
Tools: Owner's Manual (Beginner) - Check for Related Recalls and TSBs
Before testing parts, check for open recalls. Hyundai (Campaign 127) and GM (Recall 17276) 🎬 Watch this quick fix for Chevy Cruze power steering issues. have free dealer software updates that fix EPS glitches causing this code.
Tools: Internet access, VIN (Beginner) - Scan for All Codes and Check Live Data
Use an advanced OBD-II scanner to read manufacturer-specific 'B' codes. For Honda, check live data for the 'Combination Light Switch' parameter. For Toyota, monitor the 'Number of ECUs on Bus' PID.
Tools: Advanced OBD-II Scanner (Intermediate) - Path A (Honda/Acura): Test the Combination Light Switch
Cycle the headlight switch through Off, Parking, On, and Auto. If the parking lights fail to respond correctly, the switch is the primary suspect.
Tools: None (Beginner) - Path B (Toyota/Lexus): Test the Power Mirrors
Attempt to adjust both side mirrors. If they do not respond, check the power mirror fuse. If the fuse is good, the communication loss is confirmed.
Tools: Fuse puller (Beginner) - Visual Inspection of Wiring
Inspect the steering column harness (Honda) or the door jamb wiring boot (Toyota/Lexus) for visible damage, broken wires, or loose connections.
Tools: Flashlight (Intermediate) - Pro Tip (Honda/Acura): Test Switch Circuit Continuity
Disconnect the combination switch. Using a multimeter, check continuity across the pins for the 'Parking' position. A reading of 'OL' (Open Loop) confirms a failed switch. A good switch shows less than 1.0 ohm.
Tools: Digital Multimeter, wiring diagram (Advanced) - Pro Tip (Toyota/Lexus): Check CAN Bus Resistance
Disconnect the battery and the power mirror ECU. Measure resistance between CAN High and CAN Low terminals on the harness. A healthy bus reads ~60 ohms. 120 ohms indicates a broken wire.
Tools: Digital Multimeter, wiring diagram (Advanced) - Pro Tip (Hyundai/GM EPS): Check Torque Sensor Voltage
Monitor Power Steering Torque Sensor PIDs with a scan tool. Voltage should change smoothly as you turn the wheel. Stuck or erratic voltage points to a faulty torque sensor in the steering column.
Tools: Advanced OBD-II Scanner (Advanced)
When This Code Triggers (Freeze-Frame Conditions)
- Vehicle Speed: 0 mph (The BCM checks switch inputs immediately upon turning the ignition ON, before the vehicle moves.)
- Ignition Status: ON (II) (The fault registers when the ignition is on and the BCM actively monitors inputs.)
- System Voltage: 11.5V - 14.5V (B1276 usually points to a component failure under normal voltage. Very low voltage (<10.5V) sets broader network codes.)
- Component Status: Active (Sets when the Honda headlight switch moves to 'Parking', or during the Toyota CAN bus check at startup.)
How to Clear the Code After You Fix It
- Use a compatible OBD-II scanner to clear the DTC from the Body Control Module.
- Turn the ignition switch to LOCK (0), then back to ON (II).
- Operate the repaired component through all functions to ensure the code does not immediately return.
Drive cycle (~15 minutes): Body codes do not require complex drive cycles. A 15-minute test drive involving normal operation of the affected system verifies the fix.
Readiness monitors affected: None
Watch out for:
- Disconnecting the battery fails to clear the code from the BCM's memory; a scanner is required.
- Assuming the fix is complete without testing all functions of the repaired component.
- Ignoring an immediately returning code, which proves the root cause was not fixed.
Will This Fail Emissions / State Inspection?
No — by itself this code doesn't fail OBD inspection (but it can keep readiness monitors from setting, which causes a separate fail).
- California: A 'B' code doesn't fail a smog check, but an illuminated warning light or inoperative headlights/turn signals fail the safety inspection.
- New York: Inoperative headlights, parking lights, or turn signals result in an immediate safety inspection failure.
- Texas: While a B1276 won't fail the OBD-II emissions scan, a lit dashboard warning lamp or EPS light fails the safety inspection in counties where it is still required.
Helpful Videos
Shop the Parts Behind B1276
Below are the parts most often responsible for code B1276, ranked by how frequently each one is the actual culprit (per the diagnosis above). Tap any to see what we have for your vehicle.


The information in this article is provided for general reference and educational purposes only. Vehicle specifications, procedures, and part compatibility can vary by production date, trim level, and region. Always consult your vehicle's factory service manual and verify part numbers before purchasing or performing repairs. Safety-critical components such as airbags, seat belts, and braking systems should be installed by a qualified professional.
- 🎬 Helpful Videos
- 🛍️ Shop This Part
- What Does B1276 Mean?
- Can I Drive With B1276?
- Common Causes
- Symptoms
- Common Fixes & Costs
- Used vs. New Parts: Buying Guide
- Cost of Not Fixing It
- Diagnosis Steps
- When This Code Triggers (Freeze-Frame Conditions)
- How to Clear the Code After You Fix It
- Will This Fail Emissions / State Inspection?
- 🎟️ Get 5% Off