
OBD-II Code B1287: Expert Guide to Multiple Meanings & Fixes
What B1287 means, why it triggers, and how to diagnose and fix it on your specific vehicle.
- B1287 definitions vary entirely by manufacturer, meaning you must look up your specific year, make, and model before touching a single tool.
- Over 80% of B1287 codes stem from damaged wiring—specifically broken wires in the Toyota rear hatch boot or corroded GM door sill harnesses—rather than failed modules.
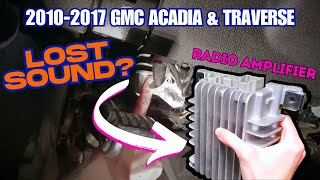
- On General Motors vehicles (2007-2017), B1287 indicates an audio amplifier control circuit fault, resulting in a complete loss of radio sound and safety warning chimes.
- Never replace a $500 amplifier or ECU without first using a multimeter to verify 12V power, solid ground, and signal continuity at the component's connector.
What Does B1287 Mean?
B1287 is a Body Control Module (BCM) code with manufacturer-specific definitions. On General Motors vehicles, it indicates a fault in the audio amplifier control circuit, causing audio loss. On Toyota vehicles, it signals lost communication with the rear hatch computer, preventing it from opening. On Ford models, it points to a shorted climate control servo motor.
Technical definition: The SAE/OBD-II definition varies by manufacturer. GM: Amplifier Control Signal Circuit Short/Open. Toyota: Back Door ECU Communication Stop. Ford: Servo Motor Potentiometer Airintake Left Circuit Short To Ground. Dodge: O2 B2 S1 Circuit Short to Ground. Chrysler: Reset Switch Performance.
Can I Drive With B1287?
Yes, But With Caution. Driving is safe, but you lose specific functions. GM vehicles lose safety-related audible chimes for seatbelts and key-in-ignition. Toyota models lose rear hatch operation, and Fords lose climate control direction. Address this promptly to restore full functionality.
Common Causes
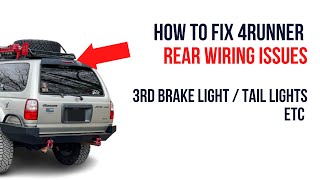
- Damaged or shorted wiring harness (Very Common) — The most frequent cause. Wires pinch, corrode, or break from repeated motion, especially in the flexible Toyota rear hatch grommet 🎬 See how to repair broken wires in the rear hatch boot. or the GM driver's side door sill channel.
- Poor ground connection (Common) — A loose or corroded ground wire creates unexpected voltage drops and high resistance, triggering the code.
- Faulty component (amplifier, ECU, or servo) (Common) — The specific part—such as the GM audio amplifier, Toyota back door ECU, or Ford servo motor—has failed internally.
- Water intrusion at connectors (Less Common) — Moisture from clogged sunroof or HVAC drains corrodes electrical connectors. This is a known issue on 2017-2023 GMC Acadias (TSB 19-NA-167).
- Weak vehicle battery (Less Common) — Modern modules require 9-16V. A weak battery causes voltage drops during startup, triggering false communication errors.
- Blown fuse (Less Common) — A blown fuse protects the circuit but usually indicates an underlying short circuit.
- Aftermarket equipment installation (Less Common) — Improperly installed alarms or stereos tap into the wrong wires, causing shorts or data interference.
Symptoms
- No sound from speakers or popping noises — On GM vehicles, you experience a complete loss of audio or hear popping sounds when the radio turns on or off.
- Rear hatch/tailgate will not open — On Toyota vehicles, the power liftgate, rear window, and rear wiper fail to operate.
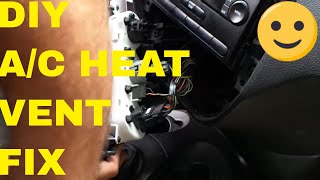
- Inaccurate climate control operation — On Ford models, air fails to route to the correct vents, often accompanied by clicking noises from the dashboard. 🎬 Watch: Step-by-step guide to Ford blend door actuator repair.
- Loss of audible warning chimes — On GM vehicles, the radio generates sounds for turn signals and seatbelts. A disabled amplifier circuit silences these chimes.
Diagnostic Flowchart
Tap your situation to follow the diagnostic path that matches what you're seeing on this code.
Common Fixes & Costs
- Repairing a damaged wiring harness — Parts: $10-$30, Labor: $200-$600, ~2.5 hr book time (Intermediate)
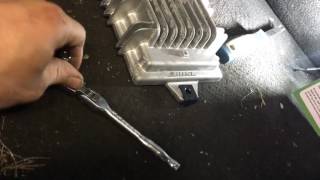
- Replacing a faulty audio amplifier (GM)
— Parts: $150-$500, Labor: $150-$300, ~1.5 hr book time
(DIY)
2013 GMC Acadia / Chevy Traverse: OEM 22989268, 23130126, 25994310 (Alt: {"brand": "ACDelco (Reman)", "part_number": "25994310", "notes": "Often sold as a remanufactured genuine part."}) - Replacing the back door ECU (Toyota)
— Parts: $250-$700, Labor: $125-$250, ~1.2 hr book time
(DIY)
2011 Toyota Sienna: OEM 89222-08020 - Replacing a faulty HVAC Blend Door Actuator (Ford)
— Parts: $50-$150, Labor: $200-$800, ~3.5 hr book time
(Intermediate)
2014 Ford Focus: OEM CV6Z-19E616-A (Alt: {"brand": "Dorman", "part_number": "604-291", "notes": "Widely available aftermarket alternative."})
Used vs. New Parts: Buying Guide
When a used part is worth it: For electronic modules like amplifiers and ECUs, a used part from a reputable recycler offers significant savings on older, high-mileage vehicles.
Donor-vehicle mileage cap: roughly under 100000 miles for the part to have meaningful remaining life.
Donor quality checklist:
- Verify the part number matches exactly; electronic modules are rarely interchangeable.
- Buy from a seller offering a 30-90 day warranty.
- Ask the seller to confirm the part passes functional testing.
Decision logic:
- If The vehicle is less than 5 years old or has low mileage → Favor a new OEM or remanufactured part for better reliability.
- If The part is for a common failure and diagnosis is uncertain → A cheap used part acts as a cost-effective diagnostic tool before buying new.
- If The part requires programming to the vehicle's VIN → Factor in dealer programming costs. Used parts are sometimes locked and unprogrammable.
Warranty tradeoff: Used parts typically have a 30-90 day functional warranty. New aftermarket parts offer 1-year to lifetime warranties.
Worst-case if a used part fails: $300-$800 if a used part fails shortly after installation, requiring repeat labor.
What Happens If You Wait — Timeline
- 0-1 month: An intermittent fault begins. GM audio pops occasionally, or the Toyota hatch fails to open once. (MPG impact: 0%% · Added cost: $0)
- 1-3 months: The fault becomes frequent. Audio cuts out for entire trips. A small parasitic drain begins weakening the battery overnight. (MPG impact: 0%% · Added cost: $0-$50)
- 3-6 months: The fault is permanent. A significant parasitic draw (50mA+) kills the battery if the vehicle sits for 2-3 days, shortening battery lifespan. (MPG impact: 0%% · Added cost: $200-$400)
- 6+ months: An unaddressed short circuit overheats and damages the sending control module (radio or BCM), requiring expensive module replacement. (MPG impact: 0%% · Added cost: $500-$2000+)
Cost of Not Fixing It
- Immediate: Loss of function (no audio, inoperable hatch, incorrect AC). For GM, this includes loss of safety chimes. (Added cost: 0)
- 1-6 months: A persistent short circuit causes a parasitic battery drain, leading to a no-start condition and premature battery failure. (Added cost: $200-$400)
- 6+ months: An unaddressed short overheats wires or damages the control module sending the signal, turning a wire repair into a module replacement. (Added cost: $500-$1500+)
Diagnosis Steps
- Identify Your Vehicle's Specific Definition
Use a scan tool or search online for your specific year, make, and model (e.g., '2013 GMC Acadia B1287'). This code points to completely different systems on different brands.
Tools: OBD-II Scan Tool, Internet Access (Beginner) - Check Related Fuses
Locate fuses related to the system (e.g., 'Radio', 'Back Door', 'HVAC'). Visually inspect and test for continuity. A blown fuse indicates an underlying short circuit.
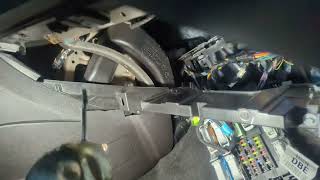
Tools: Fuse puller, Multimeter (Beginner) - Visually Inspect and Wiggle Test Wiring
Look for chafed or broken wires in flexible boots (Toyota hatch) or door sills (GM). With the system active, gently wiggle the harness to expose intermittent faults. Listen for the symptom to appear or disappear.
Tools: Flashlight, Trim removal tools (Intermediate) - Test Power and Ground at the Component
Check for correct voltage and a solid ground at the suspect component's connector. Verify 11-14V at the power pin and less than 1.0 Ω resistance on the ground pin.
Tools: Multimeter, Vehicle-specific wiring diagram (Advanced) - Test the Signal Circuit
Test the communication wire between the main module and the component. GM amps require 0.6-1.0V on the signal wire; Toyota LIN bus requires under 1.0 Ω resistance on the MPX line.
Tools: Multimeter, Vehicle-specific wiring diagram (Advanced) - Perform a Parasitic Draw Test
If suspecting a shorted component, pull the related fuse and connect the multimeter in series. A draw over 50mA after the vehicle sleeps (45 minutes) indicates a short.
Tools: Multimeter with Amperage function, Fuse adapters (Expert) - Isolate and Test the Component
If wiring, power, and ground pass, the component is faulty. Substitute with a known-good part or send to a specialist for testing.
Tools: Basic hand tools (Intermediate)
When This Code Triggers (Freeze-Frame Conditions)
- System Voltage: 9-16V (The fault logs when the module's operating voltage is within its normal range.)
- Ignition/Power Mode: Accessory or Run (The fault triggers when the affected system (radio, HVAC) is powered on.)
- Time After Activation: 400 ms (For GM audio faults, the radio checks the amplifier control circuit 400 milliseconds after sending the turn-on signal.)
- Fault Frequency: >1 (Data is captured when a problem occurs multiple times, indicating a persistent fault.)
Related Codes
- B2325 — On Toyota vehicles, B1287 indicates the communication line to the back door ECU is down (wiring). B2325 points to an internal failure of the back door ECU itself.
- U0140, U0199 — On GM vehicles, B1287 isolates the fault to the radio/amp circuit. If accompanied by U-codes, it indicates a larger network problem or failing main BCM.
- B1288 — On GM trucks (2007-2014), B1288 is a common companion code. Both are caused by broken wires in the main harness under the driver's side door sill plate.
Climate & Environmental Factors
- Cold Weather: Low temperatures make wire insulation brittle and prone to cracking from vibration, especially in flexible boots like the Toyota rear hatch.
- High Humidity / Salt Belt Regions: Moisture and road salt accelerate wiring corrosion in exposed areas like the GM driver's door sill channel, increasing resistance and causing shorts.
How to Talk to a Mechanic About This Code
Say this: "I have a B1287 body code. On my vehicle, this points to a [GM: amplifier control circuit / Toyota: back door communication / Ford: HVAC servo motor]. I'd like a diagnostic that starts by testing the specific wiring harness and connectors for this circuit before replacing any major components."
This signals you know B1287 is manufacturer-specific and commonly caused by wiring failures. It directs the technician to perform electrical diagnosis instead of swapping parts.
Avoid saying:
- 'My radio/hatch/AC isn't working.'
- 'Just fix whatever's wrong.'
- 'My car has a B1287, please replace the amplifier/ECU.'
Questions to ask before authorizing the repair:
- Did you find the failure in the wiring, the component, or the control module?
- For a wiring fault: Can you show me the broken wire or corroded connector?
- For a component fault: Did you confirm the component is receiving correct power, ground, and signal before condemning it?
- What is the warranty on both the parts and the labor for this repair?
Where to Take It: Dealer vs Independent vs Chain
- Dealer:
Best for: Vehicles under warranty, Repairs related to a known Technical Service Bulletin (TSB), like GMC Acadia water leaks., Complex issues requiring manufacturer-specific module programming.
Downsides: Higher labor rates., May prefer replacing an entire wiring harness rather than repairing a single broken wire. (Typical cost: +50% vs. baseline) - Independent Shop:
Best fit for most scenarios. An experienced independent technician diagnoses and repairs common wiring failures at a significantly lower cost than a dealer.
Best for: Out-of-warranty vehicles with common B1287 causes (Toyota hatch wiring, GM door sill wiring)., Owners seeking a wiring repair rather than a full component replacement.
Downsides: Quality varies; look for ASE certification in electrical diagnostics. (Typical cost: +0% vs. baseline) - Chain Shop:
AVOID for B1287 diagnosis. This code requires specific diagnostic expertise, carrying a high risk of misdiagnosis at chain shops.
Best for: Simple maintenance like oil changes or tires.
Downsides: Technician skill for complex electrical diagnosis is highly variable., Business model encourages replacing parts rather than performing detailed diagnostic labor. (Typical cost: -10% vs. baseline)
When to Walk Away From the Repair
If the total estimated repair cost exceeds 40-50% of the car's private-party value, consider selling the car as-is rather than repairing it.
- Car worth $8000, fix is $450: Fix it. A wiring repair on a Toyota Sienna is a small fraction of the car's value and restores critical functionality.
- Car worth $5000, fix is $900: Borderline. A labor-intensive Ford blend door actuator repair is a significant cost. Get a second opinion before authorizing.
- Car worth $3500, fix is $1800: Walk away. If a GM vehicle needs a new radio, amplifier, and wiring repair, the cost is too high relative to the vehicle's value.
What Scan Tool You Need for This Code
Minimum: A scanner that reads manufacturer-specific Body Control Module ('B') codes. Basic readers only handle 'P' (Powertrain) codes and will not see B1287.
A $20 code reader shows 'No Codes Found' because B1287 is a body fault. You need a tool that communicates with the BCM and Radio.
Budget: BlueDriver Pro (~$100) — Confirms the presence of B1287 and its manufacturer-specific definition. Reads live data from body modules for GM, Ford, and Toyota.
Mid-range: Foxwell NT510 Elite (~$180) — Provides full system diagnostics and bi-directional control. Allows you to command a Ford blend door to move or a GM amp to mute, confirming if the component or wiring is at fault.
Professional: Autel MaxiCOM MK808S (~$360-500) — Offers full bi-directional control, live data graphing, and OE-level diagnostics to quickly pinpoint faults in the sending module, receiving module, or wiring.
Rent vs buy: Free 'loan-a-tool' scanners at parts stores are typically basic readers that cannot see 'B' codes. Buying a capable scanner is a worthwhile investment.
How to Clear the Code After You Fix It
- Reconnect battery if disconnected for repair
- Use an OBD-II scan tool to clear the Diagnostic Trouble Code (DTC)
- Perform a complete drive cycle to allow all system monitors to run
Drive cycle (~25 minutes): Start with a cold engine. Idle for 2-3 minutes with electrical loads on. Drive for 15 minutes with mixed city and highway conditions. Allow the vehicle to cool completely and repeat if necessary.
Readiness monitors affected: Not applicable for emissions, Body codes do not directly affect emissions readiness monitors
Before emissions retest: drive at least 50 miles to fully set monitors.
Watch out for:
- Clearing the code with a scan tool is the only reliable method; disconnecting the battery fails to clear module memory.
- The code returns immediately if the underlying electrical fault is not repaired.
Will This Fail Emissions / State Inspection?
No — by itself this code doesn't fail OBD inspection (but it can keep readiness monitors from setting, which causes a separate fail).
- California: Body codes do not cause a smog check failure unless they illuminate the Check Engine Light.
- New York: NYS inspection checks for an illuminated MIL. B1287 does not light the MIL and will not cause a failure.
- Texas: The OBD-II test scans for emissions codes. B1287 is a body code and passes inspection.
Most Commonly Affected Vehicles
- Chevrolet Equinox, Traverse, Silverado (2008-2017) — Prone to audio amplifier and wiring issues. On the Traverse, the amplifier is located under the driver's side dashboard.
- GMC Acadia, Sierra, Yukon (2007-2023) — Often experiences faults in the amplifier control circuit. TSB 19-NA-167 covers water leaks from roof seams causing electrical issues on 2017-2023 Acadias.
- Buick Enclave, Lucerne (2007-2017) — Shares the GM audio architecture. TSB 08-08-57-003F addresses water leaks onto the IP BEC from unsealed body seams.
- Toyota 4Runner, Sienna, FJ Cruiser (2005-2020) — Commonly sets B1287 due to broken wires in the flexible harness leading to the rear hatch or a failed back door ECU.
- Ford Focus, Kuga/Escape (2011-2018) — The code points to a shorted HVAC blend door actuator. Replacement is highly labor-intensive.
- Dodge/Chrysler Various (2005-2015) — Definition is inconsistent. Dodge models indicate an O2 sensor circuit fault; Chrysler models point to a steering wheel switch issue.
- Subaru Legacy, Outback, WRX (2015-2018) — TSB 06-87-22R addresses a crack in the Electronic Parking Brake actuator connector causing various body codes.
- SAAB 9-5 (2009-2011) — Points to a fault in the Mute Amp Control Circuit, causing sound muting issues or speaker clicks.
Manufacturer-Specific Notes
- General Motors: On GMT900 trucks, the wiring harness under the driver's door sill plate is highly susceptible to moisture from wet shoes, leading to broken wires and B1287/B1288 codes.
- Toyota: The wiring harness passing through the rubber boot into the rear hatch fatigues and breaks from constant opening and closing, triggering B1287.
- Ford: Blend door actuators are buried deep within the dashboard. Replacement often requires removing the entire dashboard assembly, driving labor costs over $600.
- GMC/Buick: Multiple TSBs (19-NA-167, 08-08-57-003F) address water leaks from roof seams and cowls dripping directly onto fuse blocks and modules, causing electrical shorts.
Real Owner Stories
2013 GMC Acadia with 110K miles - No Sound
Owner experienced sudden loss of all audio and warning chimes. Code B1287 was present.
What they tried:
- Checked the 'Radio/Amp' fuse.
- Replaced the factory amplifier with a used unit for $150. The problem persisted.
Outcome: A mechanic performed a wiggle test under the dashboard and found a broken amplifier control wire. They repaired it for $250, and the original amplifier worked perfectly.
Lesson: B1287 points to a circuit fault. Always test wiring for continuity before replacing an expensive module.
2011 Toyota Sienna with 145K miles - Rear Hatch Inoperative
The power liftgate, rear window, and rear wiper stopped working. Code B1287 was stored.
What they tried:
- Got a dealer quote for $700 to replace the Back Door ECU.
Outcome: The owner peeled back the rubber boot between the body and hatch, finding three broken wires. They repaired the wires using solder sleeves for $20, restoring all functions.
Lesson: For Toyota hatch issues, the flexible wiring harness is the most common failure point and a simple DIY fix.
2008 Chevy Silverado with 180K miles - Intermittent Audio and Parasitic Drain
Owner had intermittent audio loss and a dead battery after two days. Codes B1287 and B1288 were present.
What they tried:
- Replaced the battery and the radio head unit.
Outcome: The owner removed the driver's side door sill trim plate and found corroded, broken wires in the damp channel. Repairing the harness fixed the audio and the parasitic drain.
Lesson: On GM trucks, B1287 and B1288 strongly indicate a wiring issue in the driver's door sill channel caused by moisture.
2017 GMC Acadia with 60K miles - Water Leak Causes Audio Fault
Audio system failed completely with code B1287. Owner noticed wet carpet on the passenger side.
What they tried:
- Dealer initially suspected a faulty amplifier.
Outcome: A clogged HVAC drain line dripped condensation onto the Active Noise Cancellation module, shorting it out. The repair involved replacing the module and clearing the drain (related to TSB 19-NA-167).
Lesson: If B1287 is accompanied by signs of water intrusion, investigate the source of the leak before replacing electrical parts.
How to Prevent This Code From Triggering
- Periodically clean body and sunroof drains (Once per year) — Clogged drains cause water to overflow into the cabin, damaging sensitive electronics like amplifiers and fuse boxes.
- Apply dielectric grease to key connectors (Whenever a connector is disconnected) — Applying dielectric grease to the rubber seals of connectors prevents moisture intrusion and corrosion.
- Inspect wiring harnesses in high-movement areas (Every 2-3 years) — Wires passing through doors and hatches fatigue over time. Ensure rubber boots are seated correctly to prevent chafing.
- Keep vehicle interior dry (As needed) — Wet carpets create high humidity, corroding wiring and modules located on the floor, such as the GM driver's sill channel.
Frequently Asked Questions
Can I fix a B1287 code myself?
Yes, if it is a blown fuse or visibly damaged wire in an accessible location like the Toyota hatch boot. Diagnosing complex causes requires a multimeter and wiring diagram. Stop DIY and visit a shop if the repair requires dashboard removal, like Ford blend doors.
I replaced the component but the B1287 code came back. What now?
This means the actual fault is in the wiring harness, not the component. Replacing an expensive module without testing the wires is the most common misdiagnosis. You must re-test the harness for continuity and shorts.
Can a weak or dying battery cause a B1287 code?
Yes. Low voltage causes communication errors between modules, generating false 'U' and 'B' codes. Test the battery and charging system before diagnosing individual components.
Is a Honda Maintenance Minder code 'B1' or 'B12' the same as an OBD-II code B1287?
No, they are completely different. Honda's Maintenance Minder codes are reminders for scheduled maintenance like oil changes. OBD-II code B1287 indicates a specific, active electrical fault.
Could my new stereo or remote starter have caused the B1287 code?
Yes. Improperly installed aftermarket electronics frequently cause body codes. Tapping the wrong power source or cutting a data wire creates shorts that trigger a B1287 fault.
Will clearing the code fix the problem?
No, clearing the code only turns off the warning light temporarily. The code returns immediately or after the next ignition cycle because the hard electrical fault still exists.
What does it mean if the B1287 code is intermittent?
An intermittent code points to a failing component, a loose connector, or a wire breaking internally. A 'wiggle test' on the wiring harness helps locate these faults. The connection makes or loses contact when the vehicle hits a bump.
Key Takeaways
- B1287 definitions vary entirely by manufacturer, meaning you must look up your specific year, make, and model before touching a single tool.
- Over 80% of B1287 codes stem from damaged wiring—specifically broken wires in the Toyota rear hatch boot or corroded GM door sill harnesses—rather than failed modules.
- On General Motors vehicles (2007-2017), B1287 indicates an audio amplifier control circuit fault, resulting in a complete loss of radio sound and safety warning chimes.
- Never replace a $500 amplifier or ECU without first using a multimeter to verify 12V power, solid ground, and signal continuity at the component's connector.
Helpful Videos


Shop the Parts Behind B1287
Below are the parts most often responsible for code B1287, ranked by how frequently each one is the actual culprit (per the diagnosis above). Tap any to see what we have for your vehicle.


The information in this article is provided for general reference and educational purposes only. Vehicle specifications, procedures, and part compatibility can vary by production date, trim level, and region. Always consult your vehicle's factory service manual and verify part numbers before purchasing or performing repairs. Safety-critical components such as airbags, seat belts, and braking systems should be installed by a qualified professional.
- 🧭 Diagnostic Flowchart
- 🎬 Helpful Videos
- 🛍️ Shop This Part
- What Does B1287 Mean?
- Can I Drive With B1287?
- Common Causes
- Symptoms
- Common Fixes & Costs
- Used vs. New Parts: Buying Guide
- What Happens If You Wait — Timeline
- Cost of Not Fixing It
- Diagnosis Steps
- When This Code Triggers (Freeze-Frame Conditions)
- Related Codes
- Climate & Environmental Factors
- How to Talk to a Mechanic About This Code
- Where to Take It: Dealer vs Independent vs Chain
- When to Walk Away From the Repair
- What Scan Tool You Need for This Code
- How to Clear the Code After You Fix It
- Will This Fail Emissions / State Inspection?
- Most Commonly Affected Vehicles
- Manufacturer-Specific Notes
- Real Owner Stories
- 2013 GMC Acadia with 110K miles - No Sound
- 2011 Toyota Sienna with 145K miles - Rear Hatch Inoperative
- 2008 Chevy Silverado with 180K miles - Intermittent Audio and Parasitic Drain
- 2017 GMC Acadia with 60K miles - Water Leak Causes Audio Fault
- How to Prevent This Code From Triggering
- Frequently Asked Questions
- Can I fix a B1287 code myself?
- I replaced the component but the B1287 code came back. What now?
- Can a weak or dying battery cause a B1287 code?
- Is a Honda Maintenance Minder code 'B1' or 'B12' the same as an OBD-II code B1287?
- Could my new stereo or remote starter have caused the B1287 code?
- Will clearing the code fix the problem?
- What does it mean if the B1287 code is intermittent?
- Key Takeaways
- 🎟️ Get 5% Off